Configuring Office 365 Connectors
This connector allows Stellar Cyber to collect data from external sources and add the records to the data lake.
Integrating Office 365 with Stellar Cyber provides real-time visibility into security events and alerts, enabling organizations to effectively monitor and respond to security incidents across their cloud and on-premise environments.
The Office 365 connector requires the Office 365 Business Standard license. There must be one connector for every Microsoft account to be monitored.
Stellar Cyber connectors with the Collect function (collectors) may skip collecting some data when the ingestion volume is large, which potentially can lead to data loss. This can happen when the processing capacity of the collector is exceeded.
Connector Overview: Office 365
Capabilities
-
Collect: Yes
-
Respond: No
-
Native Alerts Mapped: Yes
-
Runs on: DP
-
Interval: Configurable
Collected Data
|
Content Type |
Index |
Locating Records |
|---|---|---|
|
Audit General Audit Exchange Audit Sharepoint Audit Azure Active Directory DLP All |
Windows Events
|
Domain
|
<Authentication Endpoint> where <Authentication Endpoint> is a variable from the configuration of this connector and will be one of the following, based on the Subscription Plan:
|
Response Actions
N/A
Third Party Native Alert Integration Details
For the Audit General content type, Office 365 alerts contain events from the AlertTriggered operation, which are sent to the Alerts index.
The source records may also include related events in the AlertEntityGenerated operation. Some information (AlertEntityId and EntityType) from the AlertEntityGenerated operation is merged with the AlertTriggered operation for the same Alert ID. The information (AlertEntityId and EntityType) is stored in the event_summary field.![]()
In addition, the AlertEntityGenerated operation can be queried in Original Records, which are sent to the Windows Event index.
For details, see Integration of Third Party Native Alerts.
Required Credentials
-
Microsoft Entra ID App with permissions: ActivityFeed.Read, ActivityFeed.ReadDlp, ServiceHealth.Read
-
Directory ID, Application ID, API Access Key
Locating Records
Use the following to query for records:
-
msg_origin.source:
office365 -
msg_class:
office365_audit_general
To search the alerts in the Alerts index, use the query: msg_class: office365_audit_general AND Operation:AlertTriggered
To search the Original Records of the alerts in the Windows Event index, use the query: msg_class: office365_audit_general AND Operation:AlertTriggered AND Operation:AlertEntityGenerated
Let us know if you find the above overview useful.
Adding an Office 365 Connector
To add an Office 365 connector:
- Enable the audit log
- Register the application
- Add the connector in Stellar Cyber
- Test the connector
- Verify ingestion
Enabling the Audit Log
Use one of the following options to enable auditing in your environment:
Use our example as a guideline, as you might be using a different software version.
Using the Compliance Center GUI to Enable Auditing
-
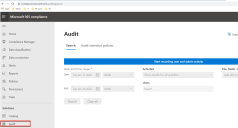
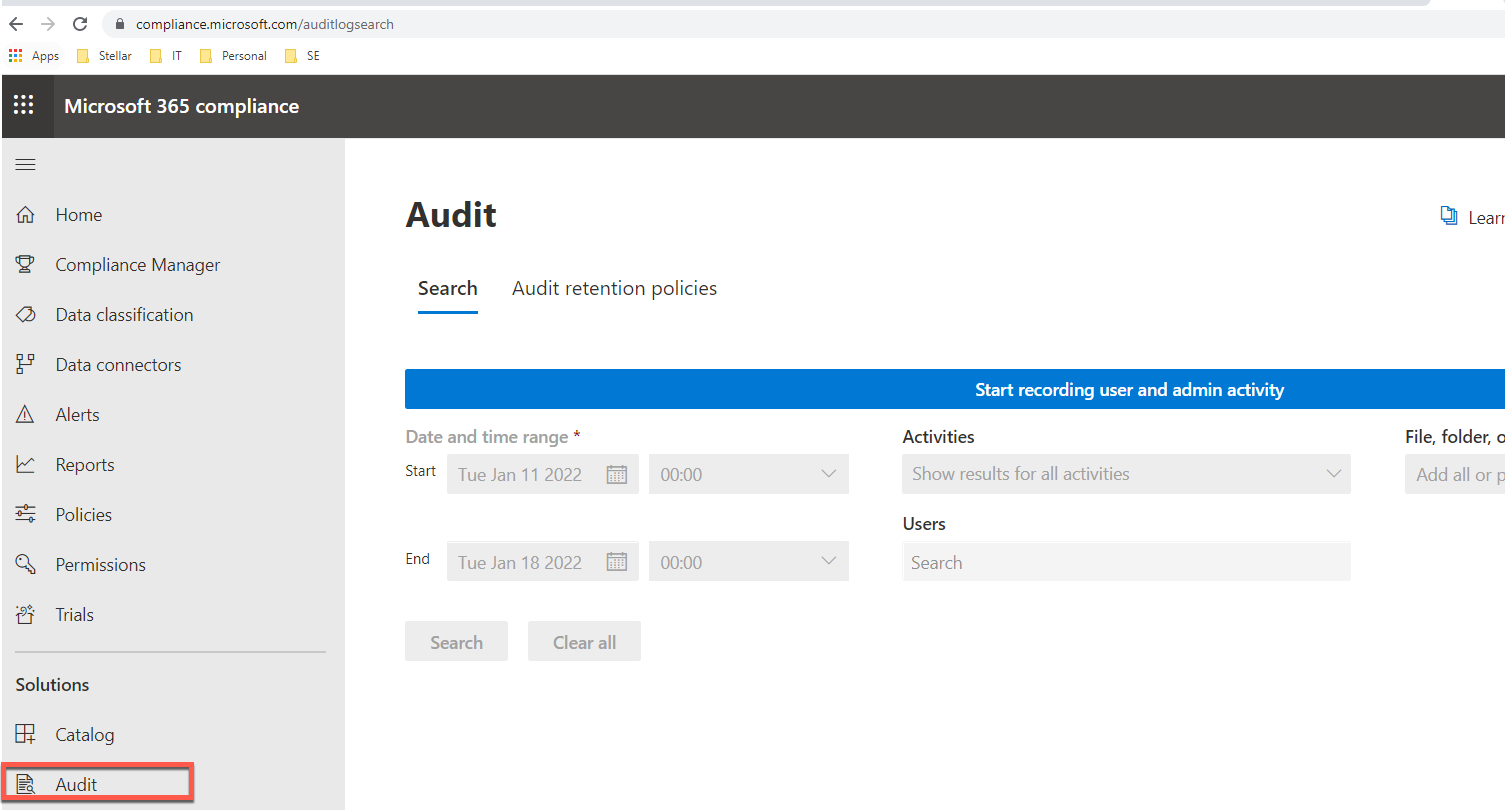
Log into https://compliance.microsoft.com or https://https://portal.office.com/adminportal#/homepage > Compliance with administrative access.
-
In the left navigation pane of the Microsoft 365 compliance center, click Audit.
-
If auditing is not turned on for your organization, a banner is displayed prompting you start recording user and admin activity.
Click the Start recording user and admin activity banner.
It may take up to 60 minutes for the change to take effect.
Using PowerShell to Enable Auditing
To use PowerShell (from Windows 10/11) to turn on auditing:
-
Locate on the search box on the taskbar and type
powershell. -
From the list of displayed options, select Windows PowerShell or just PowerShell.
-
Right-click on the menu item and select Run as administrator.
-
Execute the following commands:
Install-Module -Name ExchangeOnlineManagement
Import-Module ExchangeOnlineManagement
Connect-ExchangeOnline -UserPrincipalName <admin-username>
Set-AdminAuditLogConfig -UnifiedAuditLogIngestionEnabled $true
Using Office.com to Enable Auditing
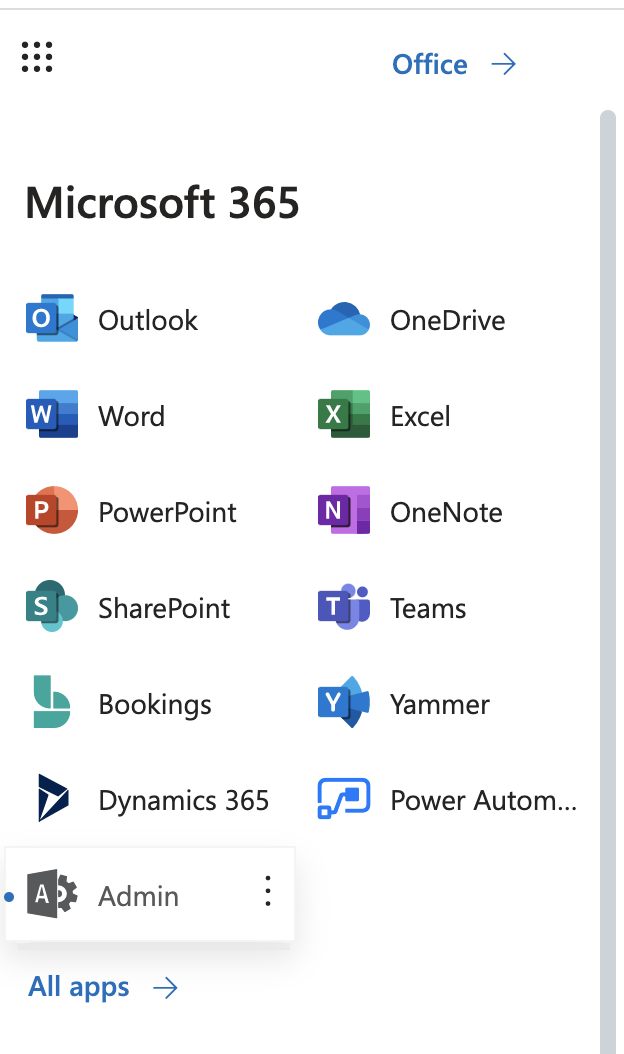
- Log in to https://portal.office.com.
-
Click Admin.

-
Under Admin centers click Security. The Security & Compliance page appears.

-
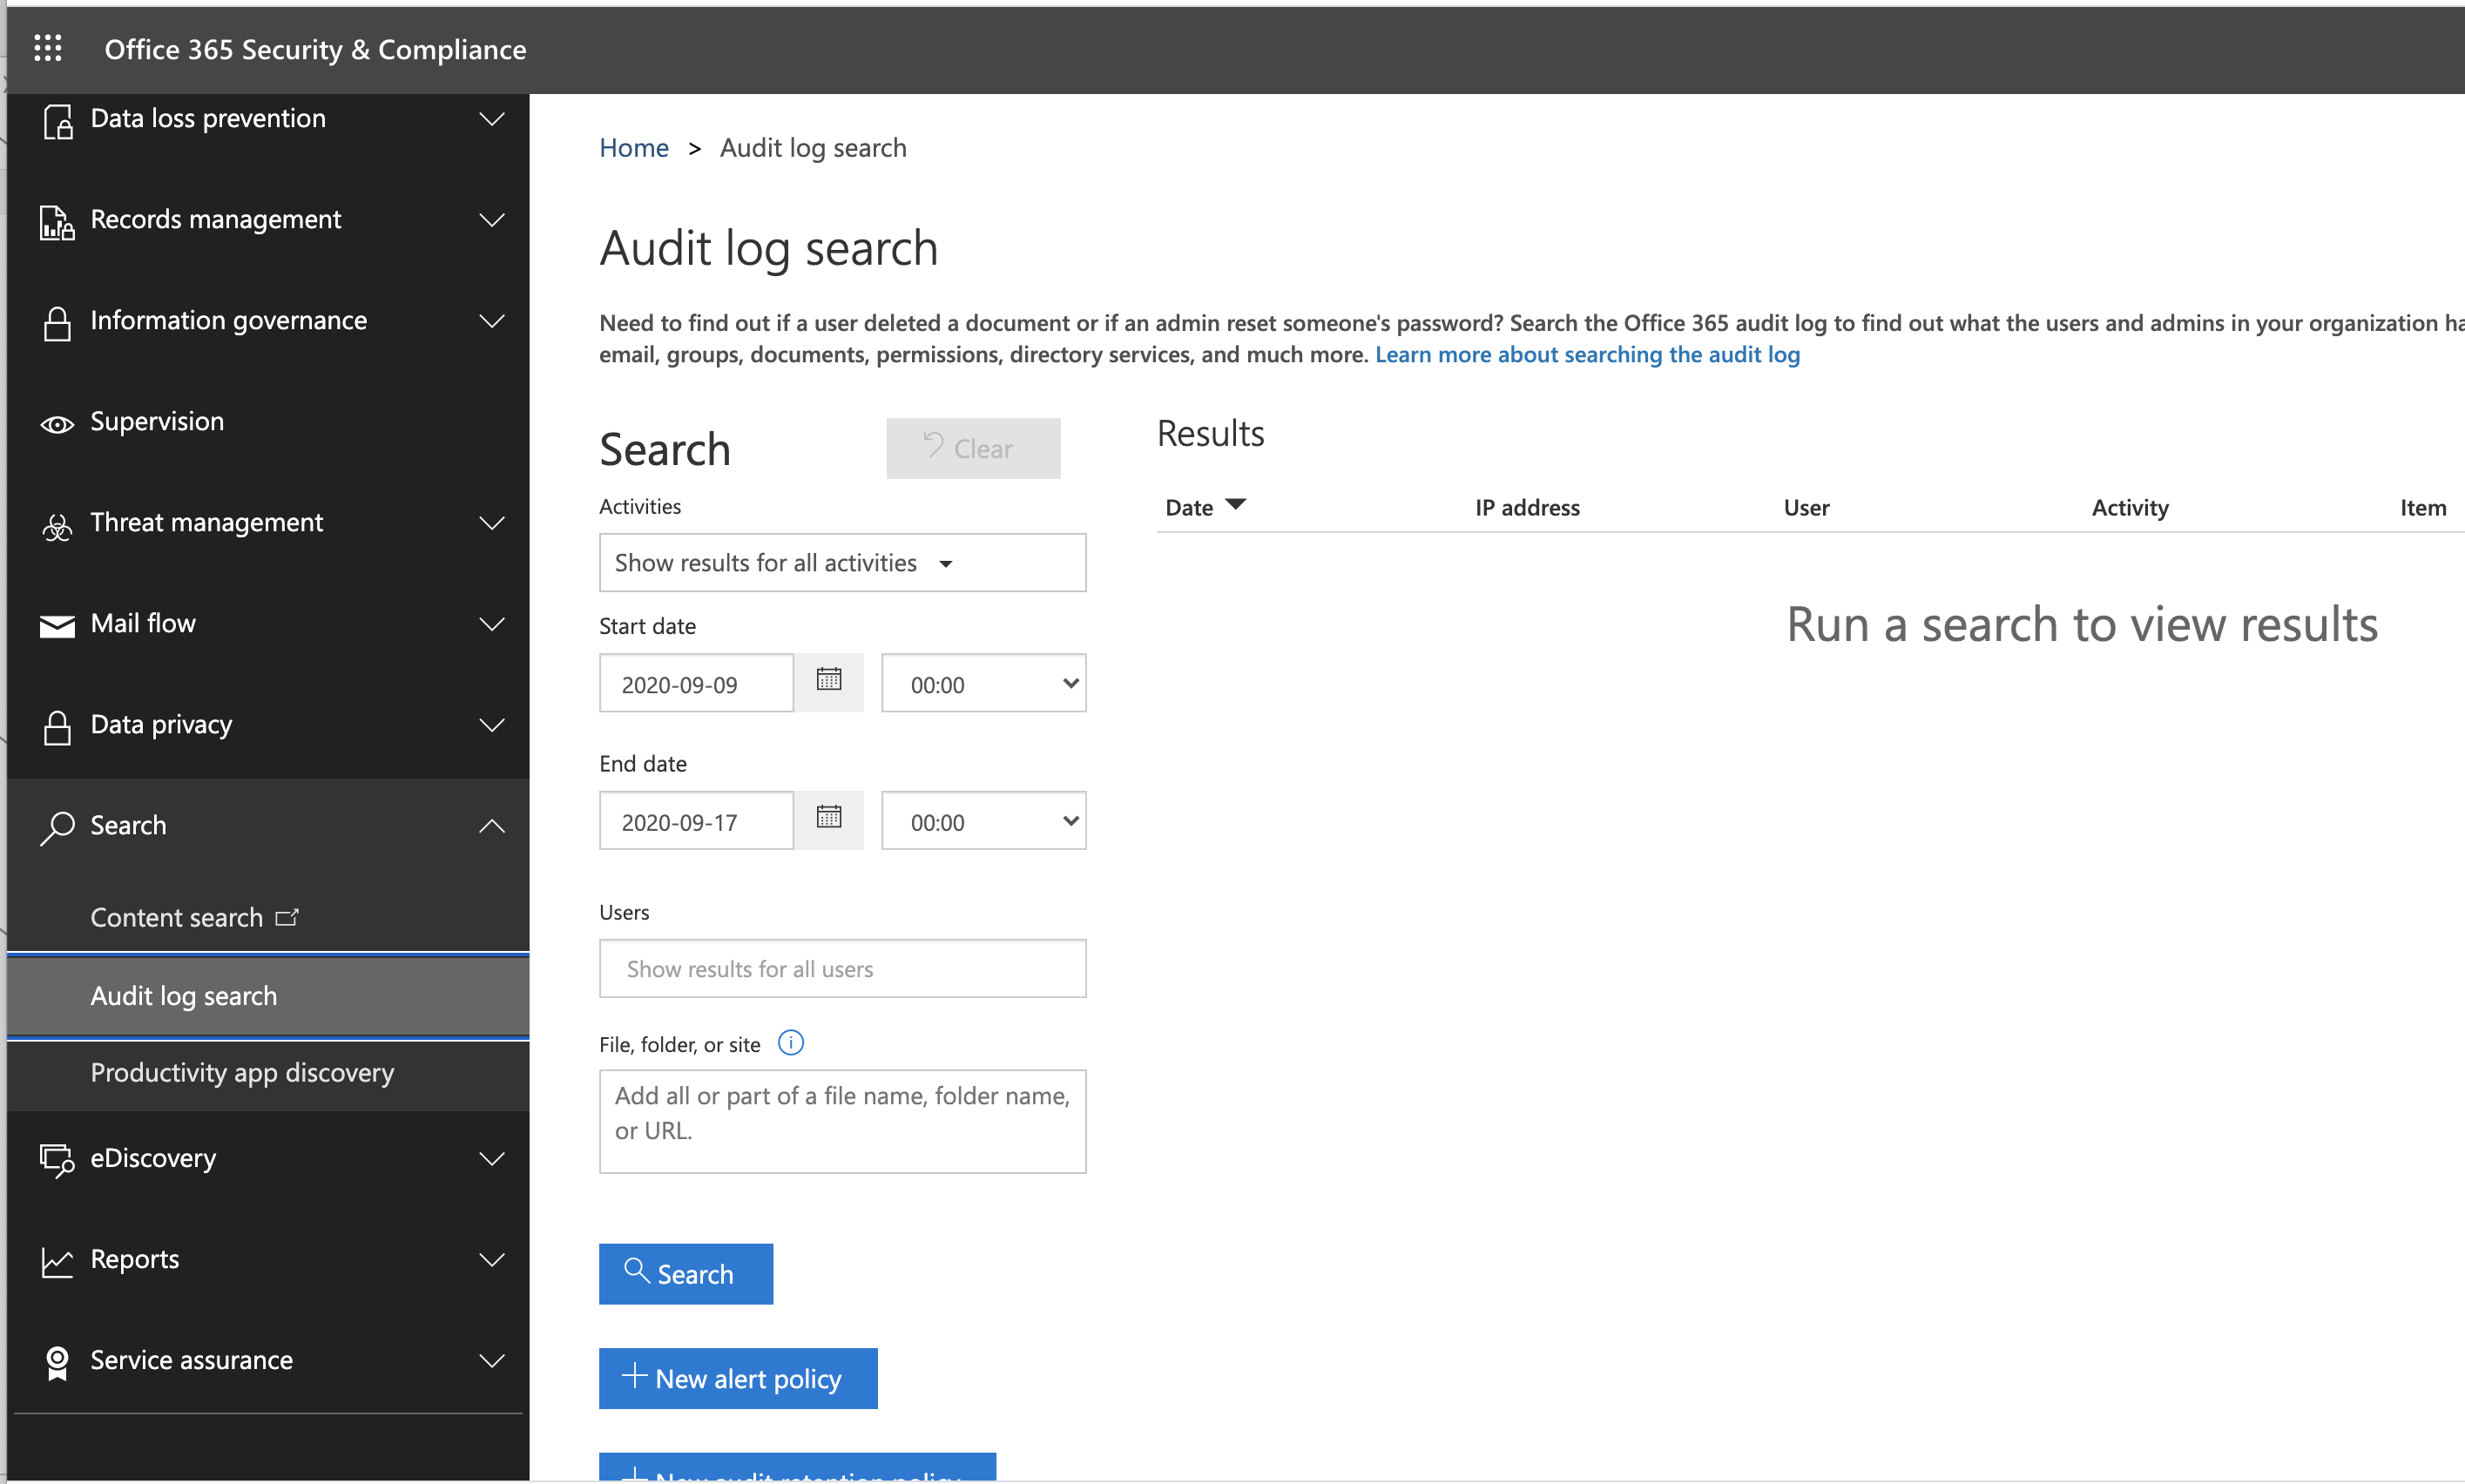
Click Audit log search. If the Audit log search page appears, the audit log is already enabled and you are done.
If the audit log is not enabled, the Enable audit log button appears.
- Click Enable audit log. The Azure audit log is now enabled.
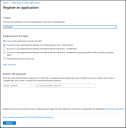
Registering the Application
To register the application in Microsoft Entra ID (formerly Azure Active Directory):
-
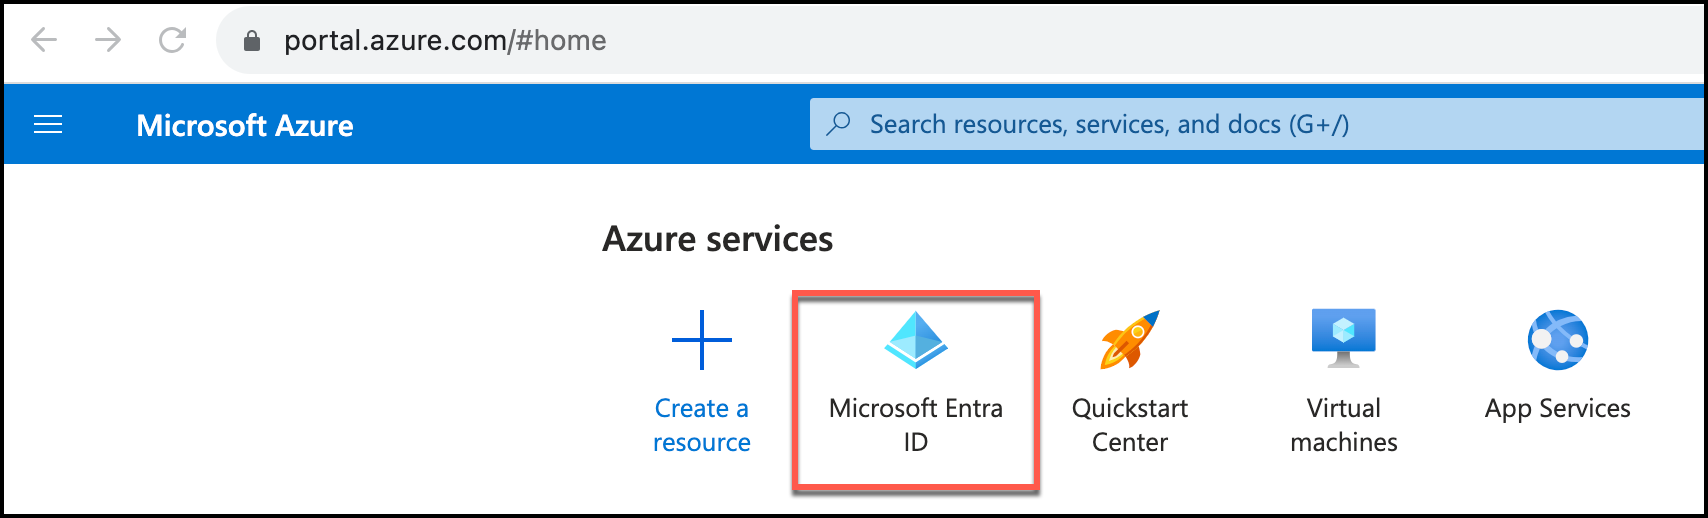
Log in to Microsoft Azure at https://portal.azure.com.
-
From Azure services, select Microsoft Entra ID.

-
In the navigation pane, select App registrations.

-
Click New registration.
-
Enter a Name.
-
Choose a supported account type. Accounts in this organizational directory only is typical.
-
Click Register.
-
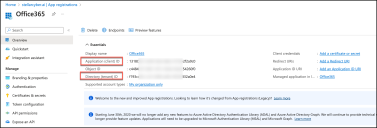
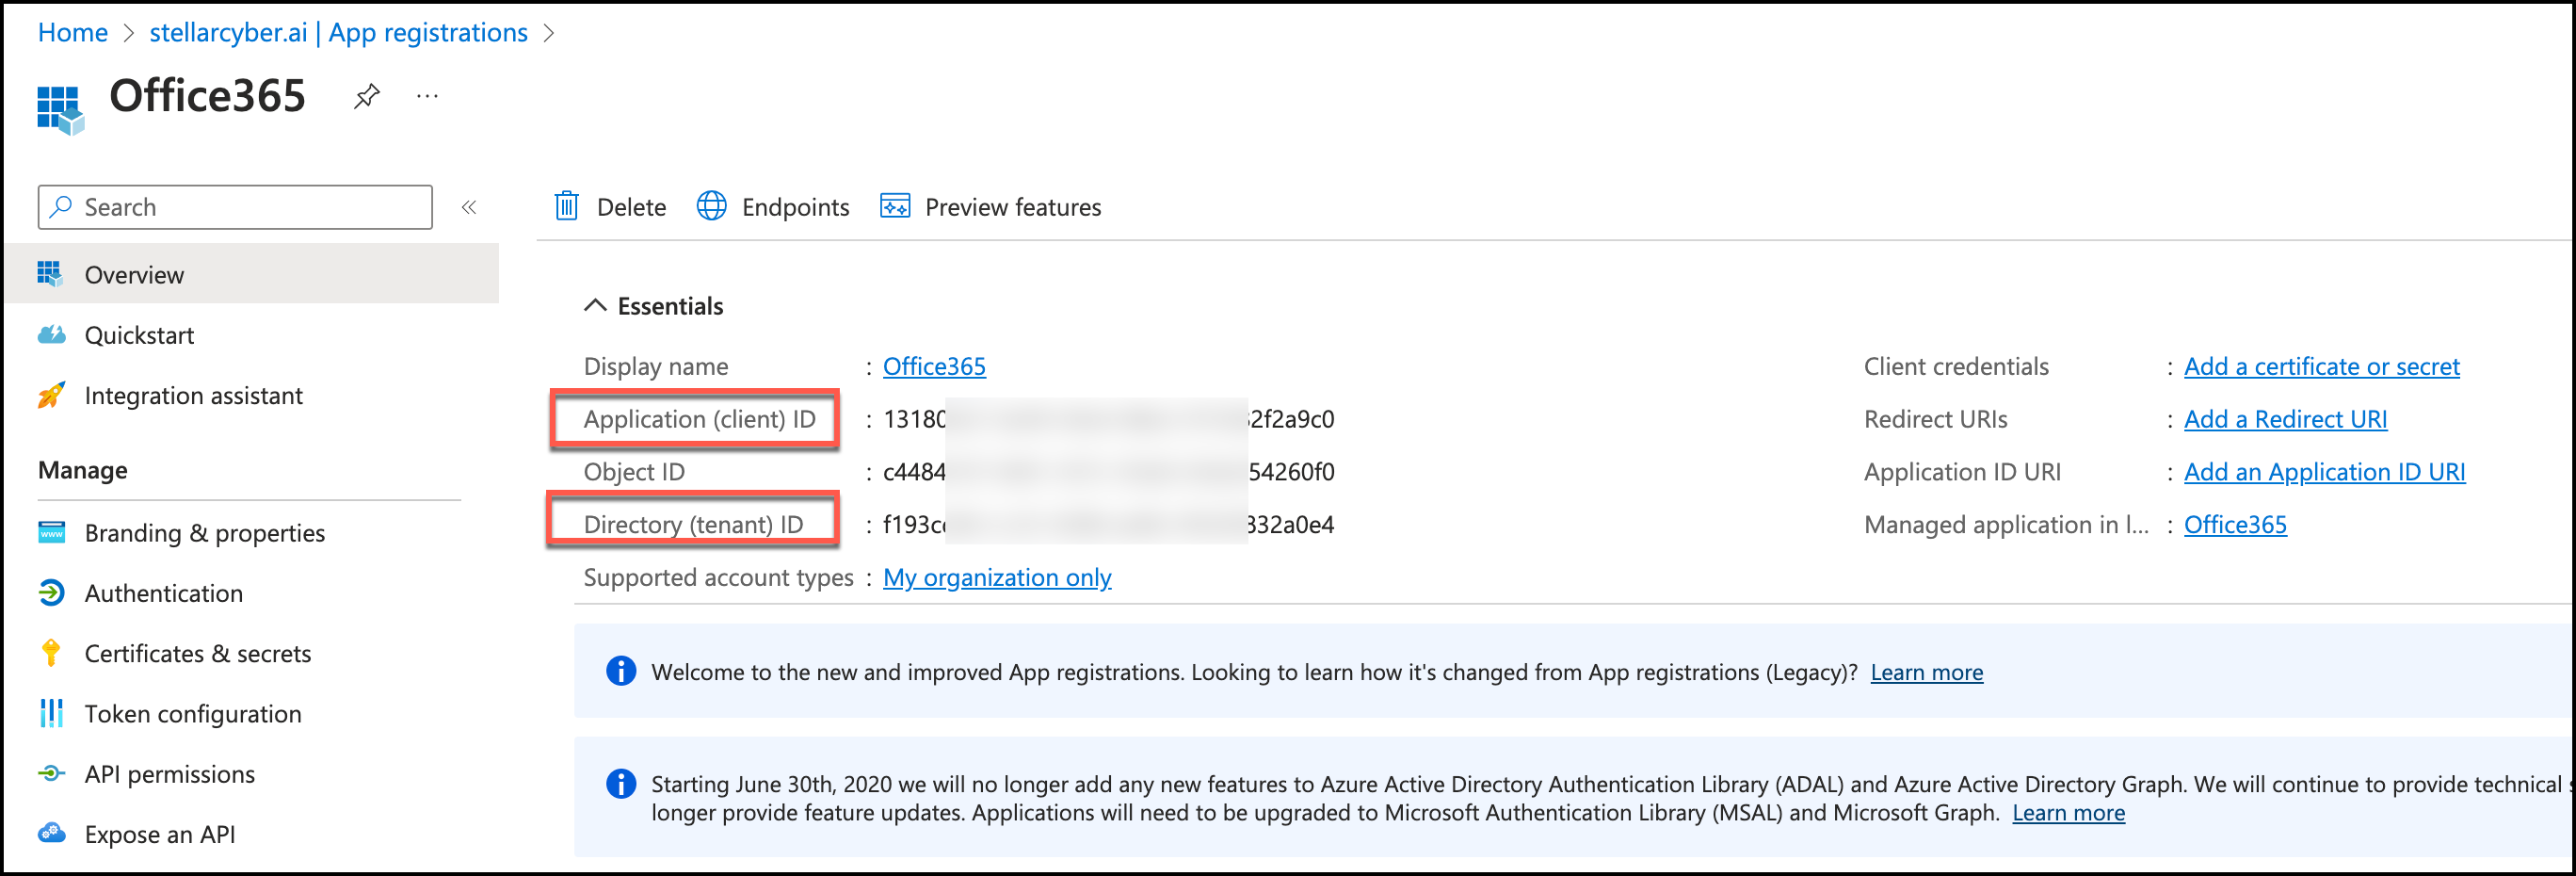
Copy the Application (client) ID and Directory (tenant) ID. You will use them to configure the connector in Stellar Cyber.
-
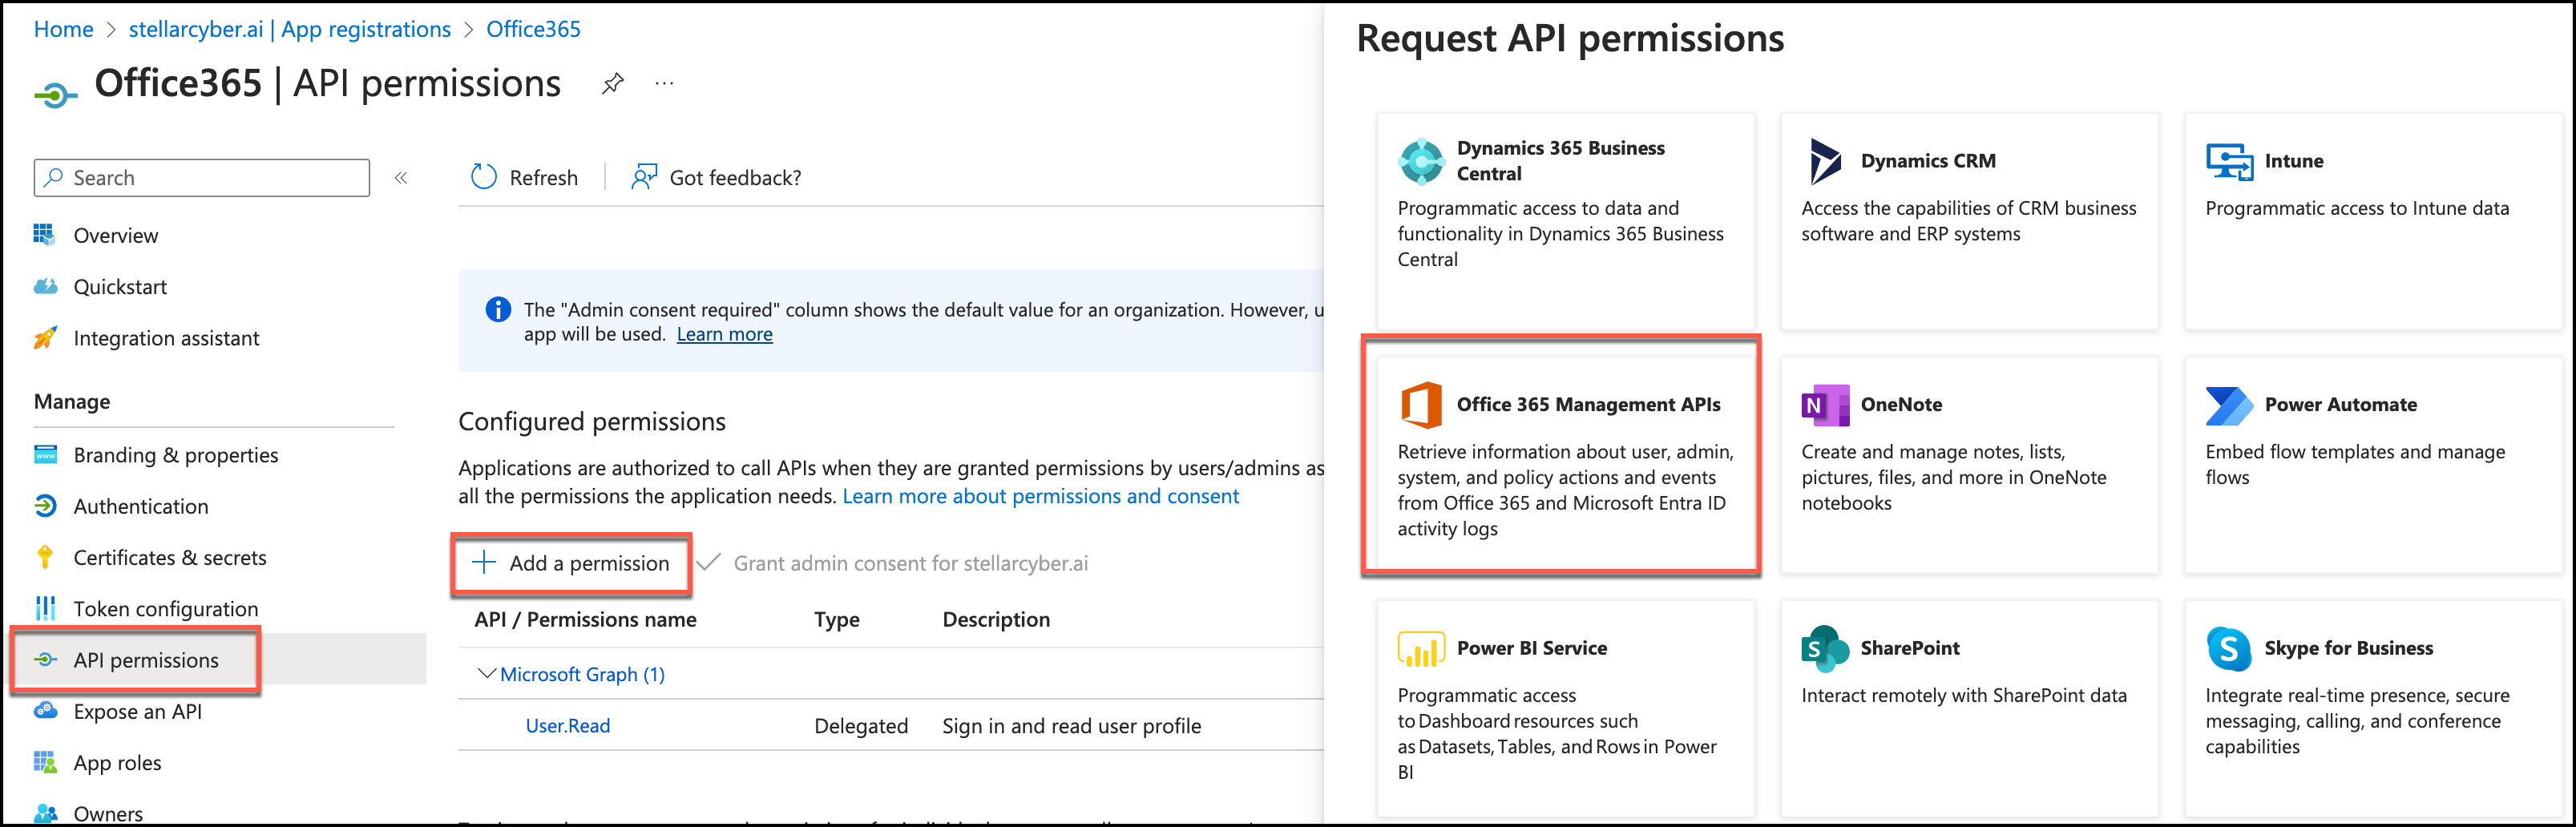
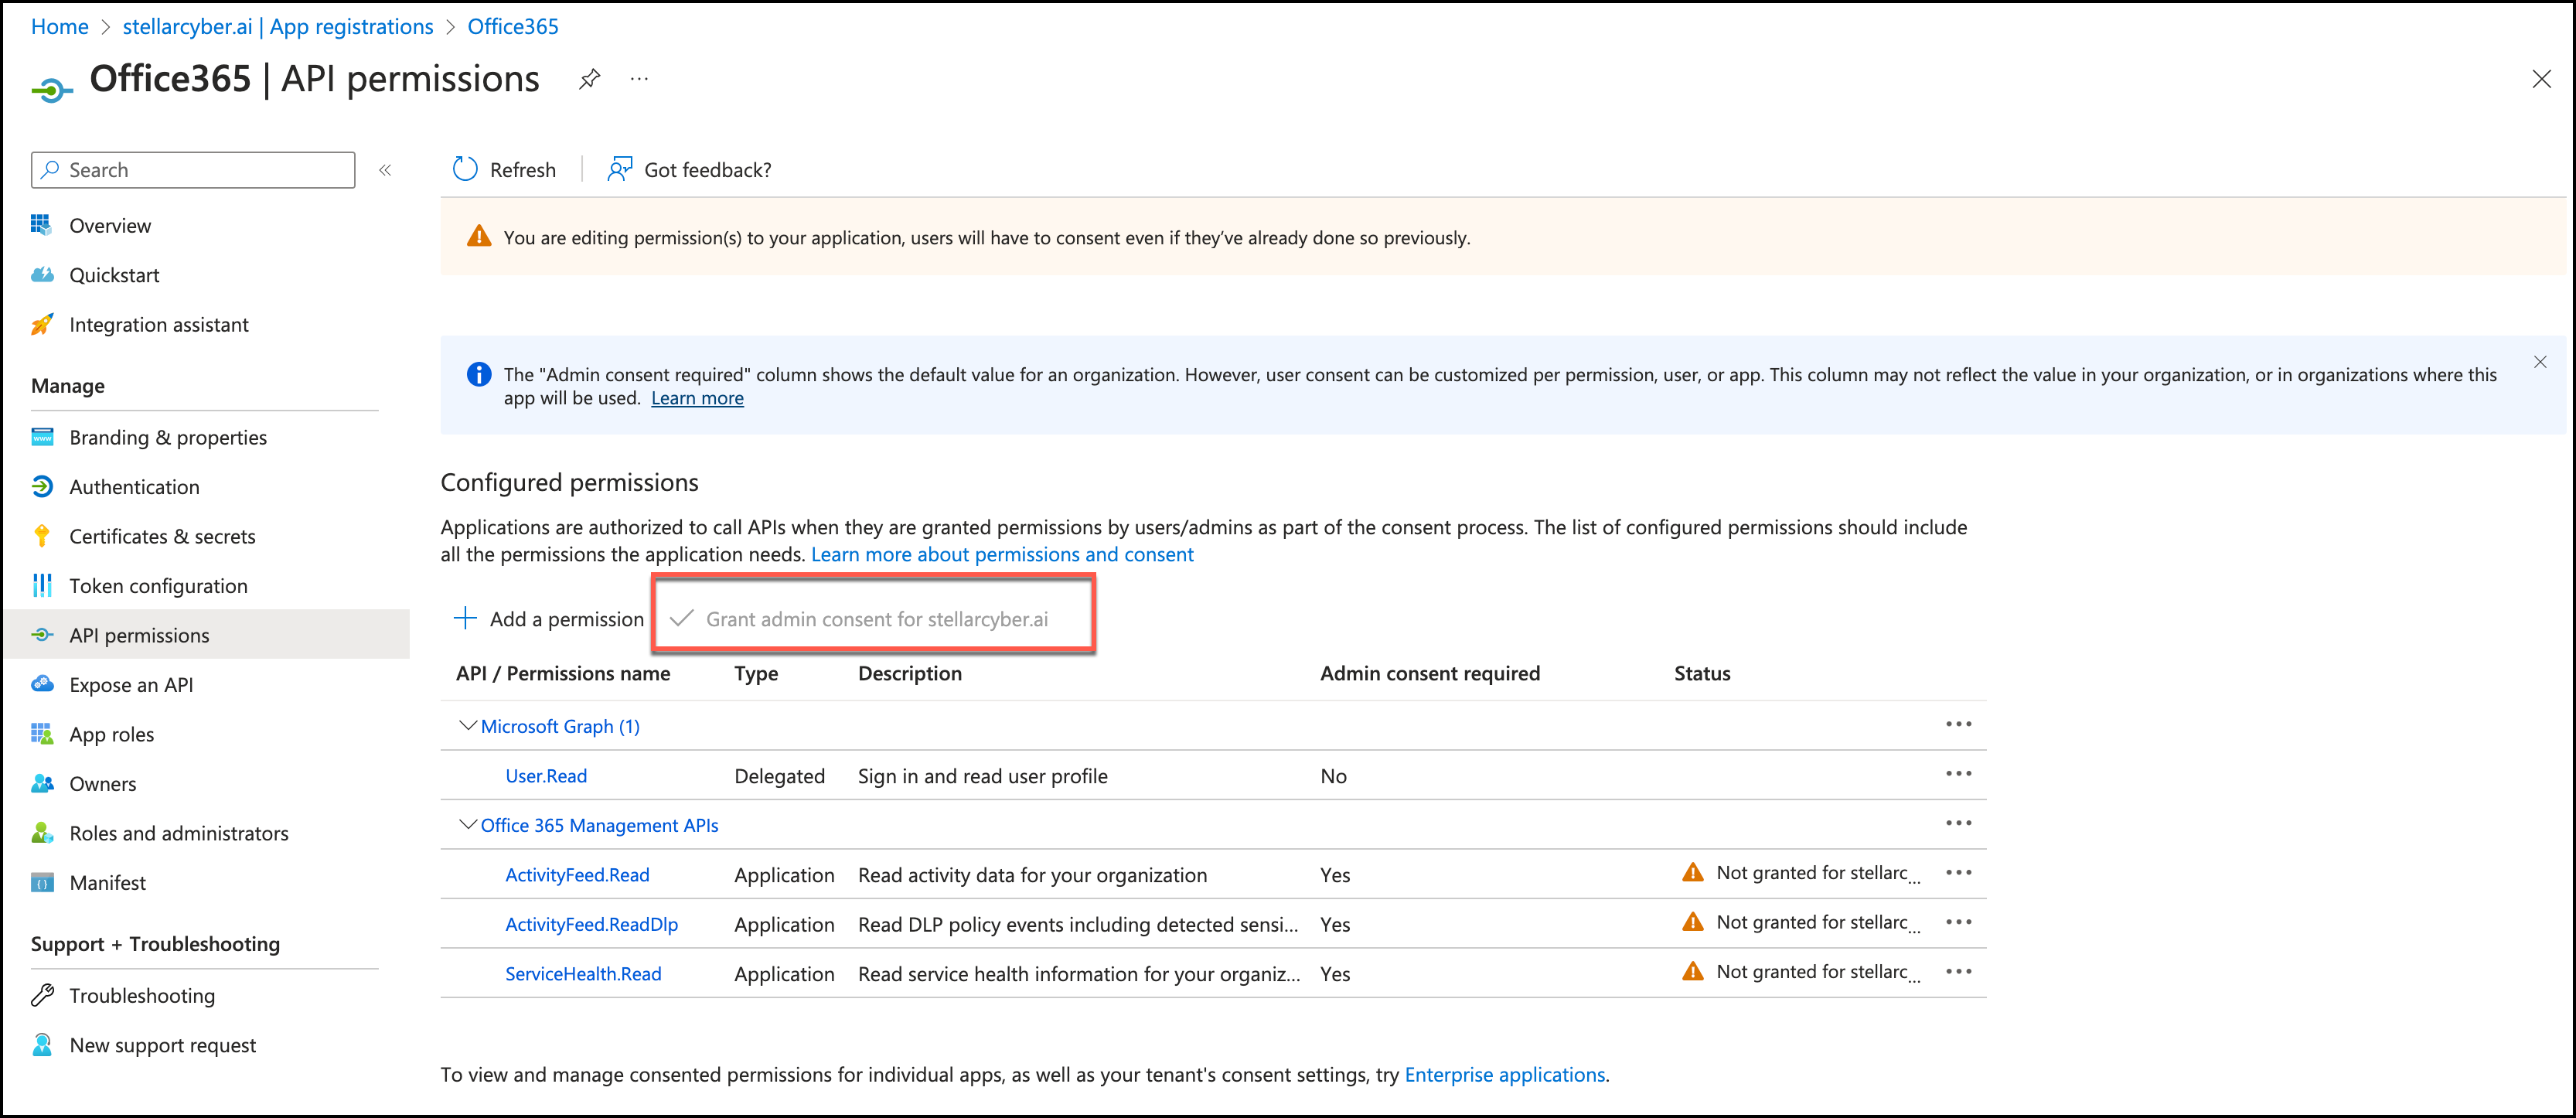
To set the permissions for your application, in the navigation pane, select API Permissions.

-
Click Add a permission.
-
Select Office 365 Management APIs.
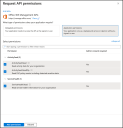
-
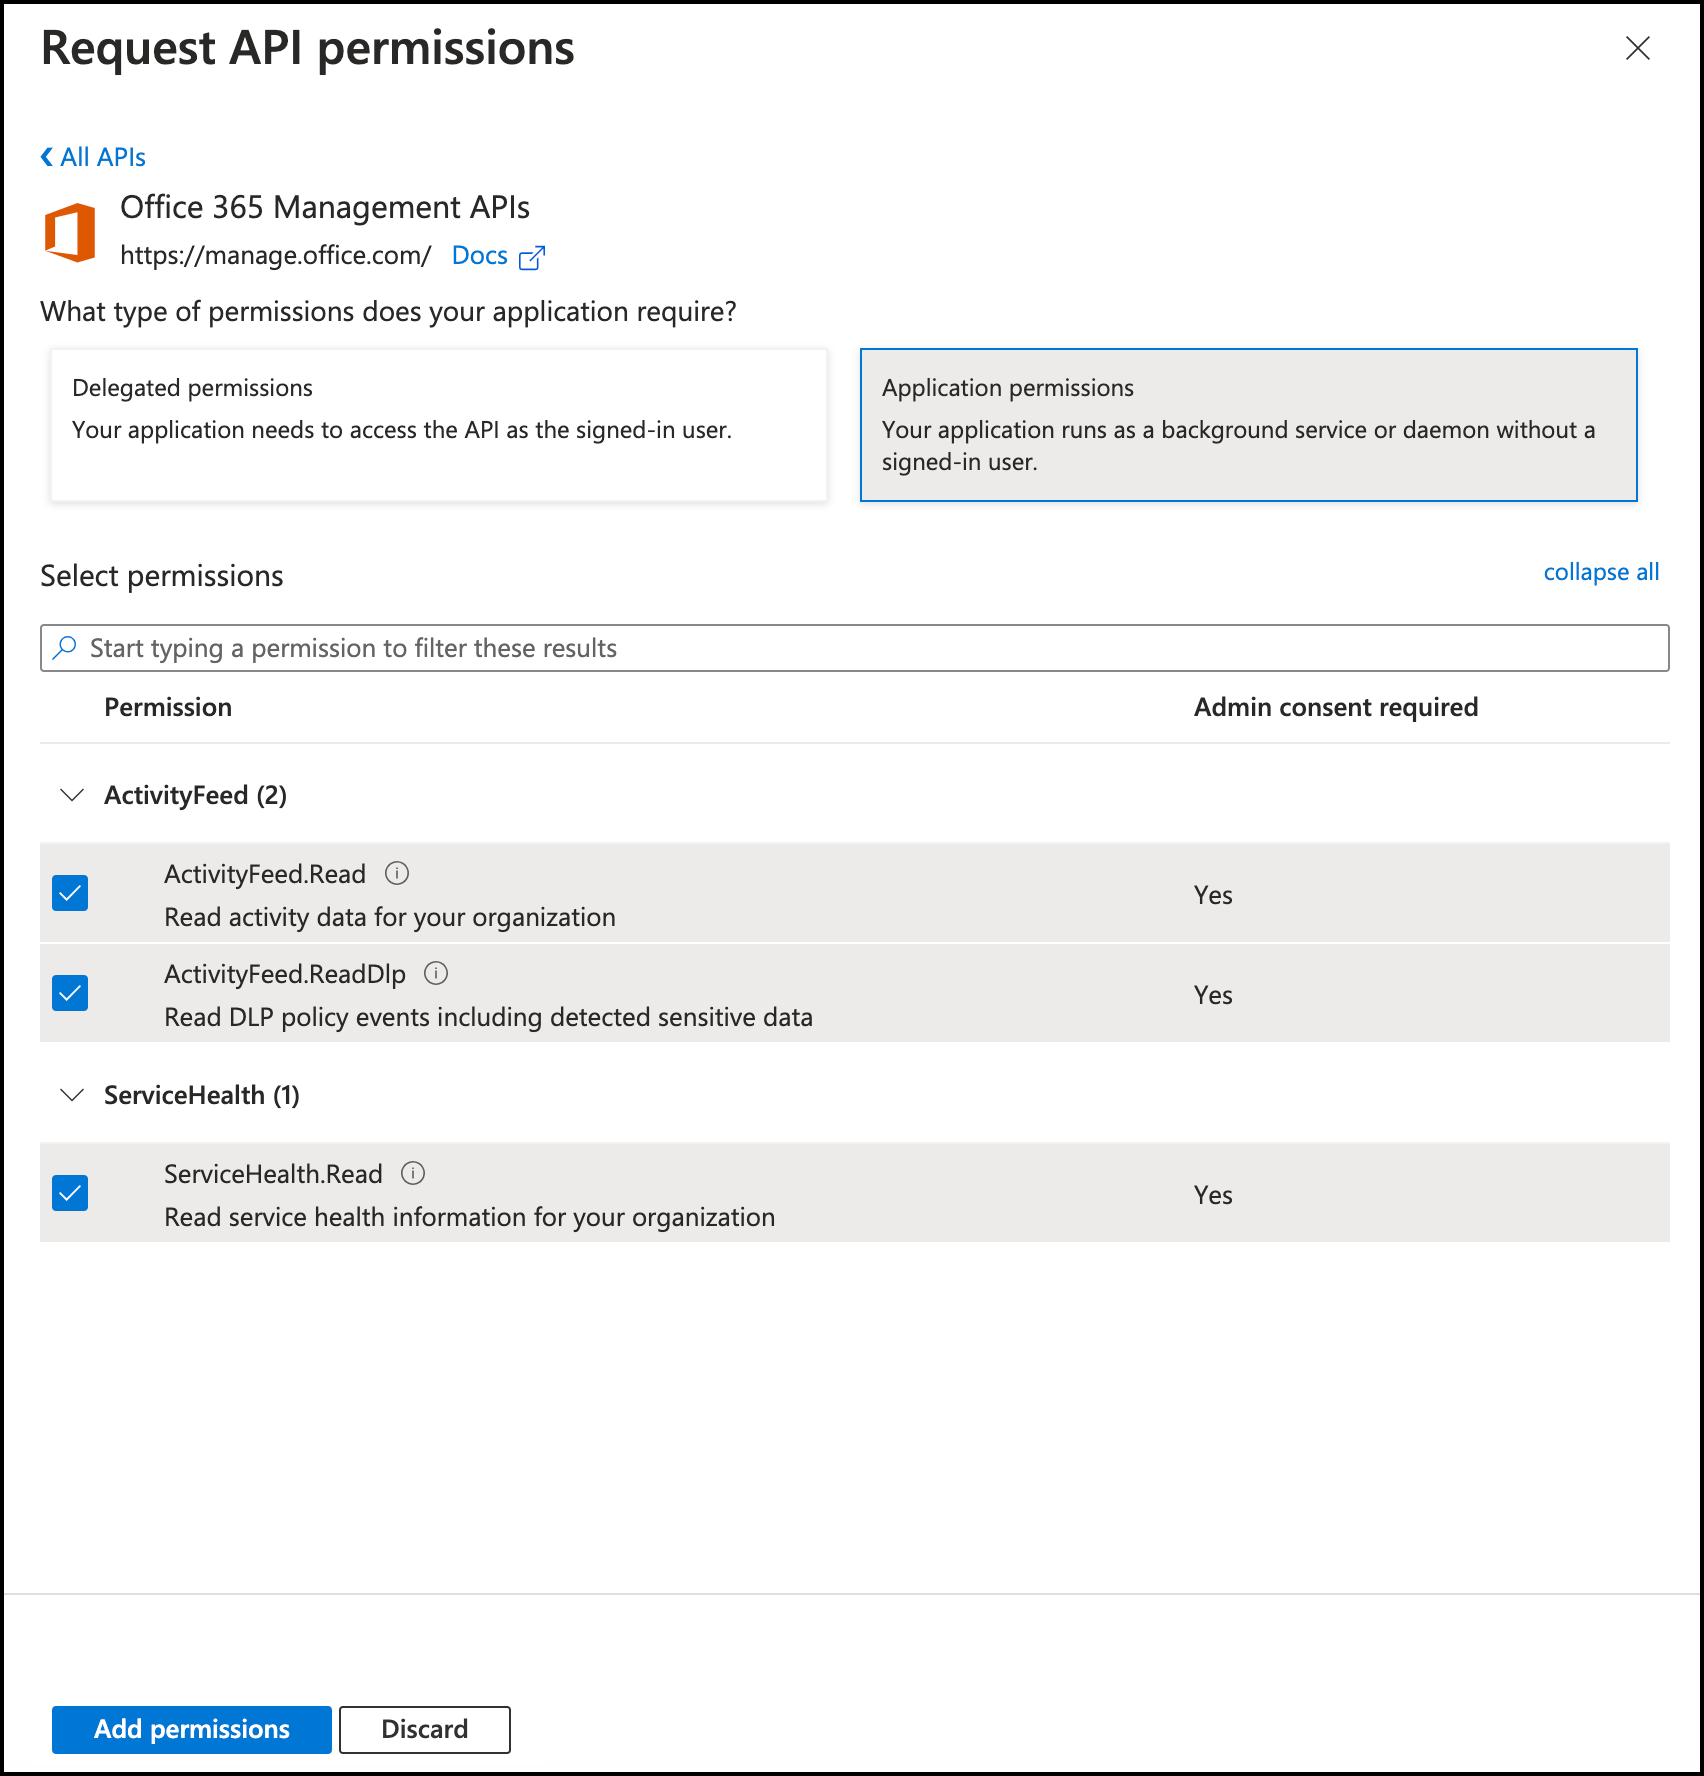
In Request API permissions, select Application permissions.
-
Select permissions for ActivityFeed.Read, ActivityFeed.ReadDlp, and ServiceHealth.Read.
-
Click Add permissions.
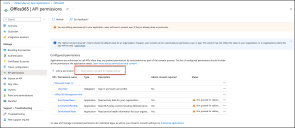
-
If you are the Office 365 super admin, grant the permissions. Select the checkmark to Grant admin consent for <account name>.
Otherwise, wait for the super admin to grant them.
Make sure that the permissions are granted. If you add the connector before permissions are granted, the process fails and you have to start over.
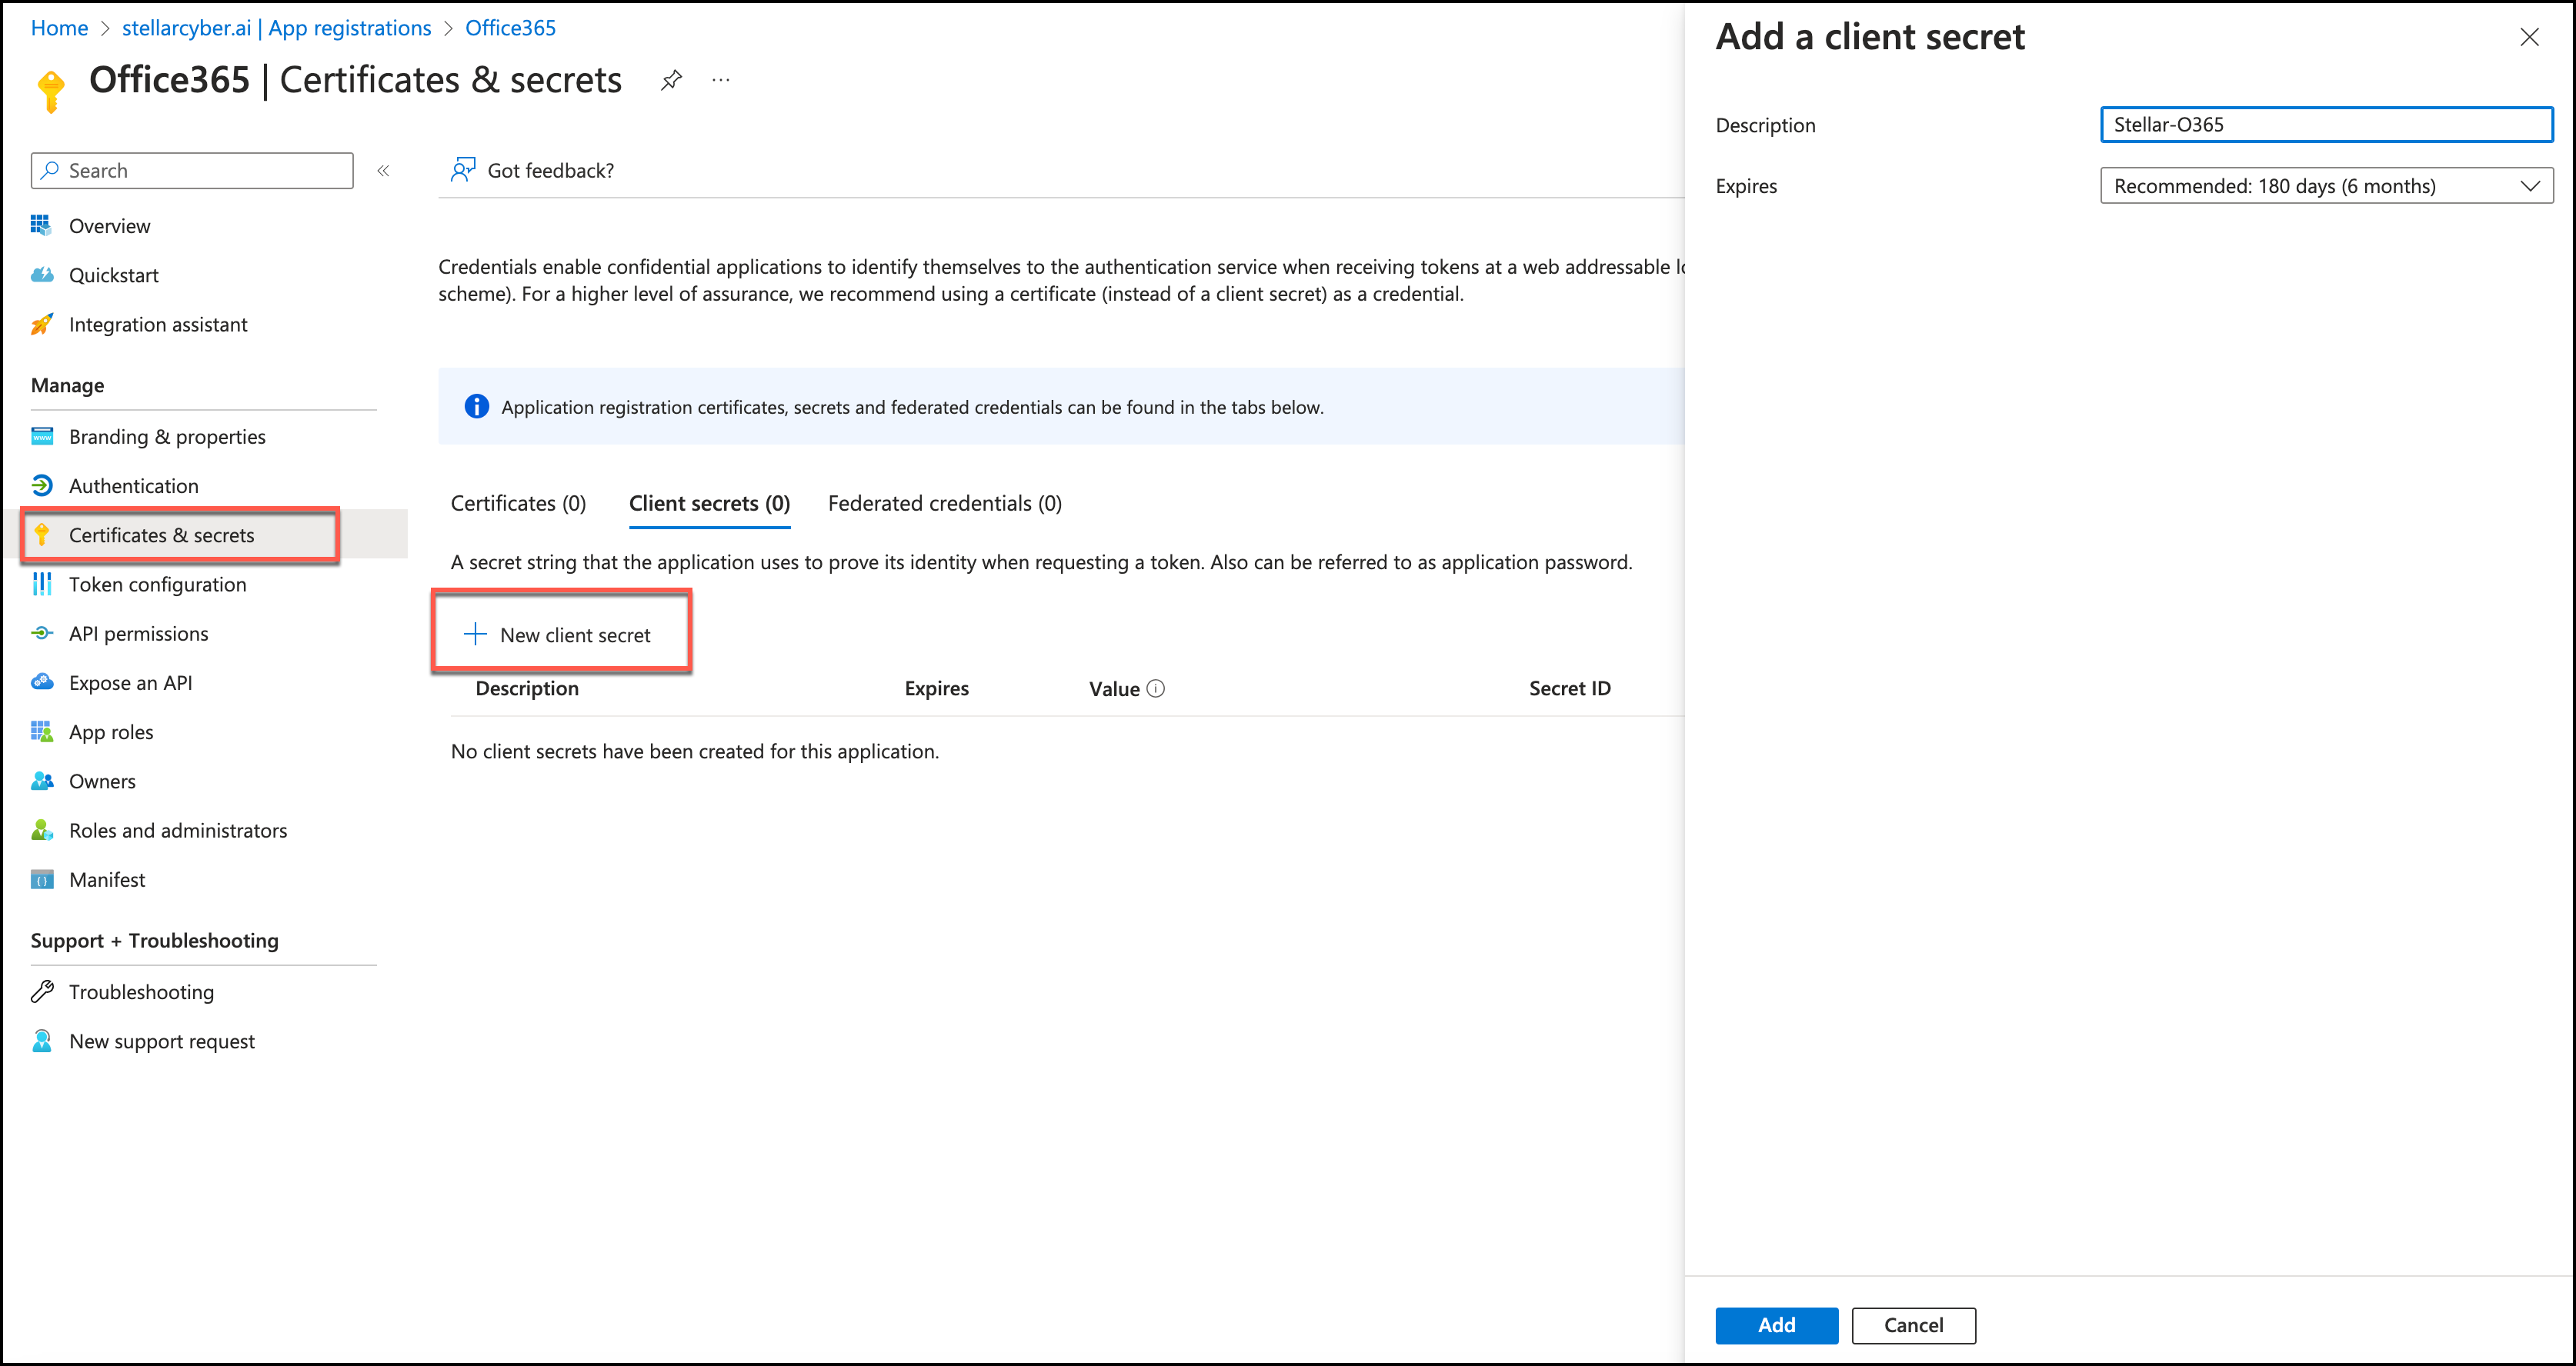
-
When the permissions are granted, in the navigation pane, click Certificates & secrets.
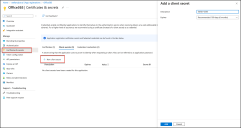
-
Click New client secret.
-
In Add a client secret, enter a Description and choose an expiration.
-
Click Add.
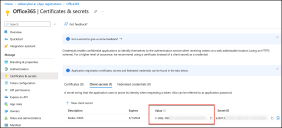
-
Copy the Value. You will use this as the API Access Key to configure the connector in Stellar Cyber.


Adding the Connector in Stellar Cyber
With the audit log enabled, the app registered, and the two IDs and secret handy, add the Office 365 connector in Stellar Cyber:
-
Log in to Stellar Cyber.
-
Click System | Integration | Connectors. The Connector Overview appears.

-
Click Create. The General tab of the Add Connector screen appears. The information on this tab cannot be changed after you add the connector.
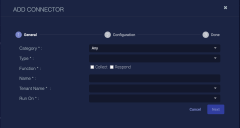
The asterisk (*) indicates a required field.
-
Choose SaaS from the Category drop-down.
-
Choose Office 365 from the Type drop-down.
-
For this connector, the supported Function is Collect, which is enabled already.
-
Enter a Name.
This field does not accept multibyte characters.
-
Choose a Tenant Name. The Interflow records created by this connector include this tenant name.
-
Choose the device on which to run the connector.
-
(Optional) When the Function is Collect, you can create Log Filters. For information, see Managing Log Filters.

-
Click Next. The Configuration tab appears.
The asterisk (*) indicates a required field.
-
Select the applicable Office365 Subscription Plan from the menu:
-
Enterprise Plan
-
GCC Government Plan
-
GCC High Government Plan
-
DoD Government Plan
To learn about Office 365 government environments and customer eligibility for the Office 365 government plans, refer to the following Microsoft documentation: https://learn.microsoft.com/en-us/office365/servicedescriptions/office-365-platform-service-description/office-365-us-government/office-365-us-government.
-
-
Select the Microsoft Authentication Endpoint you wish to use, the available selections are:
-
https://login.microsoftonline.us
-
https://login.microsoftonline.de
-
https://login.partner.microsoftonline.cn
-
https://login.microsoftonline.com
-
-
Enter the Directory ID. This is the Directory (tenant) ID you copied when you performed the application registration.
-
Enter the Application ID. This is the Application (client) ID you copied when you performed the application registration.
-
Enter the API Access Key. This is Value string you copied from Certificates & secrets.
-
Enter a Publisher ID. This ID is used to identify the application querying the API. If there are no rate limits for querying the API, you can leave this blank.
-
Set the Interval (min). This is how often the logs are collected.

-
Choose the Content Type you want to collect. The following logs are supported:
-
Audit Azure Active Directory
-
Audit Exchange
-
Audit General
-
Audit Sharepoint
-
DLP ALL
The same content types are collected for all Office365 Subscription Plans.
-
-
Click Next. The final confirmation tab appears.
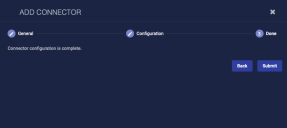
-
Click Submit.
To pull data, a connector must be added to a Data Analyzer profile if it is running on the Data Processor.


The new connector is immediately active, but the Office 365 APIs might not be active, especially if this is the first time you've enabled the Office 365 audit logs. Wait at least 30 minutes before testing the connector so that Office 365 can complete its background tasks.
The connector collects logs every 5 minutes, but does not collect any historical logs.
Testing the Connector
If you've just added this connector, wait 30 minutes before testing.
When you add (or edit) a connector, we recommend that you run a test to validate the connectivity parameters you entered. (The test validates only the authentication / connectivity; it does not validate data flow).
For connectors running on a sensor, Stellar Cyber recommends that you allow 30-60 seconds for new or modified configuration details to be propagated to the sensor before performing a test.
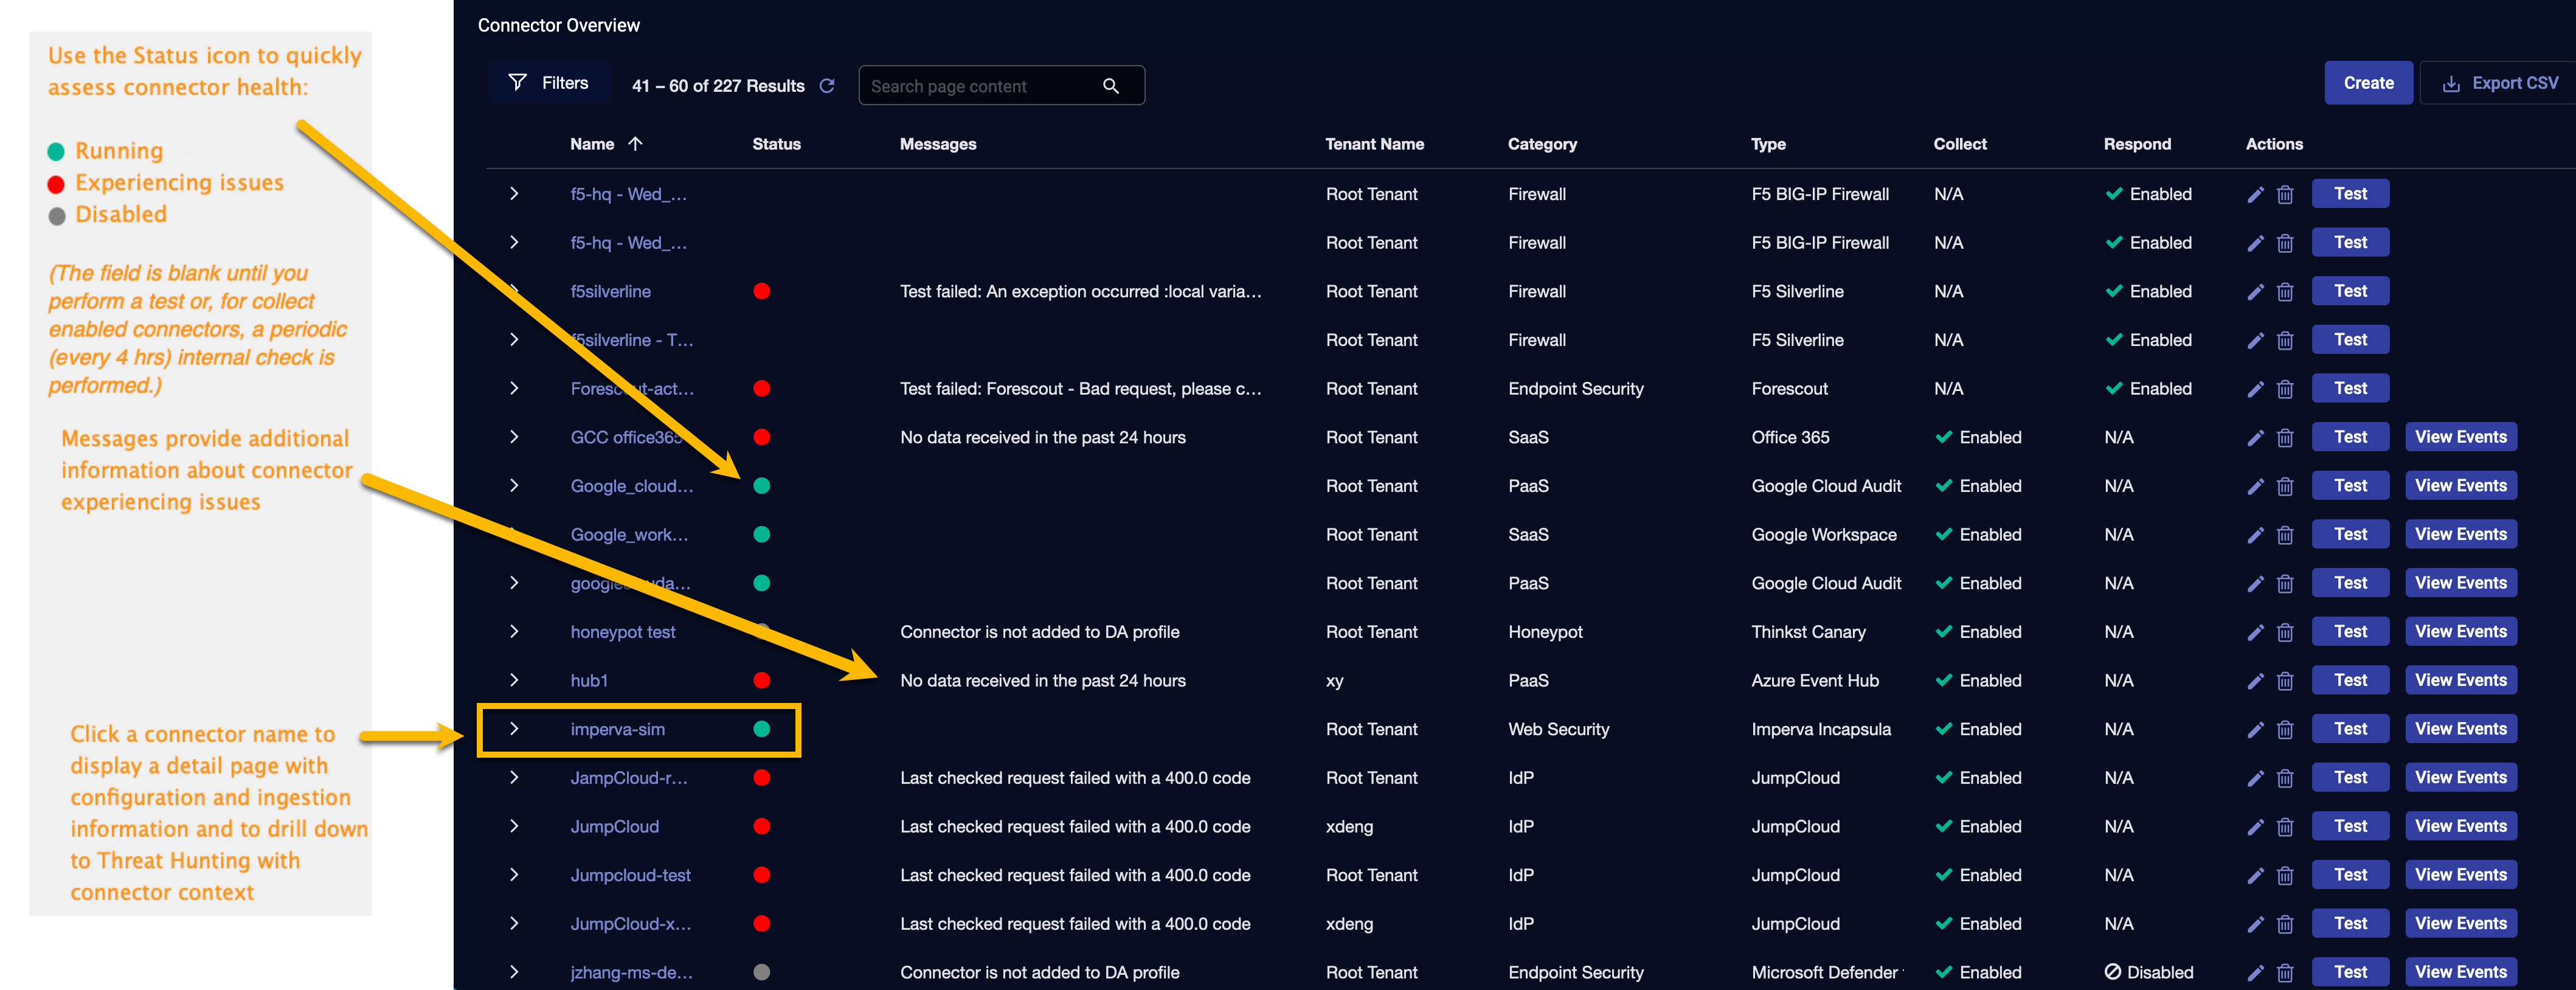
-
Click System | Integrations | Connectors. The Connector Overview appears.
-
Locate the connector that you added, or modified, or that you want to test.
-
Click Test at the right side of that row. The test runs immediately.
Note that you may run only one test at a time.
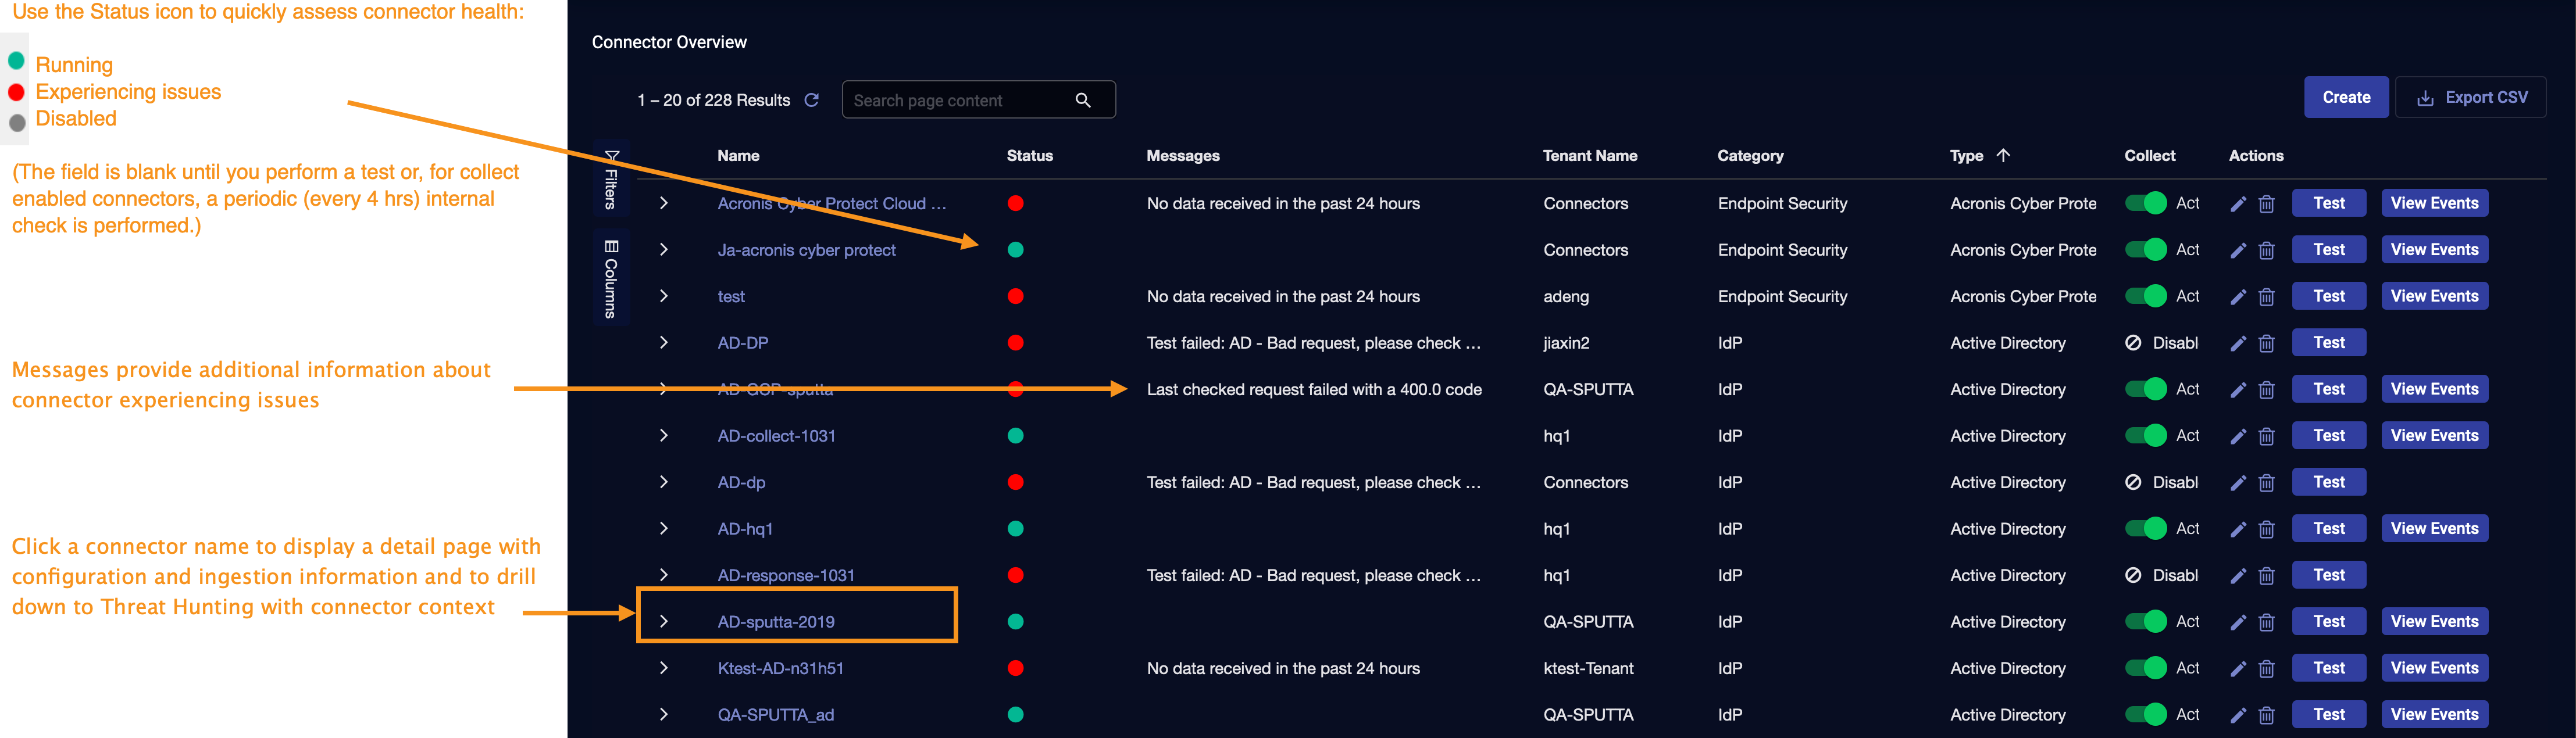
Stellar Cyber conducts a basic connectivity test for the connector and reports a success or failure result. A successful test indicates that you entered all of the connector information correctly.
To aid troubleshooting your connector, the dialog remains open until you explicitly close it by using the X button. If the test fails, you can select the button from the same row to review and correct issues.
The connector status is updated every five (5) minutes. A successful test clears the connector status, but if issues persist, the status reverts to failed after a minute.
Repeat the test as needed.


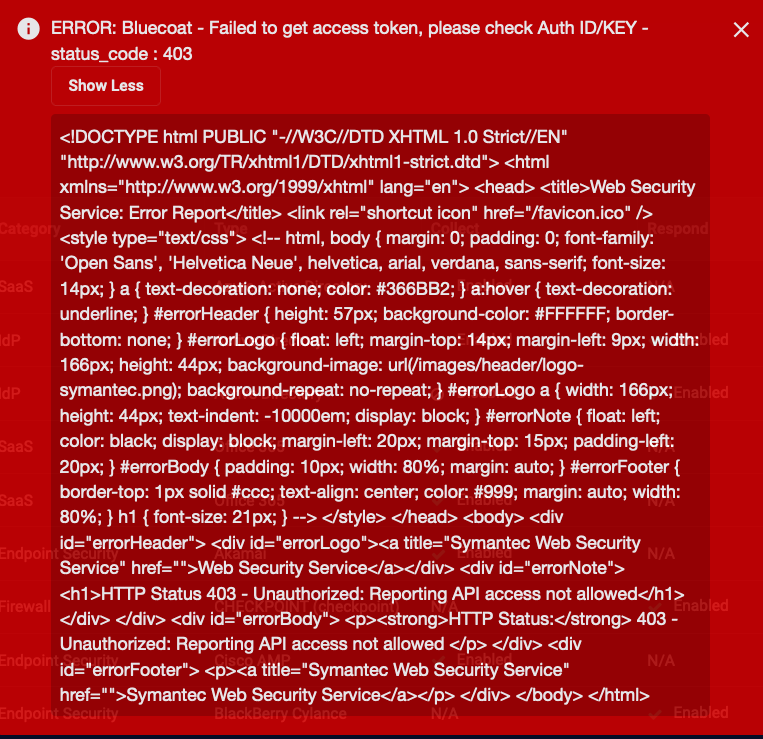
If you see an error similar to below, verify that the appropriate permissions have been granted.

Verifying Ingestion
To verify ingestion:
- Click Investigate | Threat Hunting. The Interflow Search tab appears.
- Change the Indices to Windows Events or Alerts. The table immediately updates to show ingested Interflow records.
