Managing Security Switch Actions
The Automation | Action History | Security Switch Actions tab displays the Block IP actions taken manually from the Event Display or automatically by Automated Threat Hunting. The rules pushed from Stellar Cyber can tell the switch to block network traffic that is suspected (or proved) to be a security breach. The rules can be temporary or permanent. This page displays the actions taken by Stellar Cyber, and allows you to add and revert actions.
Security Switch Actions Table
The Security Switch Actions table displays up to 1000 Block IP rules by default.
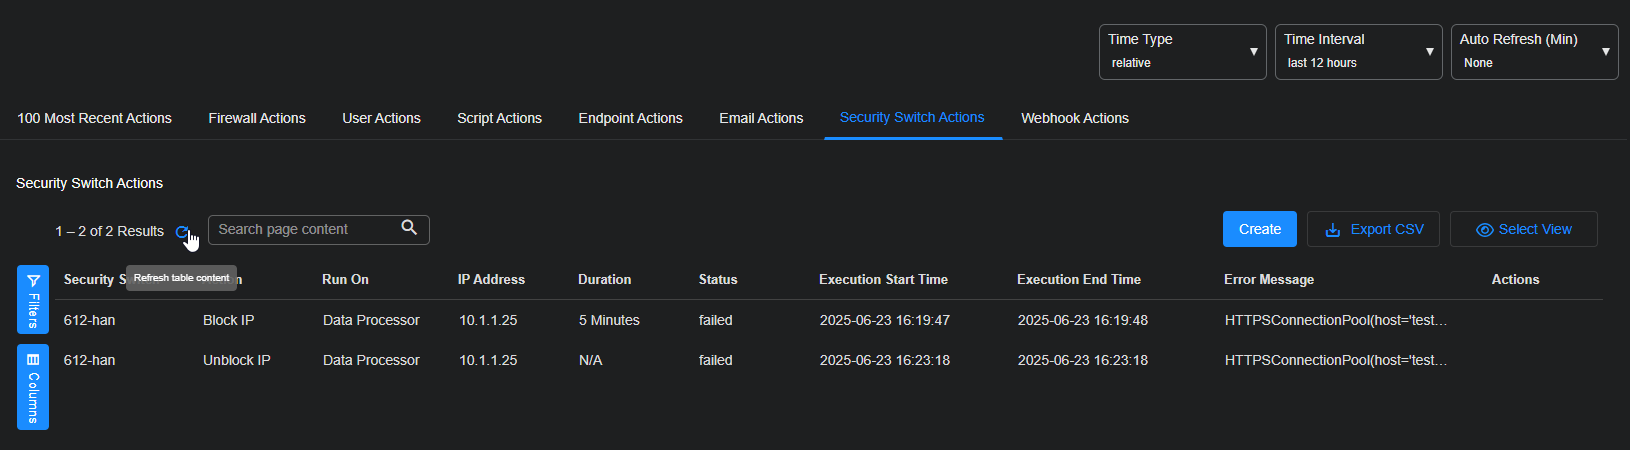
The Status can be:
- Waiting – The action is queued. This should take less than a minute.
- In Progress – The action is being communicated to the firewall.
- Succeeded – The action was successfully implemented on the firewall.
- Failed – The action failed. An Error Message relayed from the firewall provides details.
- Expiring – The action is being removed from the firewall.
- Expired – The action is no longer active.
On the Security Switch Actions table you can:
- Click Create to add a new Security Switch action.
- Click Revert to revert the action.
Stellar Cyber does not automatically delete rules when they expire. Sort the table by execution time to see which rules are in effect and which can be reverted.
See the Tables page for more information on working with tables.
Adding a Security Switch Action
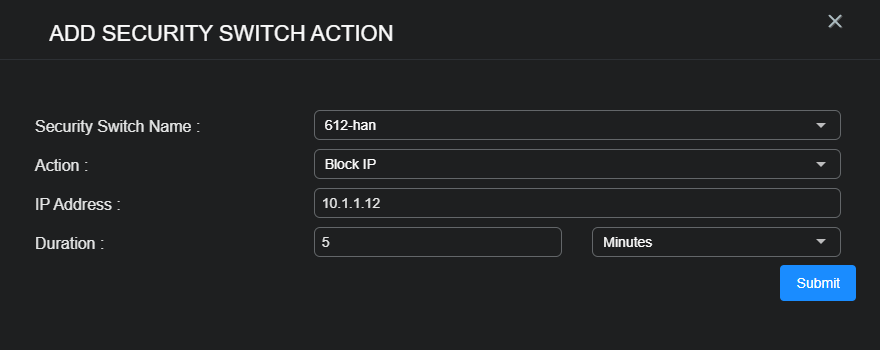
To add a security switch action:
-
Select Create.
The ADD SECURITY SWITCH ACTION screen appears.
-
Choose a switch from the Security Switch Name drop-down menu, which includes all the security switches configured in your Stellar Cyber Platform.
-
Choose an Action:
-
Block IP – Adds the rule to the switch
-
Unblock IP – Removes the rule from the switch
-
-
Enter the IP Address.
-
Set the Duration. You can choose any number of Minutes, Hours, Days, or Forever.
-
Select Submit.
The action goes into effect immediately and appears in the Security Switch Actions table.
You can also add firewall actions from the Event Display.
Reverting a Security Switch Action
To disable a security switch action, select the Revert button.
A new row for the rule is added to the table, with the action of Removed. The progress of the rule update to the switch is reported in the Status column. Use the Refresh button to monitor progress. A Status Message of Success is reported when the rule update is completed.
You cannot revert (or edit) a failed action. If the action failed, you must recreate the action.
