Using InSyncs
This topic covers a feature that is not available for all customers yet. See Early Access Program Features and Topics Under Development.
InSyncs synchronizes ServiceNow and Stellar Cyber to streamline case management and enhance communication between the two systems.
Using InSyncs, you can:
-
Open and close a Stellar Cyber case in ServiceNow.
-
Update a case in Stellar Cyber, which updates a ticket in ServiceNow.
-
Request information from ServiceNow and update the Activity Log in Stellar Cyber.
-
Retrieve data from ServiceNow data tables to update cases in Stellar Cyber.
-
Post data from Stellar Cyber cases to update ServiceNow data tables.
-
Delete a Stellar Cyber case, which deletes a case in ServiceNow.
To ensure the data is synchronized, Stellar Cyber listens for updates from ServiceNow and updates the Stellar Cyber cases or alerts every five minutes when changes occur. Updates from Stellar Cyber to ServiceNow are performed live and are applied immediately.
For more information, see the following:
Using the InSyncs Table
Select System | Integrations | InSyncs to configure and view integration syncs.
The InSyncs Overview table is displayed in the InSyncs tab.
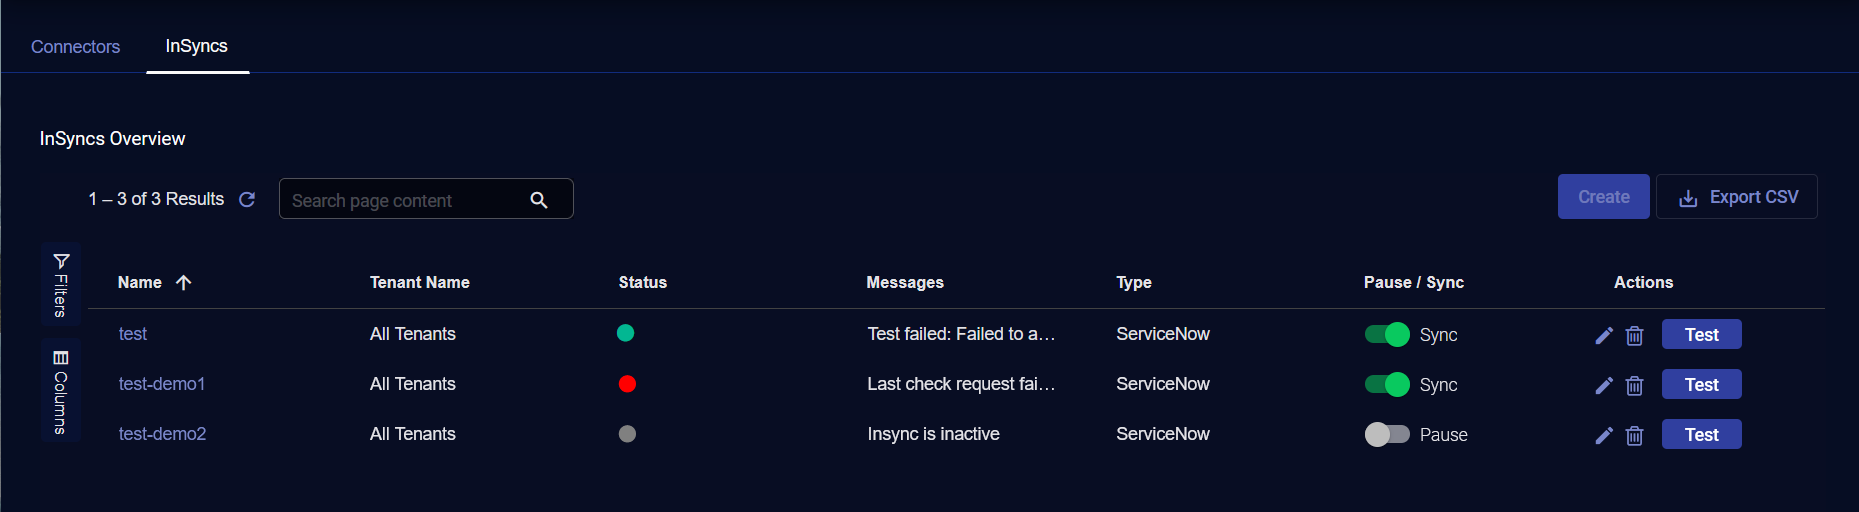
The InSyncs Overview table has the following columns:
-
Name—name of the integration sync (or InSync)
-
Tenant Name—All Tenants means that the integration sync can be used across tenants
-
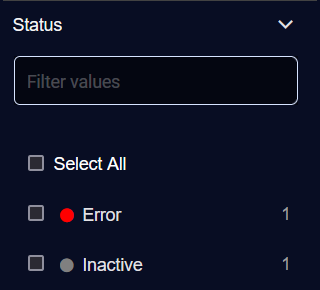
Status—status of the integration sync:
-
Success (green)
-
Error (red)
-
Inactive (gray)
-
-
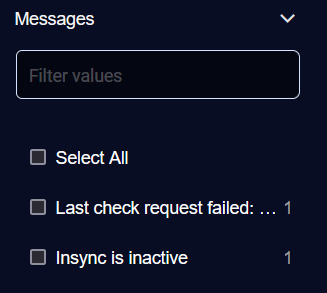
Messages—messages about the Status
-
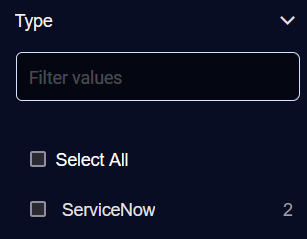
Type—type of integration sync, such as ServiceNow
-
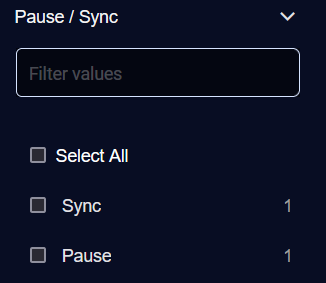
Pause/Sync—toggle of the integration sync
-
Actions—actions available for an integration sync, such as Edit this row, Delete this row, or Test.
Using Search
Use the Search box to search for information about an InSync.
Using Filters
Click Filters to use defined filters.
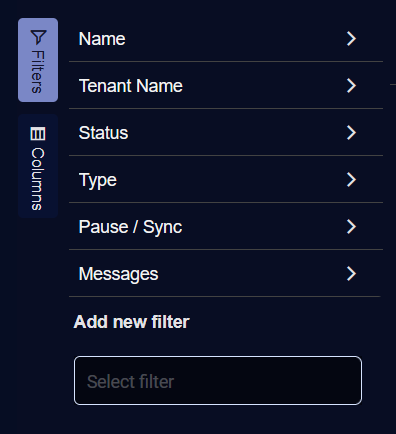
To use defined filters:
-
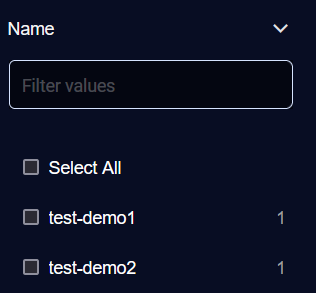
For Name, select the name of an integration sync using the check boxes or Select All. The number of integration syncs of each name is displayed on the right.
-
For Status, select the status using the check boxes or Select All. The number of integration syncs of each status is displayed on the right.
-
For Messages, select the message using the check boxes or Select All. The number of integration syncs of each message is displayed on the right.
-
For Type, select the type using the check boxes or Select All. The number of integration syncs of each type is displayed on the right.
-
For Pause/Sync, select either Pause or Sync using the check boxes or Select All. The number of integration syncs of each toggle is displayed on the right.
-
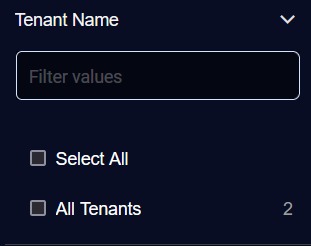
For Tenant Name, select All Tenants or Select All.
-
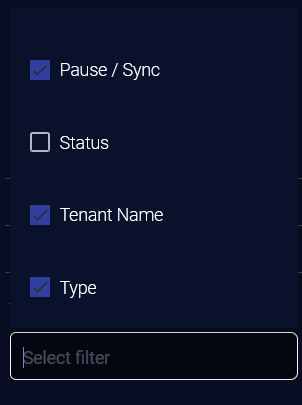
You can click the Select filter search box under Add new filter to deselect a filter in the dropdown menu.
-
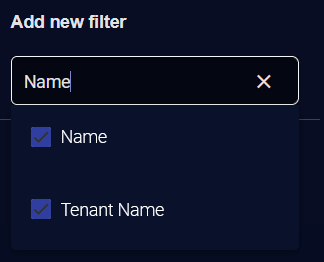
You can also type in the Select filter search box under Add new filter to search for a filter.
To exit, click Filters again. The configured filters are displayed at the top of the table.
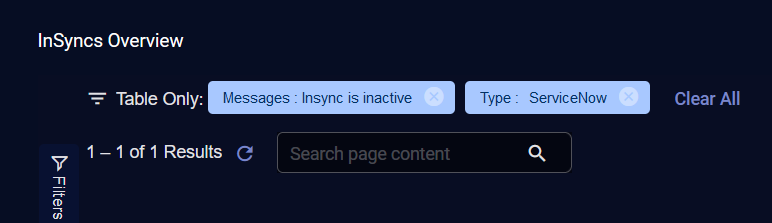
To clear an individual filter, click the icon to the right of the filter (![]() ).
).
To clear all filters, click Clear All.
Using Columns
Click Columns to add or remove columns in the table using check boxes.
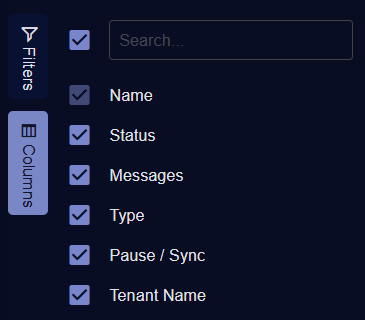
To exit, click Columns.
Pausing InSyncs
To pause an integration sync, click the toggle in the Pause/Sync column from Sync to Pause.
Starting InSyncs
To start an integration sync, click the toggle in the Pause/Sync column from Pause to Sync.
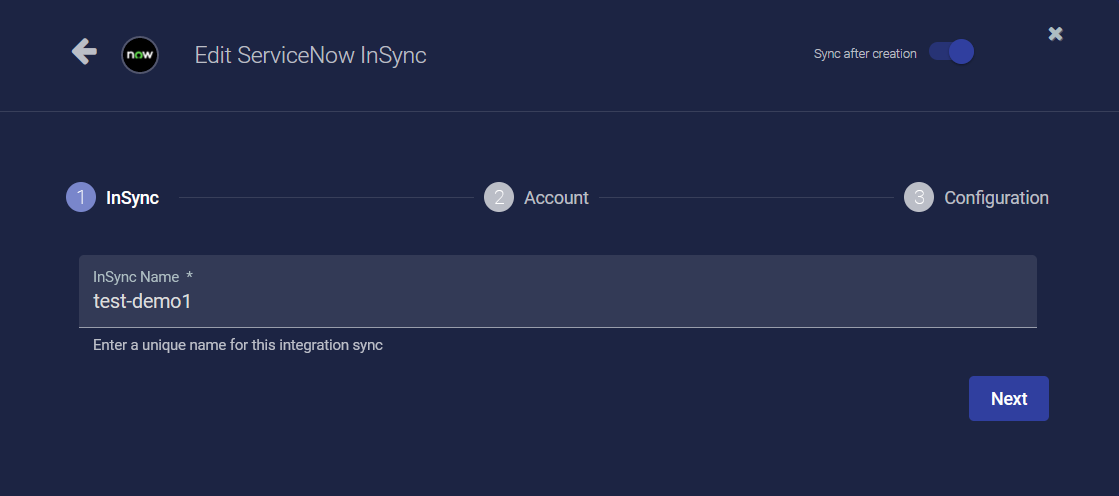
Editing InSyncs
To edit an existing integration sync, click the Edit icon (![]() ) on a row in the table. The Edit ServiceNow InSync dialog displays.
) on a row in the table. The Edit ServiceNow InSync dialog displays.
To create an integration sync, see Configuring InSyncs.
Deleting InSyncs
To delete an integration sync, click the Trash icon (![]() ) in the Actions column for a row in the table.
) in the Actions column for a row in the table.
Testing InSyncs
To test the integration sync, click Test. A message displays.
Test only validates credentials, whereas Status reflects the import and export of data between ServiceNow and Stellar Cyber. Even when the integration sync is in Error status, the credential test can be successful.
Exporting CSV
Click Export CSV to export the table as a spreadsheet file.
You can export Selected Columns or All Columns. The spreadsheet is downloaded to your Downloads folder.
Configuring InSyncs
You can create up to three InSyncs. During the configuration, you will authenticate the user with ServiceNow, select the type of integration sync (alerts, cases, or both), and provide the name of a ServiceNow alert database table, case database table, or both.
Make sure that the rules created in ServiceNow will not interfere with the creation of records in the table. If a ServiceNow rule requires certain fields to be populated, and if those fields are not available on Stellar Cyber, the record may not be created.
To create an integration sync:
-
Click Create.
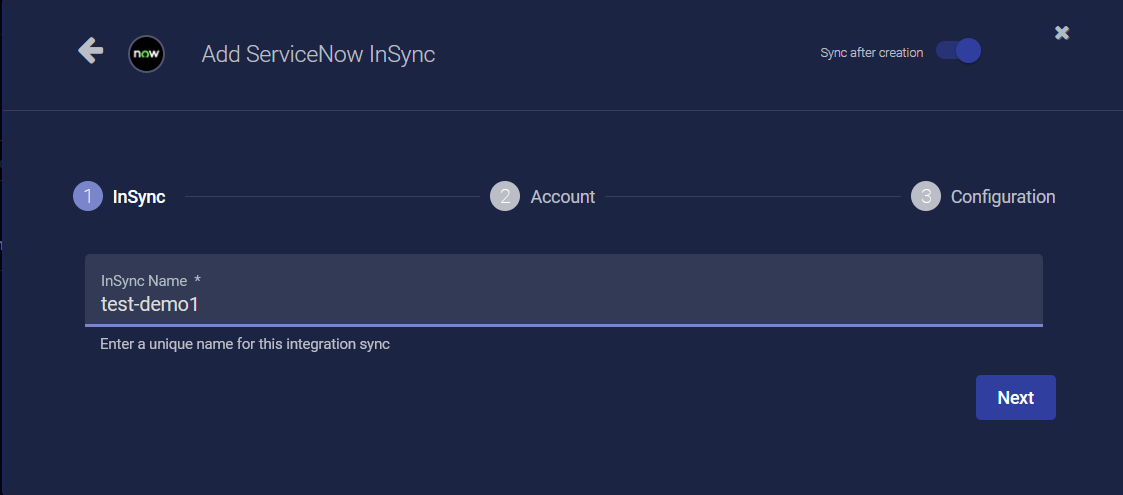
The asterisk (*) indicates a required field.
-
Enter a unique name for the integration sync in the InSync Name field.
-
(Optional) You can toggle Sync after creation to disabled. It is enabled by default.
-
Click Next.

The asterisk (*) indicates a required field.
-
The authentication type is Basic, which is already selected.
-
Enter the URL to which to synchronize, for example, https://myaccount.service-now.com.
-
Enter the Username.
-
Enter the Password.
-
(Optional) You can toggle Sync after creation to disabled. It is enabled by default.
-
Click Next.
-
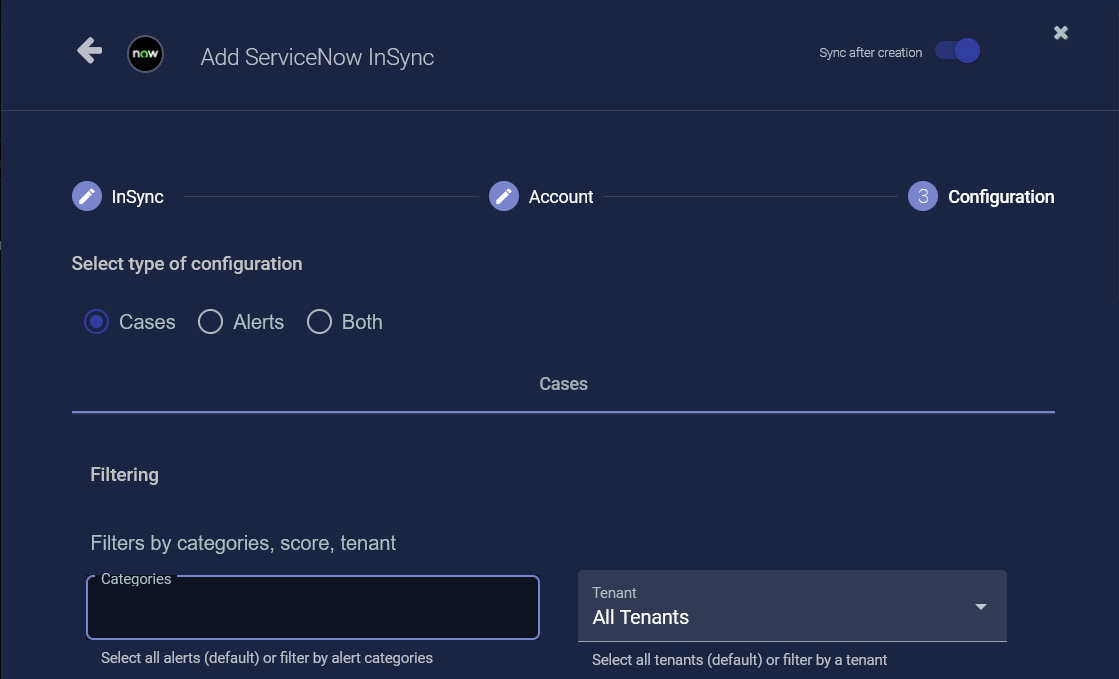
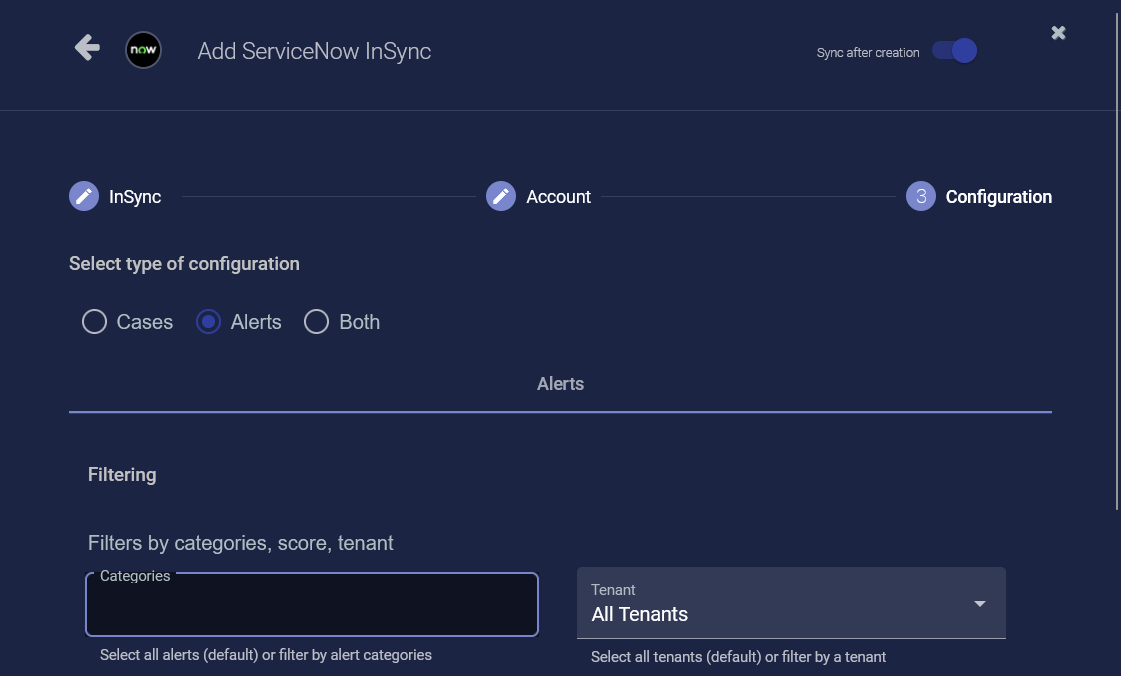
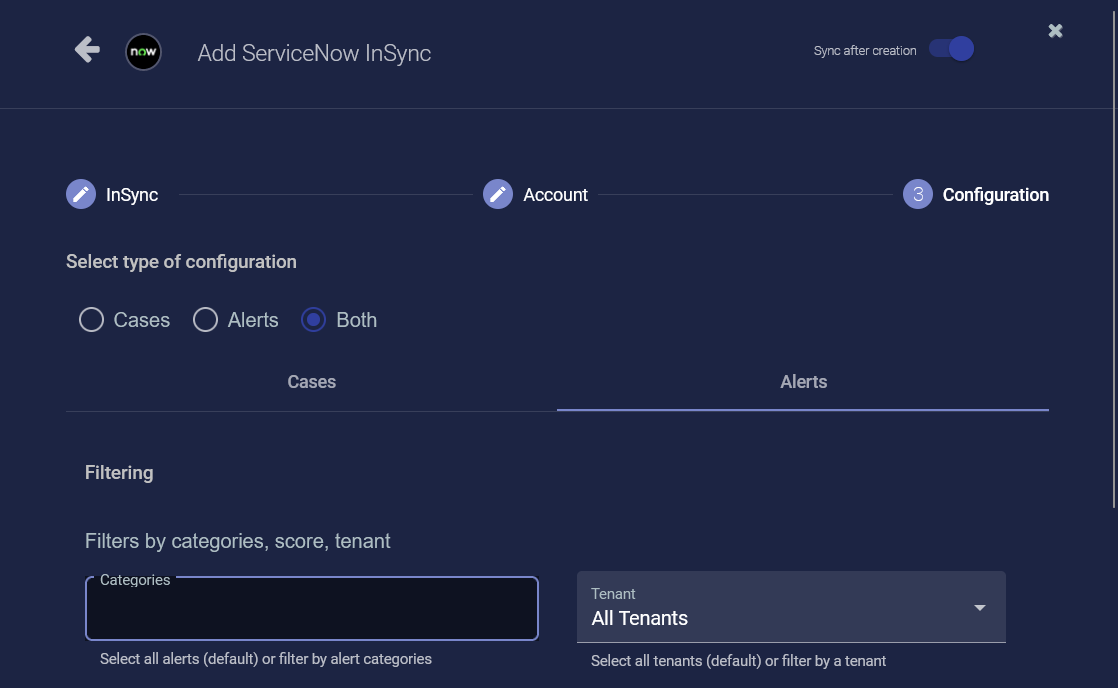
Select the type of configuration using the buttons for Cases, Alerts, or Both. Depending on your selection, the configuration options are:
For Cases:
-
(Optional) Select Filters. You can select filters by Assignee, Severity (Critical, High, Medium, or Low), or Status (Canceled, Escalated, In Progress, New, or Resolved). The default is all the case filters.
-
(Optional) Select Tenant. You can filter by a specific tenant or All Tenants. The default is All Tenants.
The asterisk (*) indicates a required field.
-
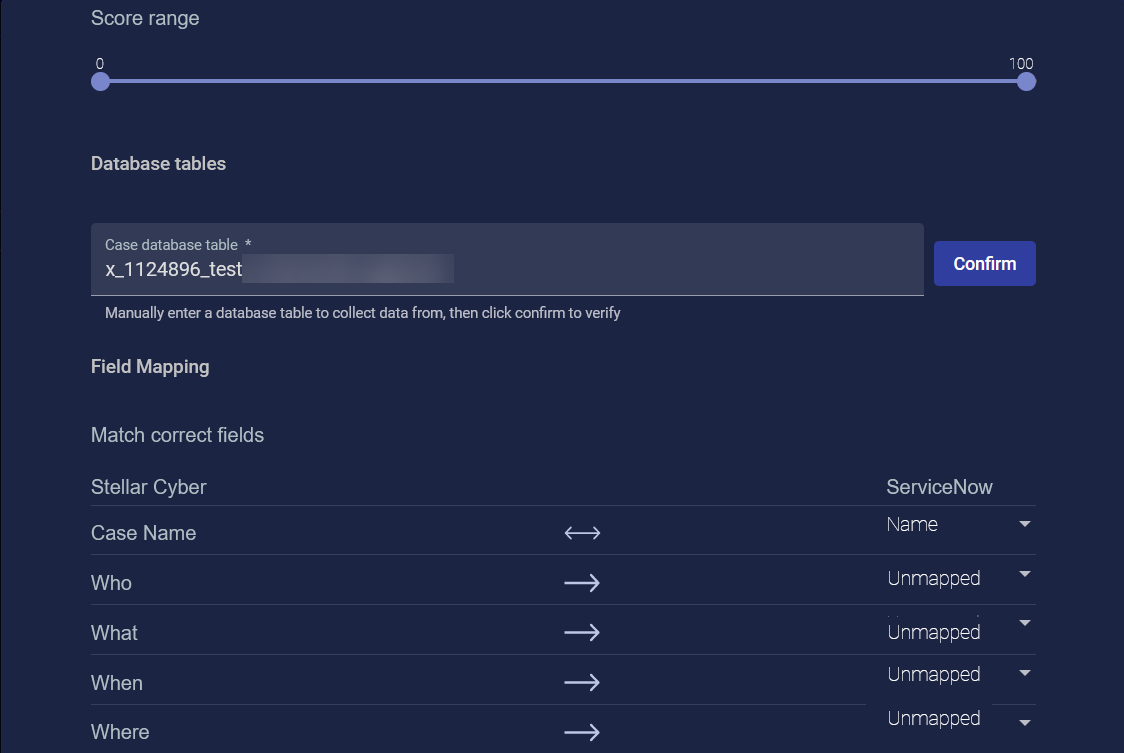
Select a Score range from 0 to 100 using the slider.
-
Enter the name of a Case database table in ServiceNow from which to collect data, then click Confirm to verify the database table. A message displays if the database table cannot be found or if fields in the database table cannot be found. To obtain table names, see Obtaining ServiceNow Table Names.
If the ServiceNow database table is created from an extensible table, only the fields created from the current table, not the parent table, can be used for field mapping.
-
For Field Mapping, match the fields on Stellar Cyber and ServiceNow to synchronize them. If the fields do not match, they will not be synchronized.
Stellar Cyber sends their status to ServiceNow. If the ServiceNow status is changed or updated to a status that matches in Stellar Cyber (case-sensitive), it updates.
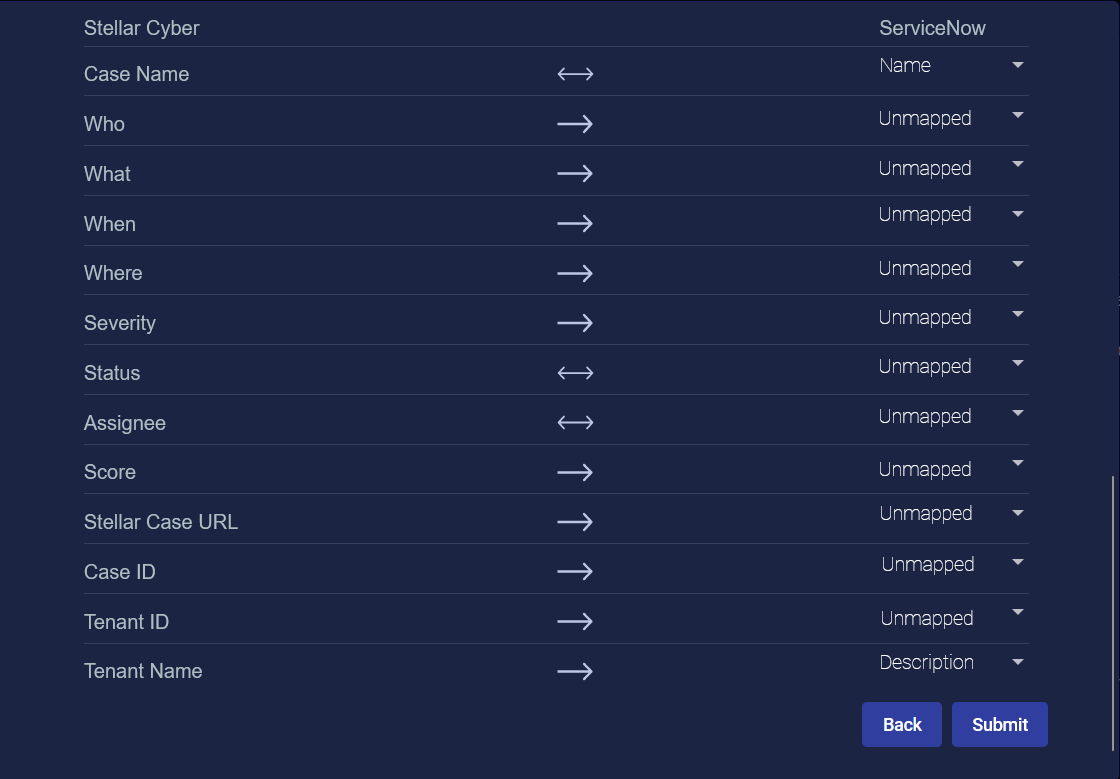
The Stellar Cyber fields are on the left side of the Field Mapping table, the arrows in the center of the table indicate the direction of the field mapping, and the ServiceNow fields are on the right side of the table.
In this example, the Stellar Cyber Case Name field is mapped to Name in ServiceNow with bidirectional synchronization (Case Name to Name and Name to Case Name) and the Tenant Name is mapped to Description with unidirectional synchronization.
Unmapped means that the selected field maps to Null.
In the Field Mapping table, you can select the ServiceNow fields from the drop-down menus, which have different options depending on the ServiceNow database table.
With field mapping, a field type of string can only map to a string field. Likewise, a URL field can only map to a URL. For details, see Supported Field Types.
For Alerts:
-
(Optional) Select Filters. You can select filters by Source (Built-in or Custom) or Status (Closed, Ignored, In Progress, or New). The default is all the alert filters.
-
(Optional) Select Tenant. You can filter by a specific tenant or All Tenants. The default is All Tenants.
The asterisk (*) indicates a required field.
-
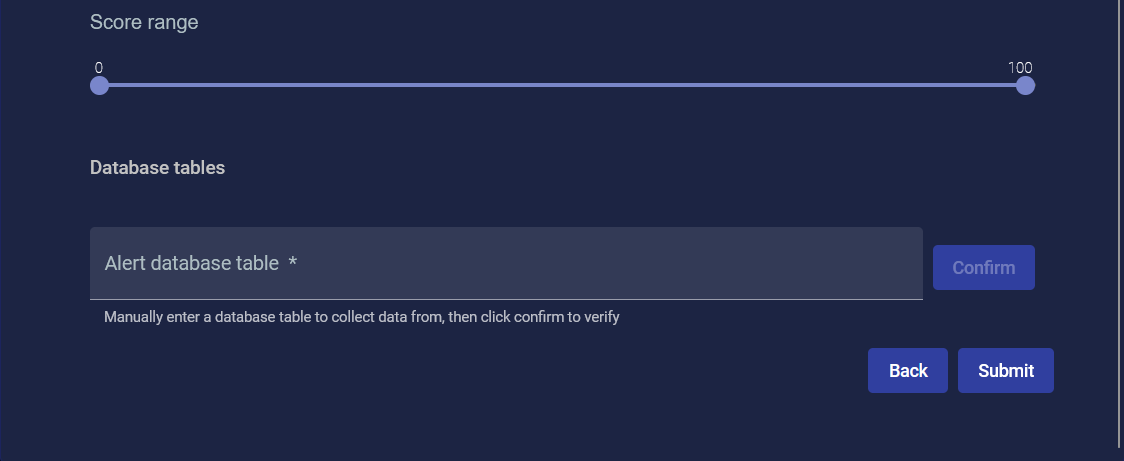
Select a Score range from 0 to 100 using the slider.
-
Enter the name of an Alert database table in ServiceNow from which to collect data, then click Confirm to verify the database table. A message displays if the database table cannot be found or if fields in the database table cannot be found. To obtain table names, see Obtaining ServiceNow Table Names.
If the ServiceNow database table is created from an extensible table, only the fields created from the current table, not the parent table, can be used for field mapping.
-
For Field Mapping, match the fields on Stellar Cyber and ServiceNow to synchronize them. If the fields do not match, they will not be synchronized.
Stellar Cyber sends their status to ServiceNow. If the ServiceNow status is changed or updated to a status that matches in Stellar Cyber (case-sensitive), it updates.
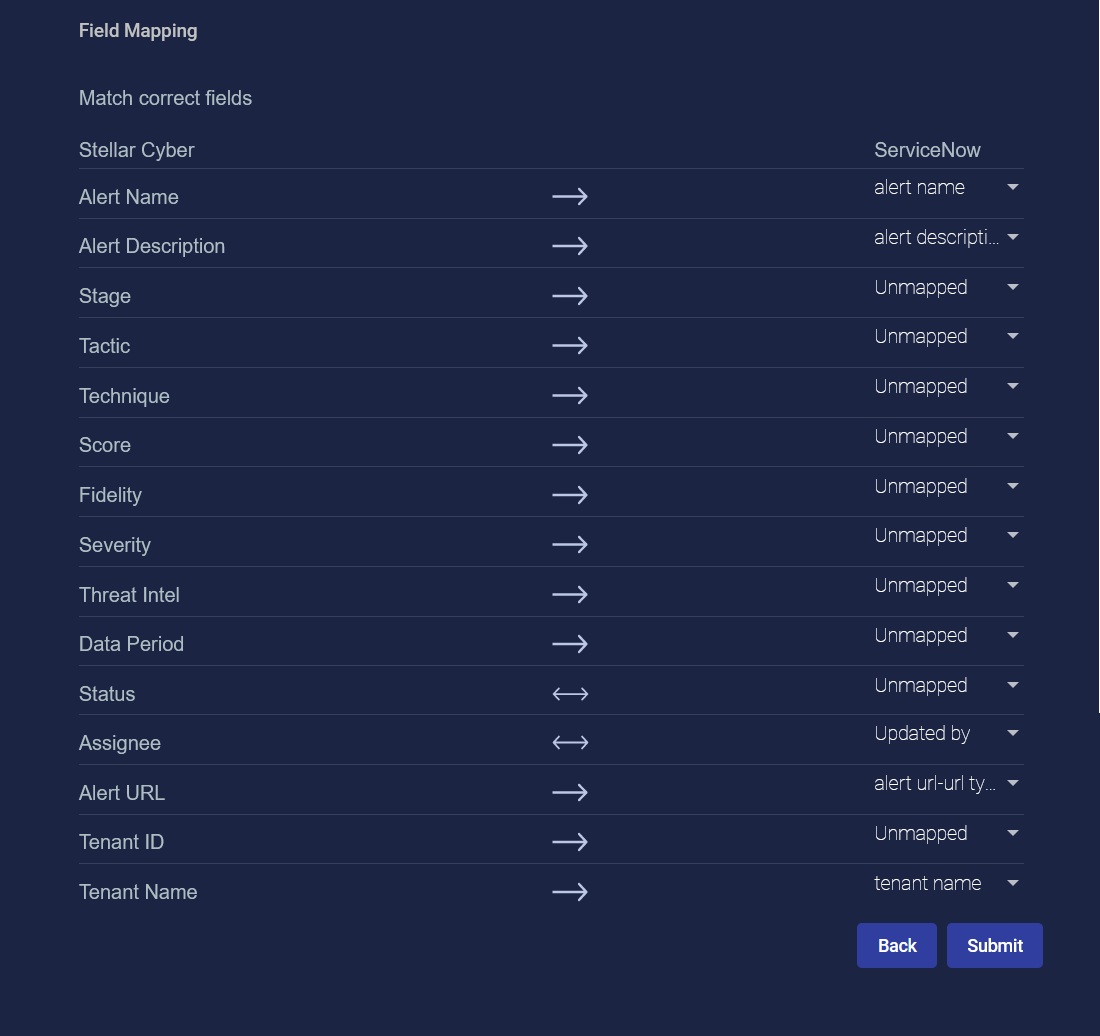
The Stellar Cyber fields are on the left side of the Field Mapping table, the arrows in the center of the table indicate the direction of the field mapping, and the ServiceNow fields are on the right side of the table.
In this example, the Stellar Cyber Alert Name field is mapped to alert name in ServiceNow with unidirectional synchronization and the Assignee is mapped to Updated by with bidirectional synchronization (Assignee to Updated by and Updated by to Assignee).
Unmapped means that the selected field maps to Null.
In the Field Mapping table, you can select the ServiceNow fields from the drop-down menus, which have different options depending on the ServiceNow database table.
With field mapping, a field type of string can only map to a string field. Likewise, a URL field can only map to a URL. For details, see Supported Field Types.
For Both:
-
Click the Cases tab to configure the same fields as for Cases above.
-
Click the Alerts tab to configure the same fields as for Alerts above.
-
-
(Optional) You can toggle Sync after creation to disabled. It is enabled by default.
-
Click Submit. Once an InSync is created, you can view it in Alerts.
Obtaining ServiceNow Table Names
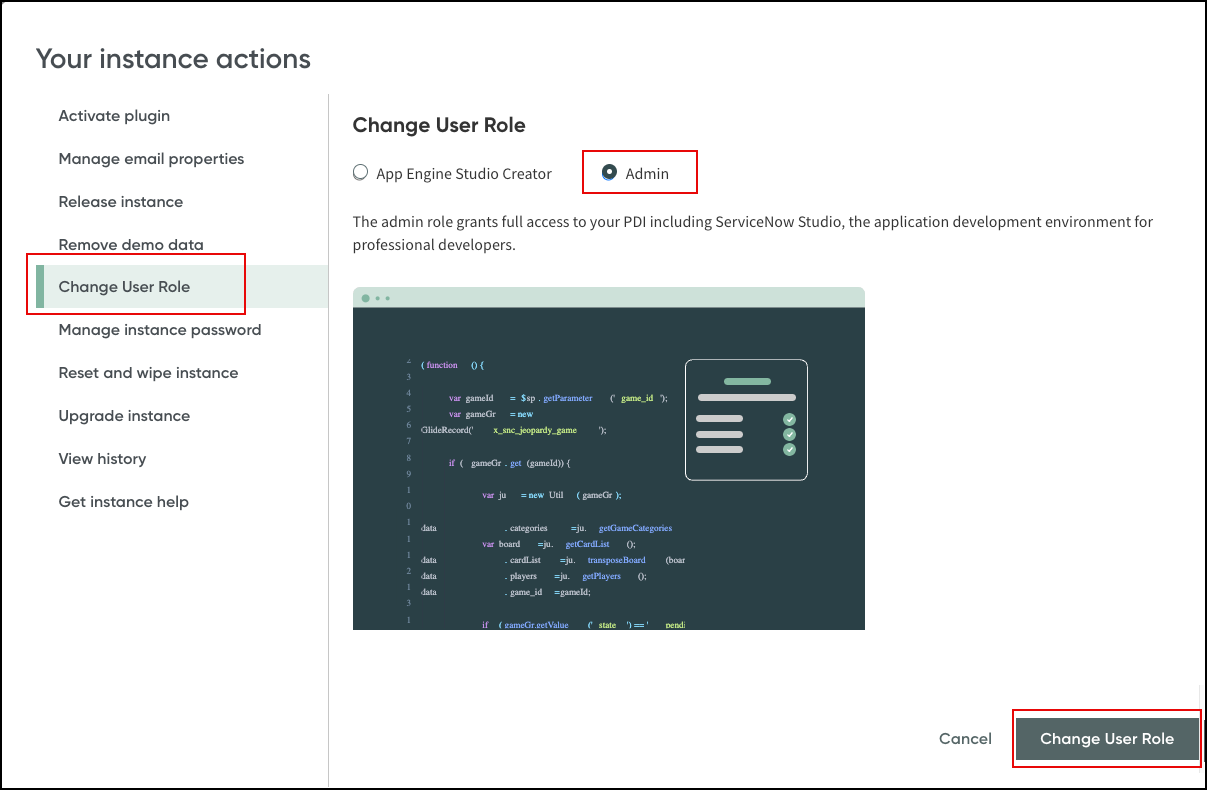
To obtain ServiceNow table names, you need an Admin role. In the following procedure, the menu item for System Definition | Tables is only displayed for a User Role of Admin in ServiceNow.
For example, to change your role to Admin if your role was App Engine Studio Creator, navigate to Change User Role. click Admin, and then click Change User Role.
To obtain table names in ServiceNow:
-
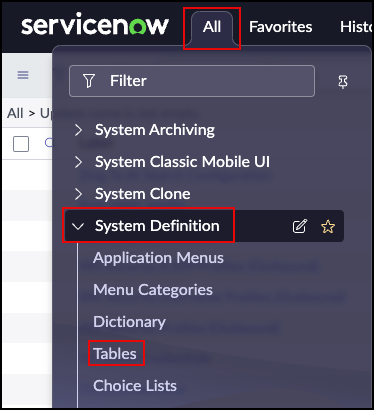
In the main ServiceNow browser window, navigate to the All menu, click System Definition, and then click Tables.
-
In the Tables list, click the table Label.

-
Note the table Name.

Supported Field Types
The following table describes the supported field types for cases.
It is recommended you configure URL fields with URL type and other string fields with String (Full UTF-8) type.
| Field Name | Stellar Cyber Field | Stellar Cyber Field Type | Direction | ServiceNow Field Types Supported |
|---|---|---|---|---|
| Case Name | name | string | Both | String, String (Full UTF-8) |
| Who | details.who | list | Out | String, String (Full UTF-8) |
| What | details.what | list | Out | String, String (Full UTF-8) |
| When | details.when |
int |
Out | String, String (Full UTF-8), Date/Time |
| Where | details.where | list | Out | String, String (Full UTF-8) |
| Severity | severity | string | Out | String, String (Full UTF-8) |
| Status | status | string | Both | String, String (Full UTF-8) |
| Assigned to | assignee_name | string | Both | String, String (Full UTF-8) |
| Score | score | float | Out | String, String (Full UTF-8), Decimal, Floating Point Number, Integer, Long |
| Stellar Case URL | case_url | string | Out | URL, String, String (Full UTF-8) |
| Case ID | ticket_id | string | Out | String, String (Full UTF-8) |
| Tenant ID | cust_id | string | Out | String, String (Full UTF-8) |
| Tenant Name | tenant_name | string | Out | String, String (Full UTF-8) |
The following table describes the supported field types for alerts.
It is recommended you configure URL fields with URL type and other string fields with String (Full UTF-8) type.
| Field Name | Stellar Cyber Field | Stellar Cyber Field Type | Direction | ServiceNow Field Types Supported |
|---|---|---|---|---|
| Alert Name | xdr_event.display_name | string | Out | String, String (Full UTF-8) |
| Alert Description | xdr_event.description | string | Out | String, String (Full UTF-8) |
| Stage | xdr_event.xdr_killchain_stage | string | Out | String, String (Full UTF-8) |
| Tactic | xdr_event.tactic.name | string | Out | String, String (Full UTF-8) |
| Technique | xdr_event.technique.name | string | Out | String, String (Full UTF-8) |
| Score | event_score | float | Out | String, String (Full UTF-8), Decimal, Floating Point Number, Integer, Long |
| Fidelity | fidelity | float | Out | String, String (Full UTF-8), Decimal, Floating Point Number, Integer, Long |
| Severity | severity | int | Out | Integer, String, String (Full UTF-8) |
| Threat Intel | threat_score | int | Out | Integer, String, String (Full UTF-8) |
| Data Period | data_period | int | Out | String, String (Full UTF-8) |
| Status | event_status | string |
Both |
String, String (Full UTF-8) |
| Assignee | assignee | string | Both | String, String (Full UTF-8) |
| Alert URL | alert_url | string | Out | URL, String, String (Full UTF-8) |
| Tenant ID | tenantid | string | Out | String, String (Full UTF-8) |
| Tenant Name | tenant_name | string | Out | String, String (Full UTF-8) |
Viewing InSyncs in Alerts
Click Alerts to go to the Alerts page. At the top of the page, there is a status indicator for the integration syncs as well as a button you can click to go back to the InSyncs page.

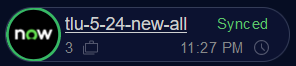
In each indicator, the name of the InSync is listed. There is a count of the number of alerts that have been synced using this InSync and a timestamp of the last synchronization.
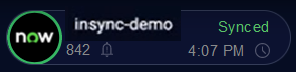
The status is indicated in the circle around the NOW icon:
-
A green circle indicates a Synced status.
-
A gray circle indicates a Paused status.
-
A red circle indicates an Error status.
Viewing the Alert Type Table
At the bottom of the Alerts page, click View on a specific alert type in the table to go deeper into the alert. In this example, click View on the row for the alert type Abnormal Parent / Child Process.
Scroll to the bottom of the Alerts table. The table has an InSyncs column showing the alerts that have been synced. When you hover over a NOW icon in the InSyncs column, an indicator is displayed with the status, Ticket ID, and Last Synced date and time for each alert.

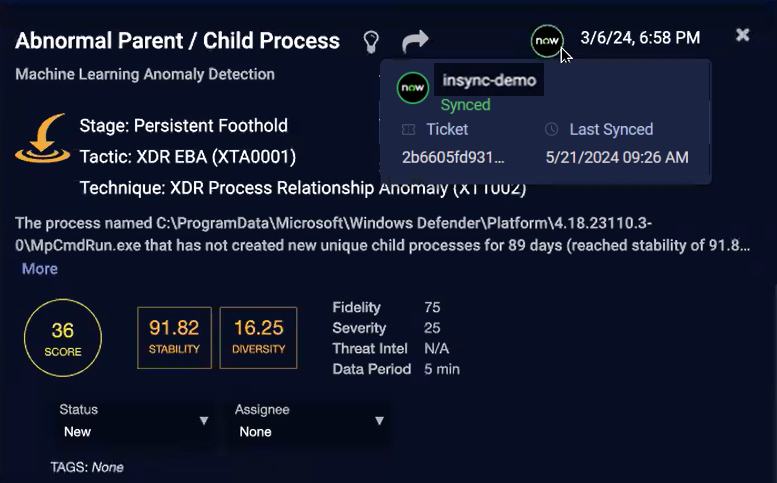
Viewing Alert Details
In the Actions column of the table, click i to display alert details. In the alert details, when you hover over the NOW icon, an indicator is displayed with the status, Ticket ID, and Last Synced date and time.
If you want to copy the ticket ID, click the JSON tab and search for insyncs and locate the source_id field.
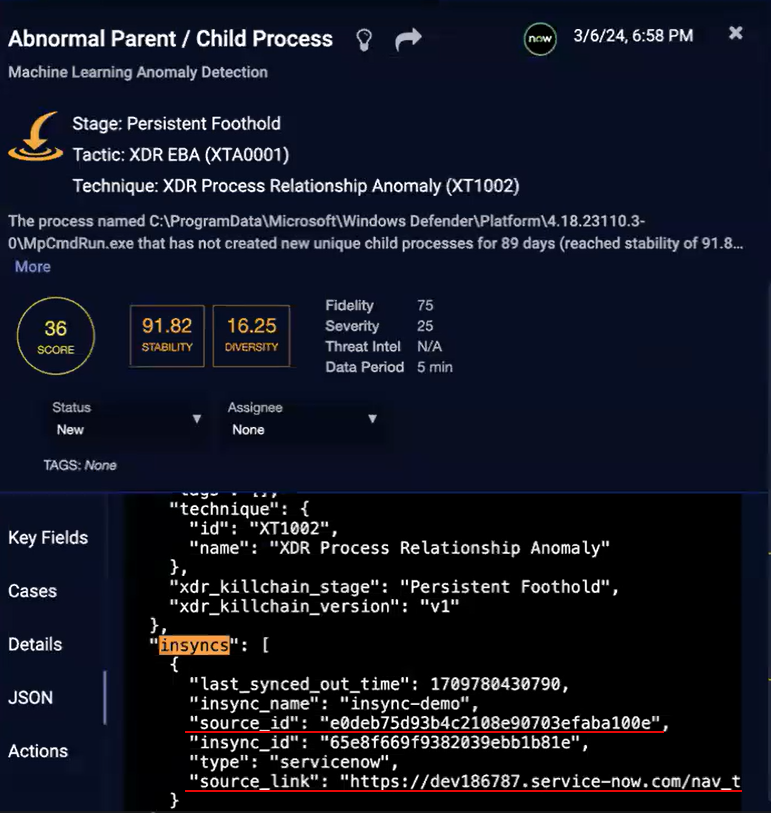
The JSON also contains the ServiceNow link (source_link).
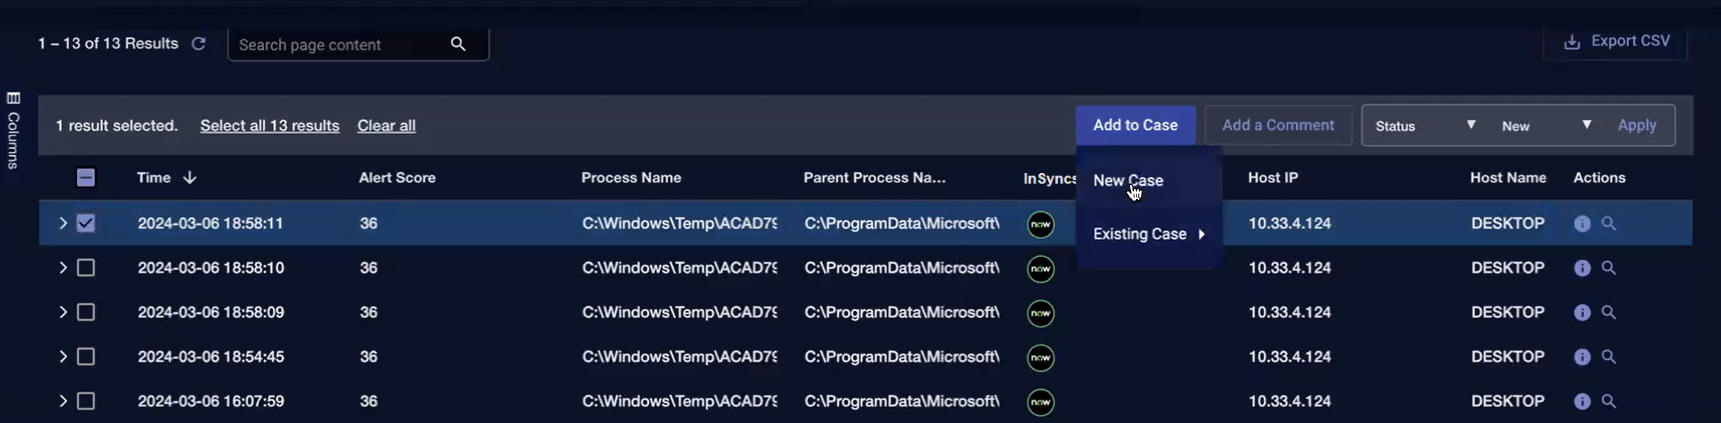
Adding a New Case from Alerts
From the Alerts page, you can add a new case. The new case will be created and synchronized automatically with ServiceNow.
Select a row in the Alert details table, click Add to Case, and select New Case.
Viewing InSyncs in Cases
Click Cases to go to the Cases page. At the top of the page, there is a status indicator for the integration syncs as well as a button you can click to go back to the InSyncs page.
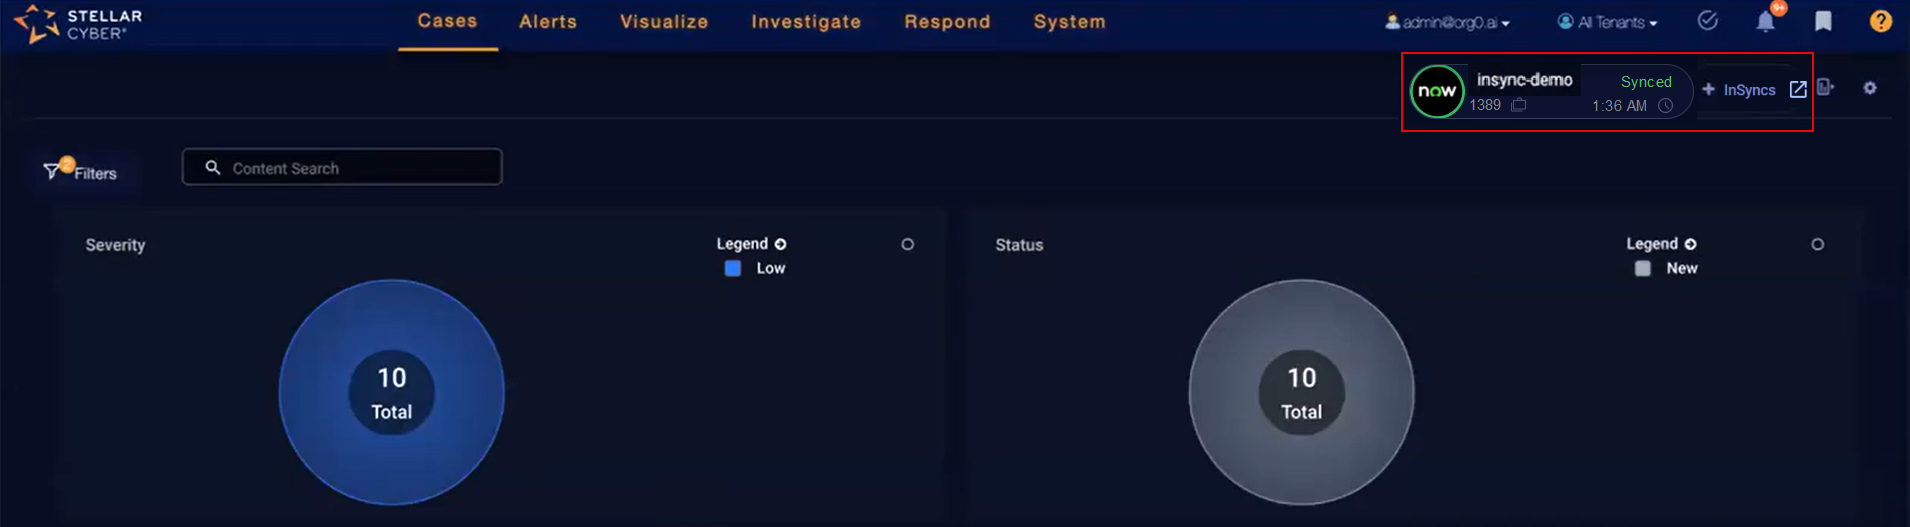
In each indicator, the name of the InSync is listed. There is a timestamp of the last sync and a count of the number of cases linked.
The status is indicated in the circle around the NOW icon:
-
A green circle indicates a Synced status.
-
A gray circle indicates a Paused status.
-
A red circle indicates an Error status.
Viewing the Cases Table
Scroll down to the Cases table. The table has an InSyncs column showing the cases that have been linked. When you hover over a NOW icon in the InSyncs column, the status, Ticket ID, and Last Synced date and time are displayed.
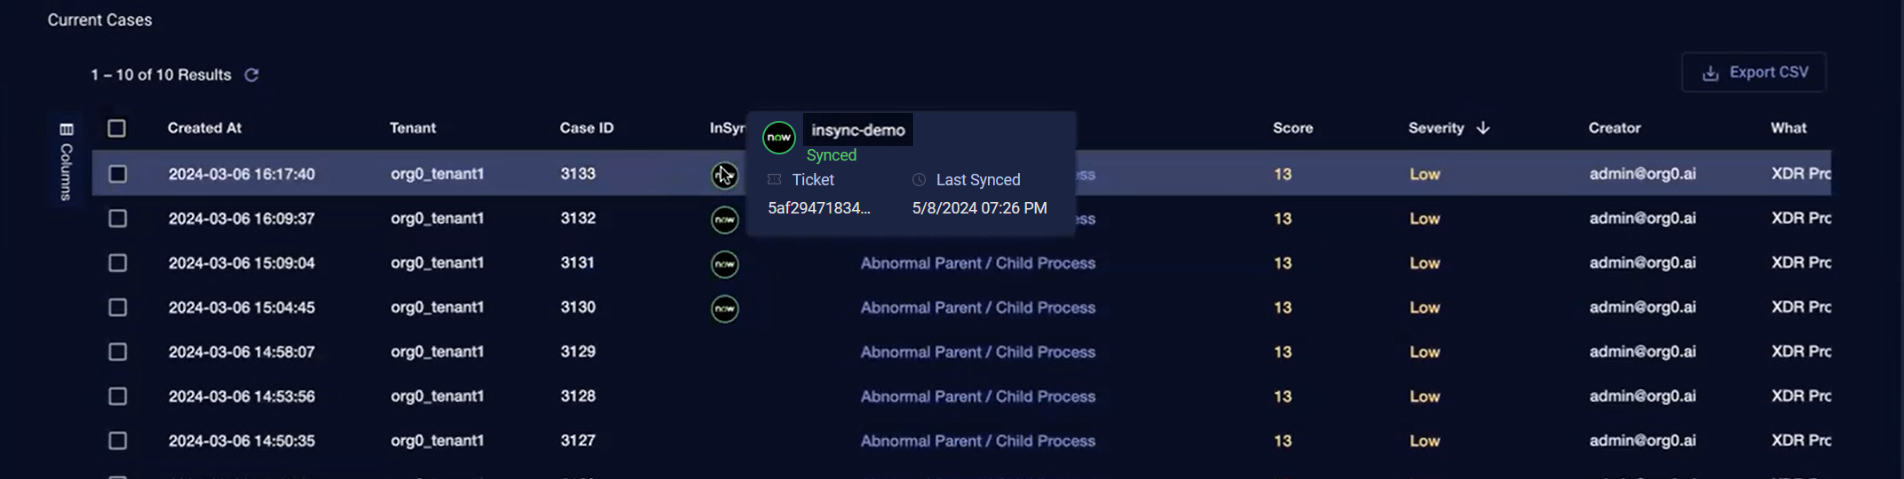
Click a Case Name in the table on the Cases page to go to the Case Details page.
Viewing InSyncs in Case Details
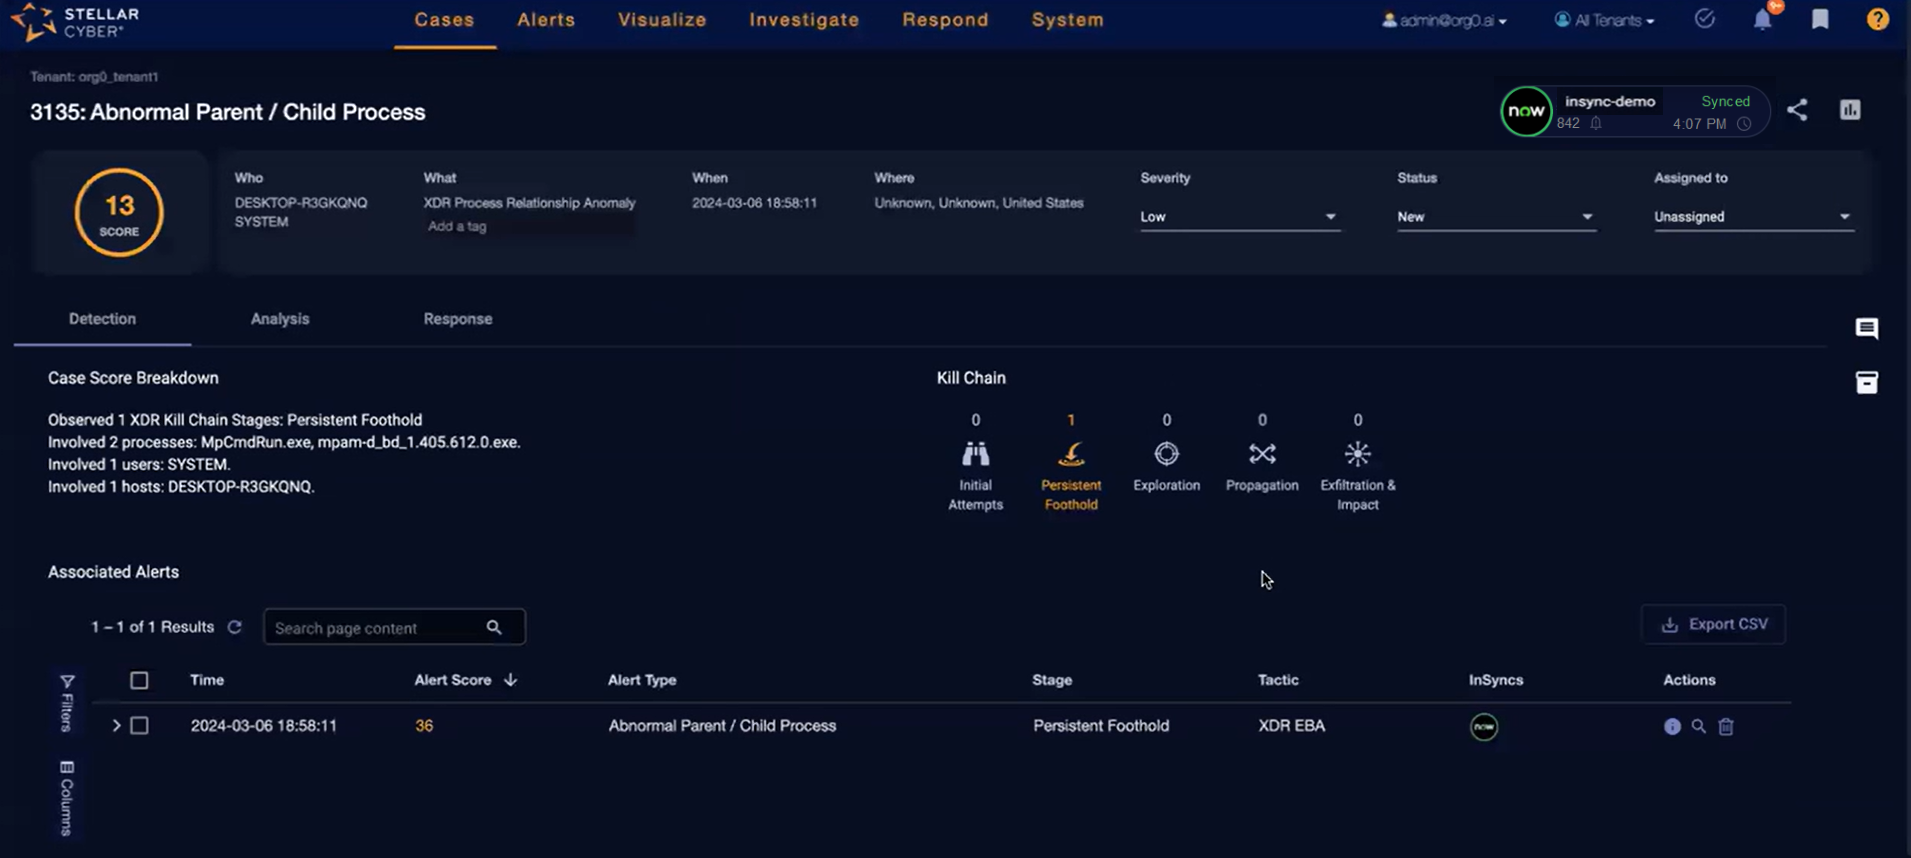
You can scroll to the bottom of the Case Details page to see the Associated Alerts table with a separate row for each alert associated with the case. The table has an InSyncs column showing the alert that has been synced. When you hover over a NOW icon in the InSyncs column, the status, Ticket ID, and Last Synced date and time are displayed.

Note that the alerts that are correlated to cases are those that can also be synchronized to ServiceNow.
Cases are created for all alerts except those from the Sensor Monitoring index. See Alerts Correlated to Cases.
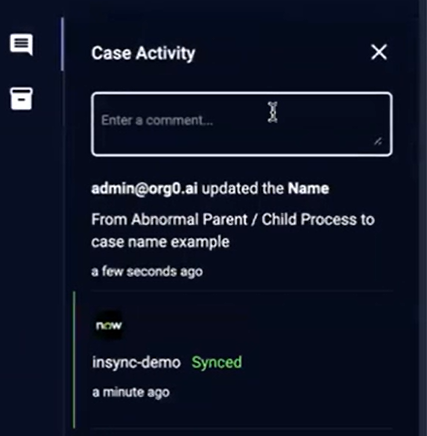
Viewing Case Activity
Scroll to the right on the Case Details page. Click the icon (![]() ) for Case Activity. The Case Activity is displayed.
) for Case Activity. The Case Activity is displayed.
Viewing the ServiceNow Record
Click the Ticket ID link in the status indicator on the Case Details page to open the ServiceNow record.
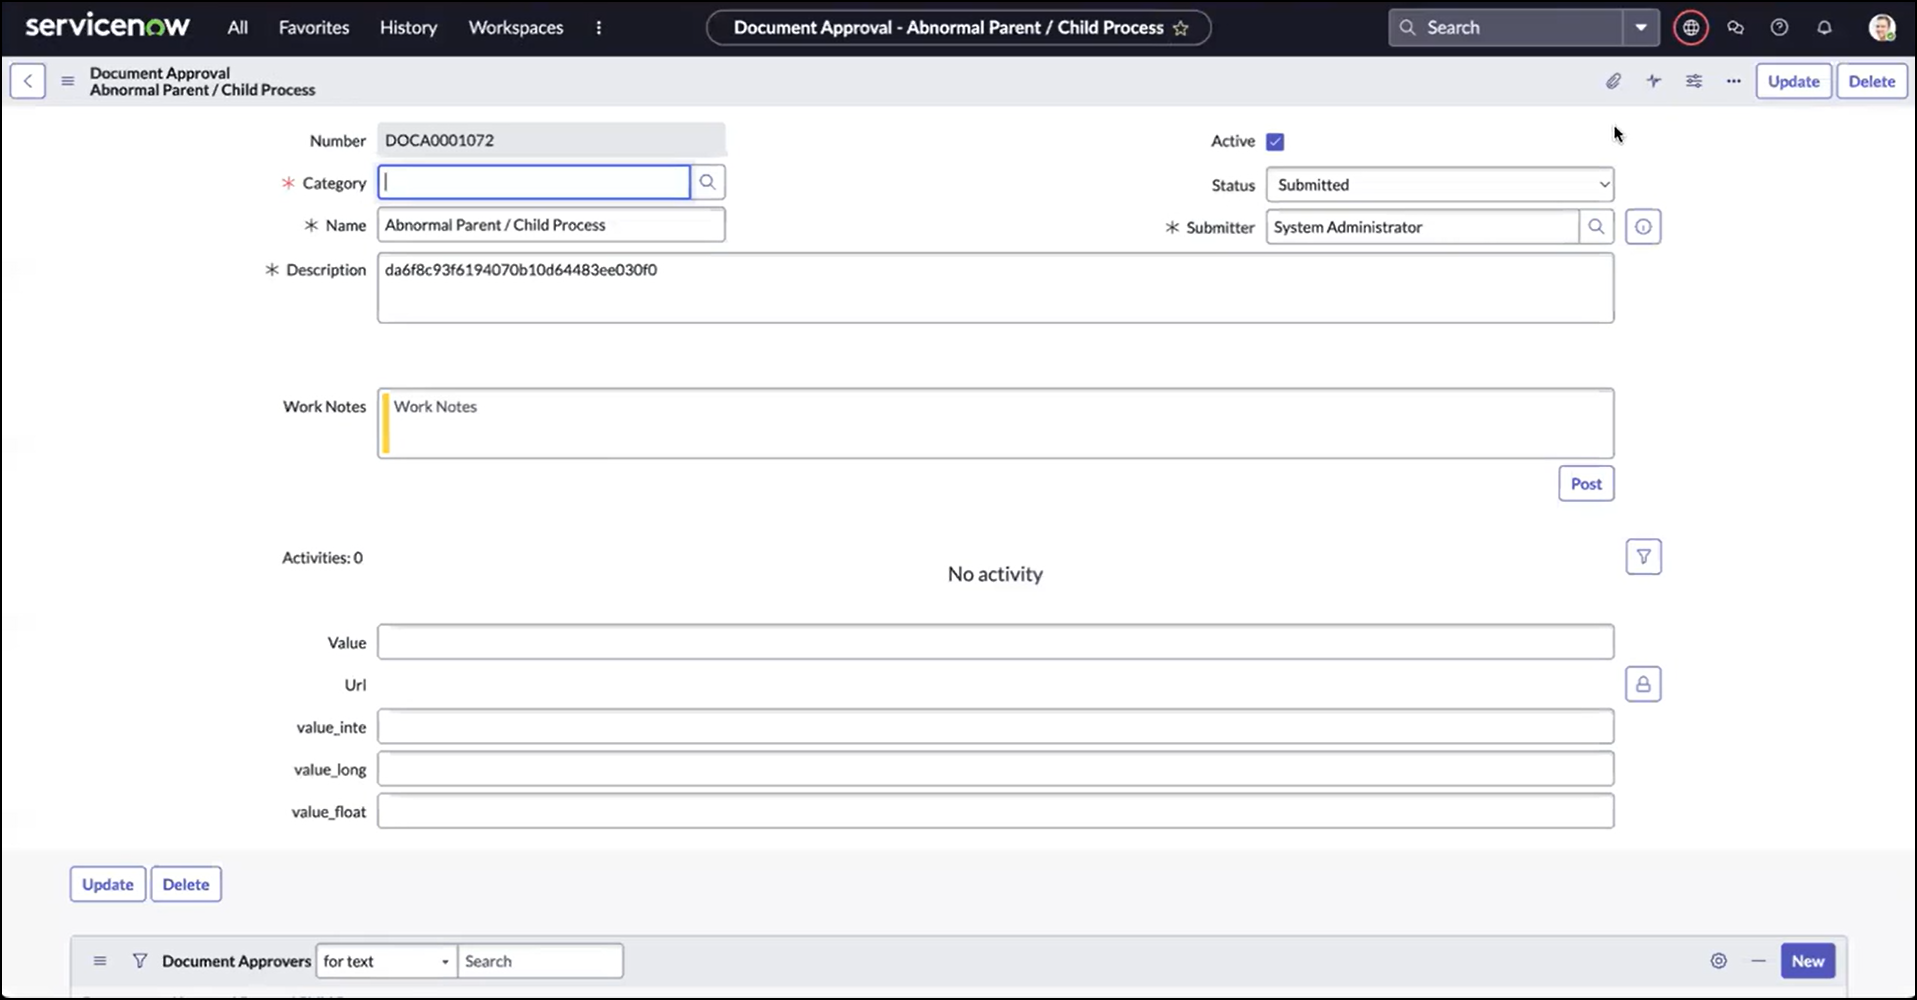
If you added a new case, it is added to the ServiceNow table. You may have to refresh the window.
Updating the Case Name Example
As an example, you can change the name of a case in Stellar Cyber and see it changed in ServiceNow:
-
Click on the name of a case in the Case Details page, then type a new case name in Stellar Cyber.
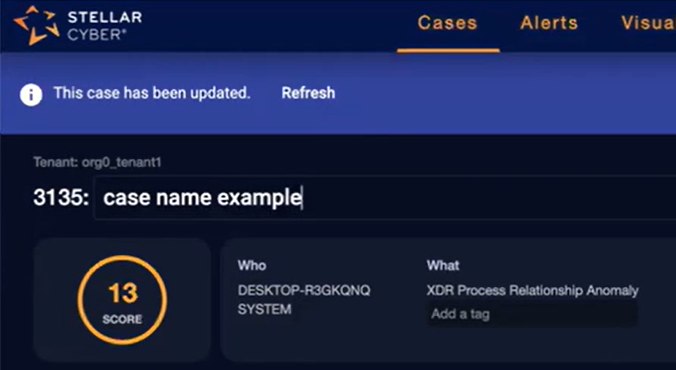
-
The case name in ServiceNow is updated. You may have to refresh the window.
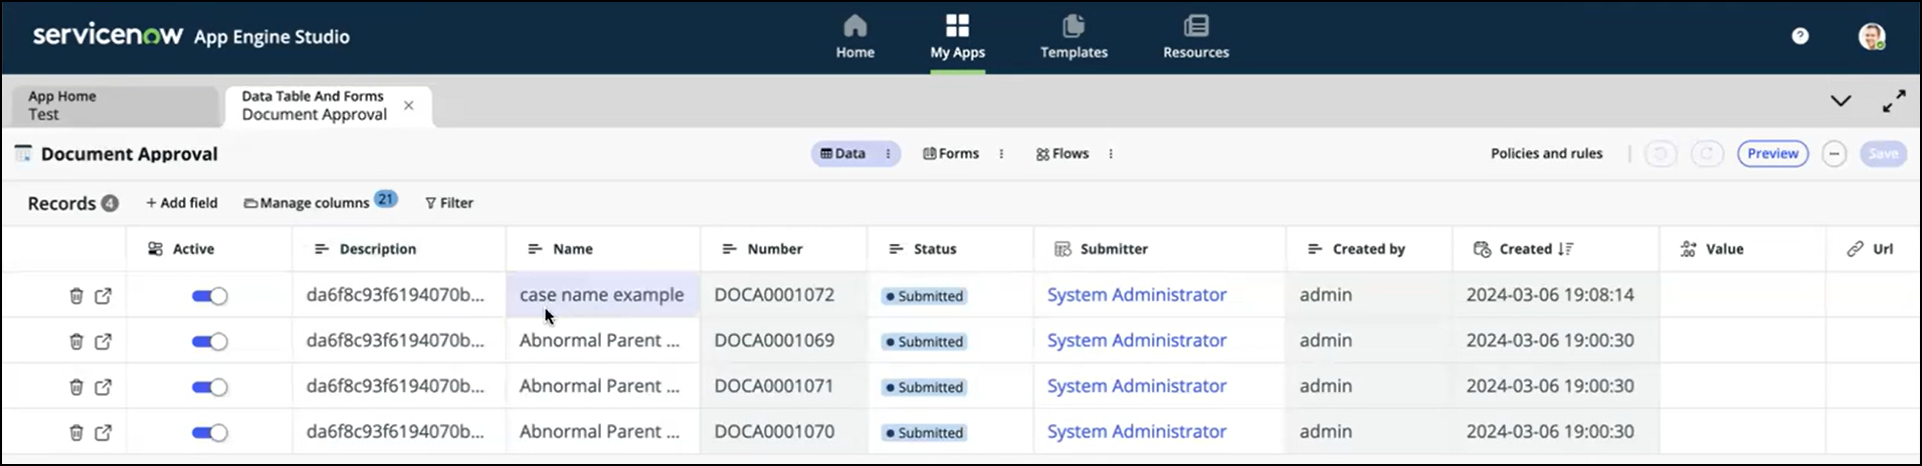
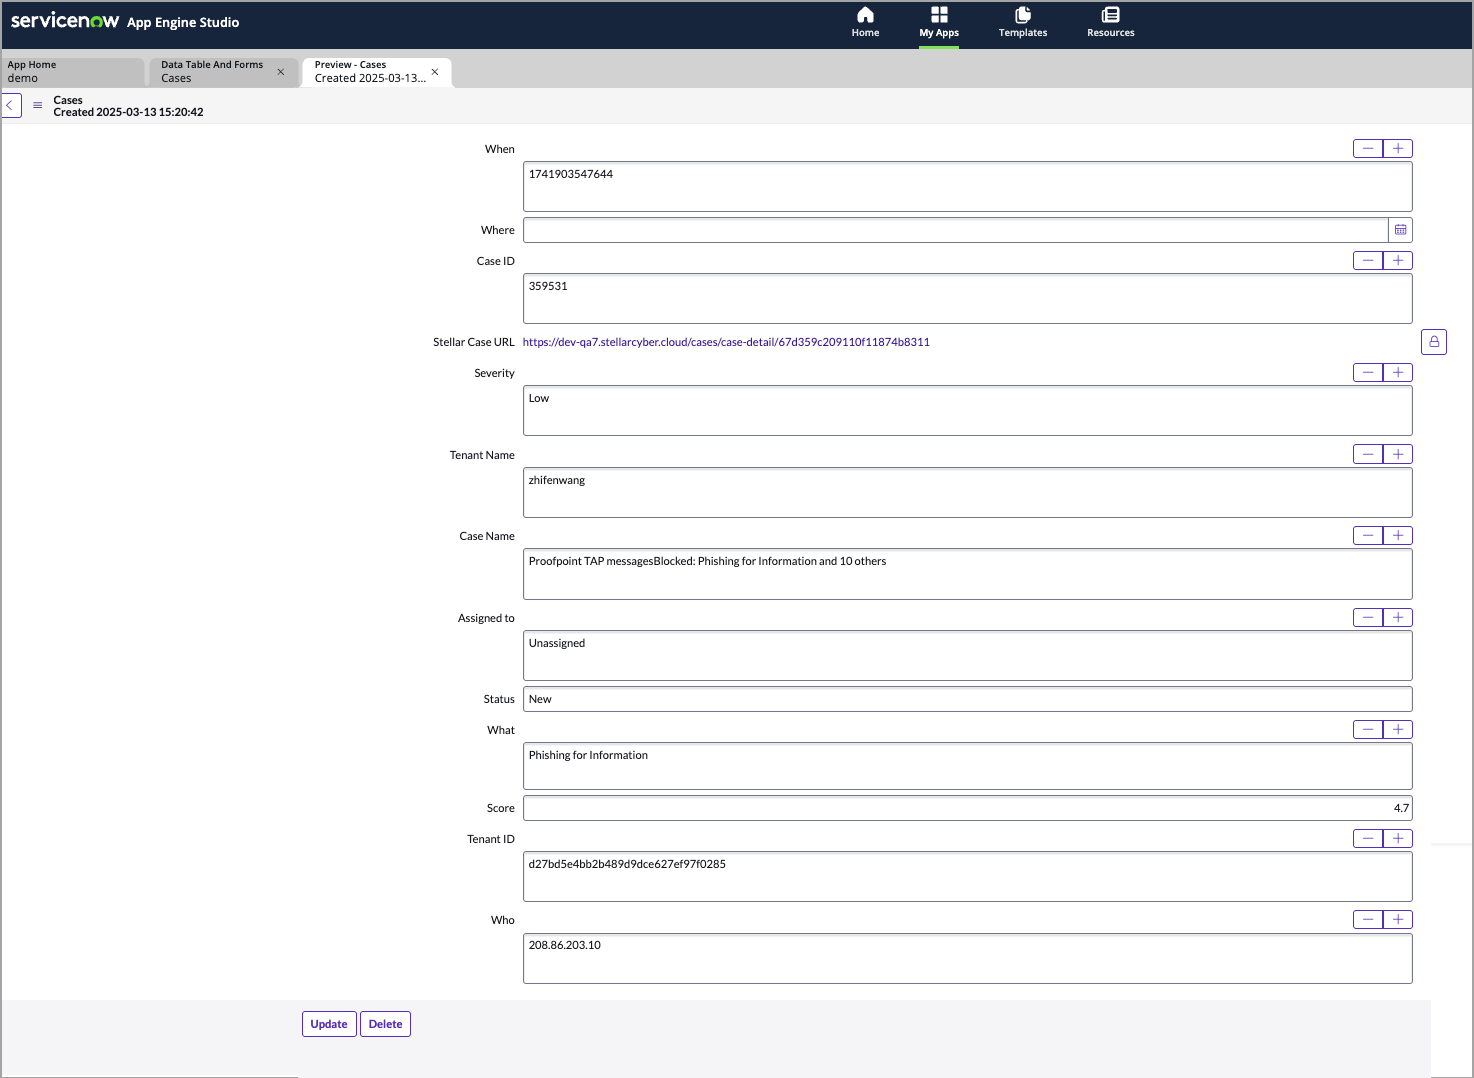
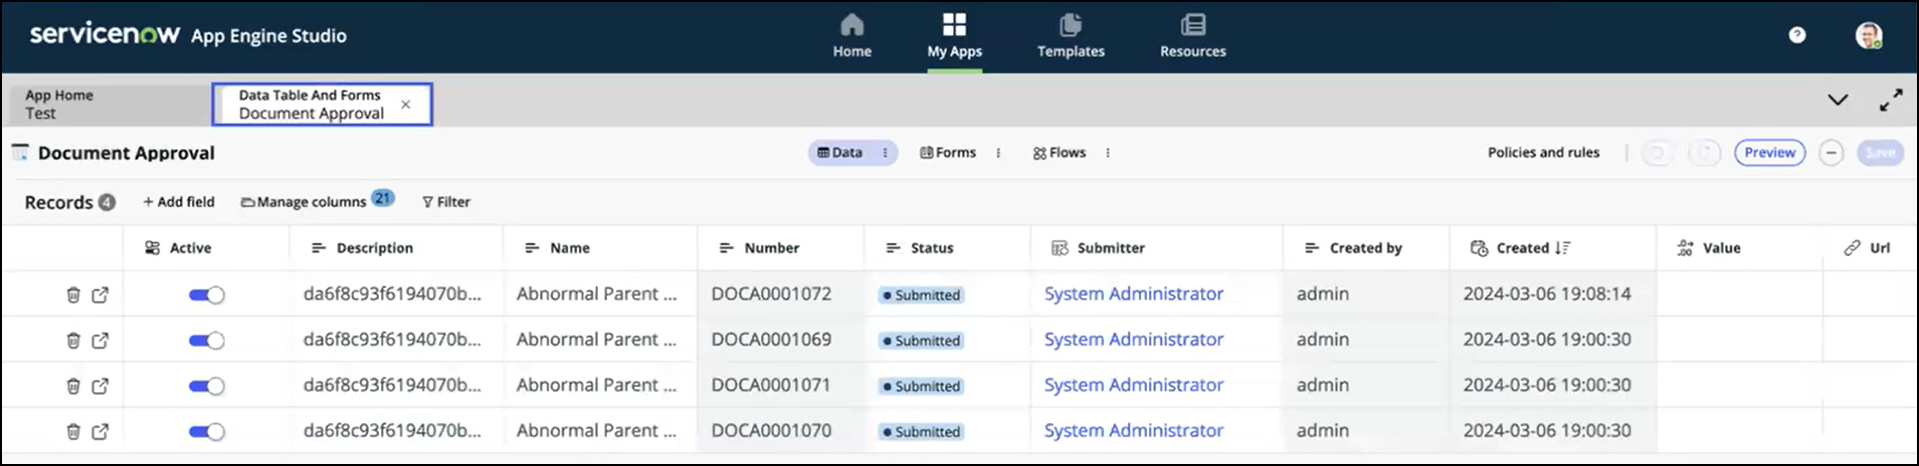
Viewing Cases in ServiceNow
In ServiceNow, you can preview cases. This provides a view of the data from Stellar Cyber in ServiceNow.