Launching DL-m and DA-m Instances in OCI
Start the standard deployment of the Stellar Cyber Data Processor by using the time-sensitive link provided to you by Stellar Cyber support to import the Stellar Cyber platform image to your Compute | Custom Images page in OCI.
Once you've imported the Stellar Cyber platform image, you can create multiple instances based on it. Each instance is based on an OCI shape. In OCI, the shape specifies the combination of processors and memory for the instance. In addition to selecting shapes for your instances, you'll also assign and configure both a boot volume and, for Data Lake instances, a block volume for data storage.
See the following sections for details:
Use our example as a guideline, as you might be using a different software version.
Importing the Stellar Cyber Platform Image
Use the following procedure to import the Stellar Cyber platform image to your OCI account.
-
Log in to your Oracle Cloud account.
-
Click the main menu icon at the top left of the Oracle Cloud Console.

-
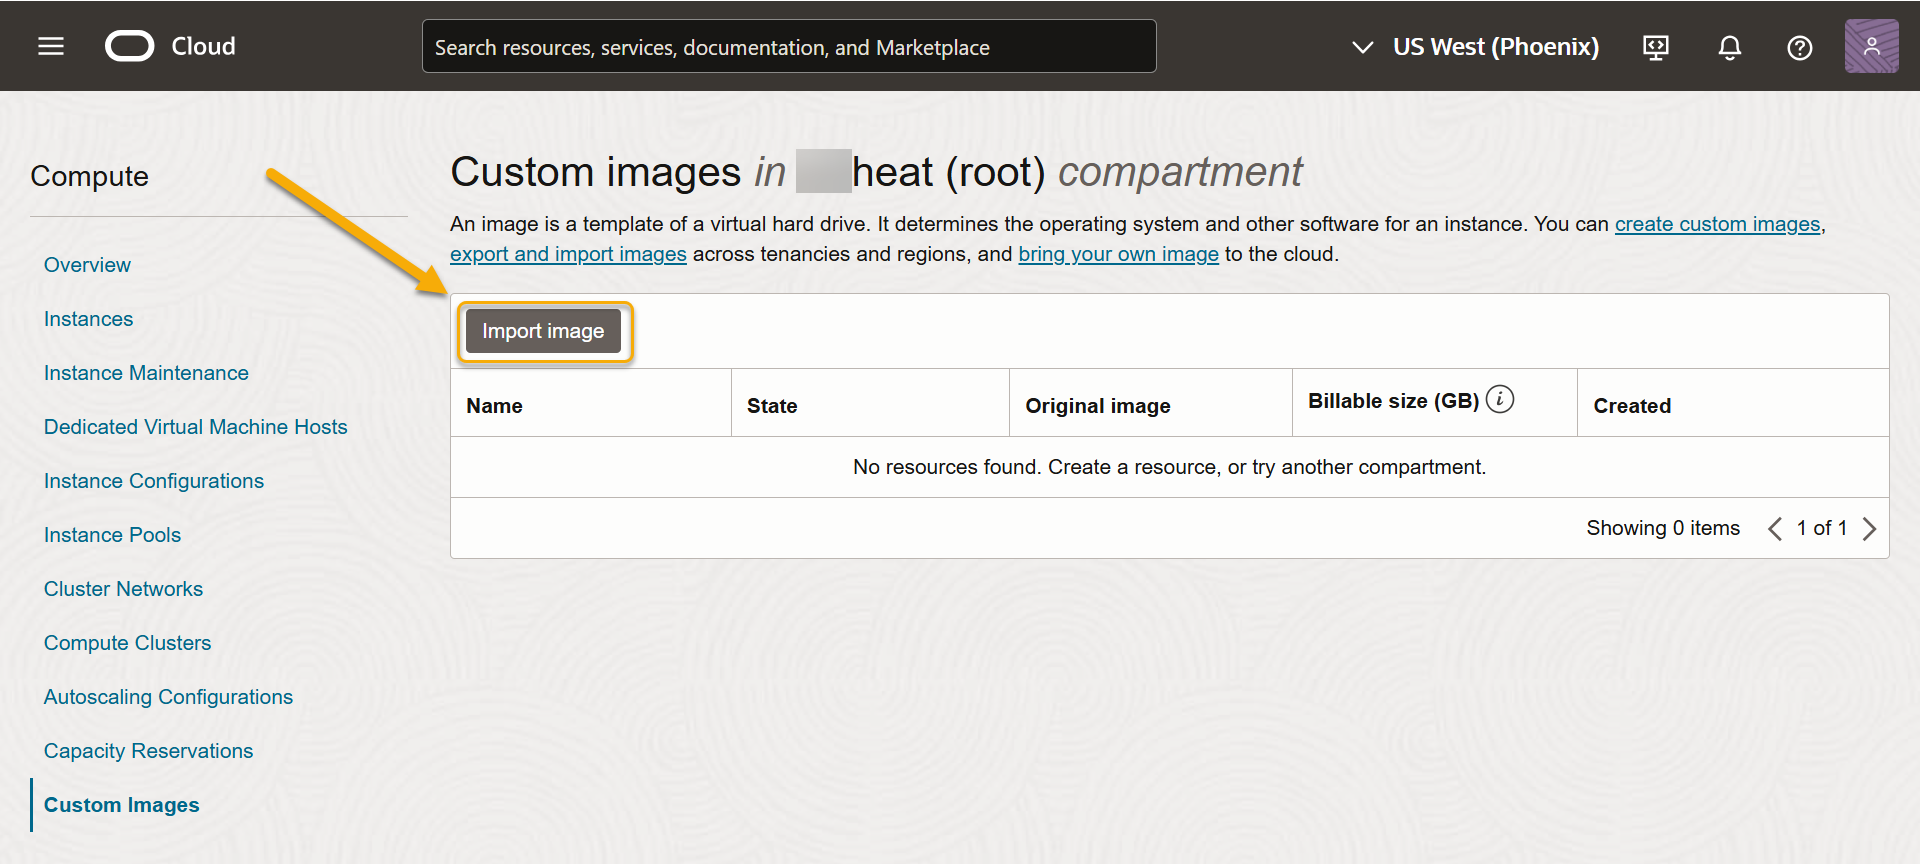
Navigate to Compute | Custom Images.
-
Click the Import image button.
-
The Import image dialog box appears:
-
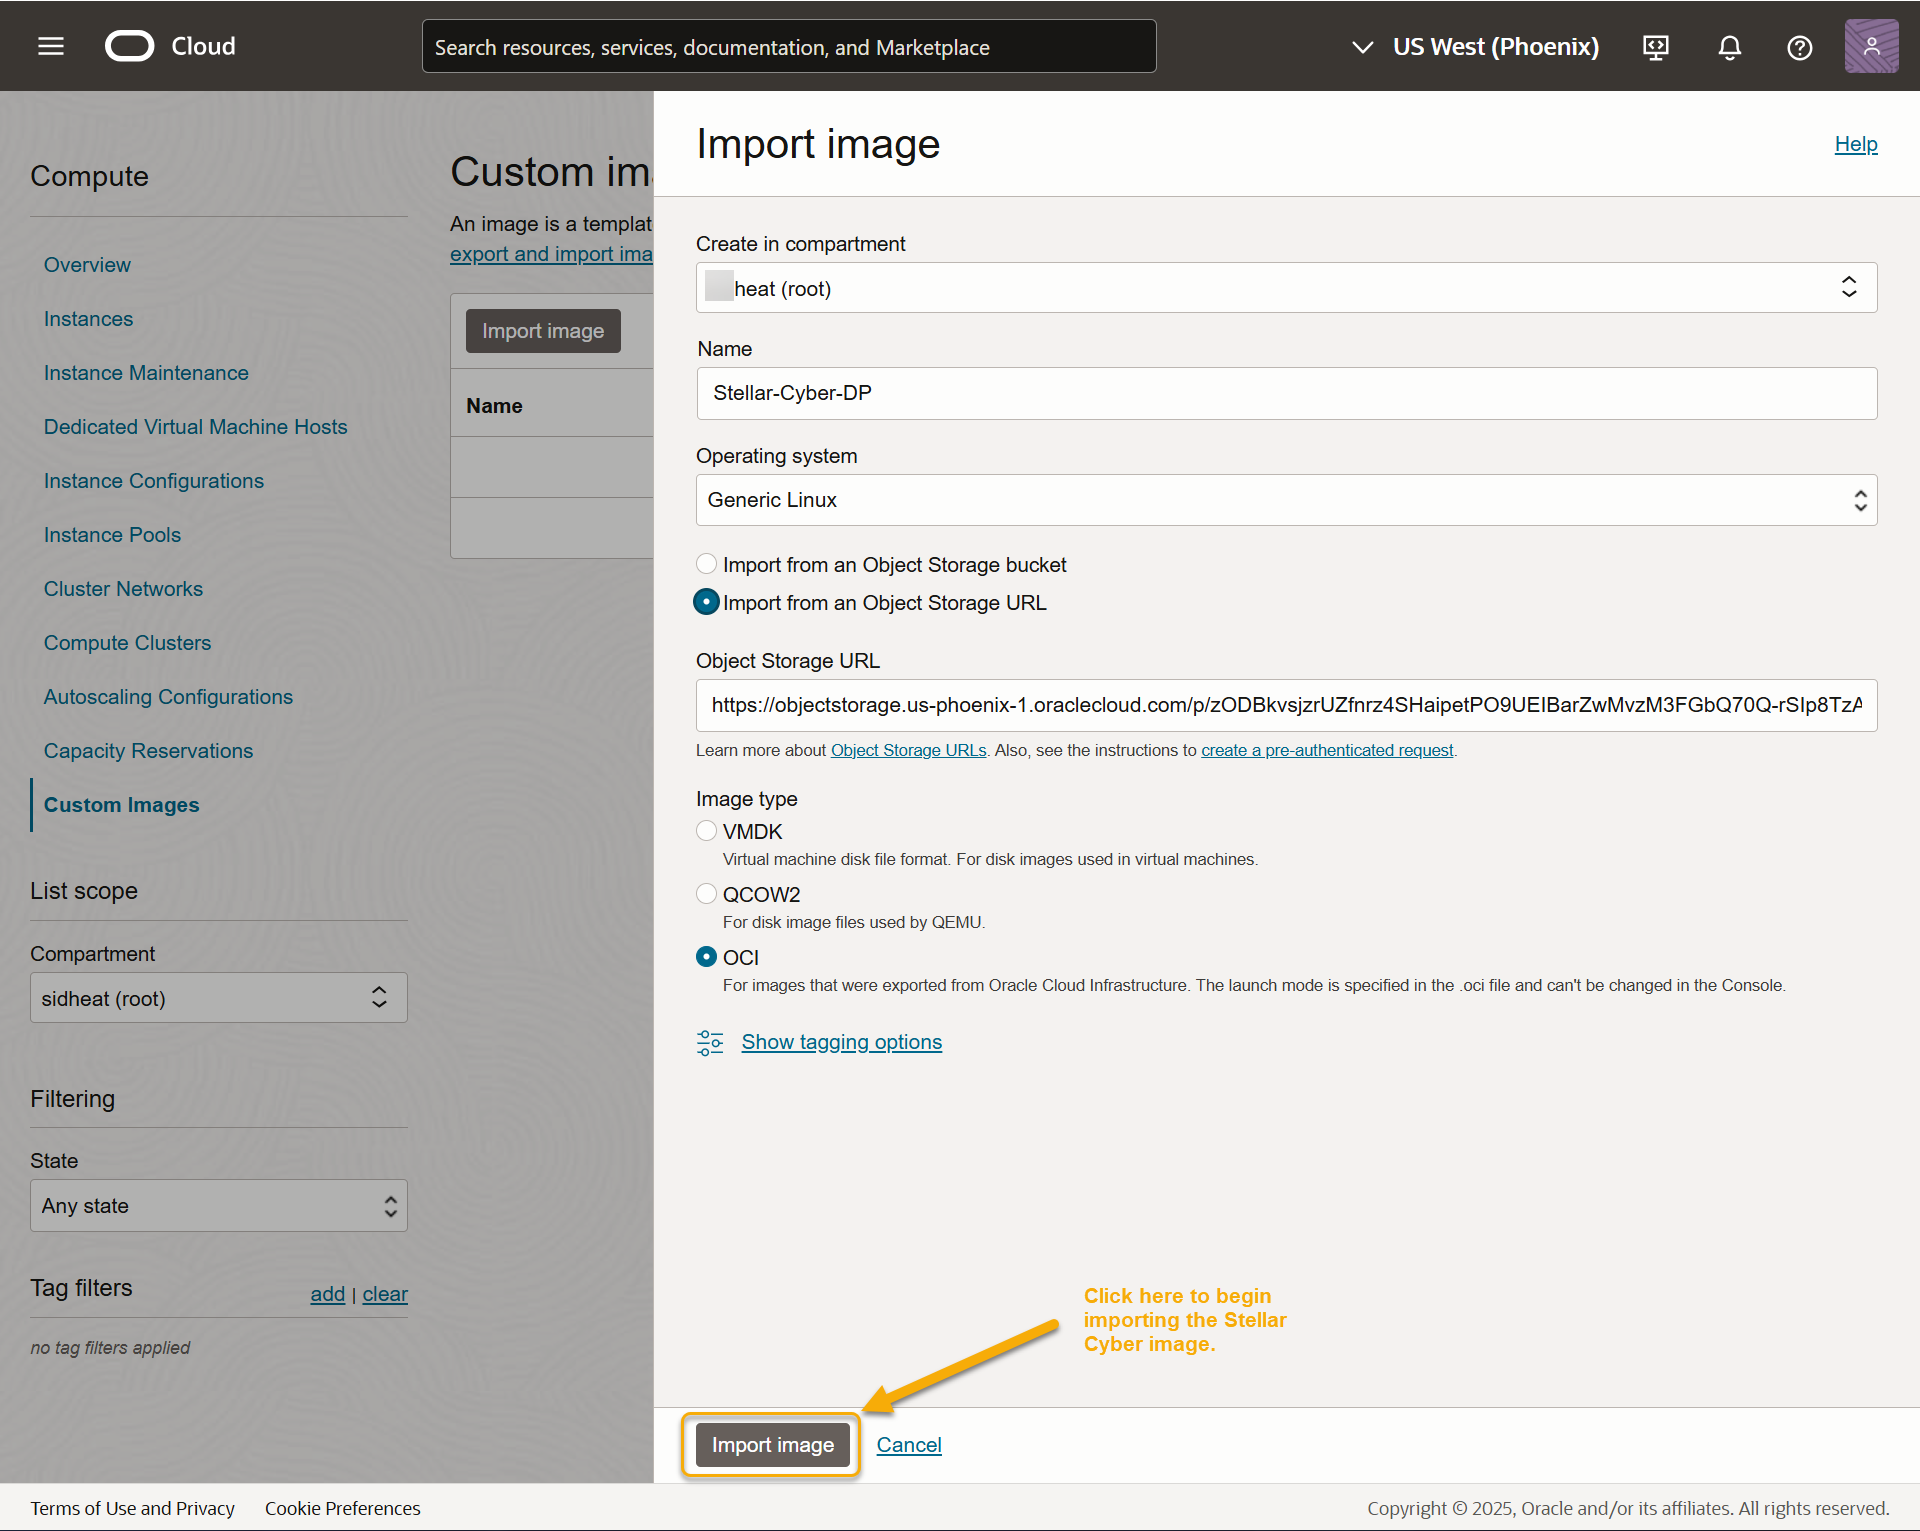
Use the Create in compartment dropdown to select the compartment for this image.
-
Use the Name field to supply a name by which this resource will be known in Oracle Cloud displays.
-
Set the Operating system dropdown to Generic Linux.
-
Choose the Import from an Object Storage URL option and paste the URL provided to you by Stellar Cyber into the Object Storage URL field.
-
Set the Image type to OCI.
When you set Image type to OCI, the Launch mode options no longer appear in the Import image dialog box. This is because for OCI images, the Launch mode is specified in the image file itself. For reference, the Stellar Cyber image for OCI uses Paravirtualized mode.
Here's an example of some sample Import image settings:
-
-
Click the Import image button to begin importing the Stellar Cyber image.
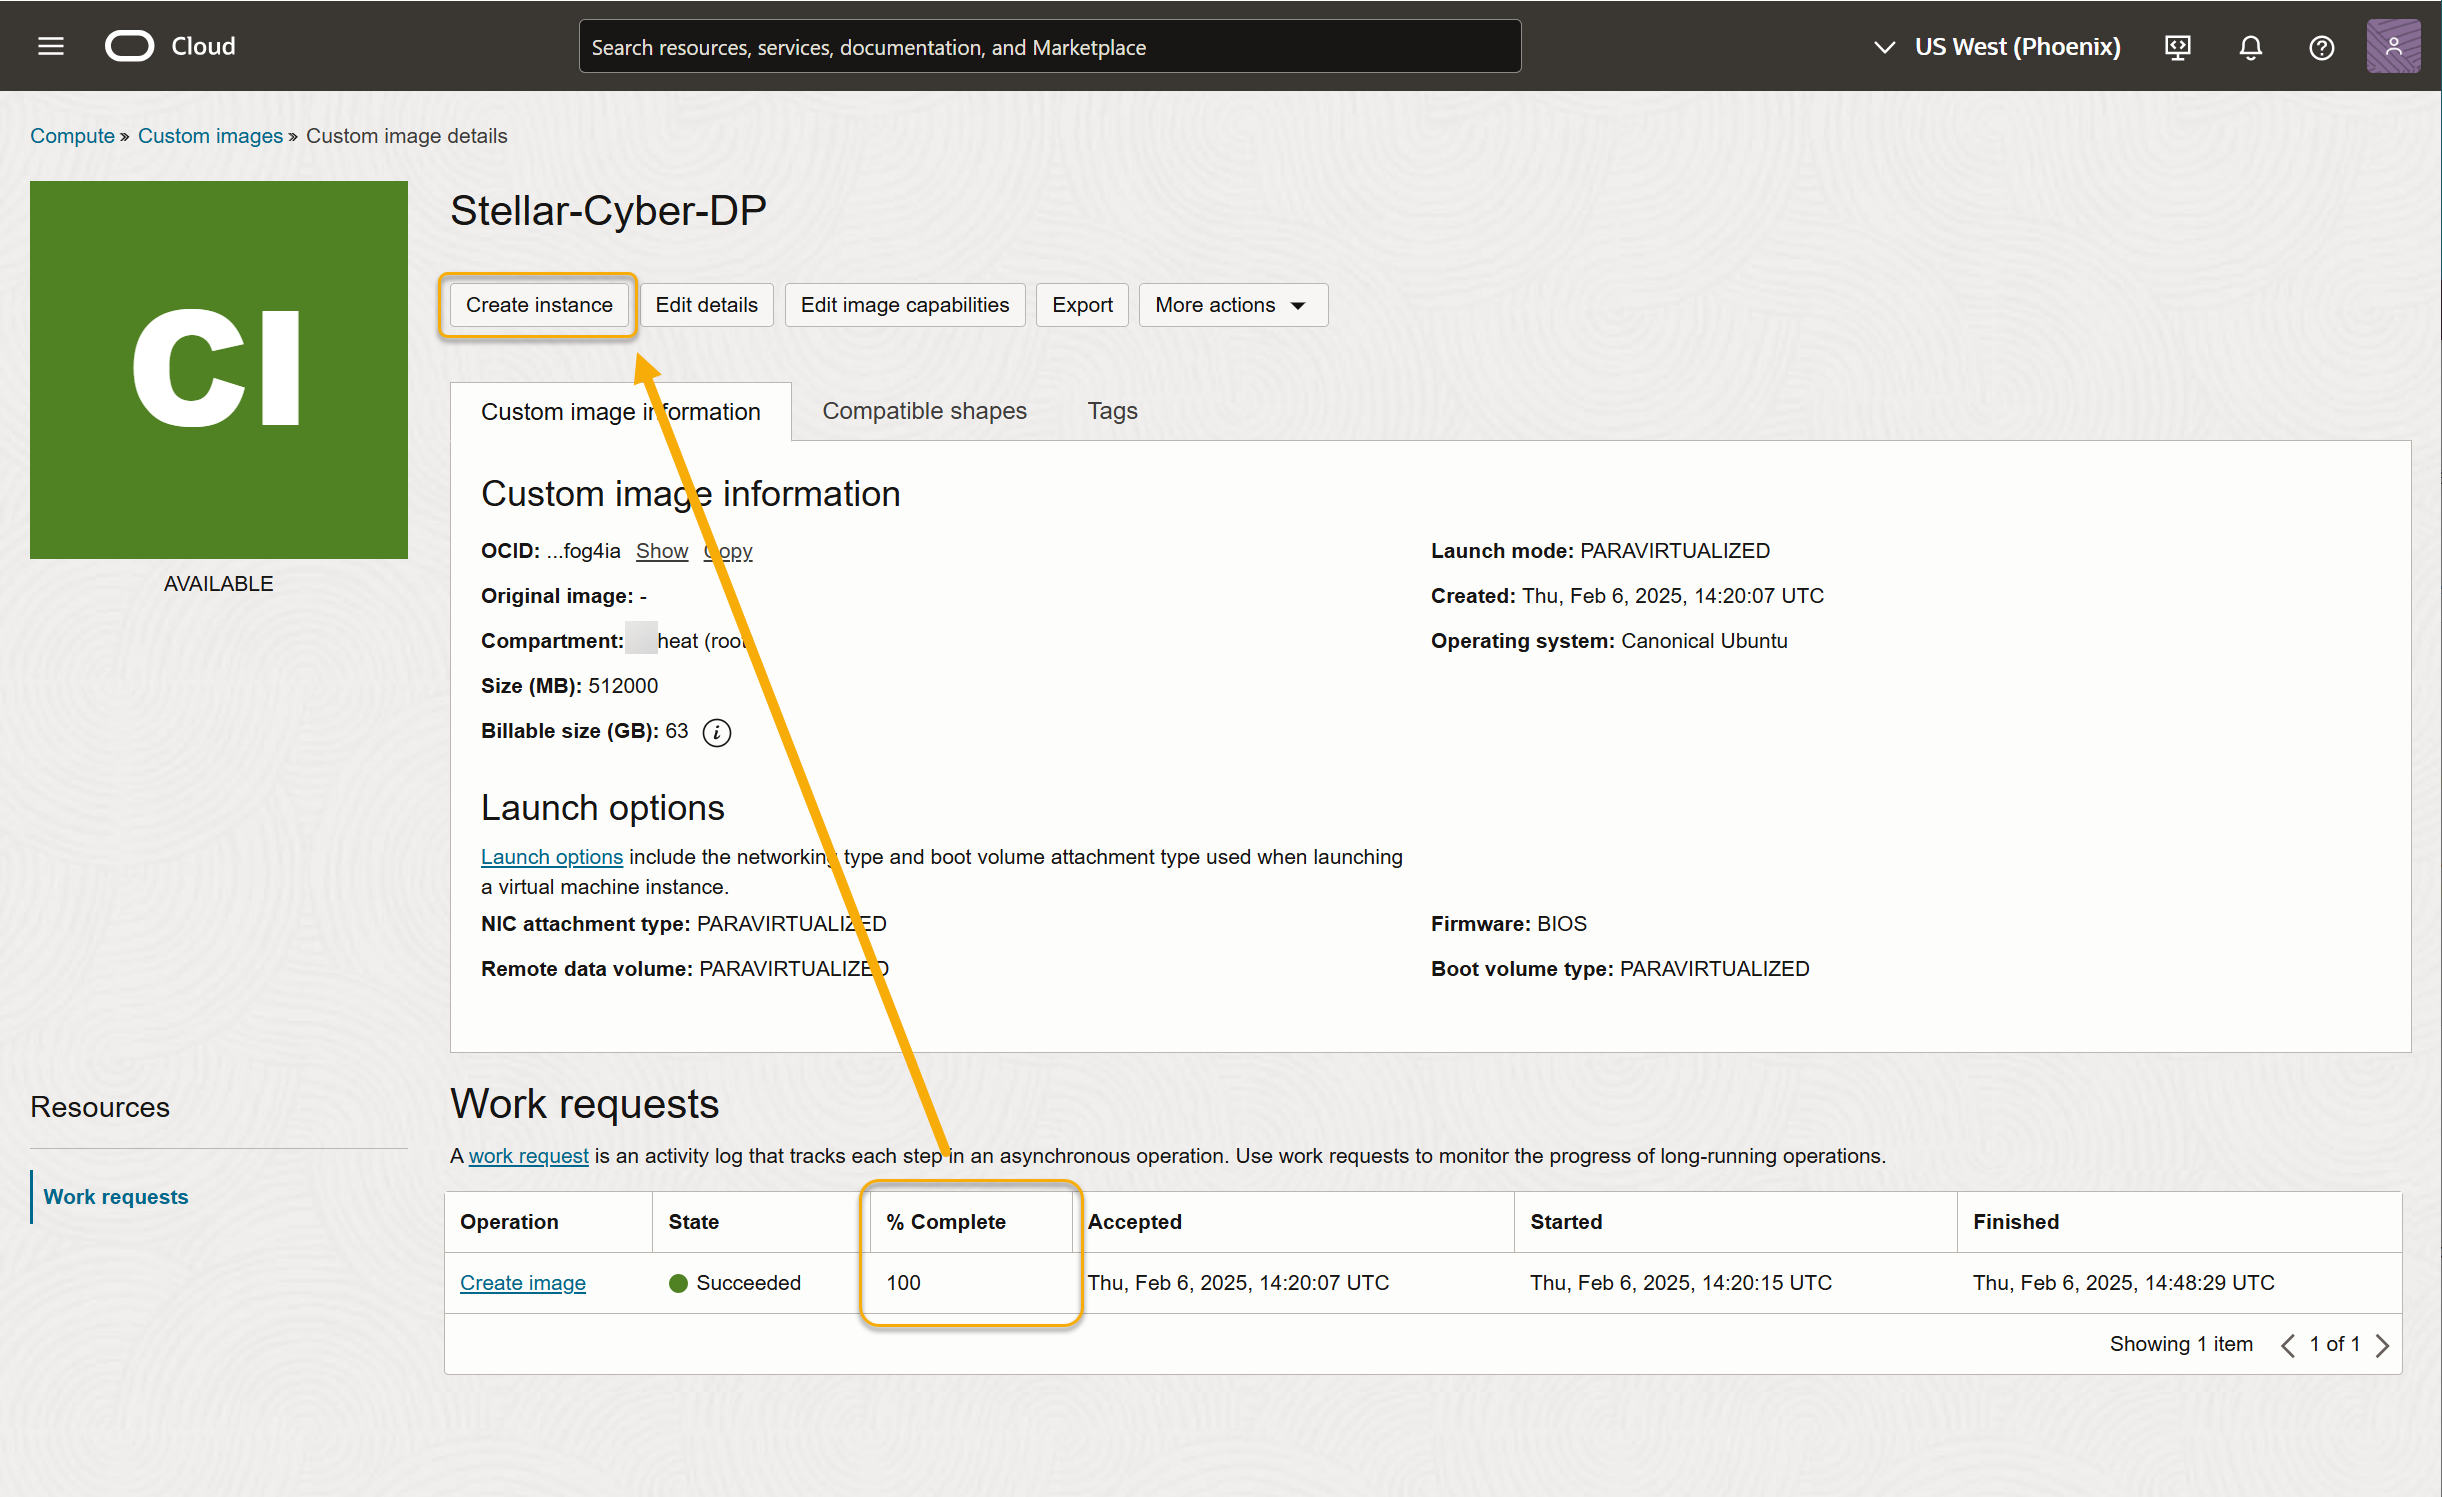
The Custom image details page appears, tracking the progress of the image import.
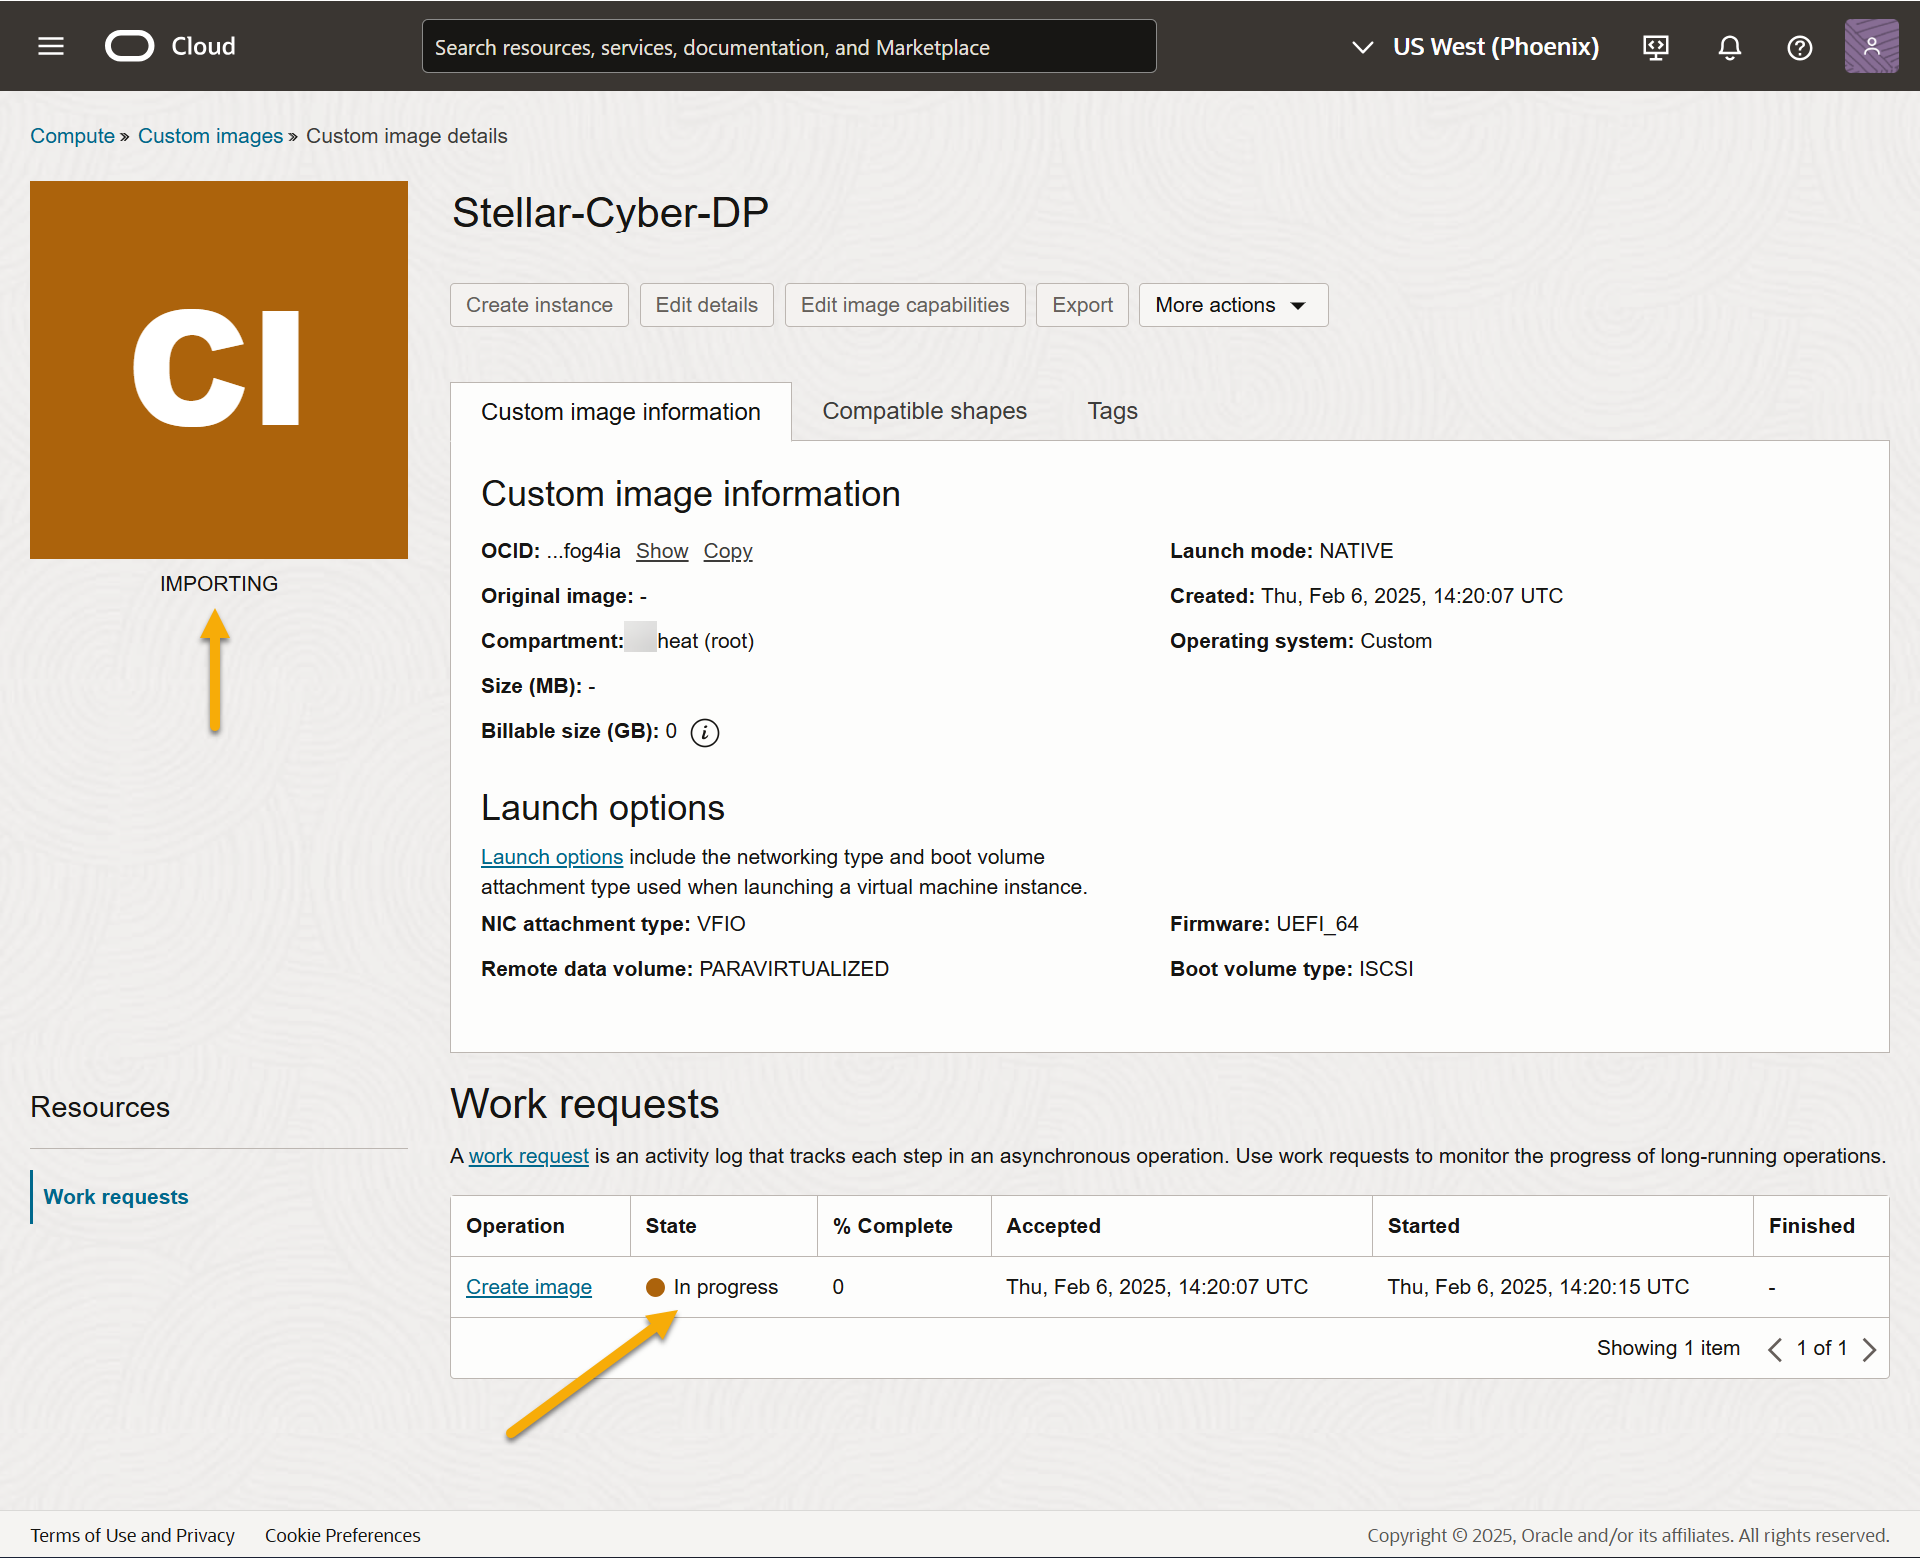
The time it takes to finish the import can vary but should take between 15-30 minutes. Keep an eye on the % Complete counter to gauge the progress.
-
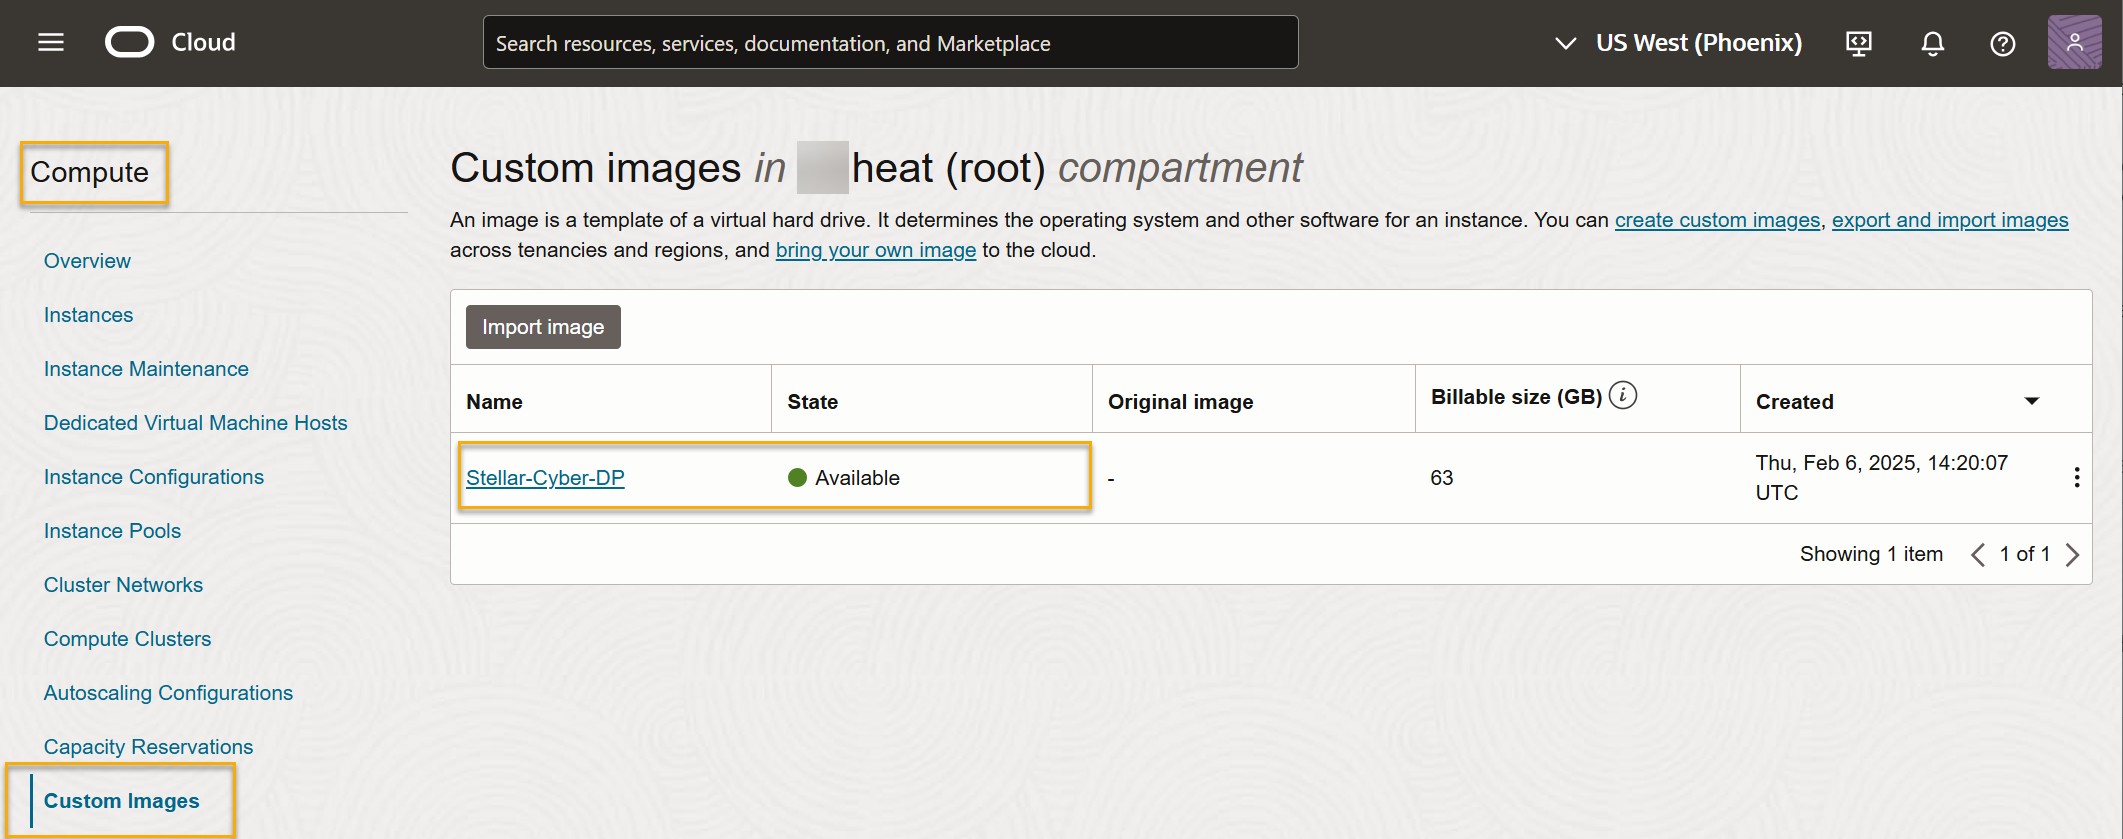
When the import finishes, the image appears in the Compute | Custom Images page for your account. For example:
Creating the DL-m and DA-m Instances
Once you've imported the Stellar Cyber platform image, you can create instances from it. Use the following procedure:
You configure some options during the instance creation procedure differently depending on whether you are creating a DL-m or a DA-m. The differences are called out in the procedure below.
-
Click the entry for the Stellar Cyber platform image in the Compute | Custom Images page.
-
Click the Create instance button.
-
Use the Create compute instance options to configure the instance:
-
Supply a name for the instance.
-
Select the compartment for the instance.
-
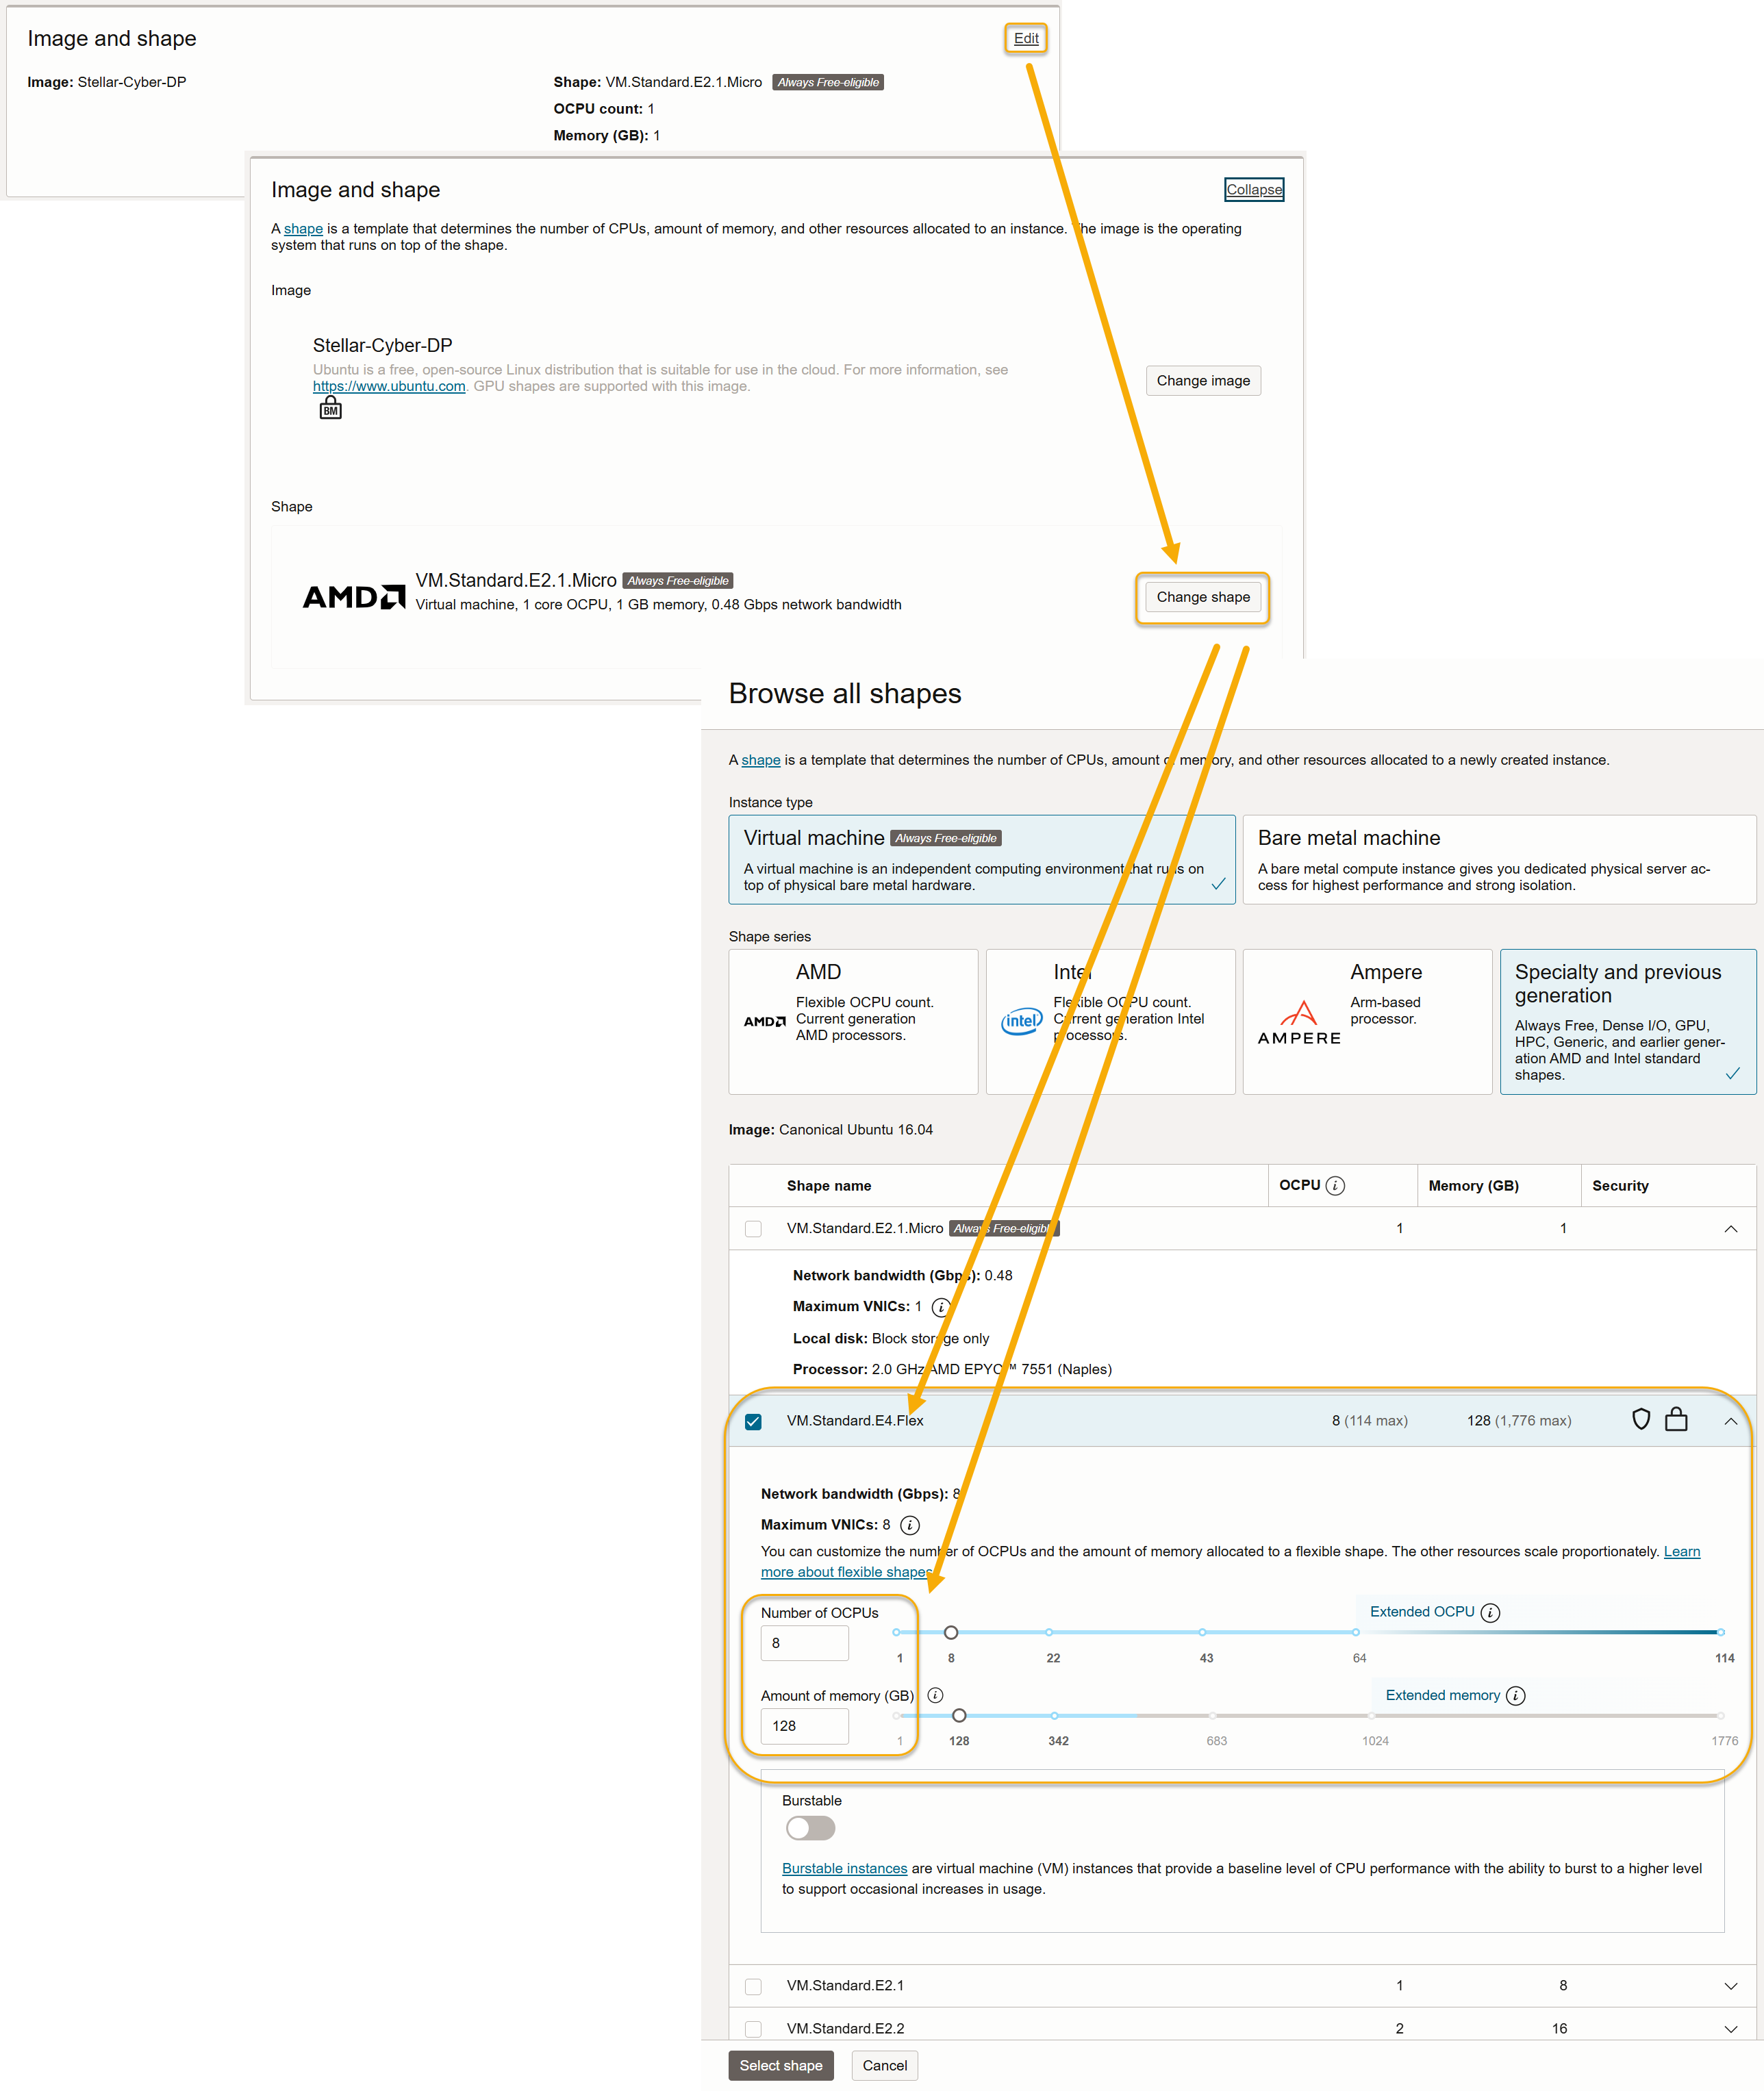
Use the Image and shape options to select and provision the shape for the type of instance you are launching:
-
DL-m – VM.Standard.E4.Flex or higher with a minimum of 8 OCPUs and 128 GB of memory.
-
DA-m – VM.Standard.E4.Flex or higher with a minimum of 8 OCPUs and 64 GB of memory.
You can click the Edit and Change shape buttons in the Image and shape pane to select and provision the shape. For example, here's a VM.Standard.E4.Flex shape provisioned to operate as a DL-m:
-
-
Click Select shape when you have finished selecting and configuring the shape.
-
Set the Primary VNIC information options for the instance according to the network and subnet where you want to deploy Stellar Cyber. Make sure you choose to assign a public IPv4 address if you want to be able to access the DP from the public internet.
-
Use the Add SSH keys options to generate a key pair and download the private key for the instance. Make sure you save the private key now – it is not shown again.
-
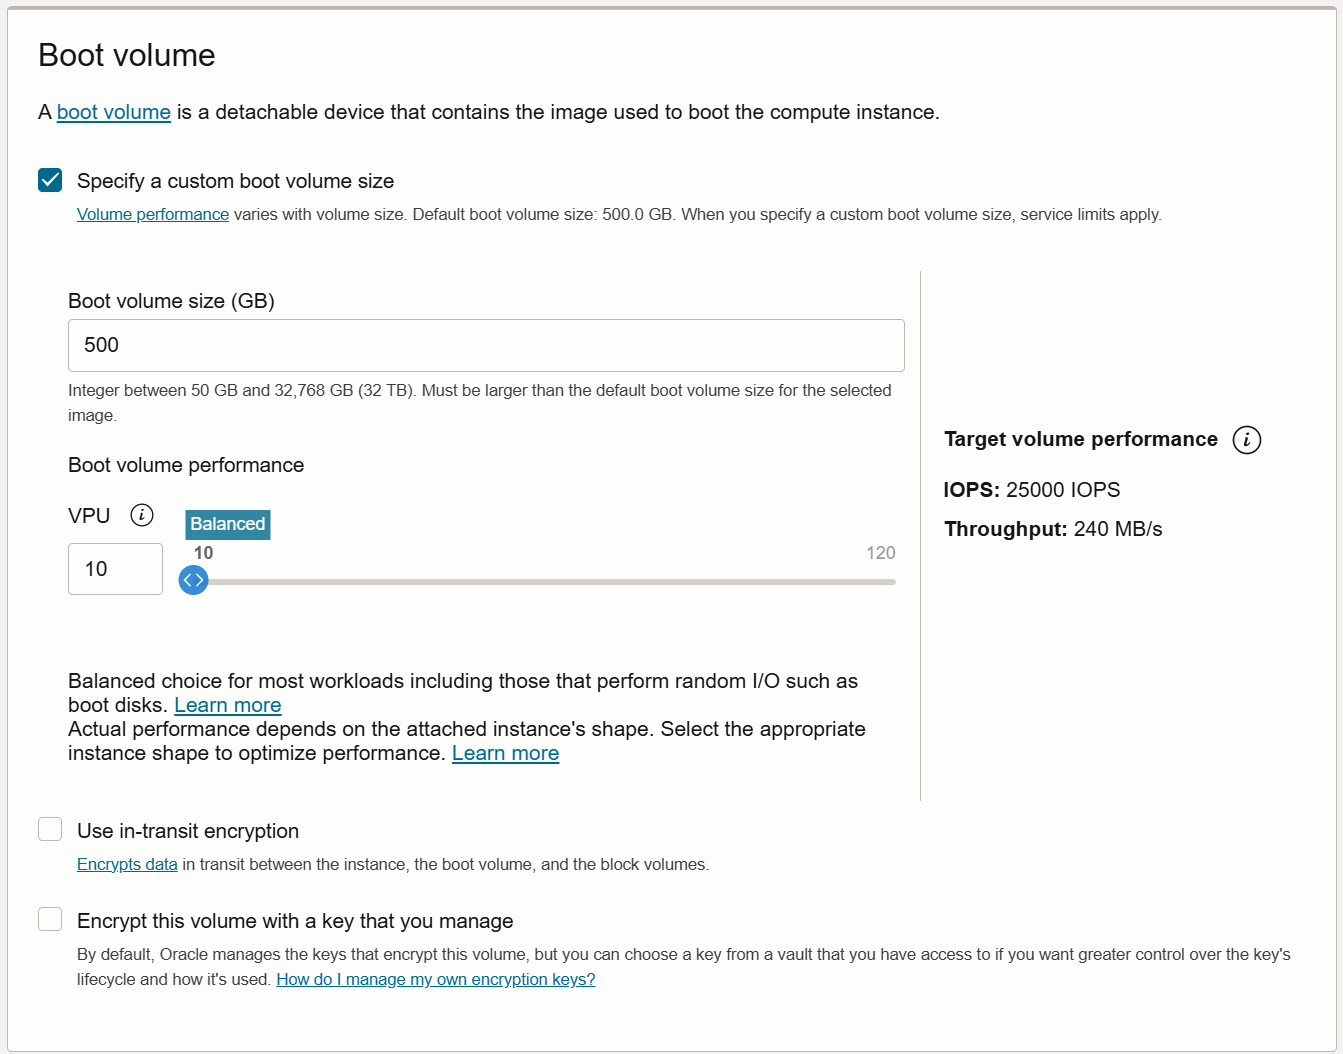
Check the Specify a custom boot volume size option and specify a size of 500 GB.
-
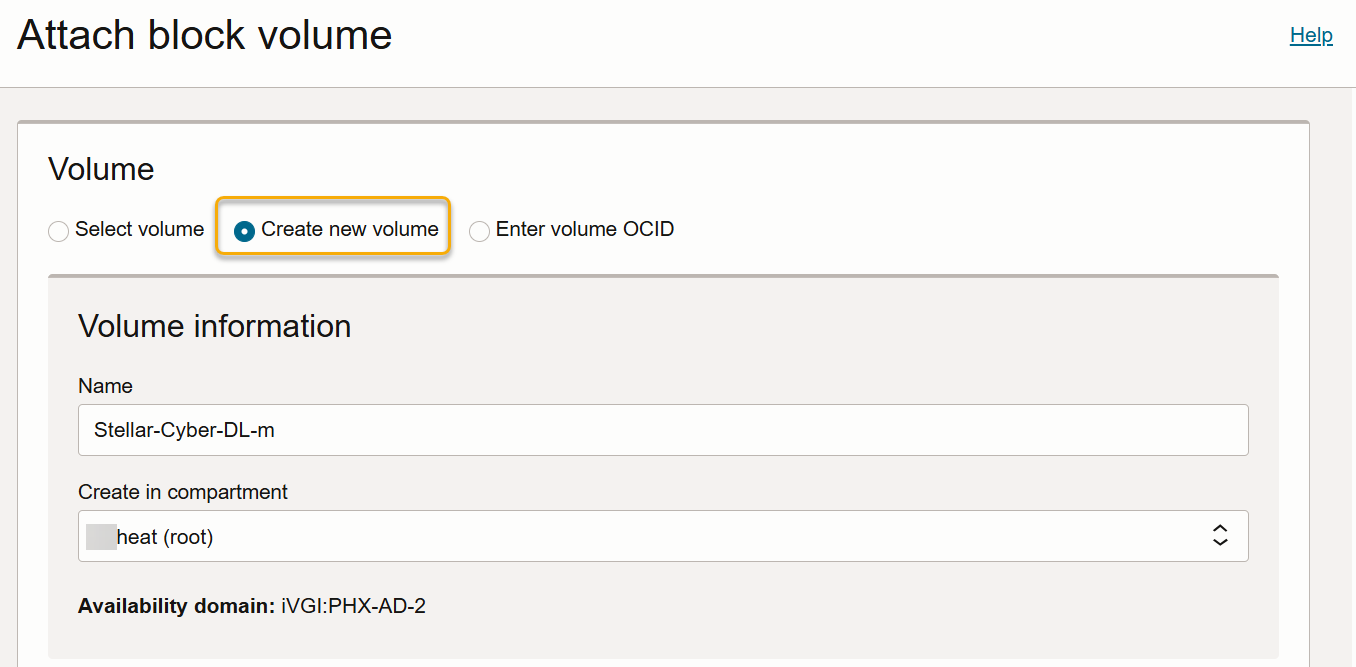
If you are launching a DL-m or DL-worker node, click the Attach block volume button to add storage.
You do not attach a block volume if you are creating a DA-m.
-
Choose the Create new volume option.
-
Supply a Name for the block volume.
-
Choose the Compartment for the block volume. This should be the same compartment where you're creating the instance.
-
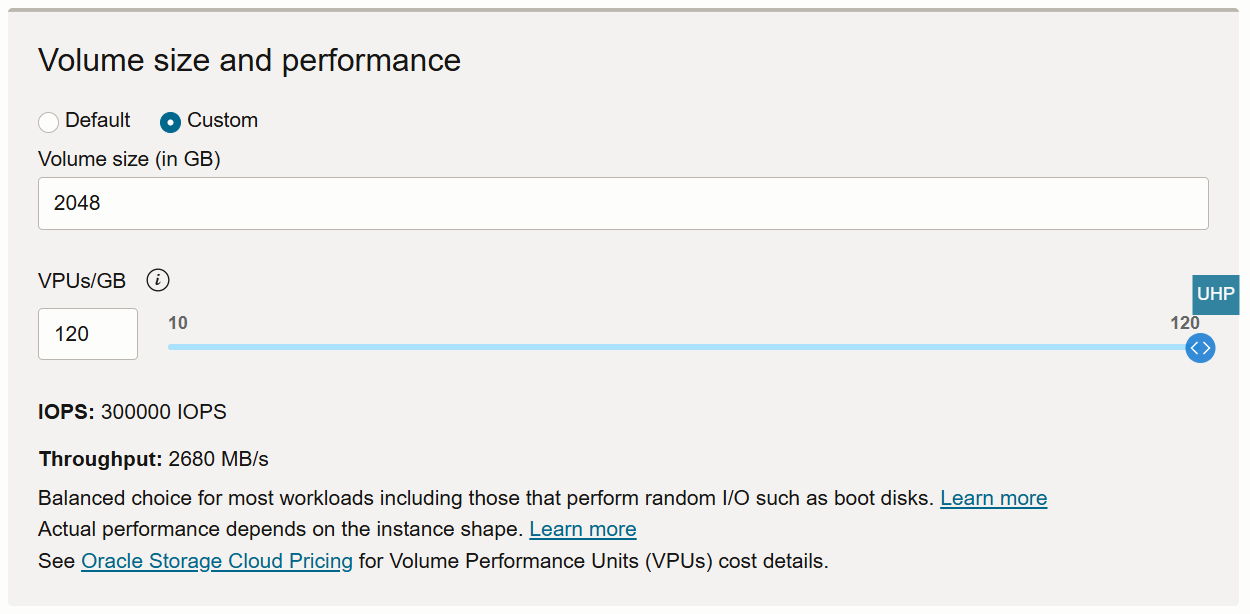
In the Volume size and performance options, select the Custom option.
-
Set the Volume size between the minimum of 2048 GB (2 TB) and the recommended value of 16384 GB (16 TB)
-
Leave the VPUs/GB option set to its default value.
-
Set the Encryption options according to your security strategy. It's generally simplest to leave this set to Encrypt using Oracle-managed keys.
-
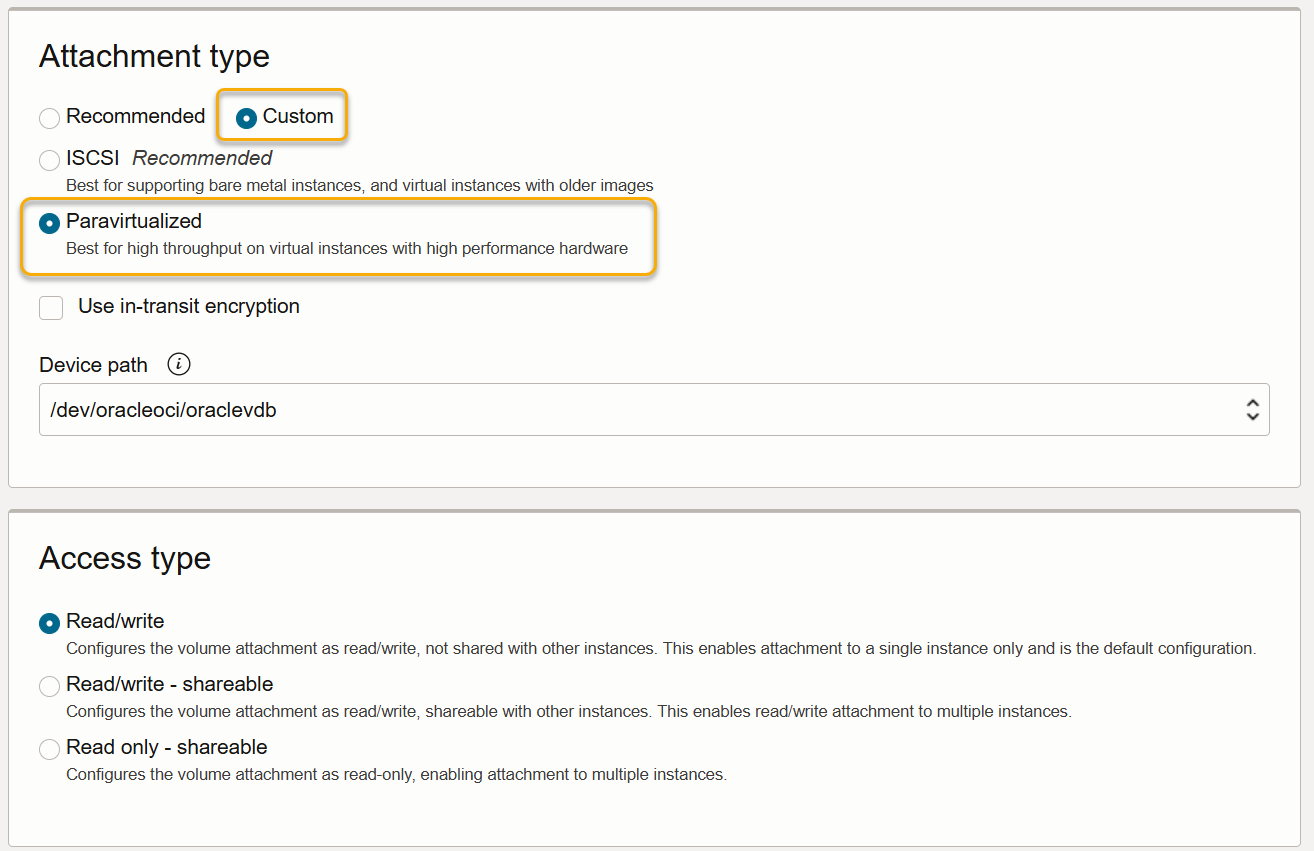
Set the Attachment type to Custom and choose the Paravirtualized option.
-
Choose a Device path for the block storage to ensure that it remains consistence across instance reboots.
-
Leave Access type set to Read/write.
-
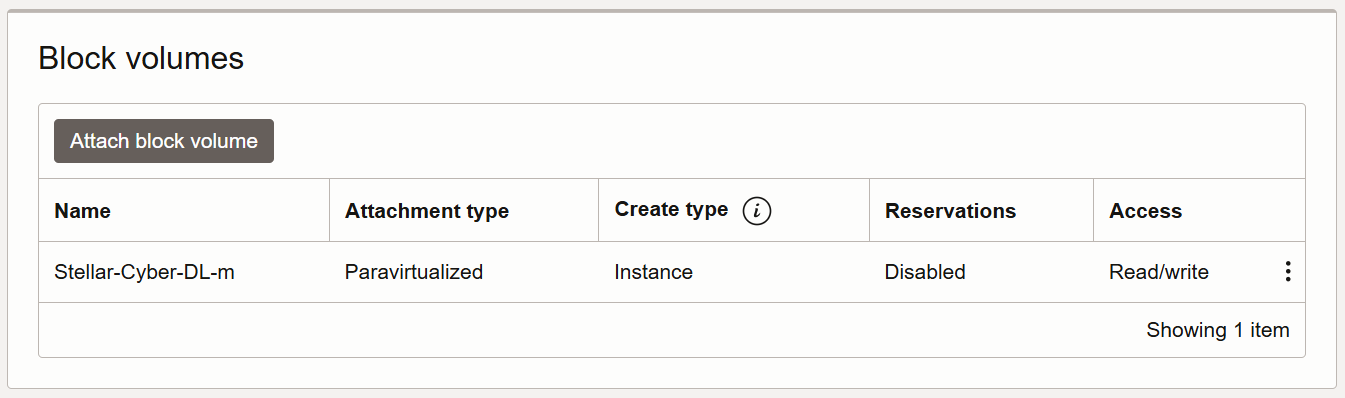
Click Attach to add your new block volume to the instance.
You are returned to the Create compute instance page with your new block volume appearing in the Block volumes list:
-
-
Click Create to provision and launch your new instance.
-
Repeat this procedure for the DA-m instance.
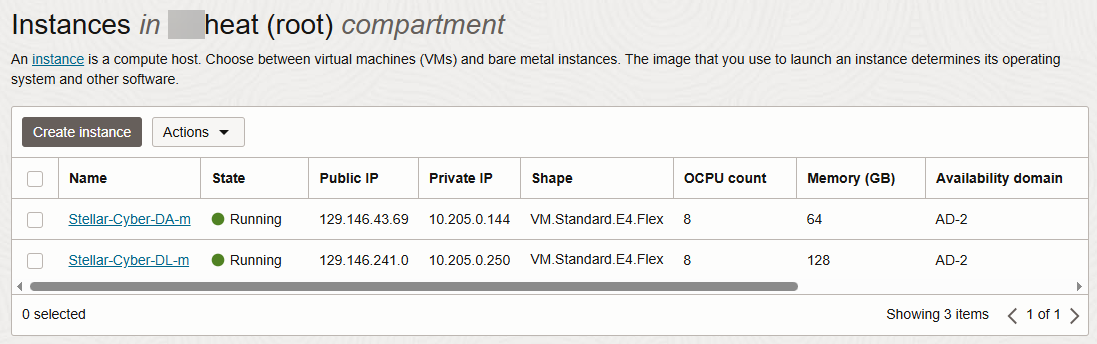
When you are finished, your Instances page should show both the DL-m and the DA-m up and running. For example:
Next Steps
The DL-m and DA-m instances are now running in the OCI cloud. The next step is to configure them in their respective CLIs.
