Configuring General S3 External Storage 
You can configure General S3 external storage locations for backup/restore. A General S3 external storage location uses an AWS S3-Compatible Storage Service for its storage (for example, wasabi or MinIO). You must configure a General S3 external storage location before you can use it for backup/restore in Stellar Cyber.
To configure General S3 external storage:
-
Get the endpoint URL in your S3-compatible storage service.
There are many S3-compatible storage services available on the market. The procedures used to create a user and retrieve the bucket name and endpoint URL vary between vendors. The examples in this procedure use the wasabi S3-compatible storage service. In addition, the MinIO service has also been tested.
Adding a User and Obtaining Keys
The following procedure provides a summary of how to add a user in wasabi. The instructions vary depending on the storage vendor you are using:
-
Navigate to www.wasabi.com and create an account.
-
Once you have created and confirmed your wasabi account, log in to the wasabi console.
-
Click on Users in the left panel. Then click the Create User button, as illustrated below:

-
Supply a username, check the box for Programmatic access, and click Next, as illustrated below:

-
Choose an optional Group for the user and then click Next. We've added our user to the admins group in the image below:

-
You can either assign a policy to the user now or create one later with the minimum permissions. We'll add the minimum permissions later and just click Next for now.
-
Click Create User to finish creating the user.
-
Wasabi provides you with the Access Key and Secret Key for your account. You'll need these later on when you add the external storage in Stellar Cyber, so make sure you click Download CSV to save them.

Here's our new user in the Users List:

Create a Bucket for the External Storage
Next, we'll create a bucket and retrieve its name so we can add it in Stellar Cyber:
-
In the wasabi console, navigate to Buckets and click the Create Bucket button, as illustrated below:

-
Supply a Bucket Name and Region for the bucket and click Next.
Make sure you note the Bucket Name. You will need it when you add the external storage in Stellar Cyber. In this example, our bucket is named stellarbucket.

-
Set the Bucket Properties as desired and click Next.
-
Review your settings and click Create Bucket to finish creating the bucket.
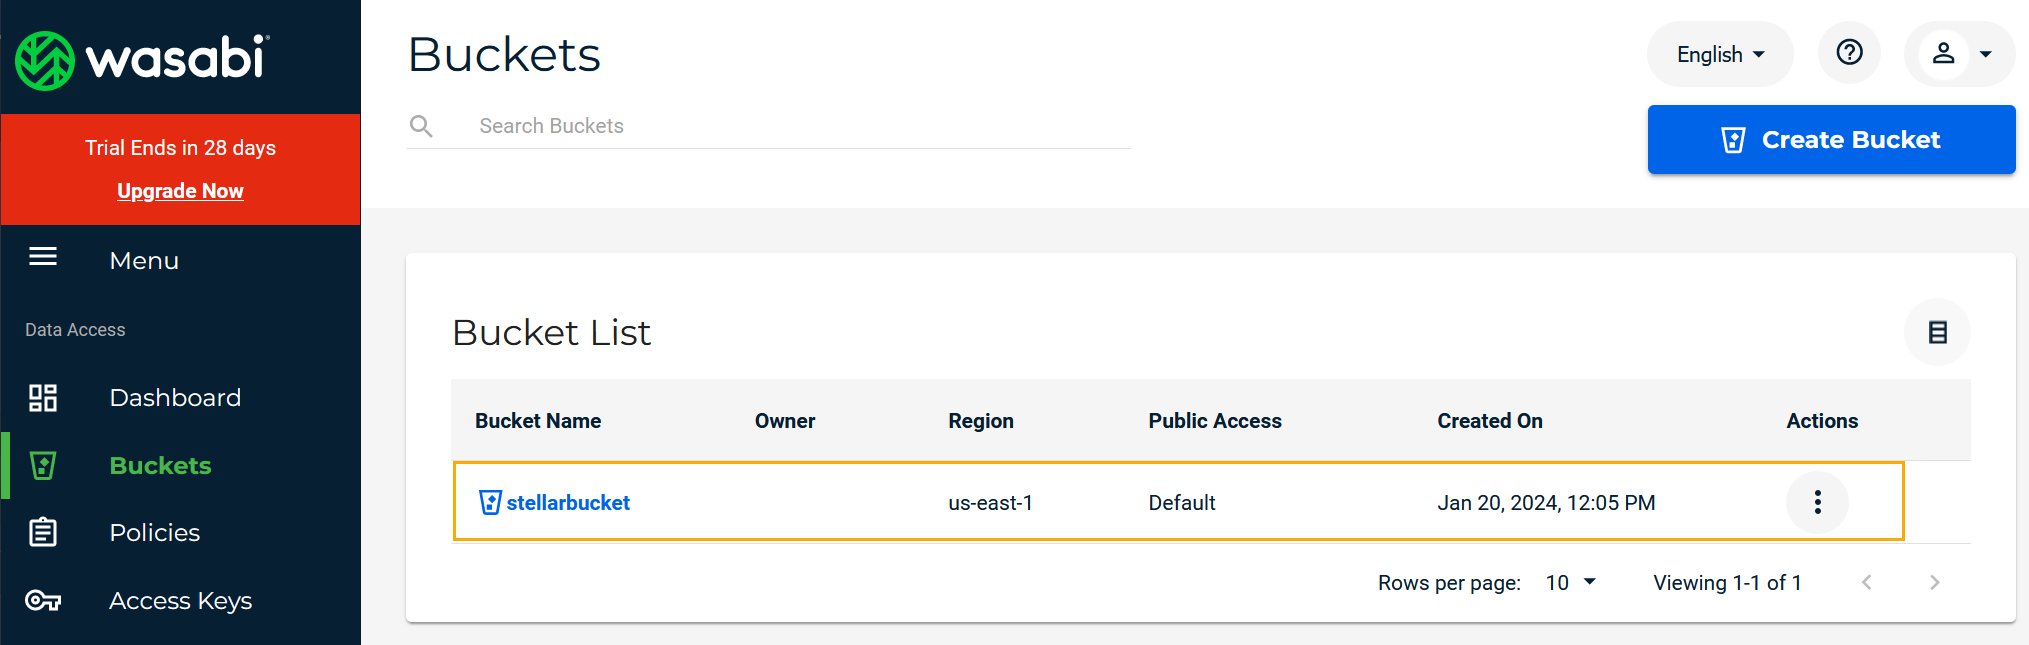
The new bucket appears in the bucket list.
Create a Policy with the Minimum Permissions
You can either use a built-in wasabi policy that provides full permissions (for example, AmazonS3FullAccess) or create your own policy with just the minimum permissions and assign that policy to the bucket you created earlier. The procedure below explains how to create a policy with just the minimum permissions:
-
In the wasabi console, navigate to Policies and click the Create Policy button, as illustrated below:

-
Supply a Name and Description for the policy.
-
Use the Policy Editor to define the permissions for the policy. As illustrated below, our policy includes only the minimum permissions listed below:
-
s3:GetObject
-
s3:PutObject
-
s3:DeleteObject
-
s3:ListBucket
Here is a sample policy with the necessary minimum permissions granted. Replace stellarbucket with your own bucket name.
Copy{
"Version": "2012-10-17",
"Statement": [
{
"Effect": "Allow",
"Action": [
"s3:ListBucket"
],
"Resource": [
"arn:aws:s3:::stellarbucket"
]
},
{
"Effect": "Allow",
"Action": [
"s3:PutObject",
"s3:DeleteObject",
"s3:GetObject"
],
"Resource": [
"arn:aws:s3:::stellarbucket/*"
]
}
]
} -
Adding General S3 External Storage in Stellar Cyber
To add General S3 external storage in Stellar Cyber:
-
Click System | DATA MANAGEMENT | Data Management.
-
Click the Snapshot Storage Configuration tab. The existing storage locations are displayed.

-
Click .The Add External Storage screen appears.
-
Enter the Name of the new location. The name must be lowercase and can include numerals, underscores (_), and hyphens (-). This field does not support multibyte characters.
-
Choose the Mode. You can choose Backup/Restore or Import/Export.
-
Choose general_s3 for the Type.
-
Supply the Endpoint URLfor the bucket. The Endpoint URLis the publicly accessible URL of the domain where your bucket is located. For example, our stellarcyber bucket in wasabi is located in the N. Virginia us-east-1 region, which corresponds to an endpoint of s3.us-east-1.wasabisys.com.
Keep in mind that not all buckets are created with public access enabled by default. Follow your storage vendor's documentation to enable public access.
-
Enter the name of the Bucket you copied earlier.
-
Enter the Access Token. This is the Access Key you copied earlier.
-
Enter the Secret Token. This is the Secret Key you copied earlier.
-
Enter the Region where the bucket is located.
Here are some sample settings for a General S3 external storage resource:

-
Click Submit.
