Reserving Resources for Virtual Modular Sensors
In order to guarantee the performance of your virtual modular sensors, you must reserve resources one hypervisors that allow it. Refer to the procedure below:
In addition, pay attention to the clock speed for provisioned processors. Stellar Cyber validates sensor installations on processors @ 2.10 GHz.
Other hypervisors may provide their own tools for reserving resources. Refer to your hypervisor's documentation for details. In general, Stellar Cyber recommends reserving resources wherever possible to guarantee sensor performance.
Note that Stellar Cyber recommends using the Thick Provision option when creating the virtual machine to maximize disk I/O rates.
To reserve resources in a VMware environment:
-
Open the vSphere Client and navigate to the VMs and Templates view.
-
Ensure that the VM whose provisioning you want to change is shut down. You can only change CPUs and memory for VMs that are shut down.
-
Right-click the VM for the Stellar Cyber sensor whose resources you want to reserve and choose Edit Settings from the menu that appears.
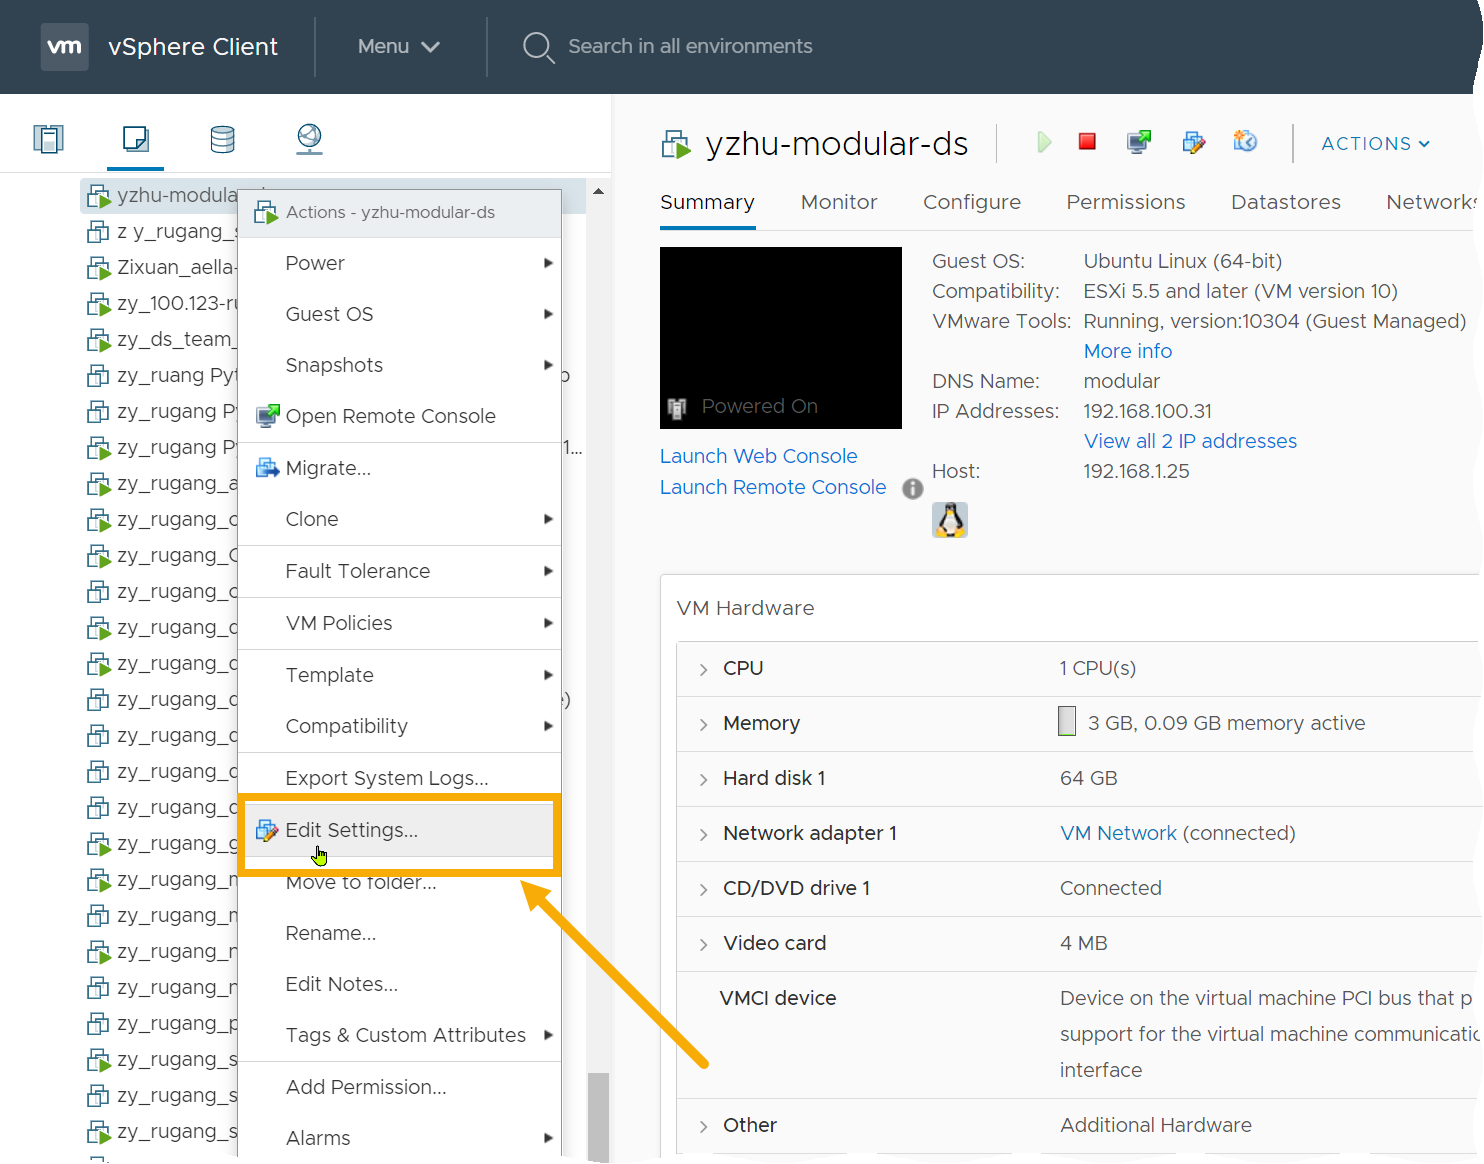
The Edit Settings dialog box appears.
-
Cascade open the CPU entry and set the CPU value to the required amount for the features you are enabling.
-
Next, you'll reserve CPU resources. You do this differently depending on whether hyperthreading is enabled on the host server. The table below summarizes the calculations you make depending on whether or not hyperthreading is enabled on the ESXi host:
Hyperthreading Enabled on ESXi Host?
CPU Reservation Calculation
Hyperthreading Enabled (most common scenario) (Number of CPUs Provisioned for VM) x (ESXi Host CPU Speed in Hz) / 2 Hyperthreading Not Enabled (Number of CPUs Provisioned for VM) x (ESXi Host CPU Speed in Hz) Examples:
The following examples illustrate sample CPU reservation calculations for a sensor VM with 16 CPUs provisioned in different ESXi environments:
-
Hyperthreading Enabled, 96.8 GHz Capacity
-
CPU Capacity – 96.8 GHz (reported in Reservation dropdown in Edit Settings dialog box)
-
Logical Processors – 88
-
Processor type – Intel(R) Xeon(R) CPU ED-2696 v4 @ 2.20 GHz
-
Sockets – 2
-
Cores per socket – (blank)
In this example, we use the following generic calculation for scenarios with hyperthreading enabled:
(Number of CPUs Provisioned for VM) x (ESXi Host CPU Speed in Hz) / 2
We will provision 16 CPUs and fill in the variables for our example as follows:
(16 CPUs) x (2.20 GHz/CPU) / 2 = 17.6 GHz
-
-
Hyperthreading Disabled, 96.8 GHz Capacity
- CPU Capacity – 96.8 GHz (reported in Reservation dropdown in Edit Settings dialog box)
-
Logical Processors – 44
-
Processor type – Intel(R) Xeon(R) CPU ED-2696 v4 @ 2.20 GHz
-
Sockets – 2
-
Cores per socket – (blank)
In this example, we use the following generic calculation for scenarios with hyperthreading disabled:
(Number of CPUs Provisioned for VM) x (ESXi Host CPU Speed in Hz)
We will provision 16 CPUs and fill in the variables for our example as follows:
(16 CPUs) x (2.20 GHz/CPU) = 35.2 GHz
-
Hyperthreading Enabled, 33.6 GHz Capacity
- CPU Capacity – 33.6 GHz (reported in Reservation dropdown in Edit Settings dialog box). Two sockets multiplied by six cores/socket multiplied by 2.80 GHz per core.
-
Logical Processors – 24
-
Processor type – Intel(R) Xeon(R) CPU X5660 @2.80GHz
-
Sockets – 2
-
Cores per socket – 6
In this example, we use the following generic calculation for scenarios with hyperthreading enabled:
(Number of CPUs Provisioned for VM) x (ESXi Host CPU Speed in Hz) / 2
We will provision 16 CPUs and fill in the variables for our example as follows:
(16 CPUs) x (2.80 GHz/CPU) / 2 = 22.4 GHz
Note that if you used the wrong calculation in this scenario and did not divide by two, the resulting value of 16 CPU x 2.80 GHz = 44.8 GHz would exceed the total CPU capacity of 33.6 GHz. Also, if you reserved the maximum available capacity of 33.6 GHz, you would commit all of the host's CPU resources to just this machine. This is why it's important to use the correct calculation for your host when reserving CPU resources.
-
-
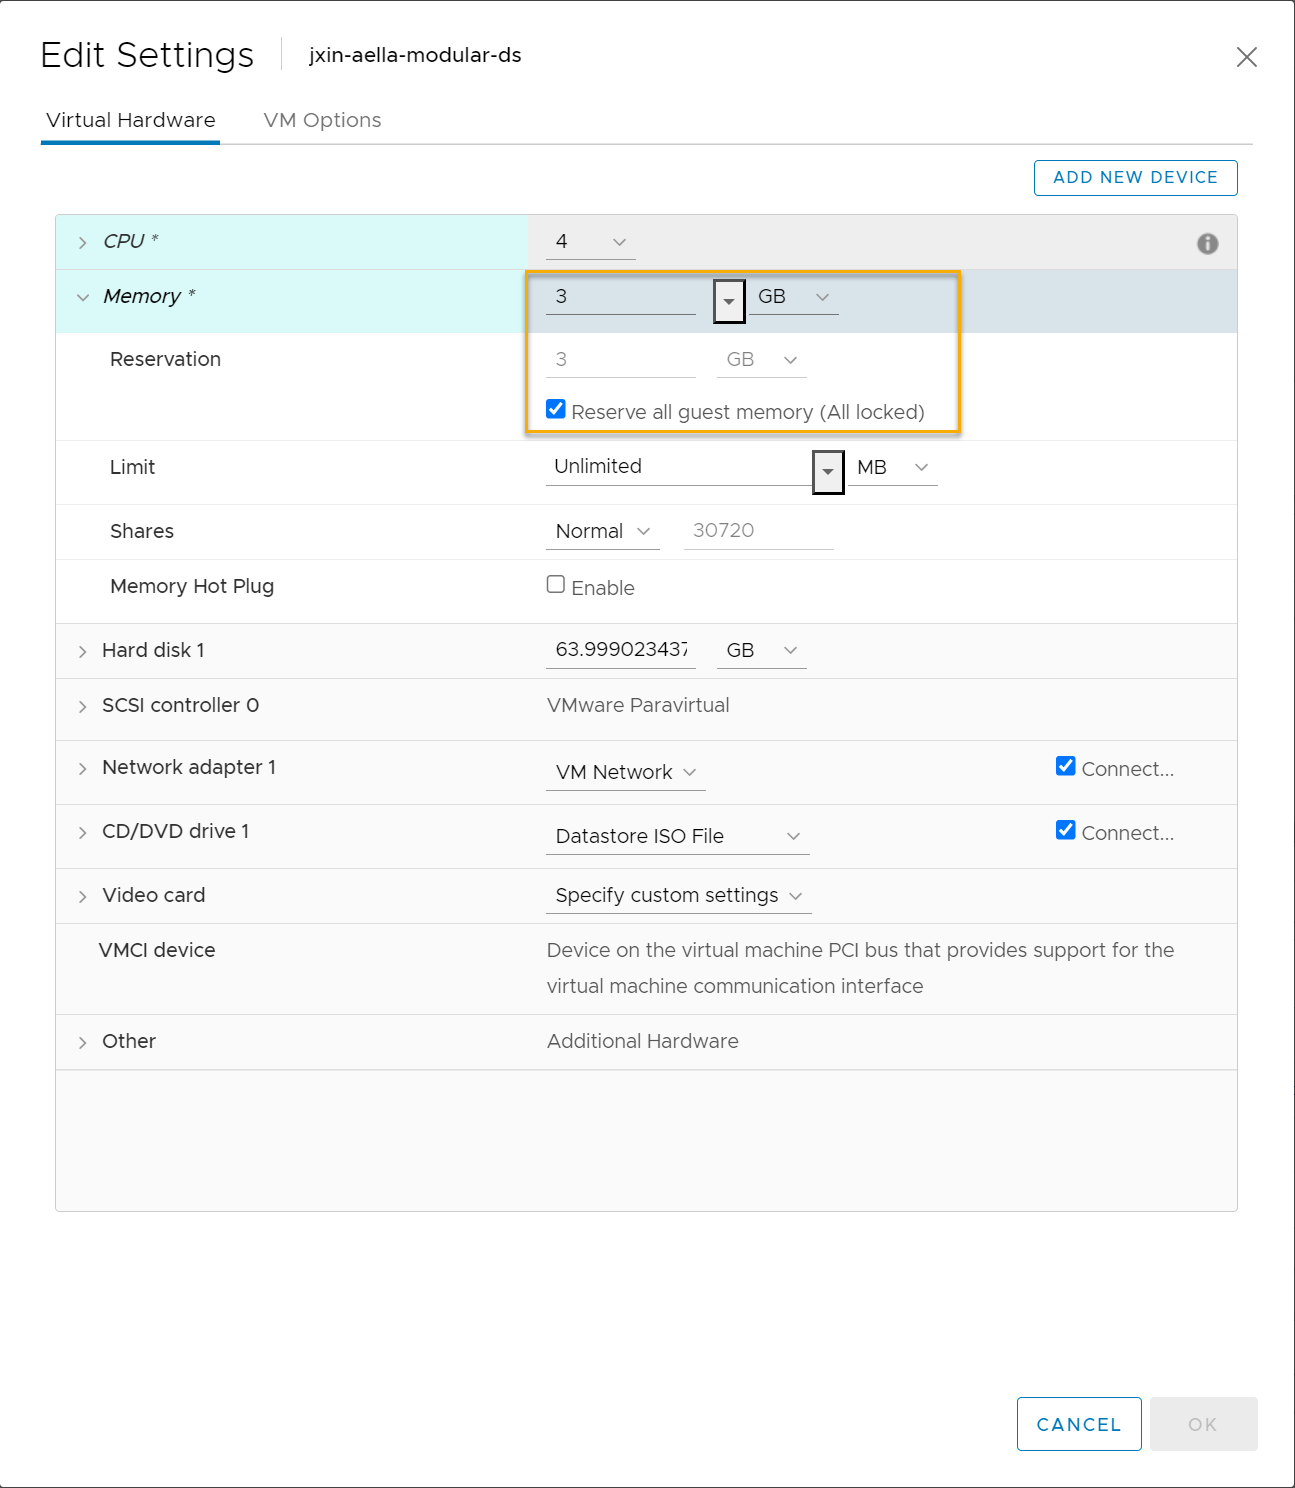
Cascade open the Memory entry and set it to the required amount for the features you are enabling.
-
Check the Reserve all guest memory (All locked) option to reserve the full amount of memory for the sensor VM's usage.
-
Click OK to apply your changes to the VM.
-
Power on the VM.
Refer to the VMware documentation for a general discussion of resource reservation as well as a set of suggested best practices for reserving resources.
