Configuring Recipients
Use the System | Recipients page to manage recipients of alerts from Stellar Cyber. Instead of entering an email address in multiple locations, you can use this page to manage recipients centrally, making maintenance much easier. If a recipient's email address changes, you only need to change it in one place.
Recipients can receive messages using any of the following methods:
- Slack
- Webhook
Recipients Table
When you select System | Recipients, Stellar Cyber displays a table listing all currently configured Recipients, as in the example below.
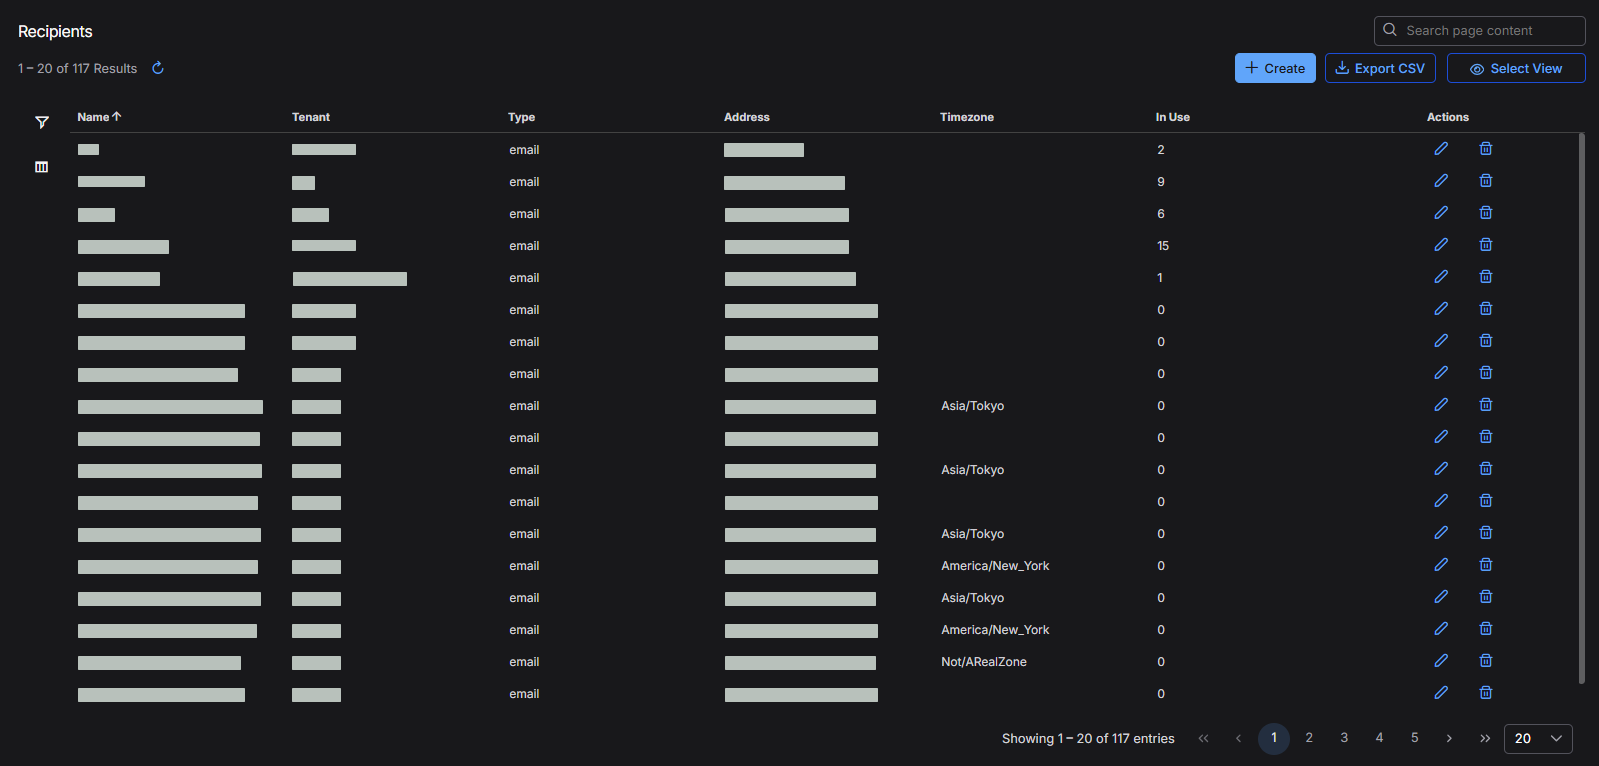
For the definitions of the columns, see the following section on adding and editing records.
Actions that can be taken include:
- Select Create to add a new recipient to the table. See the section below.
-
Select the Edit icon
 to edit the corresponding recipient. See the section below.
You cannot edit an existing recipient's Type. Create a new recipient of the desired type instead.
-
Select
 to delete the recipient.
You cannot delete a recipient that is in use in an Automated Threat Hunting (ATH) playbook, for example, or in a scheduled report.
See the Tables page for more information on working with tables.
Adding or Editing a Recipient
The dialog box used to add or edit a recipient includes the following fields:
-
Name – Assign the recipient a unique name. This is the value that's referred to in configuration forms in the Stellar Cyber UI. This field does not support multibyte characters.
-
Tenant – Choose the name of the tenant to which the recipient belongs or All Tenants.
-
Type – Choose the type of media that to use when sending messages to the recipient (Email, Slack, or Webhook). The rest of the dialog box provides different options depending on your choice here, as described below.
You cannot edit an existing recipient's Type. Create a new recipient of the desired type instead.
Options for Email Recipients
-
Email Address – Enter the email address to which Stellar Cyber sends messages.
-
Timezone – Choose the time zone that Stellar Cyber uses when rendering timestamps in ATH playbook email notifications sent to this recipient. This field appears when Type is set to Email. Select a time zone from the list of IANA (Internet Assigned Numbers Authority) time zone identifiers, or enter text in the search box to filter the list. This field is optional. If you leave it empty, timestamps are rendered in UTC (Coordinated Universal Time), which is the worldwide reference standard from which local civil times are expressed as offsets.
The selected time zone applies to timestamp variables in ATH playbook email templates, such as
ctx.execution_time. Stellar Cyber renders these values in RFC 3339 format with the numeric UTC offset for the chosen time zone, such as2026-04-21T14:30:00+09:00, accounting for daylight saving time when applicable. When an ATH playbook sends email to multiple recipients, each message shows timestamps in the time zone configured for that recipient. Recipients configured without a time zone continue to receive timestamps in UTC.
Options for Slack Recipients
-
Slack Webhook URL – Enter the URL to use when sending Slack messages.
Options for Webhook Recipients
-
Protocol – Choose either HTTP or HTTPS
-
Host – The host where the webhook message is sent. This can be either a hostname or an IP address.
-
Port – The port where the webhook message is sent. If you do not specify a port, the default ports for the selected Protocol are used (HTTP/80 or HTTPS/443).
-
Path – The path where the webhook message is sent on the specified host. If you do not specify a path, the message is sent to the base URL.
-
Stellar Cyber uses these fields to construct the URL where the webhook message is sent using the following formula:
http://<host>:<port>/path
For example, consider the settings in the image below:
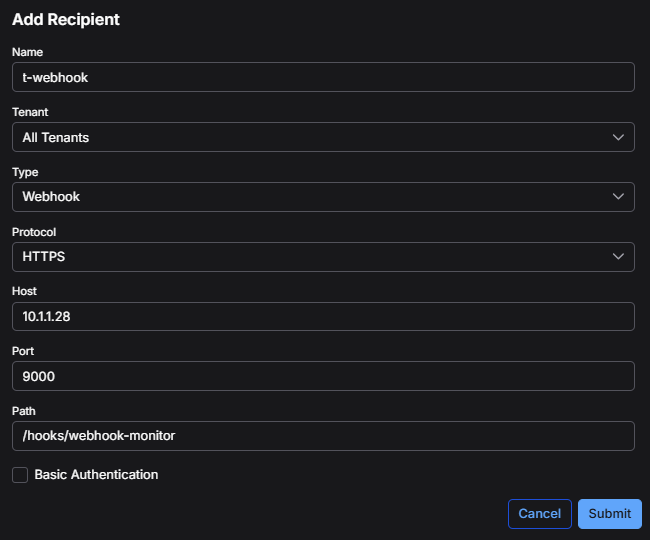
These settings result in the following Webhook URL:
https://testrecipient.com/webhook
-
Basic Authentication – Select this check box to use Basic Authentication.
-
If you do not enable Basic Authentication, the Webhook uses bearer token authentication instead.
-
If you enable Basic Authentication, additional Username and Password fields appear. The password is masked as you enter it and is not shown in the summary table of configured recipients.
-
For versions prior to
-
Enter the username without the @ or period (.) characters.
-
Enter the password without any non-alphanumeric characters except for the underscore (_).
-
-
From
-
Select Submit to save your changes. Alternatively, select Cancel to discard the entry.
