Configuring NFS External Storage
WARNING: NFS support for both External Storage and Data Sinks will be deprecated in a future release of Stellar Cyber. Stellar Cyber advises you not to use this feature and instead choose a cloud-based option. If cloud-based options are not possible, reach out to Stellar Cyber Customer Success to discuss on-premises options compatible with the AWS S3 API.
You can configure NFS external storage locations for backup/restore, import/export, and cold storage. You must configure the external storage location before using those features.
To configure NFS external storage:
Creating an NFS Storage Location
Stellar Cyber supports NFSv3 and NFSv4. When you configure an NFS external storage location you must set the following permissions:
-
rw—Allow both read and write requests on this NFS volume. -
no_subtree_check—Disables subtree checking, which has mild security implications, but can improve reliability. -
insecure—Allows clients with NFS implementations that don't use a reserved port for NFS. -
no_root_squash—Disables the default behavior of squashing the root user.
You need the following information when configuring Stellar Cyber:
- hostname or IP address of the server
- port number (2049 is the default)
- complete path to the NFS server directory
Adding NFS External Storage in Stellar Cyber
To add NFS external storage in Stellar Cyber:
-
Click System | Data Processor | Data Management.
-
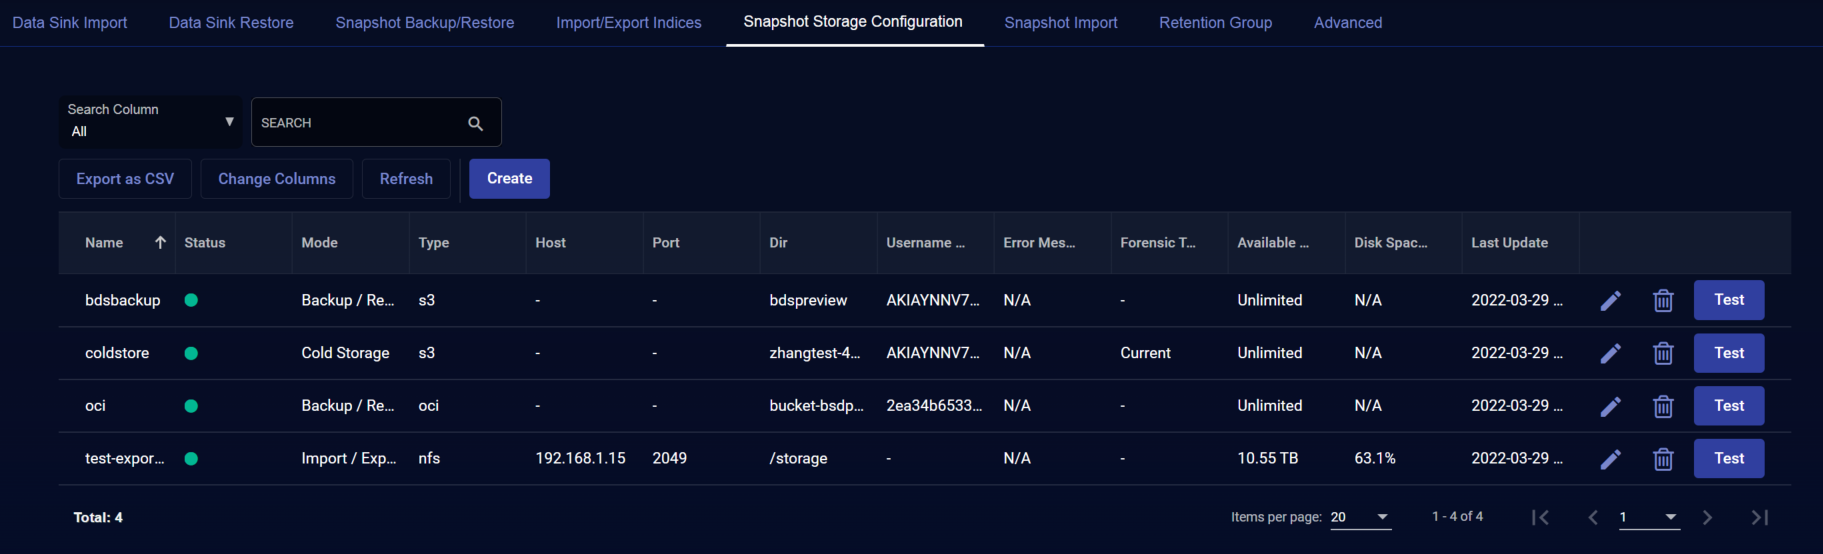
Click on the Snapshot Storage Configuration tab. The existing snapshot storage locations are displayed.
-
Click .The Add External Storage screen appears.
-
Enter the Name of the new location. The name must be lowercase and can include numerals, underscores (_), and hyphens (-). This field does not support multibyte characters.
-
Choose the Mode. You can choose Backup/Restore, Import/Export, or Cold Storage.
-
Choose NFS for the Type.
-
Enter the Directory. This is the path you copied earlier. Note that this field does not accept URLs.
-
Enter the Host DNS or IP address of the NFS server.
-
Enter the Port on the NFS server.
-
Choose the Forensic Target (for Cold Storage). If you choose Current Data Processor, Stellar Cyber increases the buffer size to account for the additional storage space needed. You can import from cold storage to your current DP or a to dedicated forensic DP regardless of which target you choose.
-
Click Submit.