Configuring Bitdefender Log Ingestion 
Bitdefender's API does not support pull of data collection. Instead, you configure Bitdefender's Push event for JSON RPC messages to send data to Stellar Cyber sensor configured to ingest httpjson over TLS. All data is ingested to the Syslog index.
Bitdefender's PUSH functionality is supported for https listeners. This requires your Stellar Cyber sensor be enabled for TLS, which affects ALL ports, not just the one used for Bitdefender.
The steps below illustrate configuring Bitdefender GravityZone to push logs to the Stellar Cyber sensor and to configure your Stellar Cyber deployment accordingly.
- Enable Deployment for TLS & HTTPJSON
- Obtain Bitdefender API Key and Endpoint URL
- Configure the Bitdefender Push Script
- Run the Push Script
- Verify the Configuration (Optional)
Enable Deployment for TLS & HTTPJSON
-
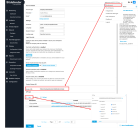
Click System | Collection | Sensor Overview. The Sensor List is displayed.
-
Click for the sensor you want to configure for ingesting TLS. The Edit Sensor Parameters window is displayed.
-
Enable Syslog TLS Enabled.
Bitdefender's PUSH functionality is supported for https listeners. This requires your Stellar Cyber sensor be enabled for TLS, which affects ALL ports, not just the one used for Bitdefender.
-
Click Submit.
-
Click System | Collection | Sensor Profiles. The Sensor Profile list is displayed.
-
Click for the sensor profile associated with the sensor you modified above. The Edit Sensor Profile window is displayed.
-
Expand the section for Log Forwarder. If it is a Standard Sensor, this option is located in the Sensor tab.
-
Enable the option for HTTP JSON Parser as shown below.

-
Open TCP port 5200 on your firewall.

Obtain Bitdefender API Key and Endpoint URL
To configure the push script, you will need the following information from your GravityZone Console account:
-
Access URL (to create API Endpoint URL)
-
API Key
-
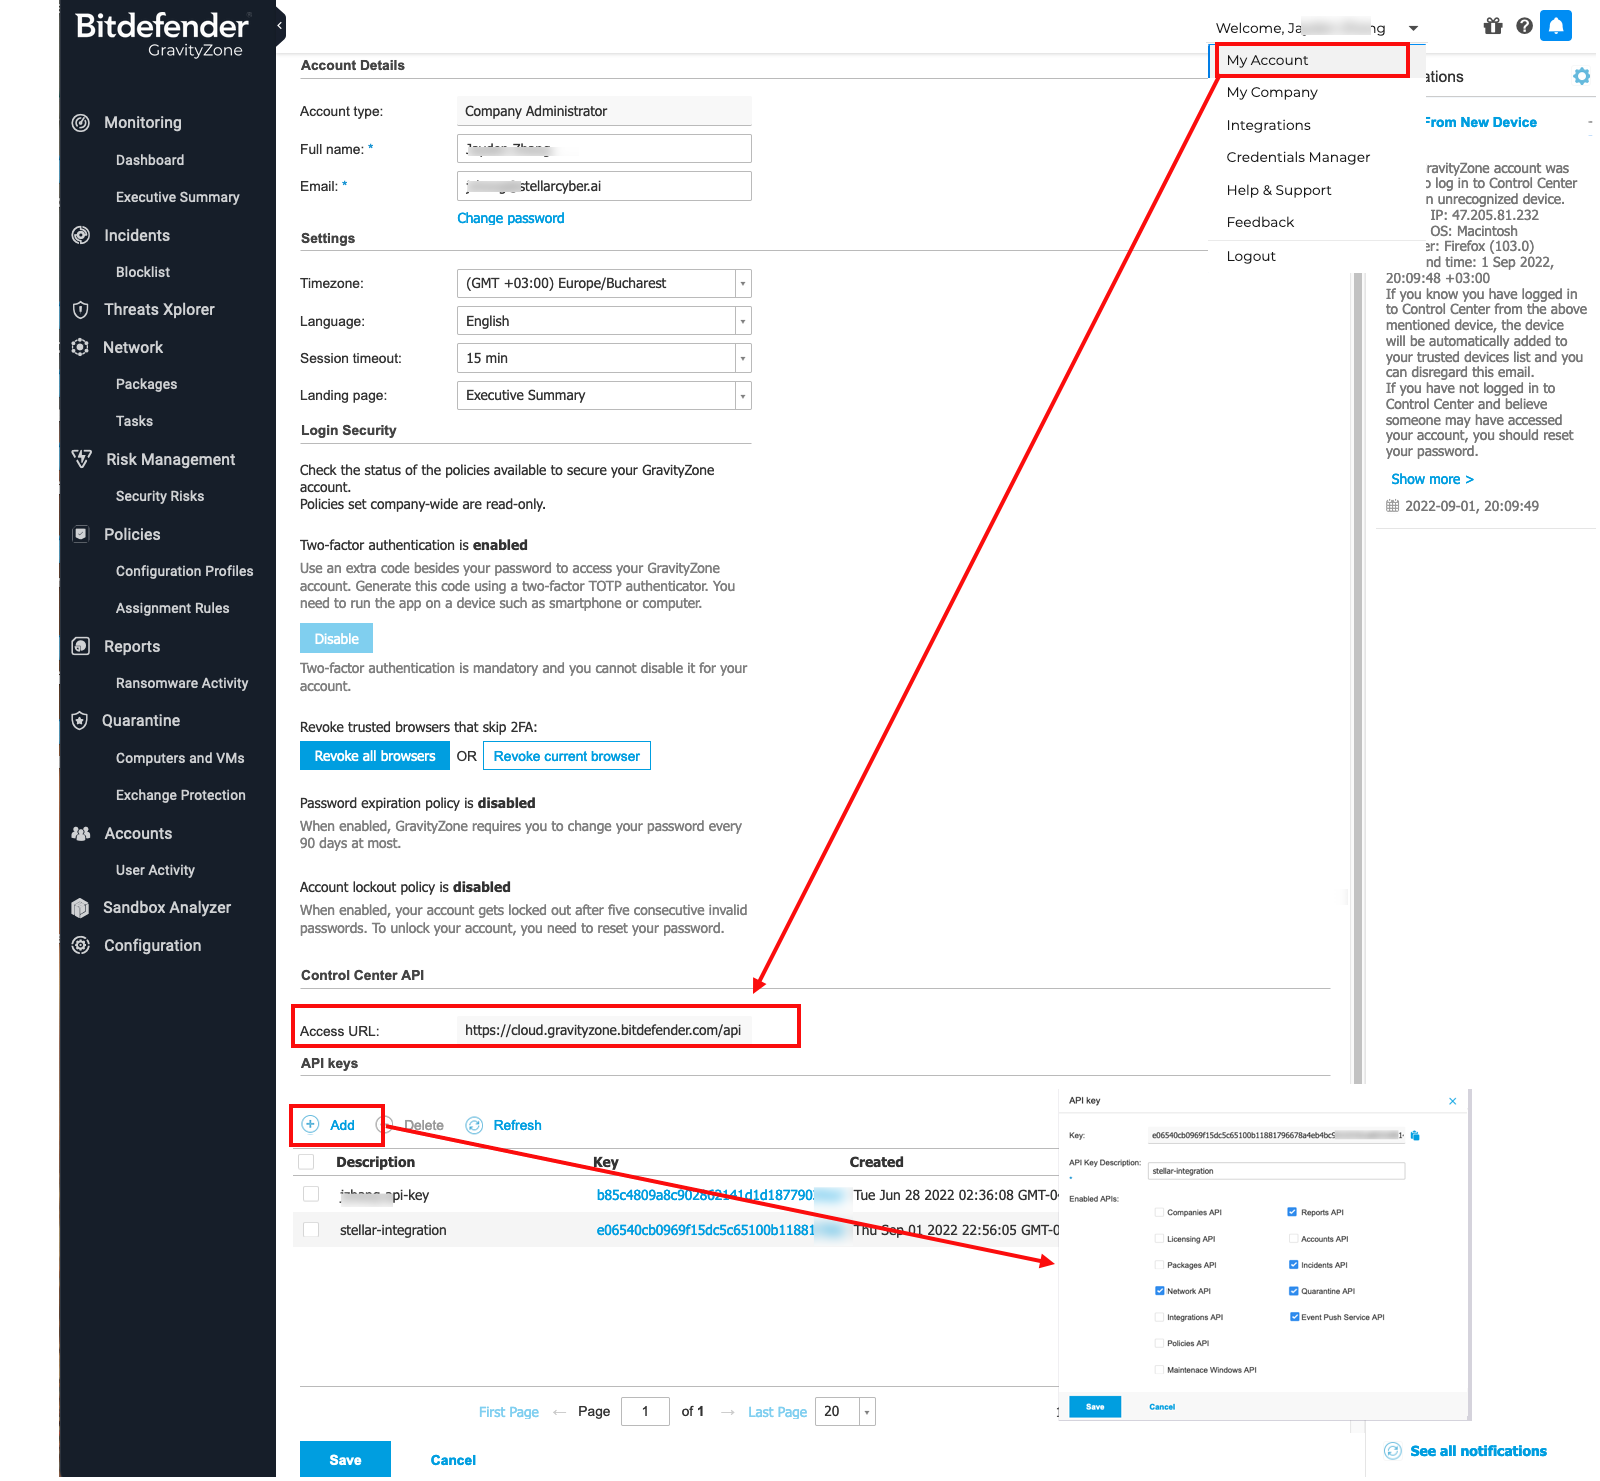
Log in to the Bitdefender GravityZone CLOUD Console as an administrative user.
-
Access your account settings.
-
Locate and save the Access URL information for use in the next section (for example: https://cloud.gravityzone.bitdefender.com).
Do not include /api at the end of the URL.
-
Select the option to Add an API Key.
-
Create the key with at least these options:
Network API
Reports API
Incidents API
Quarantine API
Event Push Service API
-
Save the API key.
-
Locate the new key in the API keys table and save the value for use in the next section.
Configure the Bitdefender Push Script
The Python script below connects to your Bitdefender account and enables the push feature for the requested APIs. If you prefer to use a language other than Python, refer to Bitdefender's documentation.
-
Save a copy of the attached sample script to a Linux system with Python 3 installed.
Copyset_push_sensor.py#!/usr/bin/python3
'''
This script is used to configure log push to a Stellar Cyber Sensor.
Used for non-EU region.
'''
import base64
import requests
import json
apiKey = "4f19cb...my.api.key.....554d0808921bf783b704d1b4baf03a67583f2483371"
loginString = apiKey + ":"
encodedBytes = base64.b64encode(loginString.encode())
encodedUserPassSequence = str(encodedBytes, 'utf-8')
authorizationHeader = "Basic " + encodedUserPassSequence
print('authorizationHeader', authorizationHeader)
apiEndpoint_Url = "https://cloud.gravityzone.bitdefender.com/api/v1.0/jsonrpc/push"
request = {
"params": {
"status": 1,
"serviceType": "jsonRPC",
"serviceSettings": {
"url": "https://public-ip-address-of-my-stellar-cyber-sensor:5200/httpjson_bitdefender_multiple_event",
"authorization": "Bearer sfasdfw34243",
"requireValidSslCertificate": False
},
"subscribeToEventTypes": {
"modules": True,
"sva": True,
"registration": True,
"supa-update-status": True,
"av": True,
"aph": True,
"fw": True,
"avc": True,
"uc": True,
"dp": True,
"sva-load": True,
"task-status": True,
"exchange-malware": True,
"network-sandboxing": True,
"adcloud": True,
"exchange-user-credentials": True,
"endpoint-moved-out": True,
"endpoint-moved-in": True,
"troubleshooting-activity": True,
"uninstall": True,
"install": True,
"hwid-change": True,
"new-incident": True,
"antiexploit": True,
"network-monitor": True,
"ransomware-mitigation": True,
"security-container-update-available": True
}
},
"jsonrpc": "2.0",
"method": "setPushEventSettings",
"id": "ad12cb61-52b3-4209-a87a-93a8530d91cb"
}
result = requests.post(apiEndpoint_Url, data=json.dumps(request), verify=False, headers={"Content-Type": "application/json", "Authorization": authorizationHeader})
print(result.json()) -
Locate the API key attribute in the script and replace it with the values you saved in the previous section:
apiKey ="4f19cb...my.api.key.....554d0808921bf783b704d1b4baf03a67583f2483371"
-
Locate the API Endpoint URL attribute and, if needed, replace the FQDN with the value you saved for Access URL above. In the example script , it is
cloud.gravityzone.bitdefender.com.apiEndpoint_Url = "https://cloud.gravityzone.bitdefender.com/api/v1.0/jsonrpc/push
-
Locate the URL attribute and replace the FQDN with the public IP address of your Stellar Cyber sensor. In the sample script, it is :
url": "https://public-ip-address-of-my-stellar-cyber-sensor:5200//httpjson_bitdefender_multiple_event"
In the script, the URL:
"url": "https://public-ip-address-of-my-stellar-cyber-sensor:5200/httpjson_bitdefender_multiple_event"supports multiple events in one log. The URL is created specifically for Bitdefender to parse one HTTP payload into multiple JSON records because the HTTP payload may contain an array of JSON.
Run the Push Script
Run the modified script from a Linux system with Python 3 installed.
$ python set_push_sensor.py
The output will be similar to:
{'id': 'ad12cb61-52b3-4209-a87a-93a8530d91cb', 'jsonrpc': '2.0', 'result': True}
Verify the Configuration (Optional)
Optionally, use the following sample scripts to verify the setting and data.
-
Modify the following get script to use the same API key and API Endpoint URL you configured in the script above.
Copyget_push_sensor script#!/usr/bin/python3
''' Verify log push Settings after configuring log push to Stellar Cyber Sensor.
Use it for non-EU region
'''
import base64
import requests
import json
import urllib3
urllib3.disable_warnings()
apiKey = "4f19cb...my.api.key.....554d0808921bf783b704d1b4baf03a67583f2483371"
loginString = apiKey + ":"
encodedBytes = base64.b64encode(loginString.encode())
encodedUserPassSequence = str(encodedBytes,'utf-8')
authorizationHeader = "Basic " + encodedUserPassSequence
apiEndpoint_Url = "https://cloud.gravityzone.bitdefender.com/api/v1.0/jsonrpc/push"
request = '{"params": {},"jsonrpc": "2.0","method": "getPushEventSettings","id": "391f7b05-ec02-481b-9ed6-c07b97de2b7b"}'
result = requests.post(apiEndpoint_Url,data=request,verify=False,headers= {"Content-Type":"application/json","Authorization":authorizationHeader})
print(result.json()) -
Run the modified script from a Linux system with Python 3 installed.
$ python get_push_sensor.py
The output will be similar to below. The subscribed event types are enabled with the API options you specified when you created the API key. Verify that the services you want to log are enabled with
True.In the script, the URL:
'url': 'https://public-ip-address-of-my-stellar-cyber-sensor:5200/httpjson', is for the generic JSON parser through HTTP. The HTTP payload will be parsed as one JSON record.authorizationHeader: Basic NGYxOWNiNDk3YjMwNjQzMTQ0NGQ1NTU0ZDA4MDg5MjFiZjc4M2I3MDRkMWI0YmFmMDNhNjc1ODNmMjQ4MzM3MTo=
{'id': '391f7b05-ec02-481b-9ed6-c07b97de2b7b', 'jsonrpc': '2.0', 'result': {'serviceSettings': {'authorization': '********', 'requireValidSslCertificate': False, 'url': 'https://public-ip-address-of-my-stellar-cyber-sensor:5200/httpjson'}, 'serviceType': 'jsonRPC', 'status': 1, 'subscribeToEventTypes': {'adcloud': True, 'antiexploit': True, 'aph': True, 'av': True, 'avc': True, 'dp': True, 'endpoint-moved-in': True, 'endpoint-moved-out': True, 'exchange-malware': True, 'exchange-user-credentials': True, 'fw': True, 'hd': False, 'hwid-change': True, 'install': True, 'modules': True, 'network-monitor': True, 'network-sandboxing': True, 'new-incident': True, 'ransomware-mitigation': True, 'registration': True, 'security-container-update-available': True, 'supa-update-status': True, 'sva': True, 'sva-load': True, 'task-status': True, 'troubleshooting-activity': True, 'uc': True, 'uninstall': True}}}
-
You can also verify the statistics are pushed, with the following script.
The get script uses the same API key and API Endpoint URL you configured in the script above.
Copyget_push_event_stats script#!/usr/bin/python3
import base64
import requests
import json
apiKey = "4f19cb...my.api.key.....554d0808921bf783b704d1b4baf03a67583f2483371"
loginString = apiKey + ":"
encodedBytes = base64.b64encode(loginString.encode())
encodedUserPassSequence = str(encodedBytes,'utf-8')
authorizationHeader = "Basic " + encodedUserPassSequence
print('authorizationHeader', authorizationHeader)
apiEndpoint_Url = "https://cloud.gravityzone.bitdefender.com/api/v1.0/jsonrpc/push"
request = '''
{
"params": {},
"jsonrpc": "2.0",
"method": "getPushEventStats",
"id": "ad12cb61-52b3-4209-a87a-93a8530d91cb"
}
'''
result = requests.post(apiEndpoint_Url,data=request,verify=False,headers= {"Content-Type":"application/json","Authorization":authorizationHeader})
print(result.json()) -
Run the modified script from a Linux system with Python 3 installed.
$ python get_push_event_stats.py
The output will be similar to below.
{
    "id": "ad12cb61-52b3-4209-a87a-93a8530d91cb",
    "jsonrpc": "2.0",
    "result": {
        "count": {
            "errorMessages": 3,
            "events": 22,
            "sentMessages": 10,
            "testEvents": 2
        },
        "error": {
            "configurationError": 0,
            "connectionError": 3,
            "serviceError": 0,
            "statusCode2xx": 0,
            "statusCode300": 0,
            "statusCode400": 0,
            "statusCode500": 0,
            "timeout": 0
        },
        "lastUpdateTime": "2022-09-07T02:31:26"
    }
}
