Launching DL-m and DA-m Instances in GCP
Start the standard deployment of the Stellar Cyber Data Processor by launching separate instances for the DL-m and DA-m using the Stellar Cyber DP images:
Use our example as a guideline, as you might be using a different software version.
-
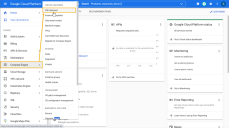
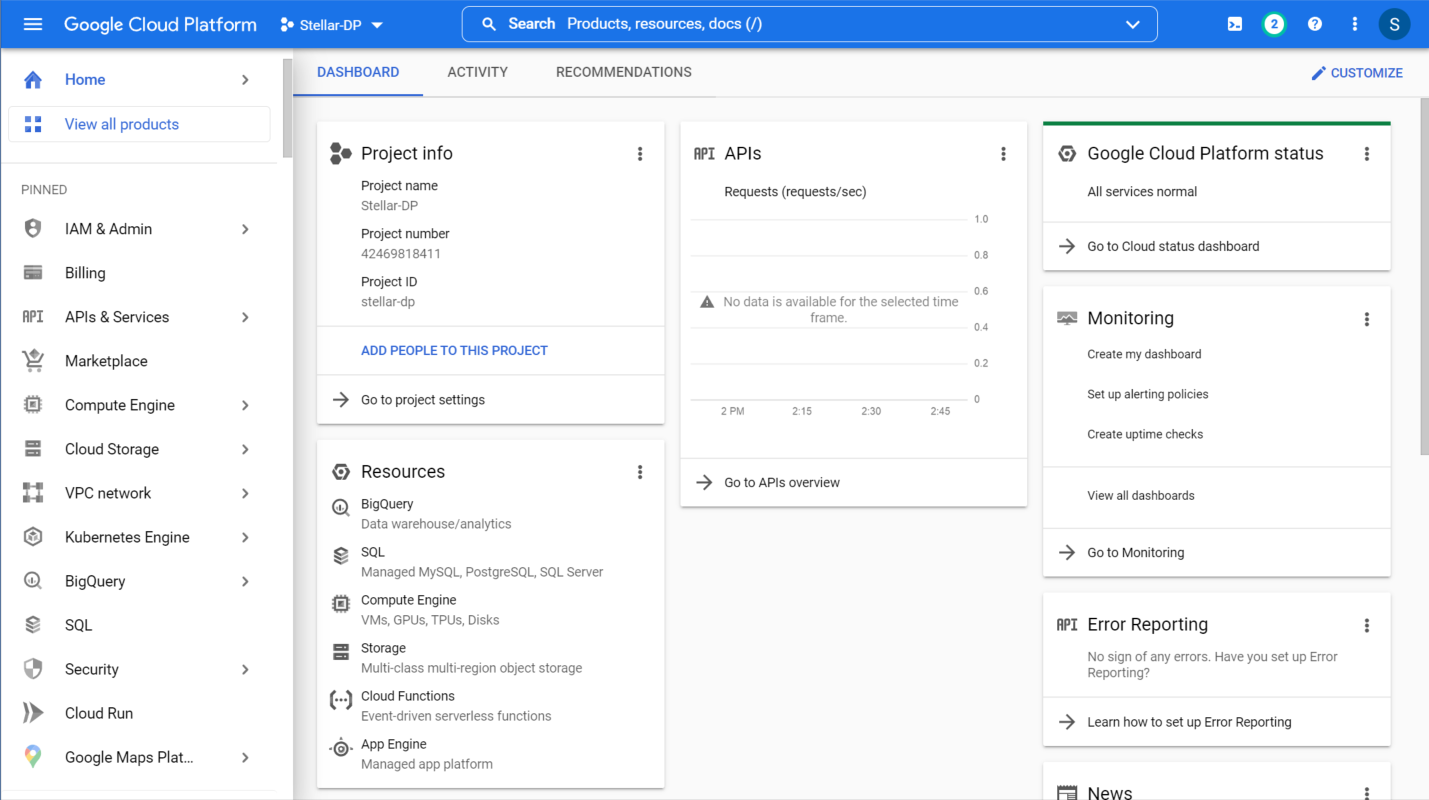
Log in to your Google Cloud Platform Dashboard.

-
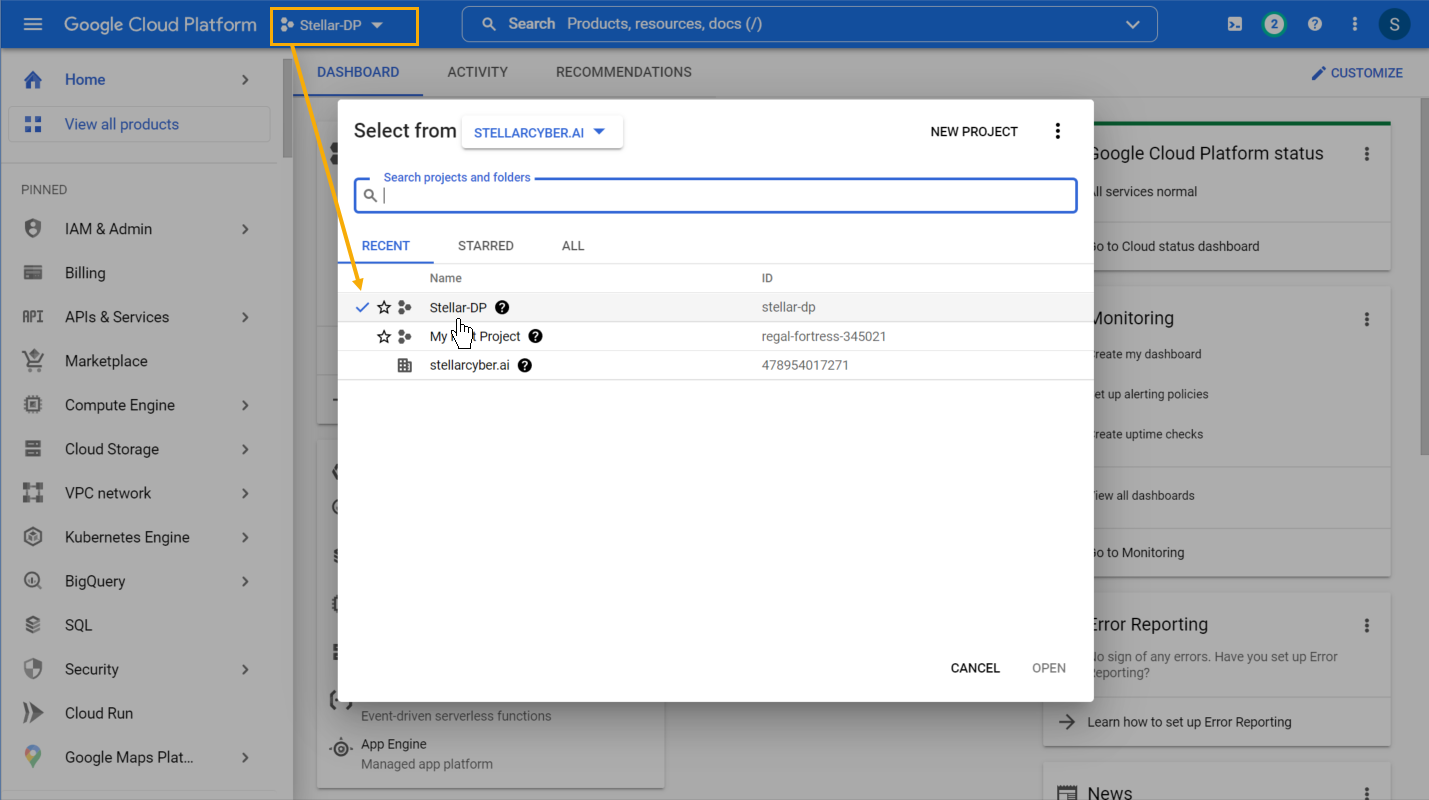
Use the dropdown in the toolbar to select the Project where you want to deploy the DP.

-
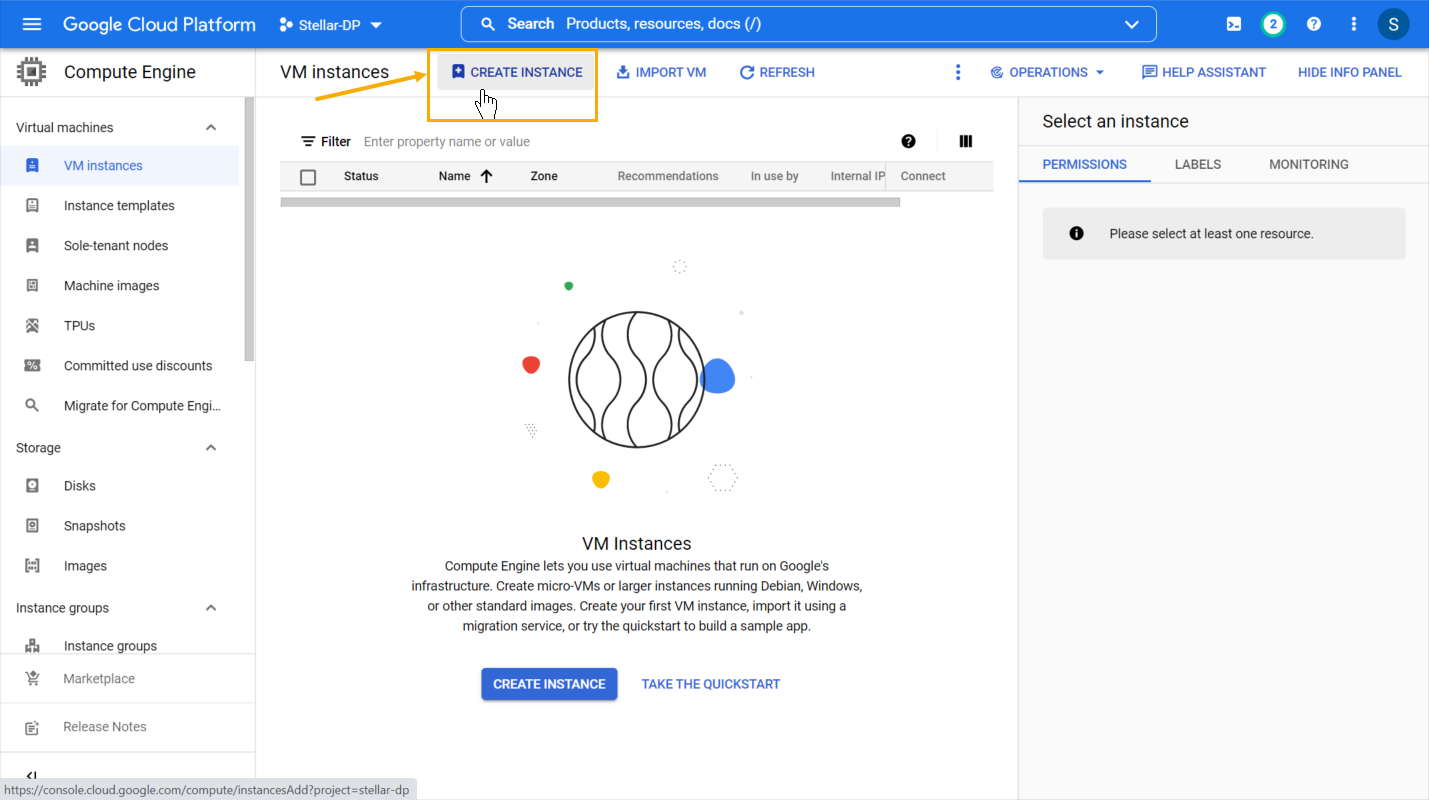
Select the Compute Engine | VM instances entry from the left navigation panel.
-
Click the Create Instance button.

-
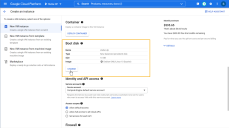
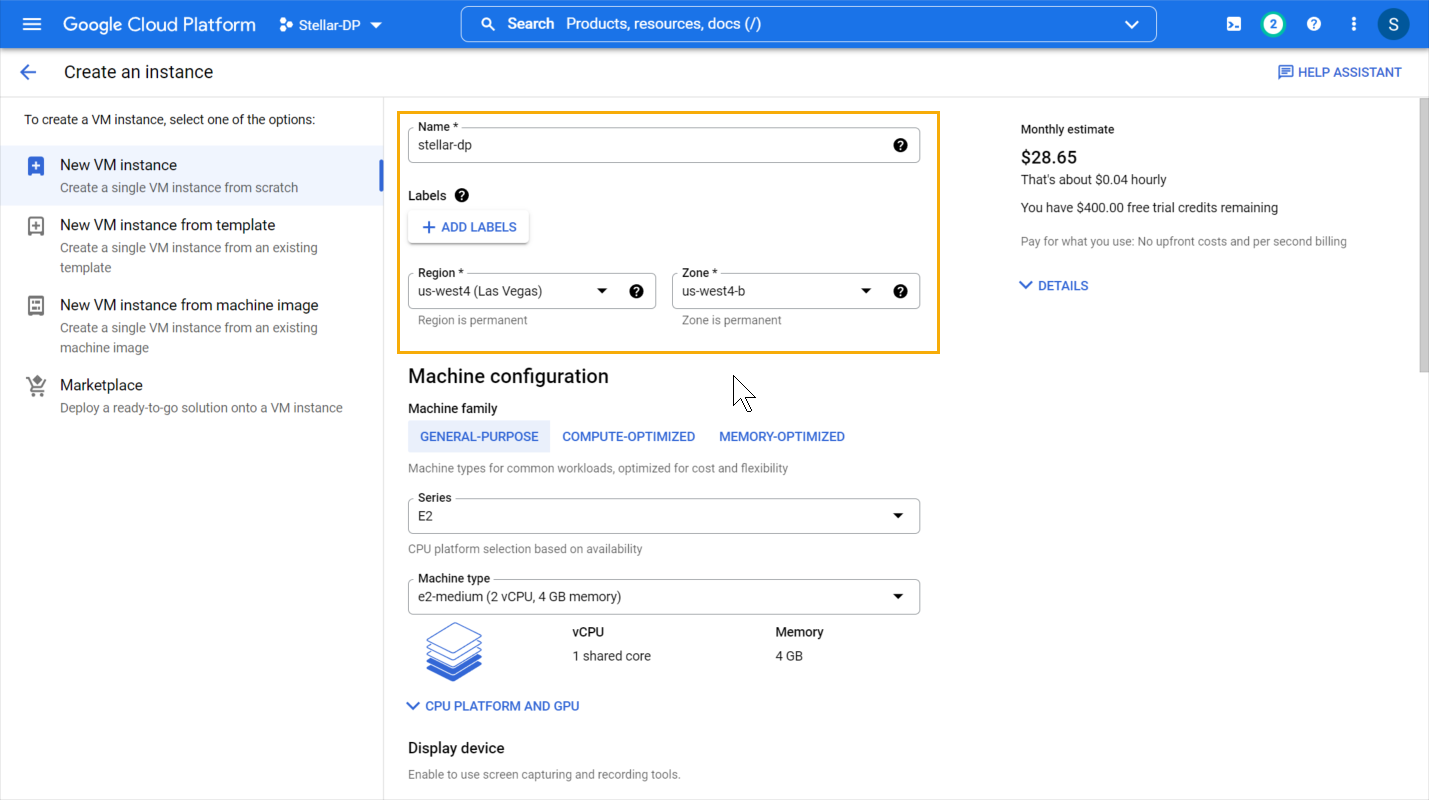
Supply a Name, Region, and Zone for the instance. Make sure you assign a meaningful name to your instance to remind you of its role. For example, dl-master, da-master, dl-worker, and so on.

-
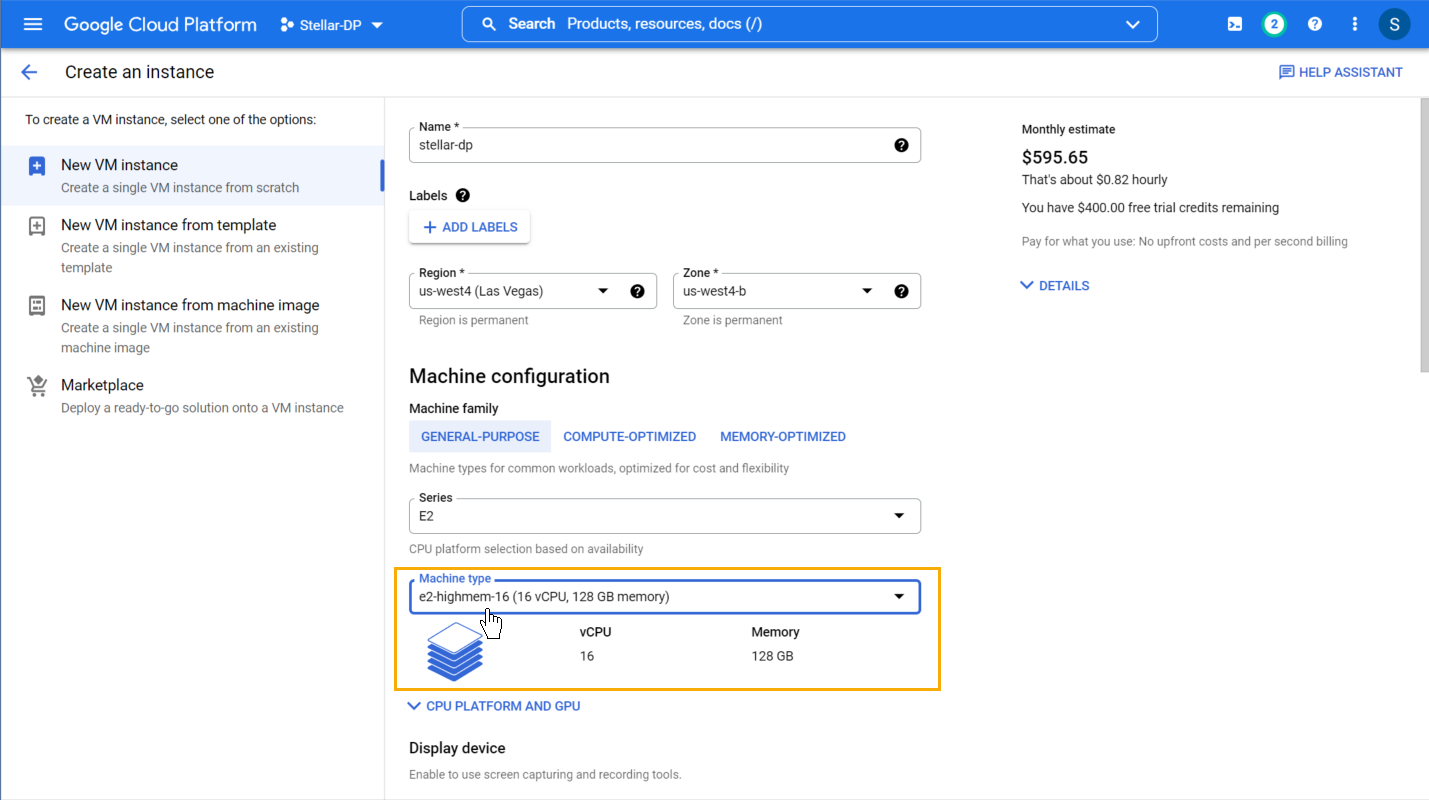
Choose a Machine type for the instance:
-
DL-Master – Choose e2-highmem-16 or better (minimum of 16 CPUs and 128 GB memory)
-
DA-Master – Choose e2-standard-16 or better (minimum of 16 CPUs and 64 GB memory)

-
-
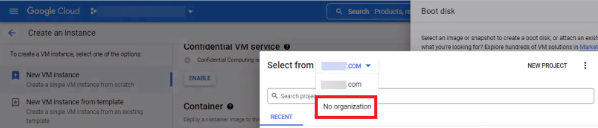
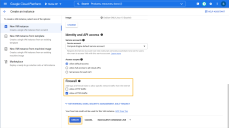
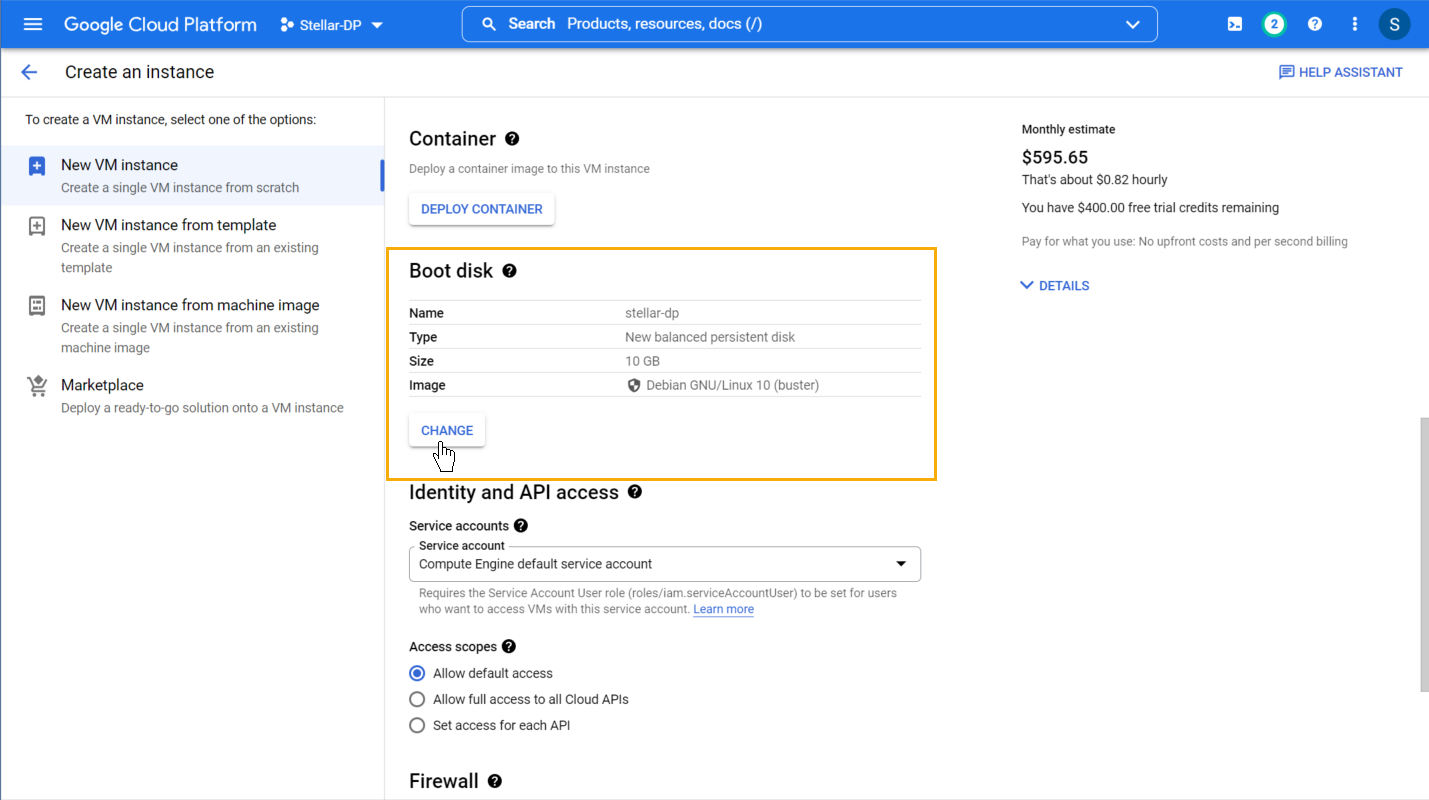
Scroll down to the Boot disk section and click the CHANGE button.
-
Set the Select From dropdown to No Organization.
-
Click on the CUSTOM IMAGES tab.
-
Click the SELECT A PROJECT button and choose the stellar-official-images project.
The stellar-official-images entry won't appear until we've made images available to your account. If you don't see the stellar-official-images entry, make sure your region is the same one where you asked Customer Success to deploy the images. If you still don't see the entry, contact Customer Success.
-
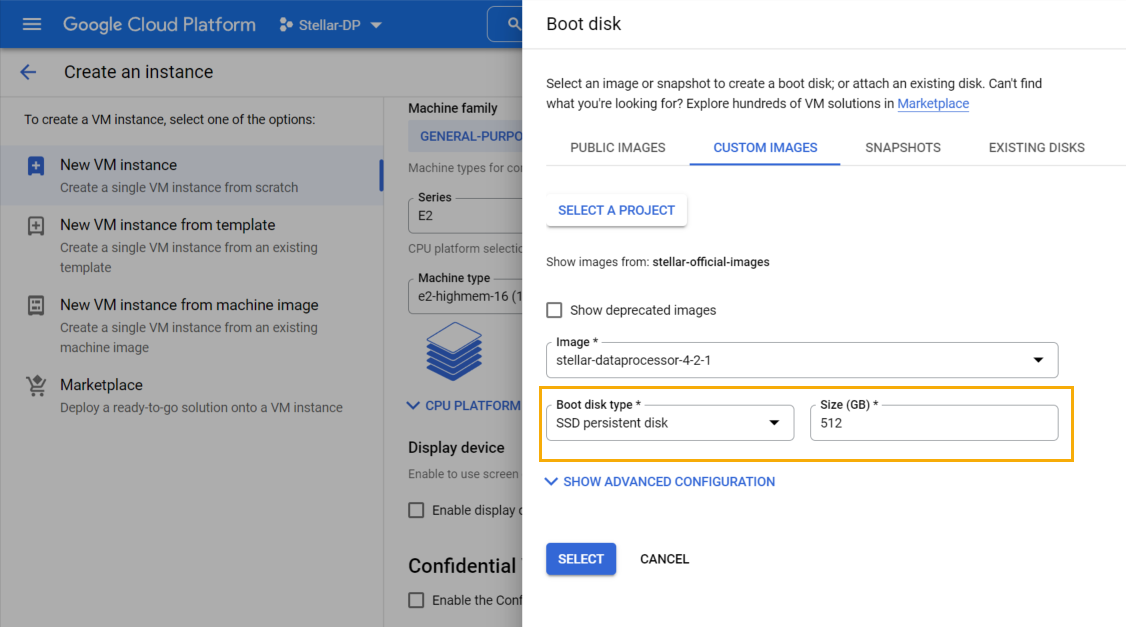
Select the image for the Stellar Cyber DP in the Images dropdown. The DP AMI is named using a stellar-dataprocessor-x-x-x format, where the x-x-x indicates the version number (for example, stellar-dataprocessor-4-2-1).
You use the same DP AMI regardless of whether you are deploying a DL, DA, or worker node. Later on, you'll assign a role in the CLI specifying what the VM actually does.
-
Set the Boot disk type to SSD persistent disk, specify a size of 512 GB, and click Select.
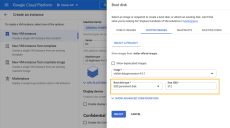
You are returned to the Create an instance wizard.
-
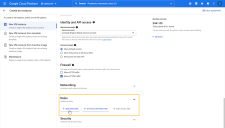
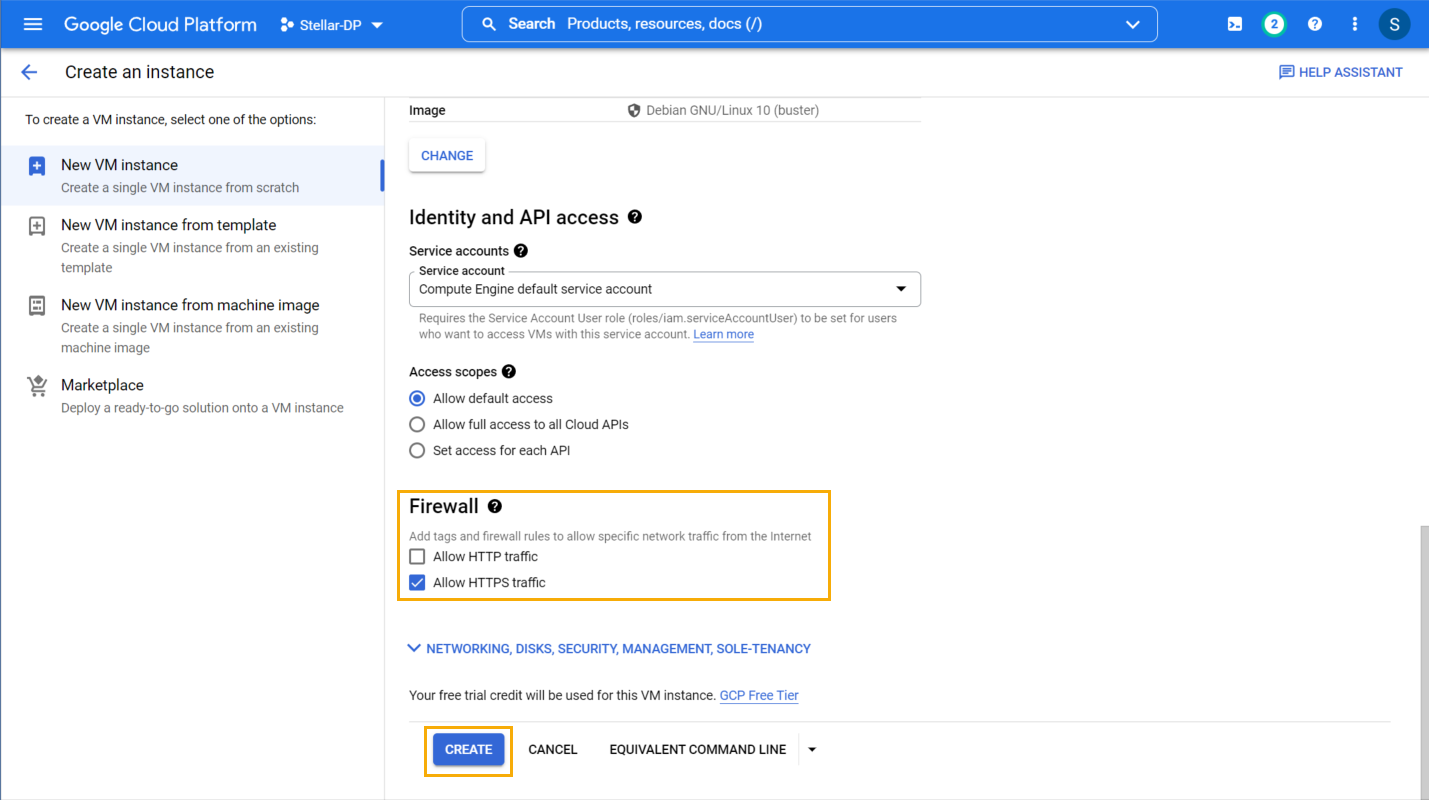
Scroll down to the Firewall section and check the Allow HTTPS traffic box.
-
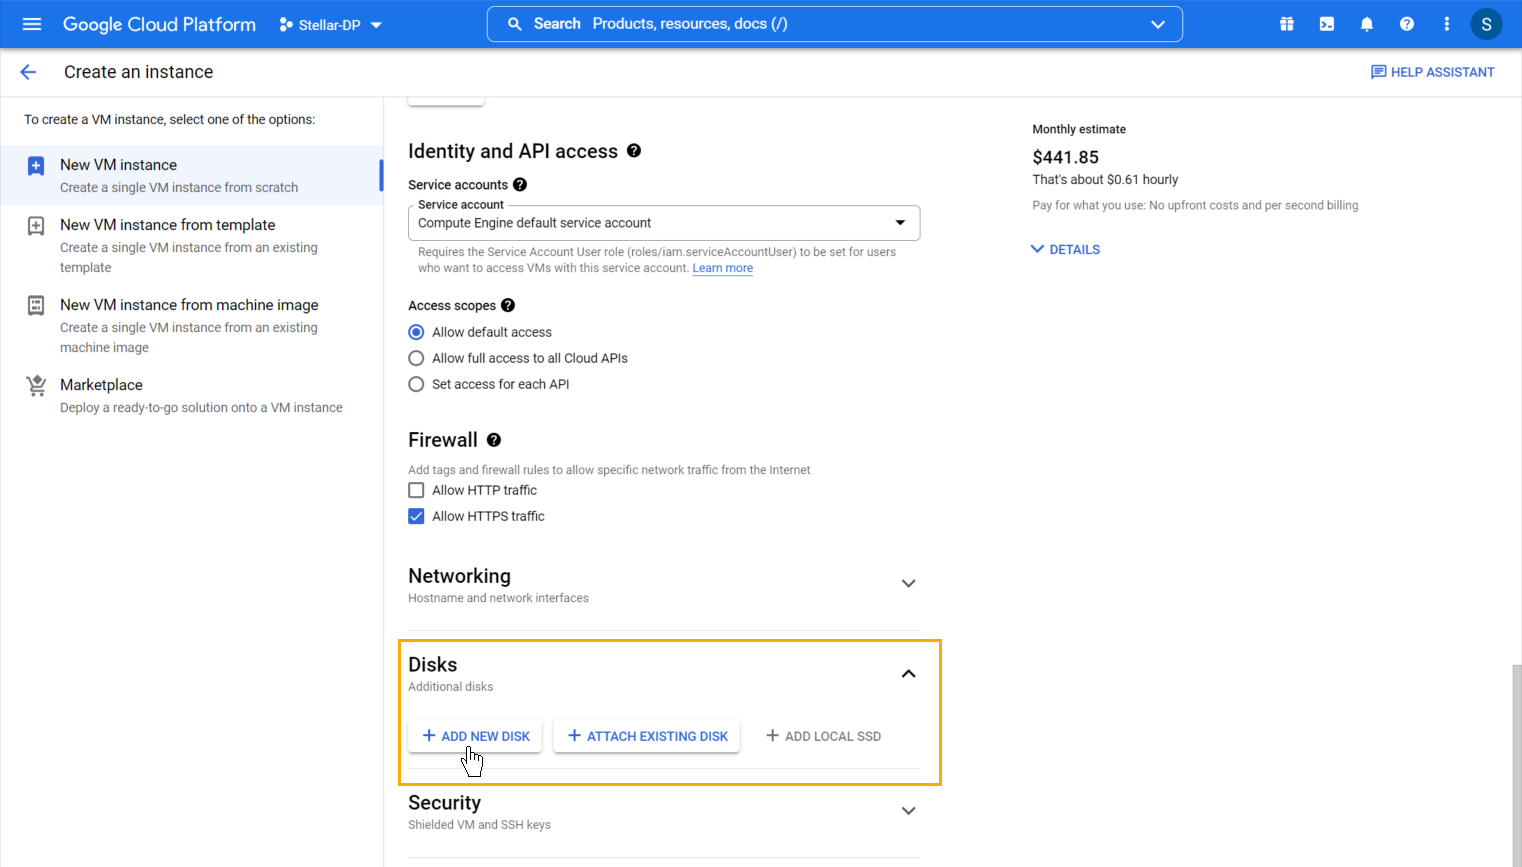
If you are launching a DL-m or DL-worker node, add a second storage disk as follows:
-
Scroll down to the NETWORKING, DISKS, SECURITY, MANAGEMENT, SOLE-TENANCY entry and cascade it open.
-
Scroll down to the Disks section, cascade it open, and click the Add New Disk button.
-
Supply a Name for the disk.
-
Set Disk type to SSD persistent disk.
-
Set the Size to between 1024 and 2048.
-
Leave the other settings at their defaults and click Save to return to the Create an instance wizard.
-
-
Click the Create button to create the instance.
You can launch the image but you cannot copy it. This means that the VM must be deployed in the GCP region where the image was authorized.
-
The VM is now running in the GCP cloud and can be seen in the Compute Engine | VM instances list.
-
Repeat this procedure for the DA-m VM.


The DL-m and DA-m VMs are now running in the GCP cloud. The next step is to configure them in their respective CLIs.
