Configuring Cisco Firewall Management Center (FMC) Connectors 
This connector allows you to Block an IP using an API call to the Cisco FMC (formerly Firepower Management Center) firewall you configure below.
Connector Overview: Cisco FMC
Capabilities
-
Collect: No
-
Respond: Yes
-
Native Alerts Mapped: No
-
Runs on: DP
-
Interval: N/A
Collected Data
N/A
Domain
|
https://<Device IP Address> where <Device IP Address> is a variable from the configuration of this connector |
Response Actions
|
Action |
Required Fields |
|---|---|
|
|
Third Party Native Alert Integration Details
N/A
Required Credentials
-
User Name and Password for API access
-
Device IP Address: This is the Cisco FMC IP address
-
Source IP Group, Destination IP Group (are required for the API but can be empty)
-
A Cisco FMC policy to block an IP address, a source IP group rule, and a destination IP group rule
-
Cisco FMC must be enabled for API access
Let us know if you find the above overview useful.
Adding a Cisco FMC Connector
To add a Cisco FMC connector:
Configuring Cisco FMC and Obtaining Credentials
-
Follow guidance on the FMC website to enable API functionality for the firewall.
-
Make note of the host IP address for your Cisco FMC instance. This is used as the Device IP Address during configuration.
-
Create a user for use with the API:
-
Log into the Cisco FMC console as an administrative user.
Do not use an administrator user for your connector configuration.
-
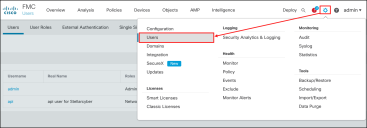
Display the Settings menu and select the option for Users.
-
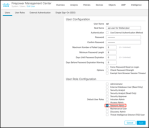
From the Users screen, click Create User.
-
In the dialog that displays, configure a user for use with Stellar Cyber that has at least the Network Admin role.
Do not create the user with administrative privileges.
-
Make note of the User Name and Password that you create.
-
Click Save.
-
-
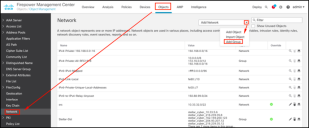
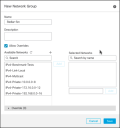
Create a Source IP Network Group for use with Stellar Cyber.
-
Repeat the previous steps to create a Destination IP Network Group.
-
Configure a policy to block the IP address.
-
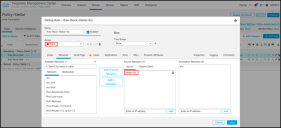
Add a rule to block the source IP group.
-
Enter a rule name and select Enabled.
-
Select Block from the Action dropdown.
-
For the Source Networks, select the Source IP Network Group for use with Stellar Cyber from the Available Networks and click Add to Source Networks.
-
For the Destination Networks, select any from the Available Networks and click Add to Destination.
-
Click Save.
-
-
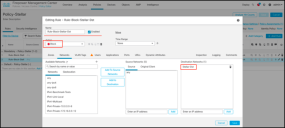
Add a rule to block the destination IP group.
-
Enter a rule name and select Enabled.
-
Select Block from the Action dropdown.
-
For the Source Networks, select any from the Available Networks and click Add to Source Networks.
- For the Destination Networks, select the Destination IP Network Group for use with Stellar Cyber from the Available Networks and click Add to Destination.
-
Click Save.
-
You can view the policy and the rules as follows:
-
-
You should have the following information ready to configure your connector:
-
User Name and Password
-
Device IP Address
-
Source IP Group
-
Destination IP Group
-
Cisco FMC must be enabled for API access
-
Adding the Connector in Stellar Cyber
With the access information handy, you can add a Cisco FMC connector in Stellar Cyber:
-
Log in to Stellar Cyber.
-
Click System | Integration | Connectors. The Connector Overview appears.
-
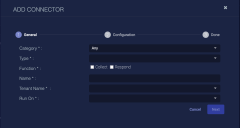
Click Create. The General tab of the Add Connector screen appears. The information on this tab cannot be changed after you add the connector.
The asterisk (*) indicates a required field.
-
Choose Firewall from the Category drop-down.
-
Choose Cisco FMC from the Type drop-down.
-
For this connector, the supported Function is Respond, which is enabled already.
-
Enter a Name.
This field does not accept multibyte characters.
-
Choose a Tenant Name. This identifies which tenant is allowed to use the connector.
-
Choose the device on which to run the connector.
-
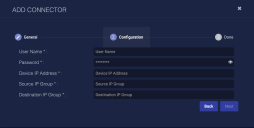
Click Next. The Configuration tab appears.
The asterisk (*) indicates a required field.
-
Using the data you collected in the previous section, complete the following fields:
-
User Name
-
Password
-
Device IP Address
-
Source IP Group
-
Destination IP Group
-
-
Click Next. The final confirmation tab appears.
-
Click Submit.
The new connector is immediately active.
Testing the Connector
When you add (or edit) a connector, we recommend that you run a test to validate the connectivity parameters you entered. (The test validates only the authentication / connectivity; it does not validate data flow).
For connectors running on a sensor, Stellar Cyber recommends that you allow 30-60 seconds for new or modified configuration details to be propagated to the sensor before performing a test.
-
Click System | Integrations | Connectors. The Connector Overview appears.
-
Locate the connector that you added, or modified, or that you want to test.
-
Click Test at the right side of that row. The test runs immediately.
Note that you may run only one test at a time.
Stellar Cyber conducts a basic connectivity test for the connector and reports a success or failure result. A successful test indicates that you entered all of the connector information correctly.
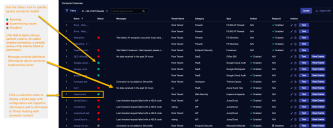
To aid troubleshooting your connector, the dialog remains open until you explicitly close it by using the X button. If the test fails, you can select the button from the same row to review and correct issues.
The connector status is updated every five (5) minutes. A successful test clears the connector status, but if issues persist, the status reverts to failed after a minute.
Repeat the test as needed.

