Configuring Cisco Meraki Firewall Connectors
You can connect Stellar Cyber to firewalls so that you can quickly and easily implement firewall rules on those firewalls from within Stellar Cyber, while you are threat hunting. You can configure firewall actions or manually trigger a firewall action from the event display. With a Cisco Meraki firewall connector configured, you can create a Stellar Cyber rule to automatically or manually block on that firewall.
Connector Overview: Cisco Meraki Firewall
Capabilities
-
Collect: No
-
Respond: Yes
-
Native Alerts Mapped: No
-
Runs on: DP
-
Interval: N/A
Collected Data
N/A
Domain
|
https://api.meraki.com/api/v1 |
Response Actions
|
Action |
Required Fields |
|---|---|
|
|
Third Party Native Alert Integration Details
N/A
Required Credentials
-
API Key, Organization Name, Network or Template Name
Let us know if you find the above overview useful.
Adding a Cisco Meraki Firewall Connector
To add a Cisco Meraki firewall connector:
Enabling API Access
Other than having your firewall rules enabled, you will need to obtain the following three things from your Cisco Meraki account:
-
API Key
-
Organization Name
-
Network Name
To obtain the information:
-
Access the Cisco Meraki Dashboard as a user with administrative privileges.
-
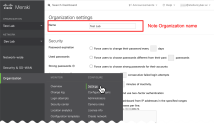
Select your Organization from the navigation menu on the left side of the dashboard. Then select Organization>Settings, below that.
-
When the right pane refreshes to display the Settings, make note of Organization Name located at the top of the pane.
-
Next, scroll down the page to API Access and ensure the corresponding checkbox is enabled.
-
From the top right of the page, click your user name and then select My Profile.
-
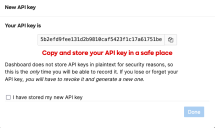
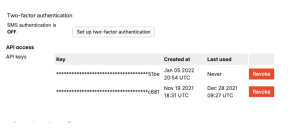
When your account details display, scroll to the API Access block and click, the button to Generate a new API key.
-
Make note of that key as you will not be able to view it later, then check the note box and click Done.
-
Now, use the navigation pane to display your organization's networks. You will need either the Name or Template Name of each network for which you want to create a connector:
-
If the network is NOT bound to any template, use the Network Name when you add the connector in Stellar Cyber.
-
If the network IS bound to a template, use the Template Name when you add the connector in Stellar Cyber.
As described below, using the correct type of name for your configuration ensures that Block IP and Revert actions work correctly.
If you want to use more than one network, you can create multiple connector instances with one for each network or template name.
-
After you obtain this information, you can proceed to configuring the connector in Stellar Cyber. Based on the examples above, you should now have:
-
API Key: 5b2efd9fee131d2b9810caf5423f1c17a61751be
-
Organization Name: Test Lab
-
Network Name: Stellar-Meraki-MX64
Adding the Connector in Stellar Cyber
To add a new Meraki firewall connector in Stellar Cyber:
-
Log in to Stellar Cyber.
-
Click System | Integration | Connectors. The Connector Overview appears.
-
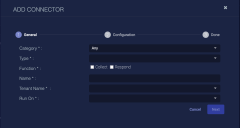
Click Create. The General tab of the Add Connector screen appears. The information on this tab cannot be changed after you add the connector.
The asterisk (*) indicates a required field.
-
Choose Firewall from the Category drop-down.
-
Choose Cisco Meraki Firewall from the Type drop-down.
-
For this connector, the supported Function is Respond, which is enabled already.
-
Enter a Name.
This field does not accept multibyte characters.
-
Choose a Tenant Name. The Interflow records created by this connector include this tenant name.
-
Choose the device on which to run the connector.
-
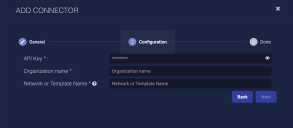
Click Next. The Configuration tab appears.
The asterisk (*) indicates a required field.
-
Enter the API Key to access the firewall.
-
Enter the Organization Name you noted earlier.
-
Enter the Network Name or Network Template Name
 you noted earlier.
You can specify either a network name or a network template name. Keep in mind that if the network is bound to a template, you must use the template name in order for the Block IP and Revert actions to work correctly. The Test button still works correctly if you use the network name for a network that is bound to a template, but the actions only work correctly if you use the template name. This is summarized in the table below.
Meraki Firewall Name Configuration
Added in Stellar Cyber Using...
Supported Operations
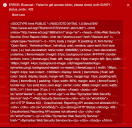
Network Name, no template Network Name Test button, Block IP, and Revert actions all work correctly. Network Name, bound to template Template Name Test button, Block IP, and Revert actions all work correctly. Network Name, bound to template Network Name Test button works but Block IP does not work correctly. Fails with error message similar to the following: " {"errors":["Cannot override L3 firewall rules on a network bound to a template - the firewall rules are inherited from the template"]}." -
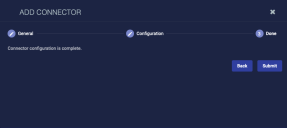
Click Next. The final confirmation tab appears.
-
Click Submit.
The new firewall connector is immediately active.
Testing the Connector
When you add (or edit) a connector, we recommend that you run a test to validate the connectivity parameters you entered. (The test validates only the authentication / connectivity; it does not validate data flow).
For connectors running on a sensor, Stellar Cyber recommends that you allow 30-60 seconds for new or modified configuration details to be propagated to the sensor before performing a test.
-
Click System | Integrations | Connectors. The Connector Overview appears.
-
Locate the connector that you added, or modified, or that you want to test.
-
Click Test at the right side of that row. The test runs immediately.
Note that you may run only one test at a time.
Stellar Cyber conducts a basic connectivity test for the connector and reports a success or failure result. A successful test indicates that you entered all of the connector information correctly.
To aid troubleshooting your connector, the dialog remains open until you explicitly close it by using the X button. If the test fails, you can select the button from the same row to review and correct issues.
The connector status is updated every five (5) minutes. A successful test clears the connector status, but if issues persist, the status reverts to failed after a minute.
Repeat the test as needed.
