Configuring Generic S3 Connectors
This connector allows Stellar Cyber to pull data sent to S3 and add the records to the data lake.
The Generic S3 connector uses Amazon Simple Queue Service (SQS) queues and S3 buckets to pull data. The SQS queue gets information about newly added S3 objects. Stellar Cyber reads from the queue to get information about the S3 bucket and key for the newly added files. When there is a new upload, notifications are sent to the SQS queue URL.
This is a generic S3 connector that can support a wide-range of data sources. Sample sources are included with this connector but new sources can also be added. This requires some additional information to be configured and uploaded for each new source from which you want to pull data. Contact Stellar Cyber Customer Support to assist with this.
Connector Overview: Generic S3
Capabilities
-
Collect: Yes
-
Respond: No
-
Native Alerts Mapped: No
-
Runs on: DP
-
Interval: 5 minutes (if there is no data) or, reads notifications from the SQS queue (if there is data)
Collected Data
|
Content Type |
Index |
Locating Records |
|---|---|---|
|
N/A (collects all data in the provided SQS Queue URL) |
Syslog (for CrowdStrike (JSON), Generic (JSON), Proofpoint (JSON), and Teleport (JSON)) |
Domain
<SQS Queue URL>
where <SQS Queue URL> is a variable from the configuration of this connector
Response Actions
N/A
Third Party Native Alert Integration Details
N/A
Required Credentials
-
Access Key ID, Secret Access Key, SQS Queue URL
Let us know if you find the above overview useful.
Adding a Generic S3 Connector
To add a Generic S3 connector:
Obtaining Credentials
To obtain the required credentials, refer to the following sections:
Permissions
You need the following permissions to create the SQS queue:
-
s3:GetBucketNotification
-
s3:PutBucketNotification
-
sqs:CreateQueue
-
sqs:DeleteQueue
-
sqs:GetQueueAttributes
-
sqs:GetQueueUrl
-
sqs:SetQueueAttributes
You also need the following permissions to perform actions:
-
iam:CreateRole
-
iam:DeleteRolePolicy
-
iam:GetRole
-
iam:PutRolePolicy
Prerequisites
The prerequisite for the following procedure is that you are already sending data to an S3 bucket.
The S3 bucket is limited to data from only one log source.
Configuring the Bucket for Notifications (SQS Queue)
The procedures in this document are for an S3 bucket and SQS queue that are created in the same AWS account.
Have the following information handy:
-
AWS account ID
-
S3 bucket name
In this procedure you create an SQS queue, attach an access policy to the queue, and add a notification configuration to the bucket.
Configure only one SQS queue URL per S3 bucket.
-
Log in to the Amazon SQS console at https://console.aws.amazon.com/sqs/.
-
In the navigation pane, choose Queues.
-
Click Create queue.
-
For Type, the Standard queue type is set by default.
-
Enter a Name for your queue.
-
For Server-side encryption, Enabled is set by default.
-
For Encryption key type, Amazon SQS key (SSE-SQS) is set by default.
-
Click Create queue.
-
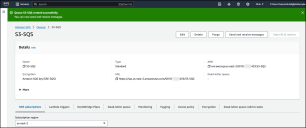
Note the URL. This is the SQS Queue URL, which you will need when configuring the connector in Stellar Cyber.
-
Note the ARN. This is the SQS-queue-ARN, which you will need when configuring the access policy in the following step.
-
-
Replace the access policy attached to the queue:
-
In the Amazon SQS console, in the Queues list, select the queue name.
-
Click Edit.
-
Replace the access policy attached to the queue. Provide the following:
-
Amazon SQS ARN you noted above for the <SQS-queue-ARN>
-
your source S3 bucket name for <awsexamplebucket1>
-
your AWS account ID for <bucket-owner-account-id>
Copy{
"Version": "2012-10-17",
"Id": "example-ID",
"Statement": [
{
"Sid": "example-statement-ID",
"Effect": "Allow",
"Principal": {
"Service": "s3.amazonaws.com"
},
"Action": [
"SQS:SendMessage"
],
"Resource": "<SQS-queue-ARN>",
"Condition": {
"ArnLike": {
"aws:SourceArn": "arn:aws:s3:*:*:<awsexamplebucket1>"
},
"StringEquals": {
"aws:SourceAccount": "<bucket-owner-account-id>"
}
}
}
]
} -
-
Click Save.
-
-
Add a notification configuration to your bucket.
-
In the Amazon S3 Buckets console, locate your S3 bucket.
-
Double-click your bucket name.
-
Click the Properties tab.
-
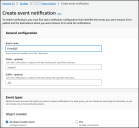
Scroll down to Event notifications and click Create event notification.
-
Enter an Event name.
-
For Event types, select All object create events.
-
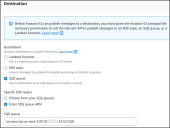
Scroll down to Destination:
-
For Destination, select SQS queue.
-
For Specify SQS queue, select Enter SQS queue ARN.
-
For SQS queue, enter the ARN.
-
-
Click Save changes.
-
Adding an AWS User for Stellar Cyber
Create an IAM user in the same AWS account as the SQS queue. You will need the SQS-queue-ARN you noted above for the policy.
Use our example as a guideline, as you might be using a different software version.
To add a user with the appropriate permissions:
-
Log in to your AWS Management Console at https://aws.amazon.com/console. View the services in the Console Home or choose View all services.
-
Choose IAM. The IAM Dashboard appears.
-
Choose Policies and then choose Create Policy.
-
In the Create policy pane, choose the JSON tab.
-
Using the example below as a guide, edit the JSON policy document.
The following is just an EXAMPLE. You must modify this JSON to match the resources in your own environment.
CopyGeneric S3 policy{
"Version": "2012-10-17",
"Statement": [
{
"Sid": "VisualEditor0",
"Effect": "Allow",
"Action": [
"sqs:DeleteMessage",
"sqs:ReceiveMessage"
],
"Resource": "arn:aws:sqs:<aws-region:account-id:queue-name>"
}
]
} -
Choose Next.
-
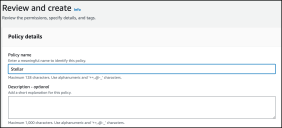
Give your policy a name to associate it with Stellar Cyber, then choose Create policy.
The policy can now be attached to a user.
-
From the IAM navigation pane, choose Users and then choose Create user.
-
In the Specify user details page for User details, enter a User name for the new user.
-
Choose Provide user access to the – AWS Management Console optional to produce login credentials for the new user, such as a password.
-
Choose how you want to create the Console password and then choose Next.
-
For Set permissions, choose Attach policies directly. Then search for the policy you created above.
-
Select the checkbox to the left of the policy name, then choose Next.
-
Verify the information and then choose Create user.
Obtaining the Access Key ID and Secret Access Key
To obtain the access key ID and secret access key:
-
Log in to the IAM Console with your AWS account ID, your IAM user name, and password. You must have the permissions required to create access keys for a user.
-
Choose Users, then choose the user name, and click Security credentials.
-
In the Access keys section, choose Create access key. Access keys have two parts: an access key ID and a secret access key. Click Create access key.
-
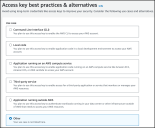
On the Access key best practices & alternatives page, choose Other and then choose Next.
-
Click Create access key.
-
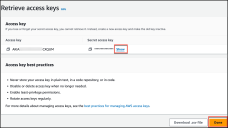
On the Retrieve access keys page, choose Show to reveal the value of the user's secret access key. Save the access key ID and secret access key in a secure location. You will need them when configuring the connector in Stellar Cyber.
-
Click Done.
Adding the Connector in Stellar Cyber
With the access information handy, you can add a Generic S3 connector in Stellar Cyber:
-
Log in to Stellar Cyber.
-
Click System | Integration | Connectors. The Connector Overview appears.
-
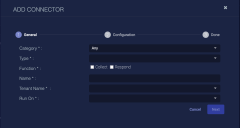
Click Create. The General tab of the Add Connector screen appears. The information on this tab cannot be changed after you add the connector.
The asterisk (*) indicates a required field.
-
Choose PaaS from the Category drop-down.
-
Choose Generic S3 from the Type drop-down.
-
For this connector, the supported Function is Collect, which is enabled already.
-
Enter a Name.
This field does not accept multibyte characters.
-
Choose a Tenant Name. This identifies which tenant is allowed to use the connector.
-
Choose the device on which to run the connector.
-
(Optional) When the Function is Collect, you can create Log Filters. For information, see Managing Log Filters.

-
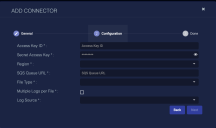
Click Next. The Configuration tab appears.
The asterisk (*) indicates a required field.
-
Enter the Access Key ID you noted above in Obtaining the Access Key ID and Secret Access Key.
-
Enter the Secret Access Key you noted above in Obtaining the Access Key ID and Secret Access Key.
-
Choose the Region from the available AWS regions in the drop-down.
-
Enter the SQS Queue URL you noted above. It has the following format:
https://<aws-region>.amazonaws.com/<account-id>/<queue-name>
-
Choose the File Type. This refers to the specific data within the S3 object. The supported file types are gzip and text. The only supported format is JSON. For example, if the File Type is text, the file must contain a properly formatted JSON object.
-
(Optional) If the specified File Type contains multiple JSON objects in the file, select the Multiple Logs per File checkbox. For example, if there are multiple JSON objects in the file, one per line, with each line being a single JSON object, then select this checkbox. Your file contents will look like this:
Do not select this checkbox if there is only a single JSON object in the file and your file contents looks like this:
-
Choose the Log Source. The supported log sources are CrowdStrike (JSON), Generic (JSON), Proofpoint (JSON), and Teleport (JSON). Only one log source can be configured per connector.
In addition, there may be other Log Sources listed in this drop-down menu. Contact the Stellar Cyber Customer Support team if you have a log source you want added.
-
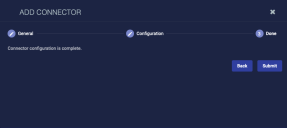
Click Next. The final confirmation tab appears.
-
Click Submit.
To pull data, a connector must be added to a Data Analyzer profile if it is running on the Data Processor.
The new connector is immediately active.
Testing the Connector
When you add (or edit) a connector, we recommend that you run a test to validate the connectivity parameters you entered. (The test validates only the authentication / connectivity; it does not validate data flow).
For connectors running on a sensor, Stellar Cyber recommends that you allow 30-60 seconds for new or modified configuration details to be propagated to the sensor before performing a test.
-
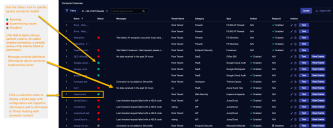
Click System | Integrations | Connectors. The Connector Overview appears.
-
Locate the connector that you added, or modified, or that you want to test.
-
Click Test at the right side of that row. The test runs immediately.
Note that you may run only one test at a time.
Stellar Cyber conducts a basic connectivity test for the connector and reports a success or failure result. A successful test indicates that you entered all of the connector information correctly.
To aid troubleshooting your connector, the dialog remains open until you explicitly close it by using the X button. If the test fails, you can select the button from the same row to review and correct issues.
The connector status is updated every five (5) minutes. A successful test clears the connector status, but if issues persist, the status reverts to failed after a minute.
Repeat the test as needed.
Verifying Ingestion
To verify ingestion:
- Click Investigate | Threat Hunting. The Interflow Search tab appears.
- Change the Indices to Syslog. The table immediately updates to show ingested Interflow records.
