Azure AD B2C SSO: Prepare Details for Policy / Key Configuration
The steps in this section are critical to perform first. Here, you obtain and note details for configuring the polices in the next section. You must also prepare the environment with certain keys and applications before you do that configuration.
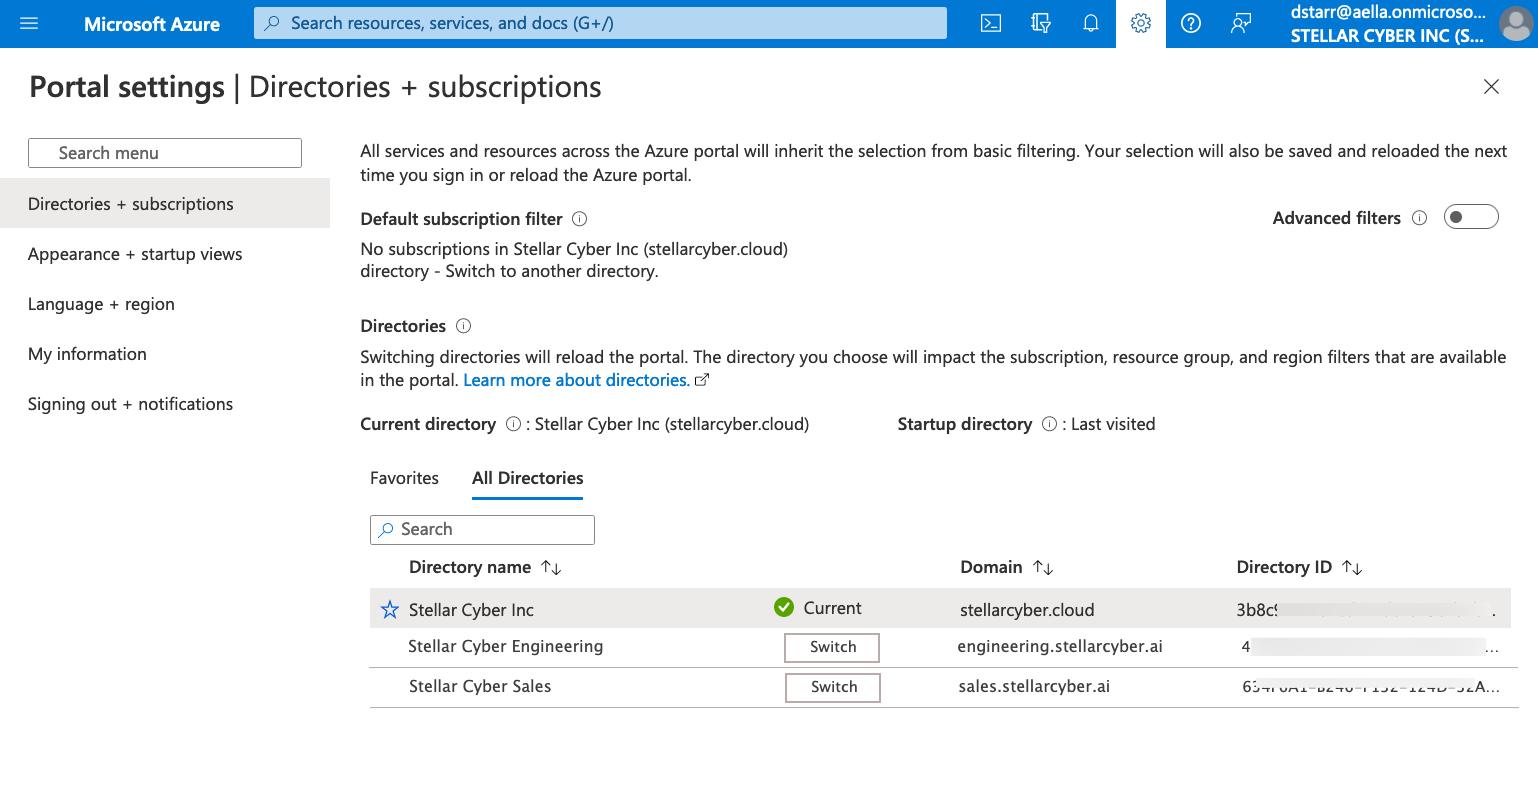
If you stop and return to any of the procedures in this configuration process, ensure that you switch to the correct directory before you continue so that you are working on the correct Azure AD B2C Tenant container.
- Before You Begin
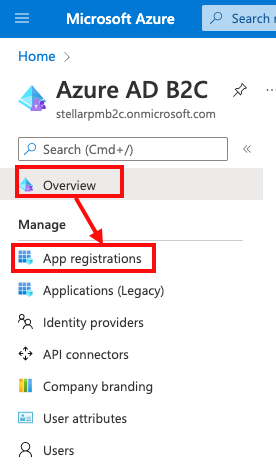
- Set Azure AD B2C Directory & Obtain Tenant ID / Domain Name
- Create Azure AD B2C Signing and Encryption Keys
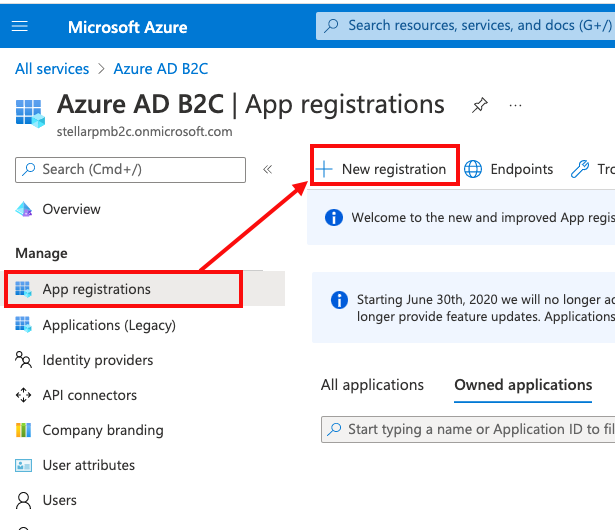
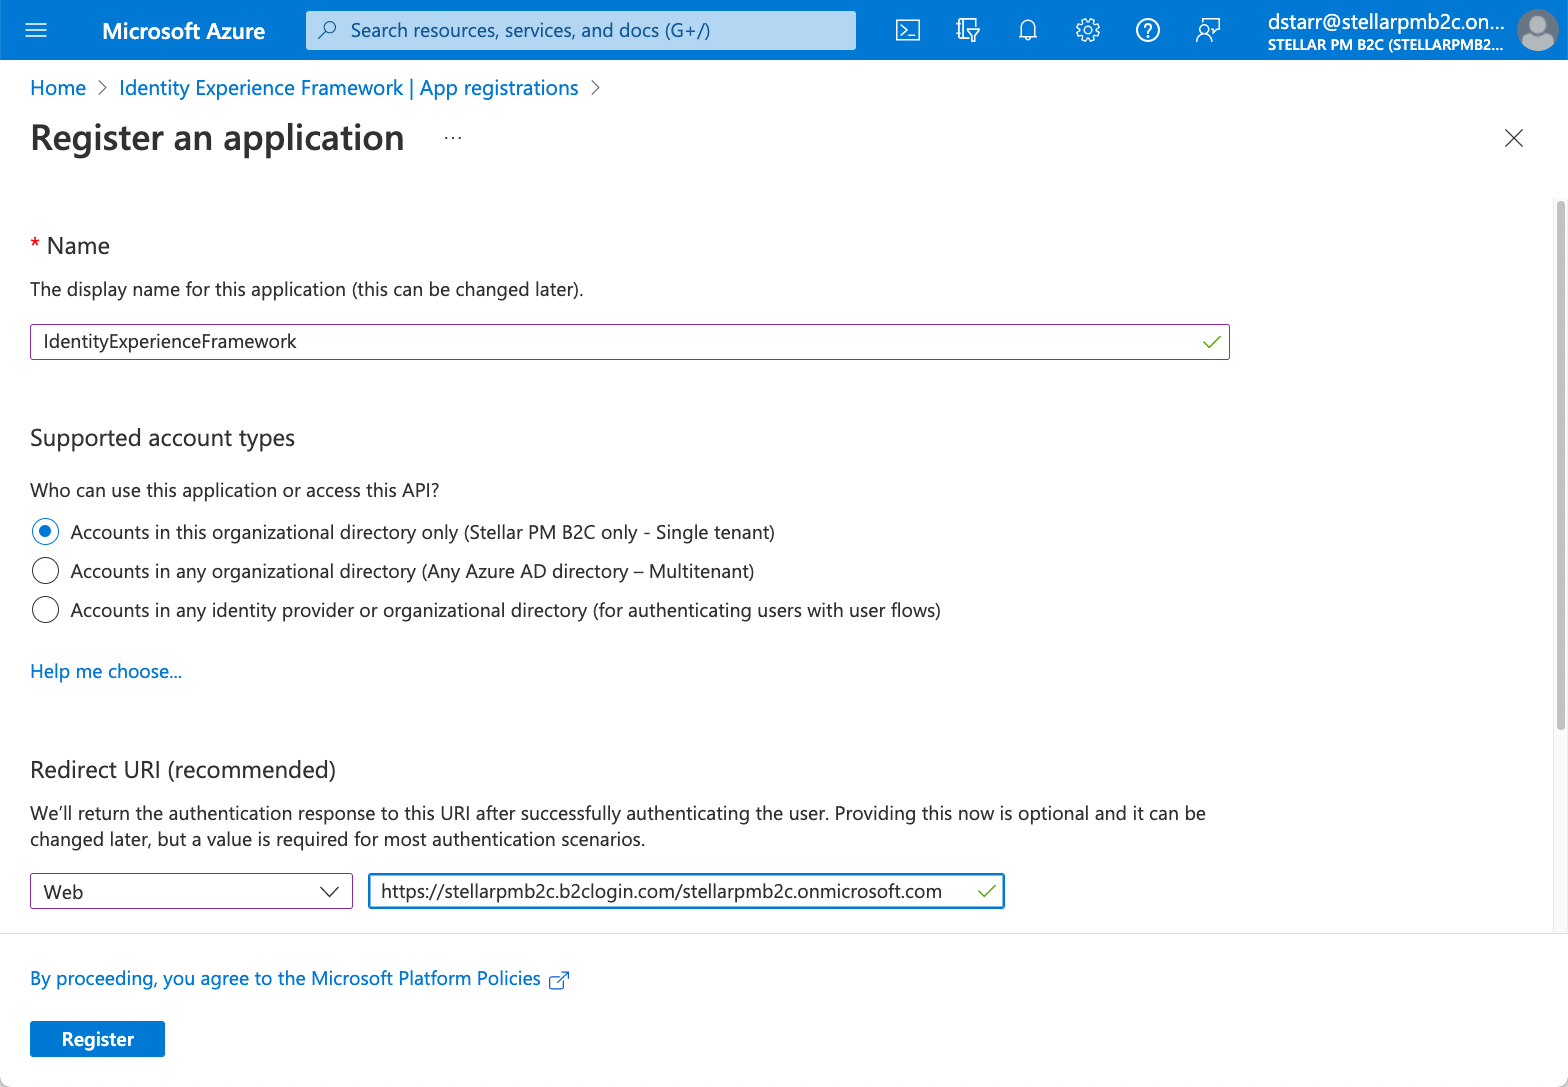
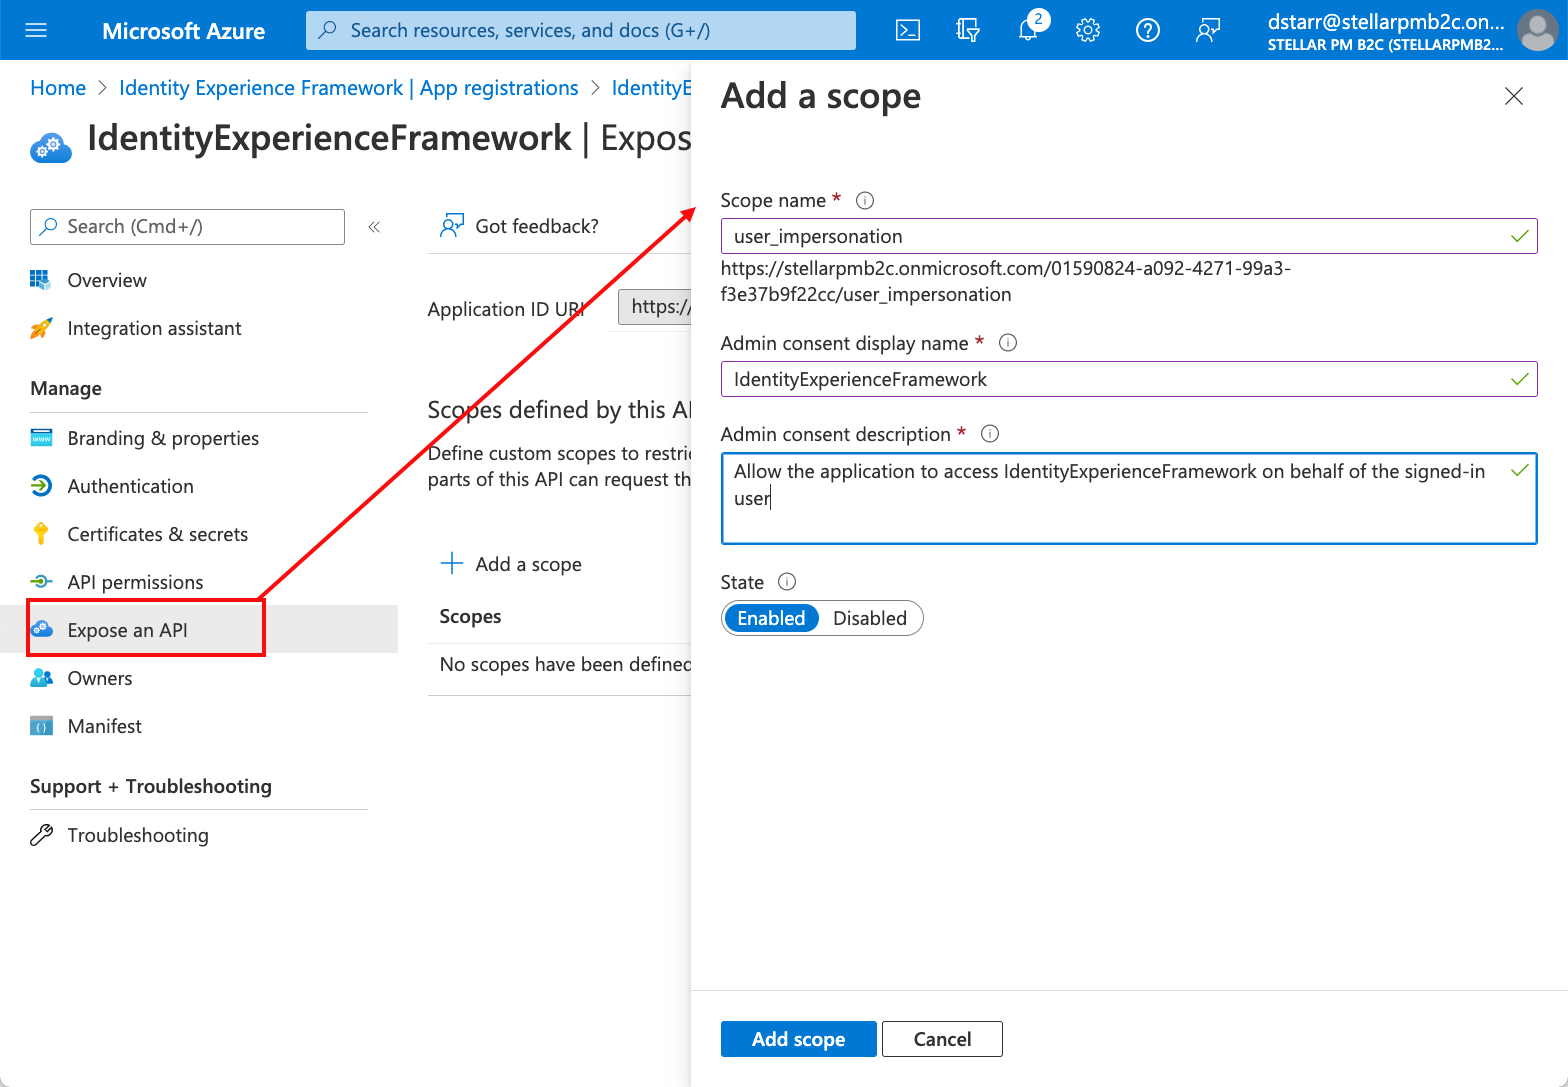
- Configure an IdentityExperienceFramework Application
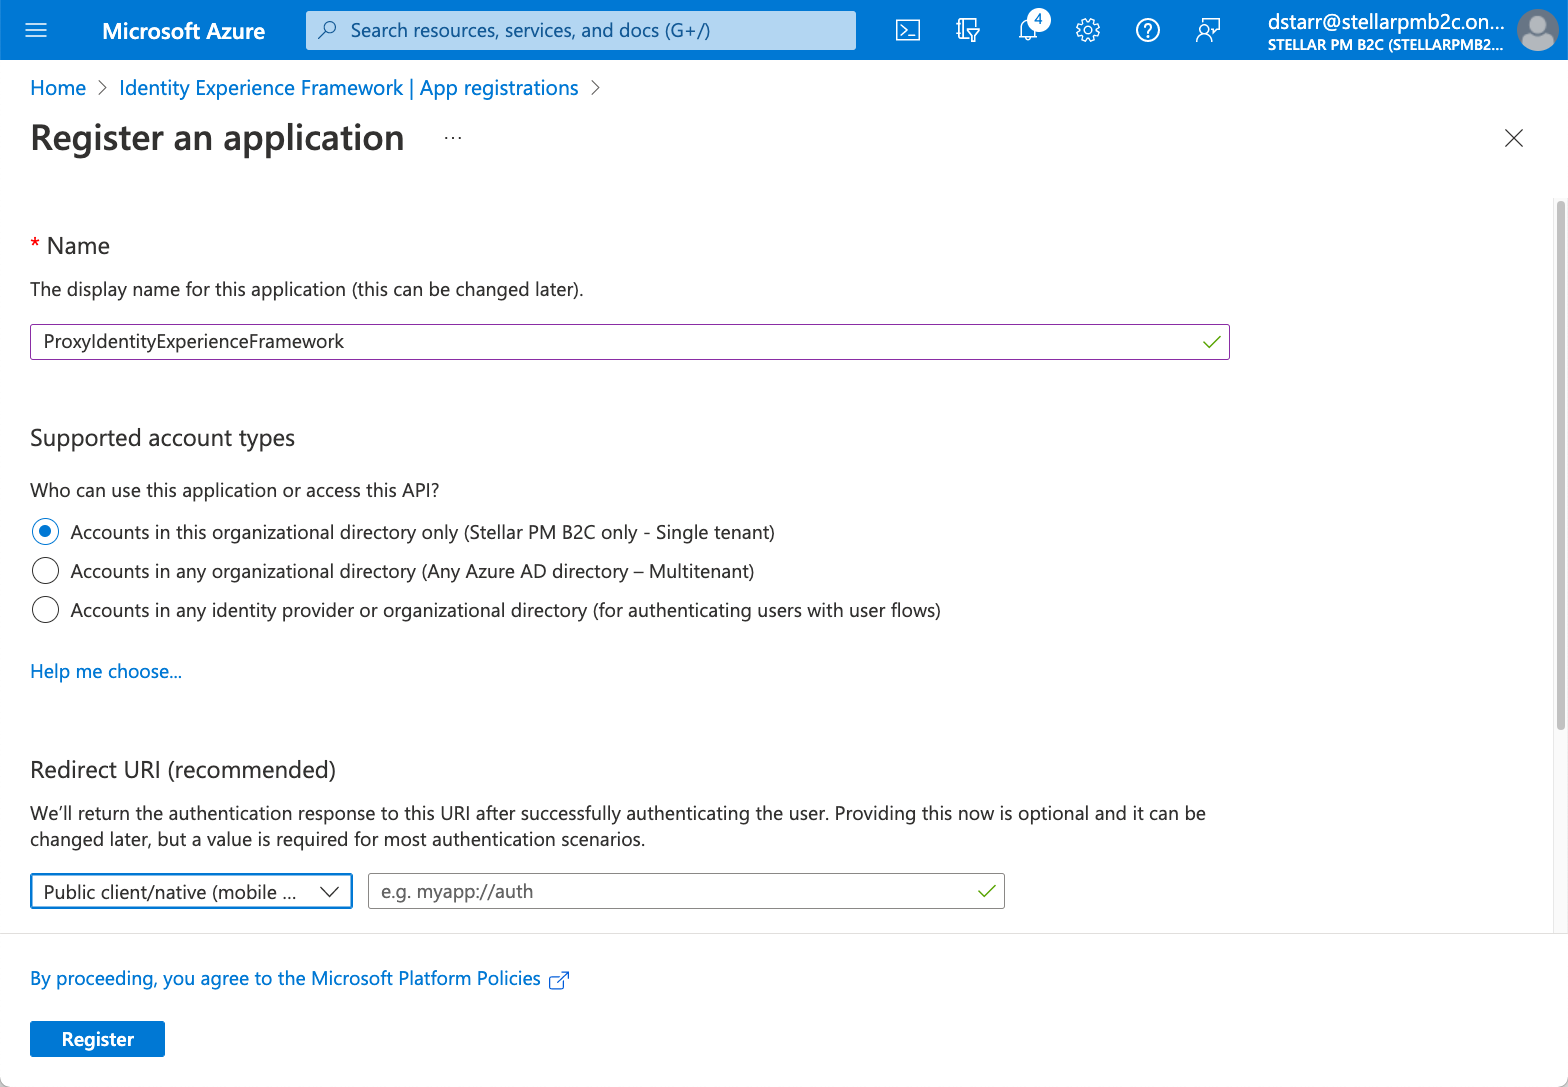
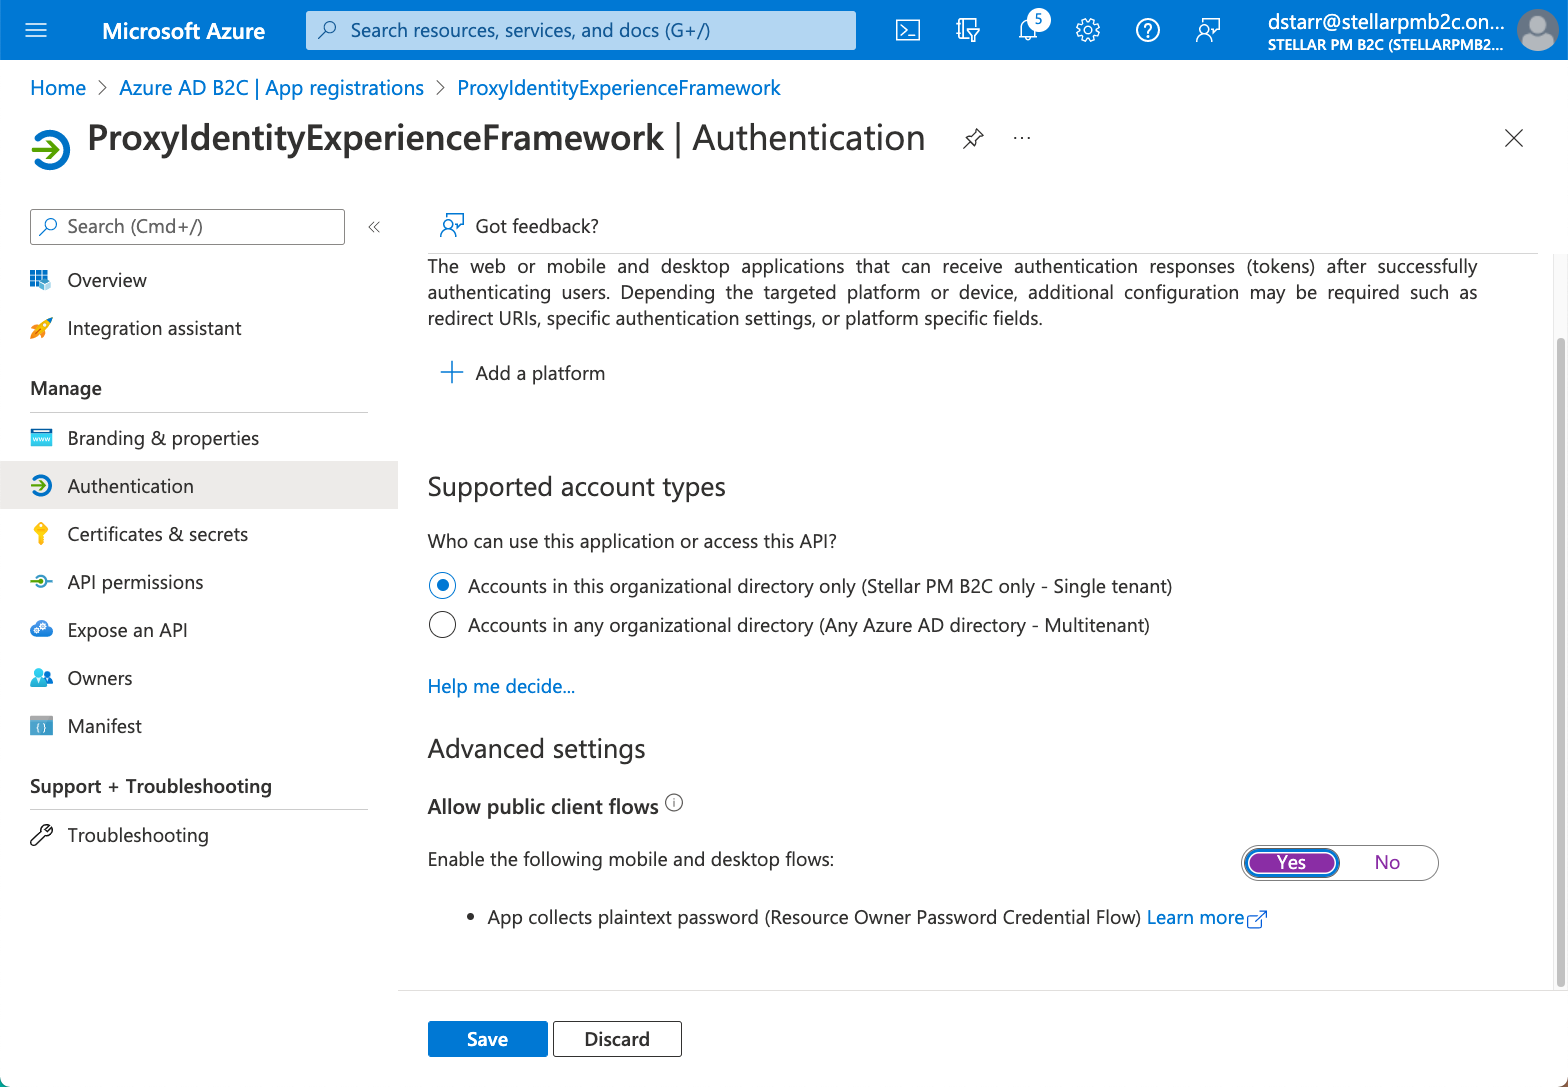
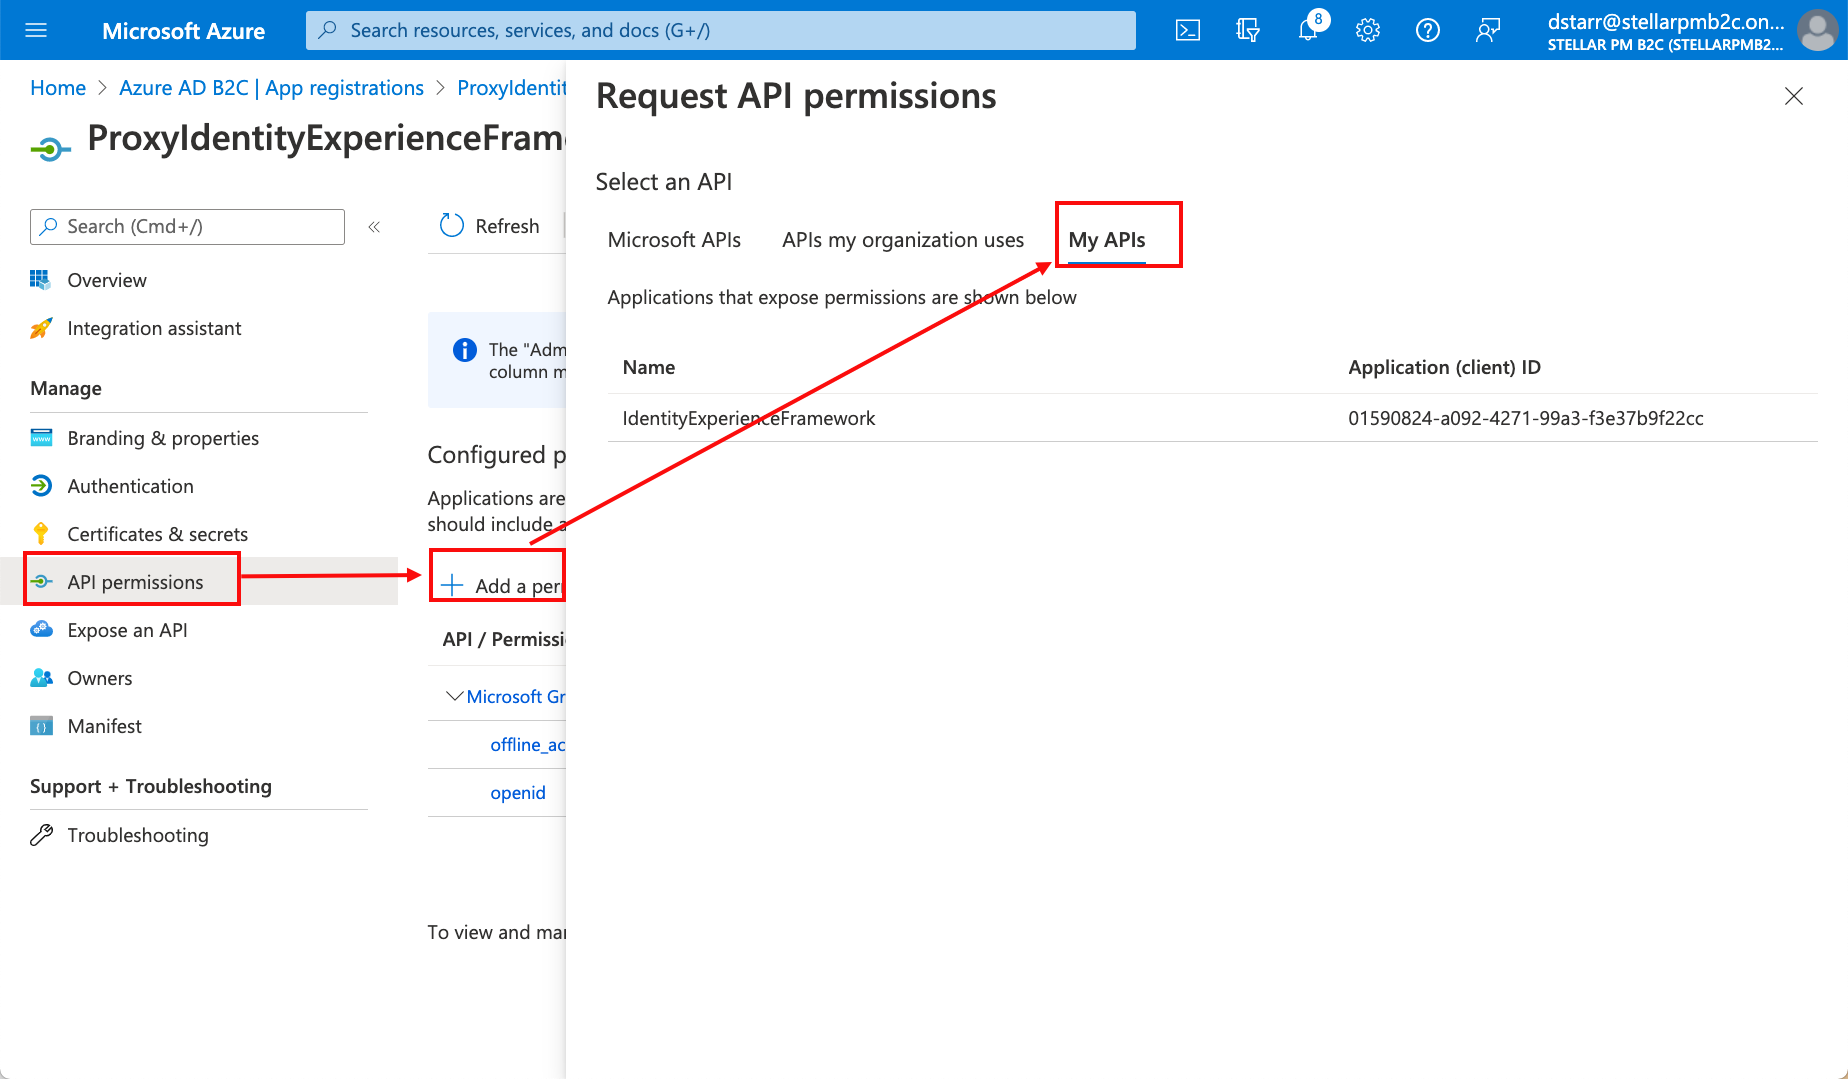
- Configure a ProxyIdentityExperienceFramework Application
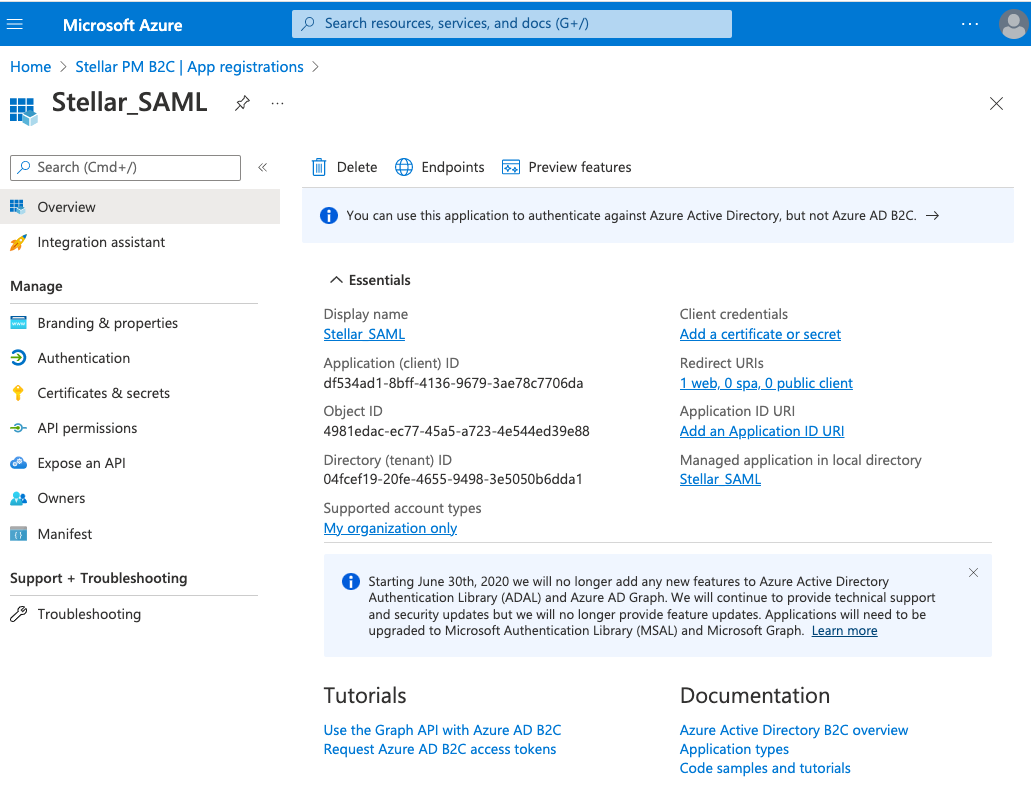
- Register the Stellar Cyber SAML Application
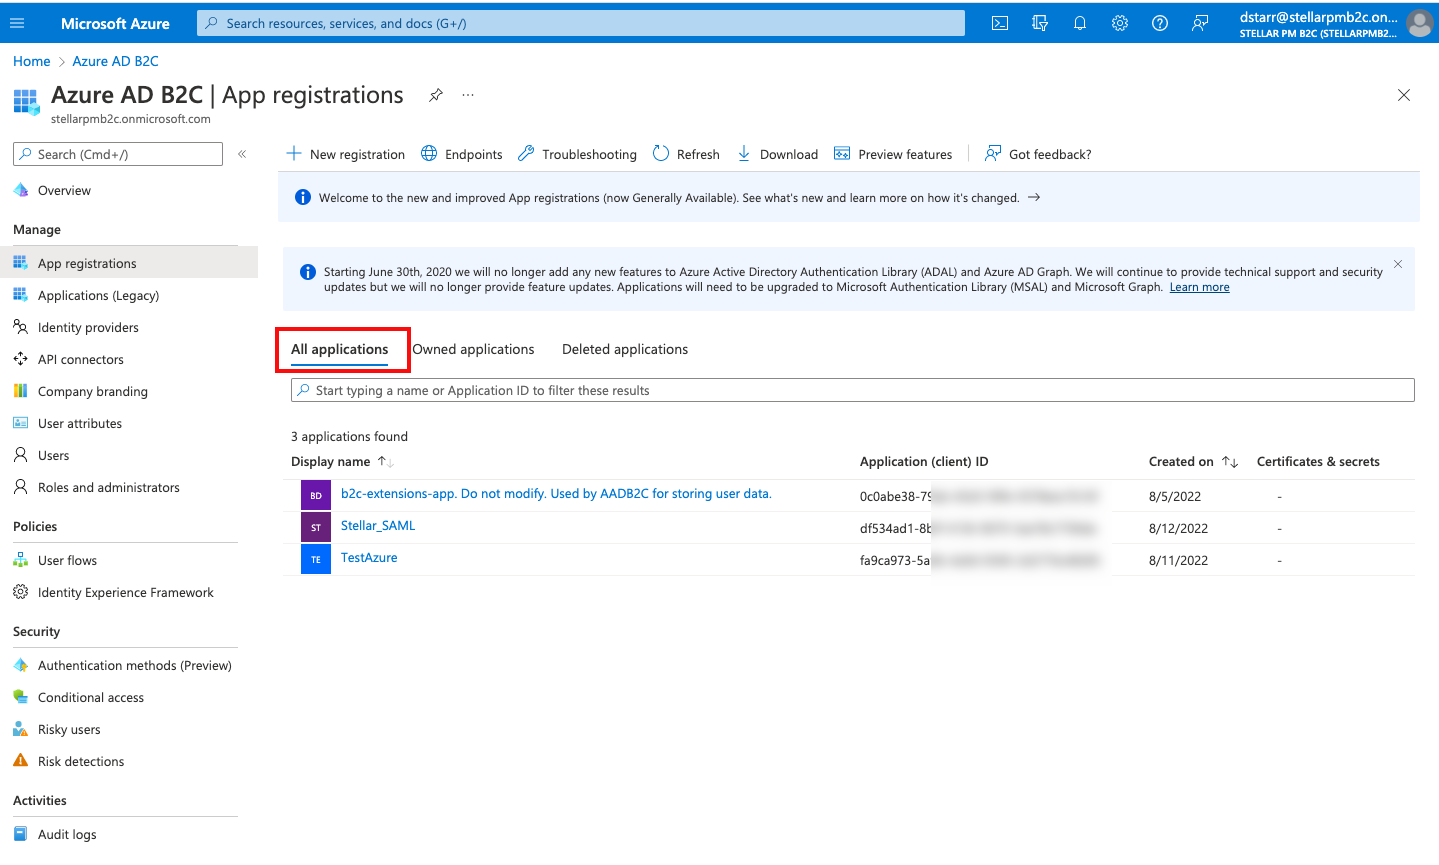
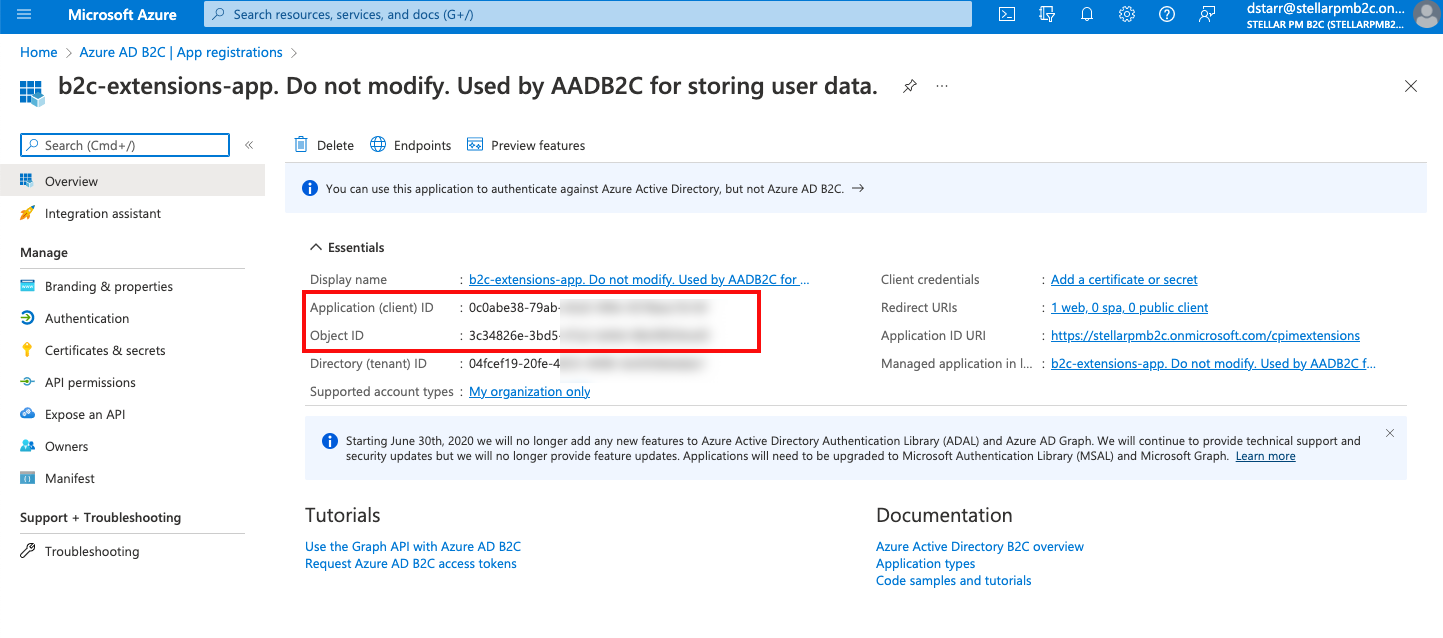
- Obtain IDs from the b2c-extensions-app
- Verify Preparations
The order in which you perform certain steps matters. Perform the steps in exactly the order shown.
Before You Begin
-
Make note of the FQDN of your Stellar Cyber DP. You will be using for assorted configurations in this topic.
-
Obtain the following from your Stellar Cyber configuration:
- A server pem certificate and the private key for the server hosting your Stellar Cyber DP. This will be uploaded in the Stellar Cyber Certificates screen.
- Prepare a .pfx file which combines the certificate and the private key, for uploading to the Azure AD B2C server.
IMPORTANT: Self-signed server certificates are NOT supported for configuration with Azure AD B2C.
-
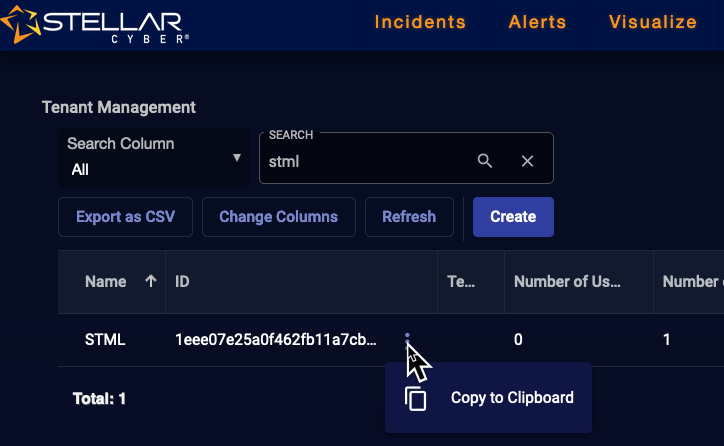
If you are configuring per-tenant SSO, obtain the Stellar Cyber ID of that tenant:
-
The following worksheet may be helpful to track certain values that you will use during configuration, especially in the policy files. Note that the syntax / case matters for all of these values (see printable HTML version or Word version).
ATTRIBUTE
EXAMPLE
MY VALUES
Stellar Cyber Server Information (obtain before you begin) DP FQDN
testdp.stellarcyber.ai
Tenant ID (for per tenant-SSO only)
29443942
stellar_scope (authorization only)
root
stellar_privilege (authorization only)
super_admin stellar_tenant (optional) (authorization only)
a112c31c04734b7ba5243e5e5432bfe6
stellar_tenant_group (optional) (authorization only)
25320755 Azure AD B2C Server Information (in order of occurrence) Domain / Primary Domain
stellarpmb2c.onmicrosoft.com
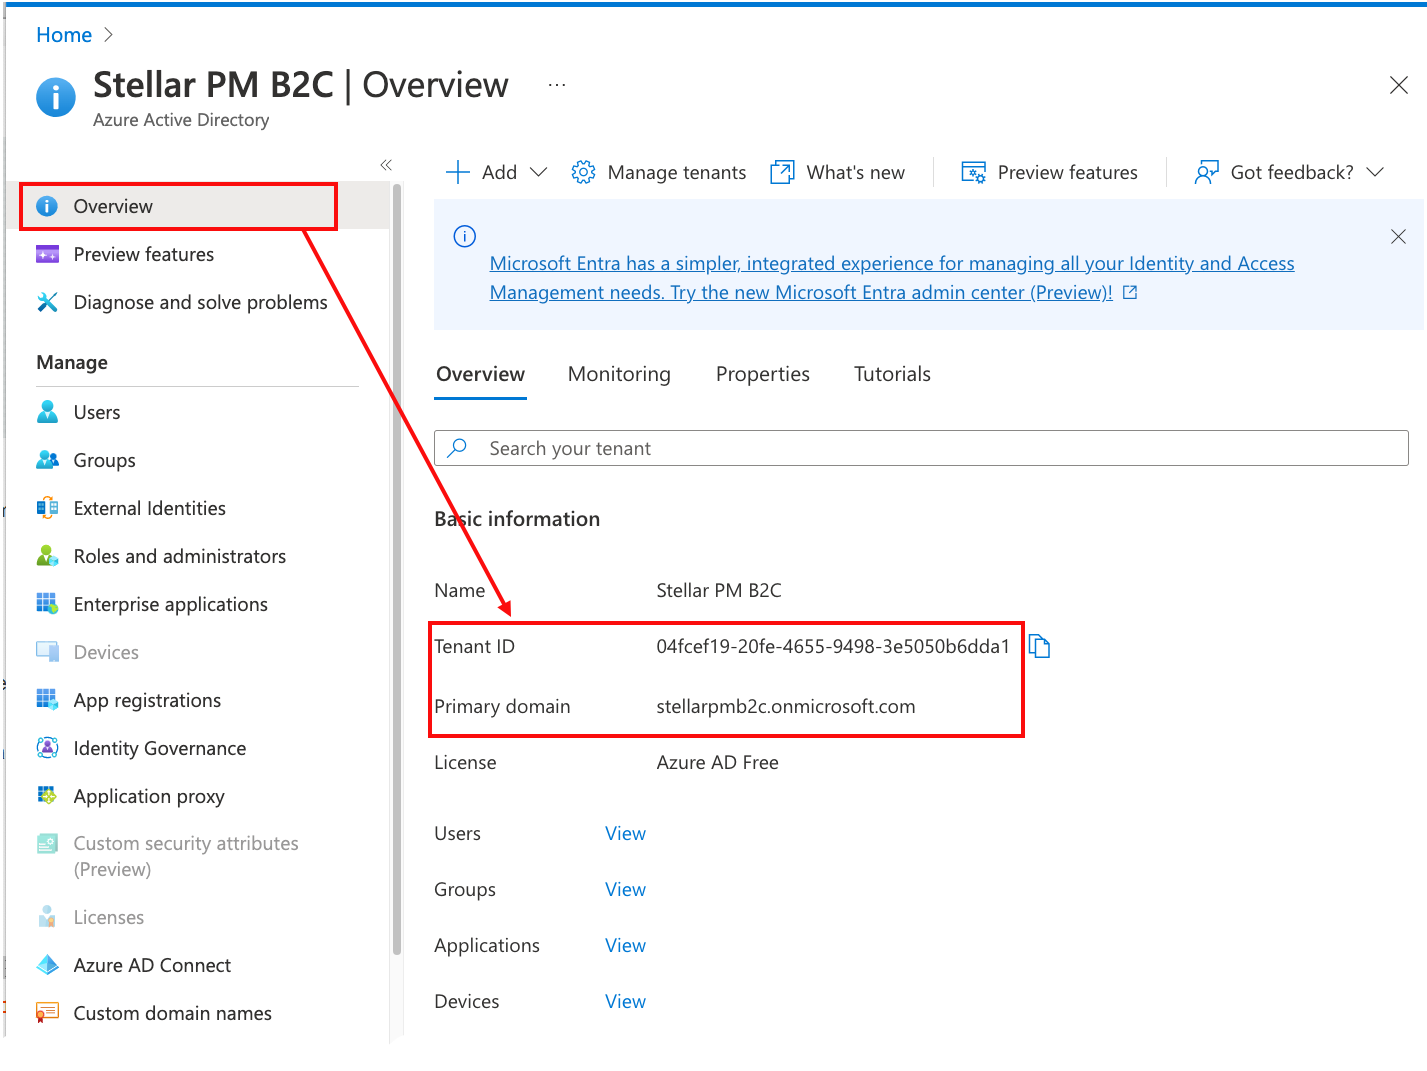
Tenant ID / Tenant (Object ID)
04fcef19-20fe-4655-9498-3e5050b6dda1
Application (Client) ID for IdentityExperienceFramework
01590824-a092-4271-99a3-f3e37b9f22cc
Application (Client) ID for ProxyIdentityExperienceFramework
0c54849b-121f-496e-b1c3-406976bec48b
SAML App Name
Stellar_SAML
identifierUris
https://<Azure AD B2C tenant name>.onmicrosoft.com/<SAML application name>
http://stellarpmb2c.onmicrosoft.com/Stellar_SAML
Application ID URI
https://stellarpmb2c.b2clogin.com/stellarpmb2c.onmicrosoft.com
b2c-extensions-app: Application (Client) ID
0c0abe38-79ab-45d3-99fe-9378eec7b16f
b2c-extensions-app: Object ID
3c34826e-3bd5-47a2-b44d-08c09034cef2
Metadata URL
https://stellarpmb2c.b2clogin.com/stellarpmb2c.onmicrosoft.com/B2C_1A_signup_signin_saml/samlp/metadata
Issuer URL
http://testdp.stellarcyber.ai
replyUrlsWithType
Global SSO:
https://testdp.stellarcyber.ai/saml/login/callback
Per-tenant SSO:
https://testdp.stellarcyber.ai/saml/login/callback/cust_id/a112c31c04734b7ba5243e5e5432bfe6
Azure AD B2C User IDs (email & Issuer ID, if different)
SoCguy@stellarpmb2c.onmicrosoft.com
Example of issuer assigned ID that is not the same as email:
AnalystTwo@stellarpmb2c.onmicrosoft.com,
6b744a55-9031-4b8c-ad6f-81dac5e74055@stellarpmb2c.onmicrosoft.com
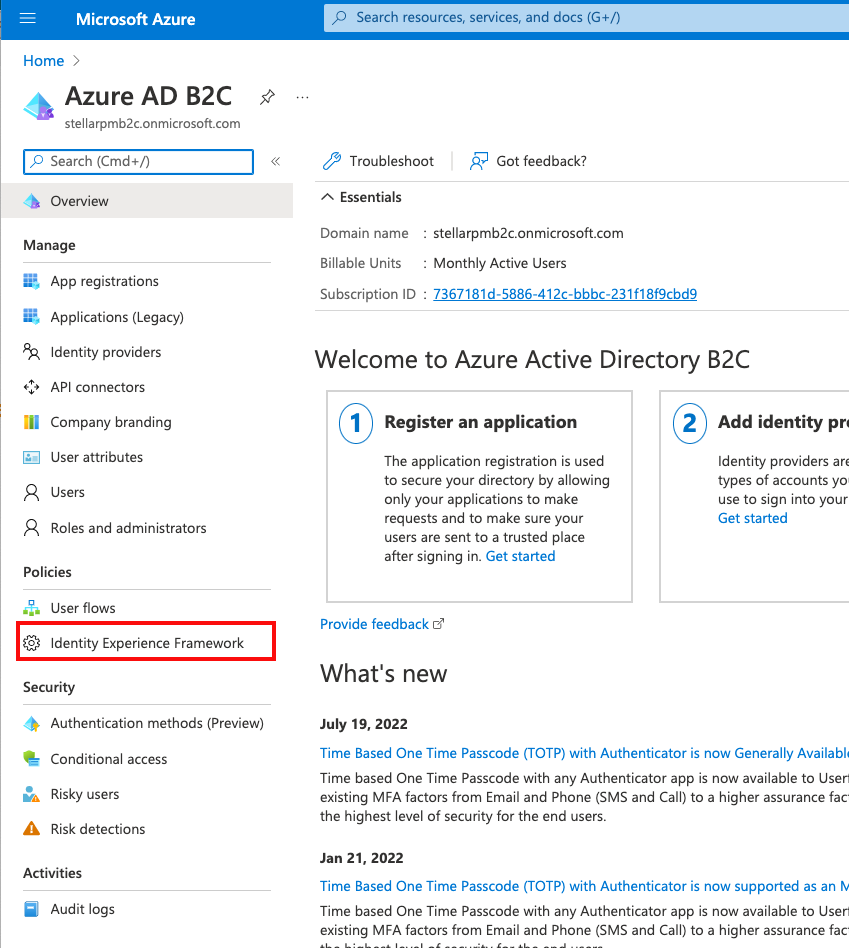
Set Azure AD B2C Directory & Obtain Tenant ID / Domain Name

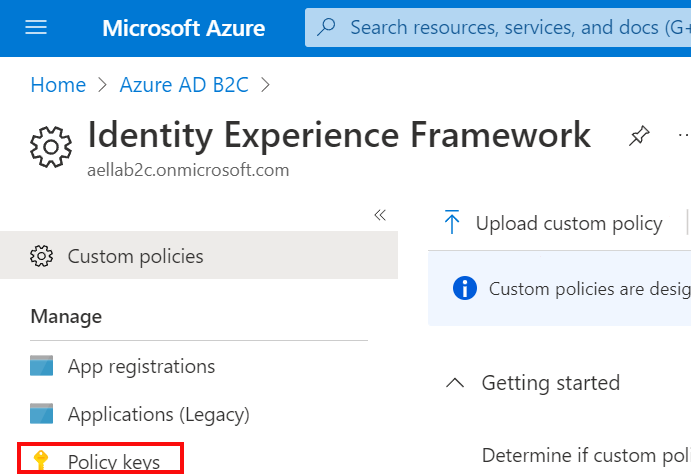
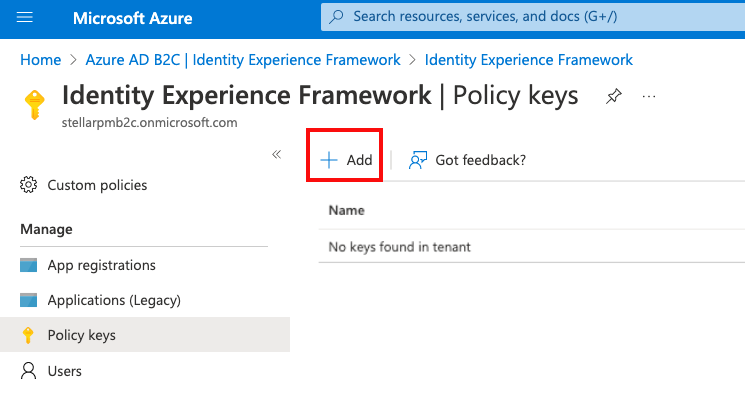
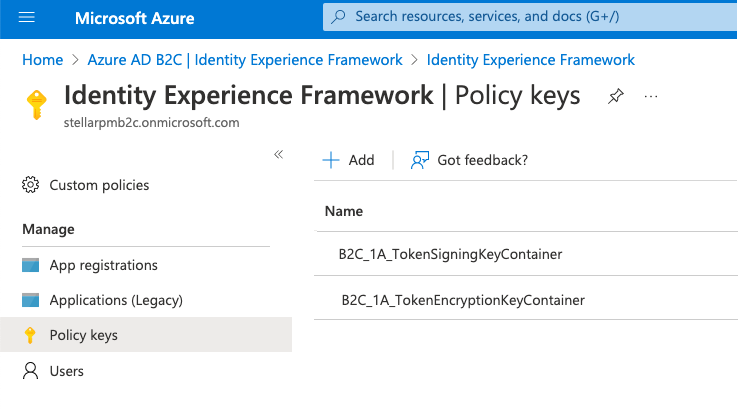
Create Azure AD B2C Signing and Encryption Keys

Configure an IdentityExperienceFramework Application
Configure a ProxyIdentityExperienceFramework Application

Register the Stellar Cyber SAML Application


Obtain IDs from the b2c-extensions-app
Verify Preparations
Before you proceed to the next section, review your worksheet and ensure you have obtained information that you will use to configure the policies.
