Using the Detection Tab in the Case Details View 
The Detection tab is the default display for the Case Detail view – it's what you see when you first open a case's Detail view. From here, you can get a high-level summary of the case, including a breakdown of what Stellar Cyber has seen and why it is scoring the case the way it is. You can also see a summary of the XDR Kill Chain stages involved, and a table of Associated Alerts.
The figure below illustrates key features of the Detection tab:

-
Case Score Breakdown lists the XDR Kill Chain stages with associated alerts, as well as the observables involved in the case (internal or external hosts, as well as URLs, files, users, services, processes, and sensor status alerts).
-
Kill Chain shows at a glance which of the XDR Kill Chain stages have alerts associated with this case. Stages with alerts are illuminated in the display, along with a count for the alert total at the corresponding stage. For example:


Using the Associated Alerts Table
The Detection tab also provides the Associated Alerts table, a sortable table of all alerts associated with the case.
In addition to standard Stellar Cyber table functionality for searching, sorting, exporting, and column management, the Associated Alerts table lets you perform the following useful tasks for a case:
-
Remove any alert in the table from an case by clicking its Delete button
 . Alternatively, you can bulk delete multiple alerts by selecting their entries in the table and then clicking the Remove Alerts button. Note the following:
-
Deleting an alert from a case may change its score as Stellar Cyber reevaluates the case in light of the new suite of associated alerts.
-
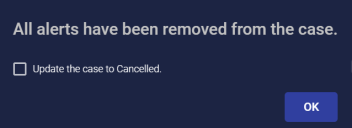
Once you have removed all alerts from a case, Stellar Cyber asks you if you want to set the case's status to Cancelled, as illustrated below:
You can also remove alerts from a case without deleting them by checking their boxes in the table and then using the dropdowns at the top of the table to set their Event Status to either Ignored or Closed. This way, you can remove an alert from a case without losing visibility on its previous existence.
-
-
You can click the More Info button for any alert in the Alerts table to see its associated Event Details, including the supporting Interflow data. From here, you'll also find a Cases list that shows other cases associated with an alert in descending order by score, up to a maximum of five. From here, you can drill to another related case's detail display, or use the View All link at the top of the list to see a filtered tab showing only those cases associated with the selected alert.
-
Cascade any alert open using the > button at the far left of the Alerts table to see its associated Interflow data.
-
Add comments to one or more alerts by selecting their entries in the table and then using the Add a Comment button.
-
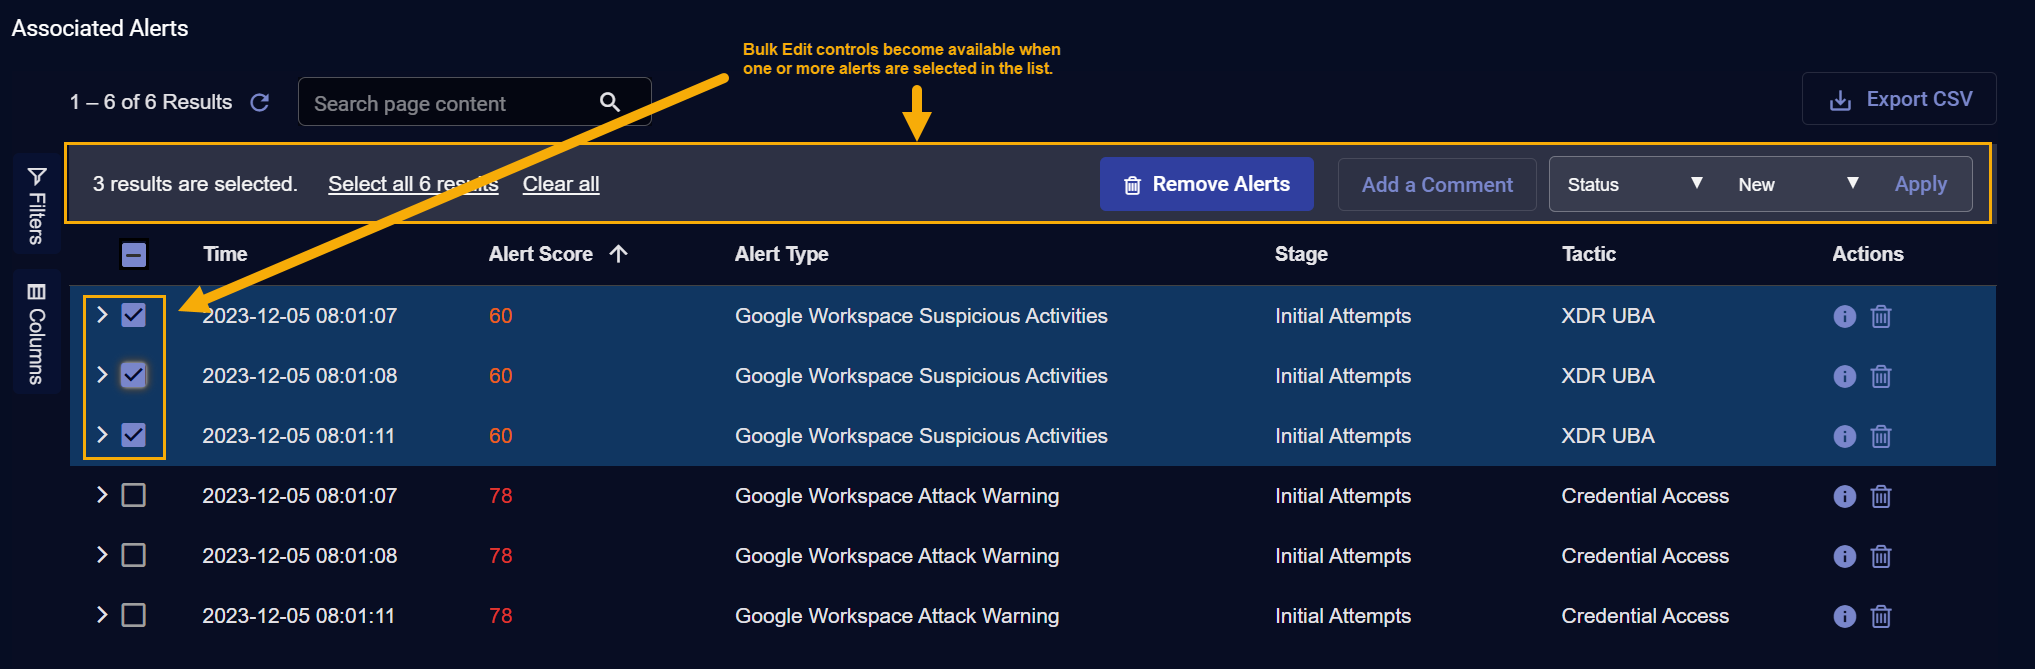
Use the Bulk Edit options to change information for multiple alerts simultaneously:

-
Check the boxes for one or more alerts to enable the Bulk Edit controls.
-
You can change Status, Event Tags, or Assignee using the Bulk Edit controls. Select the field you want to edit.
-
Use the adjacent Bulk Edit dropdown to set the new value. The available values change depending on which field you are editing.
-
-
Export the contents of the Associated Alerts table to a CSV file using the Export CSV button.
You can also export the case as a whole using the Export button in the Case Identification panel at the top of the display
 . This technique exports both a PDF and a CSV file of the case.


Applying Display Filters to the Associated Alerts Table
The Associated Alerts table supports standard display filtering capabilities:
-
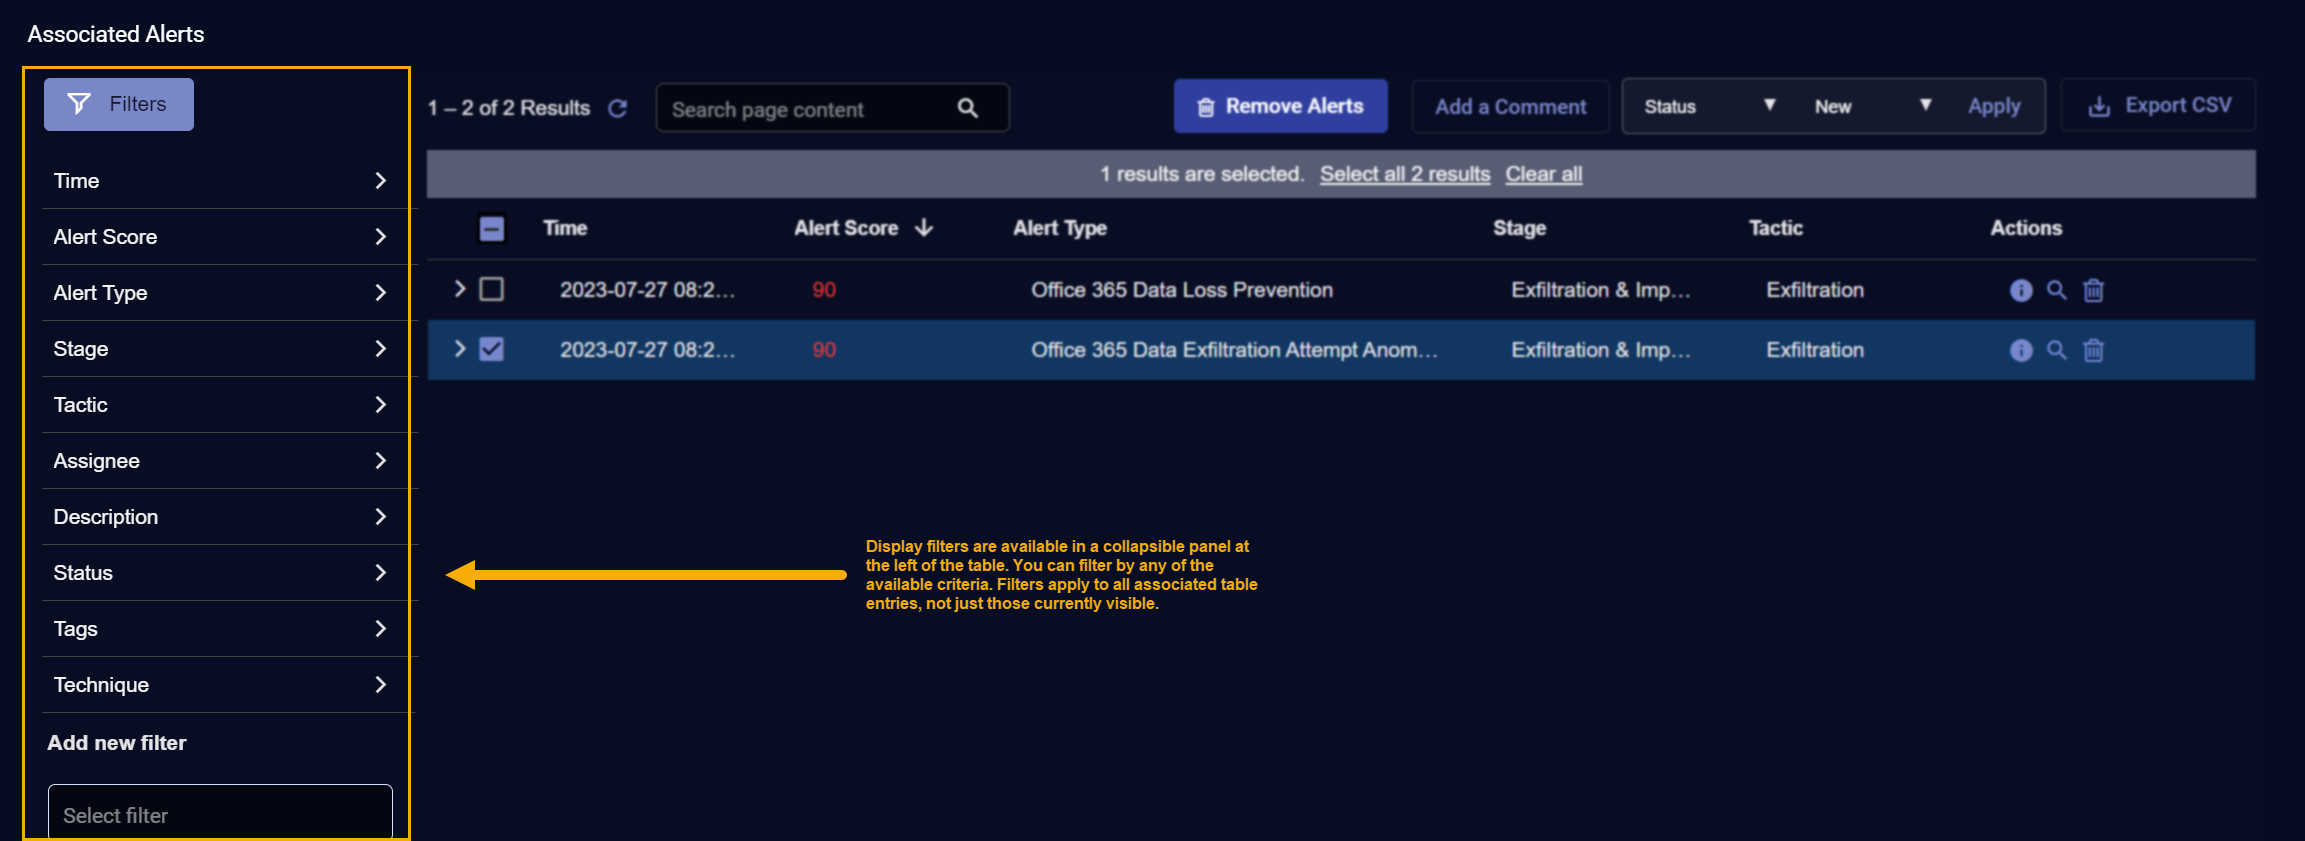
Click the
 button at the top of the table to see the available display filters. For example:
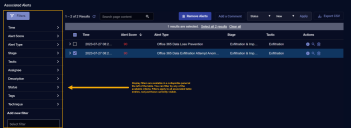
-
You can filter by any combination of the listed criteria. If a particular criterion you expect to see is not listed, use the Add new filter feature to see all available criteria.
Display filters apply to all table entries, not just those that are currently visible (for example, if a table contains multiple pages of entries, the filter applies to all pages, not just the currently visible page).
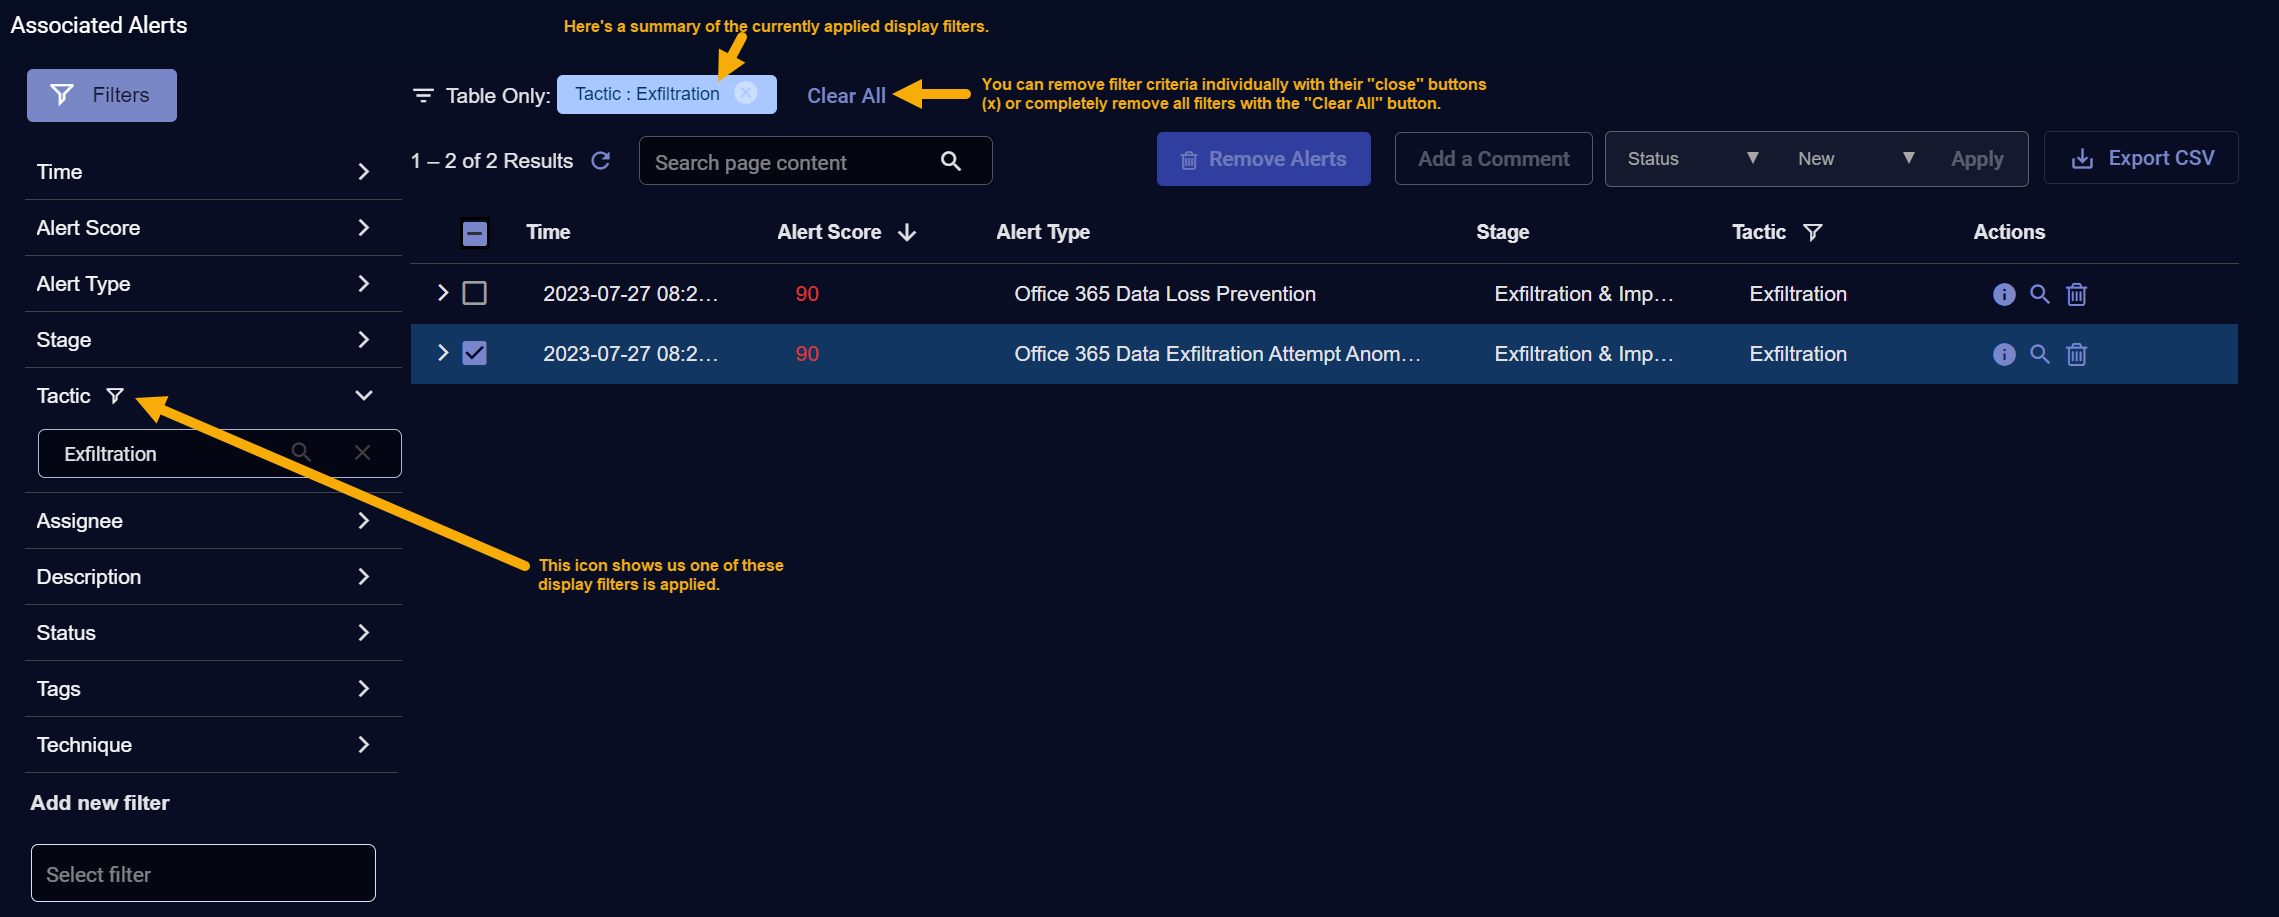
Display filters that are currently applied are displayed with a distinctive filter icon in their entry. In addition, the currently displayed filters are summarized at the top of the table, as shown below.

You can remove filter criteria individually by clicking the close icon ("x) in their entries at the top of the table, or remove all filters with the Clear All button.