Using Tenant Groups
You must have Root scope to use this feature.
Stellar Cyber allows you to create any number of Tenant Groups. Tenant Groups allow partners to manage multiple tenants, assign users at each tenant, and view the data for all or individual tenants. A partner user is associated with a single Tenant Group in User Management, when that user account is created. That Tenant Group contains all the Tenants the partner manages. By default, the partner user's Tenant menu is set to view the whole group but can be switched to any tenant in the group. The examples below show how a partner managing a Tenant Group can switch between viewing different tenants or all tenants.
|
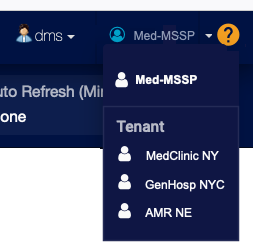
User: dms Tenant group: Med-MSSP Tenant view: all |
User: dms Tenant group: Med-MSSP Tenant view: GenHosp NYC only |
|
|
|

See the User Management page for information about configuring users.
See the Tenants overview page for general information about Tenants.
To perform bulk actions, assets and UBA users tables, partners in tenant group views must first switch from viewing all the tenants viewing the specific tenant. The bulk action options are disabled in the global view.
Tenant Group List
When you select the System | Administration | Tenant Groups option, Stellar Cyber displays a table of the existing tenant groups similar to the example below.
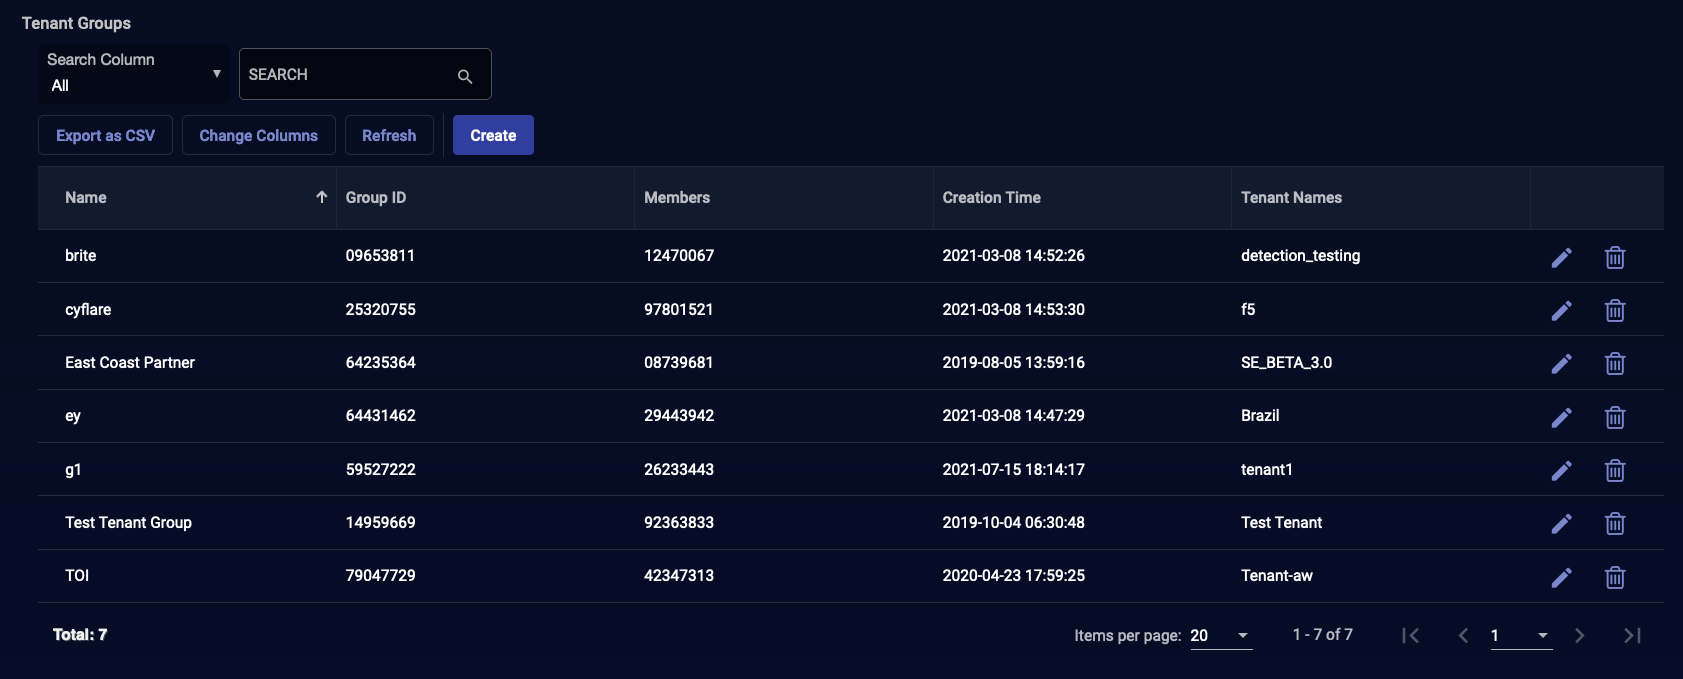
The columns are:
-
Name—The name of the Tenant Group.
-
Group ID—The unique ID number for the Tenant Group.
-
Members—The Tenant ID numbers of the tenants in the group.
-
Creation Time—When the Tenant Group was created.
-
Tenant Names—The names of the tenants in the group.
-
Action—The actions that you can take for each Tenant Group.
You can take the following actions:
- Click Create to create a new tenant. The ADD TENANT GROUP dialog box (described below) appears.
- Click
 to edit the corresponding Tenant Group. The EDIT EXISTING TENANT GROUP dialog box, which is similar to the ADD TENANT GROUP dialog box (described below), appears.
 - Click the
 button to delete the corresponding Tenant Group. The group is immediately deleted.
See the Tables page for more information on working with tables.
Adding and Editing Tenant Groups
When you add or edit a Tenant Group, a dialog box similar to the one below appears. This example is for adding a Tenant Group, but the same options appear in both dialog boxes.
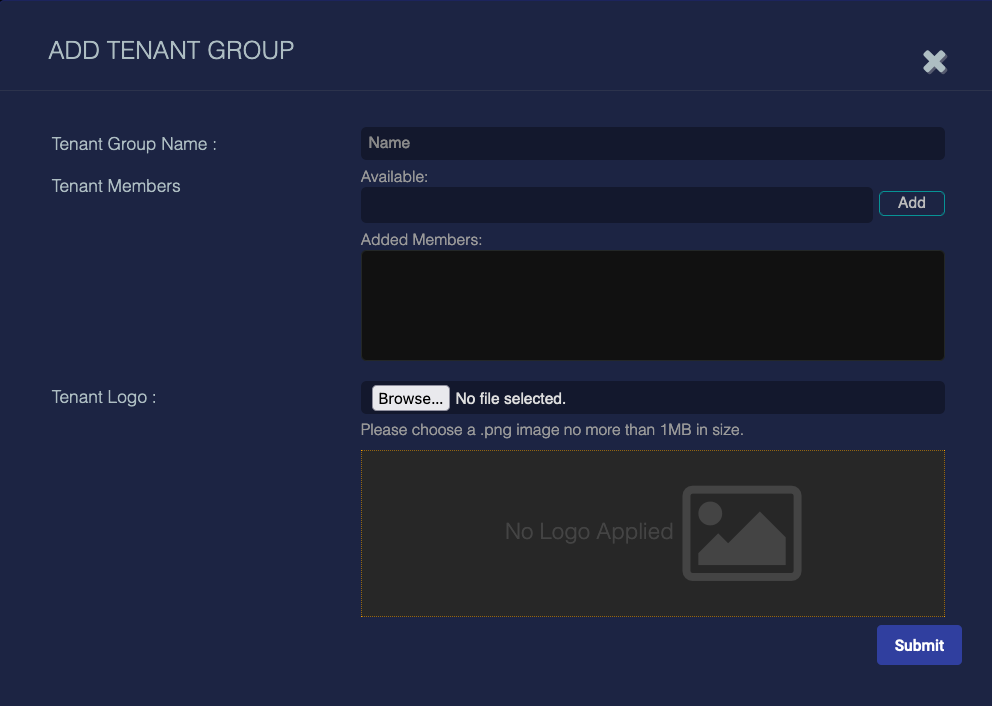
To add a Tenant Group:
-
Enter the Tenant Group Name. Use a name that helps you remember the purpose for the group.
-
Click in the Available field to see a drop-down of available tenants.
-
Click a tenant name to select that tenant.
-
Click Add to add the tenant. There is no limit to the number of tenants you can add.
-
Add a Tenant Logo if you'd like. This logo replaces the Stellar Cyber logo on reports. A System Logo, submitted on the Admin Settings page, takes precedence over the Tenant Logo.
-
Click Submit. The button becomes active only when the Tenant Group Name and at least one tenant have been added.
