Managing Users
The System | Administration | Users page provides the following tabs:
-
Users – lets you view, edit, and add users.
-
Activity Log – provides a sortable, searchable table of events broken out by user, time, and activity.
-
Current Sessions – provides a sortable, searchable table of currently active sessions on the Stellar Cyber server.
Users List
The Users List, with all existing users, appears by default.
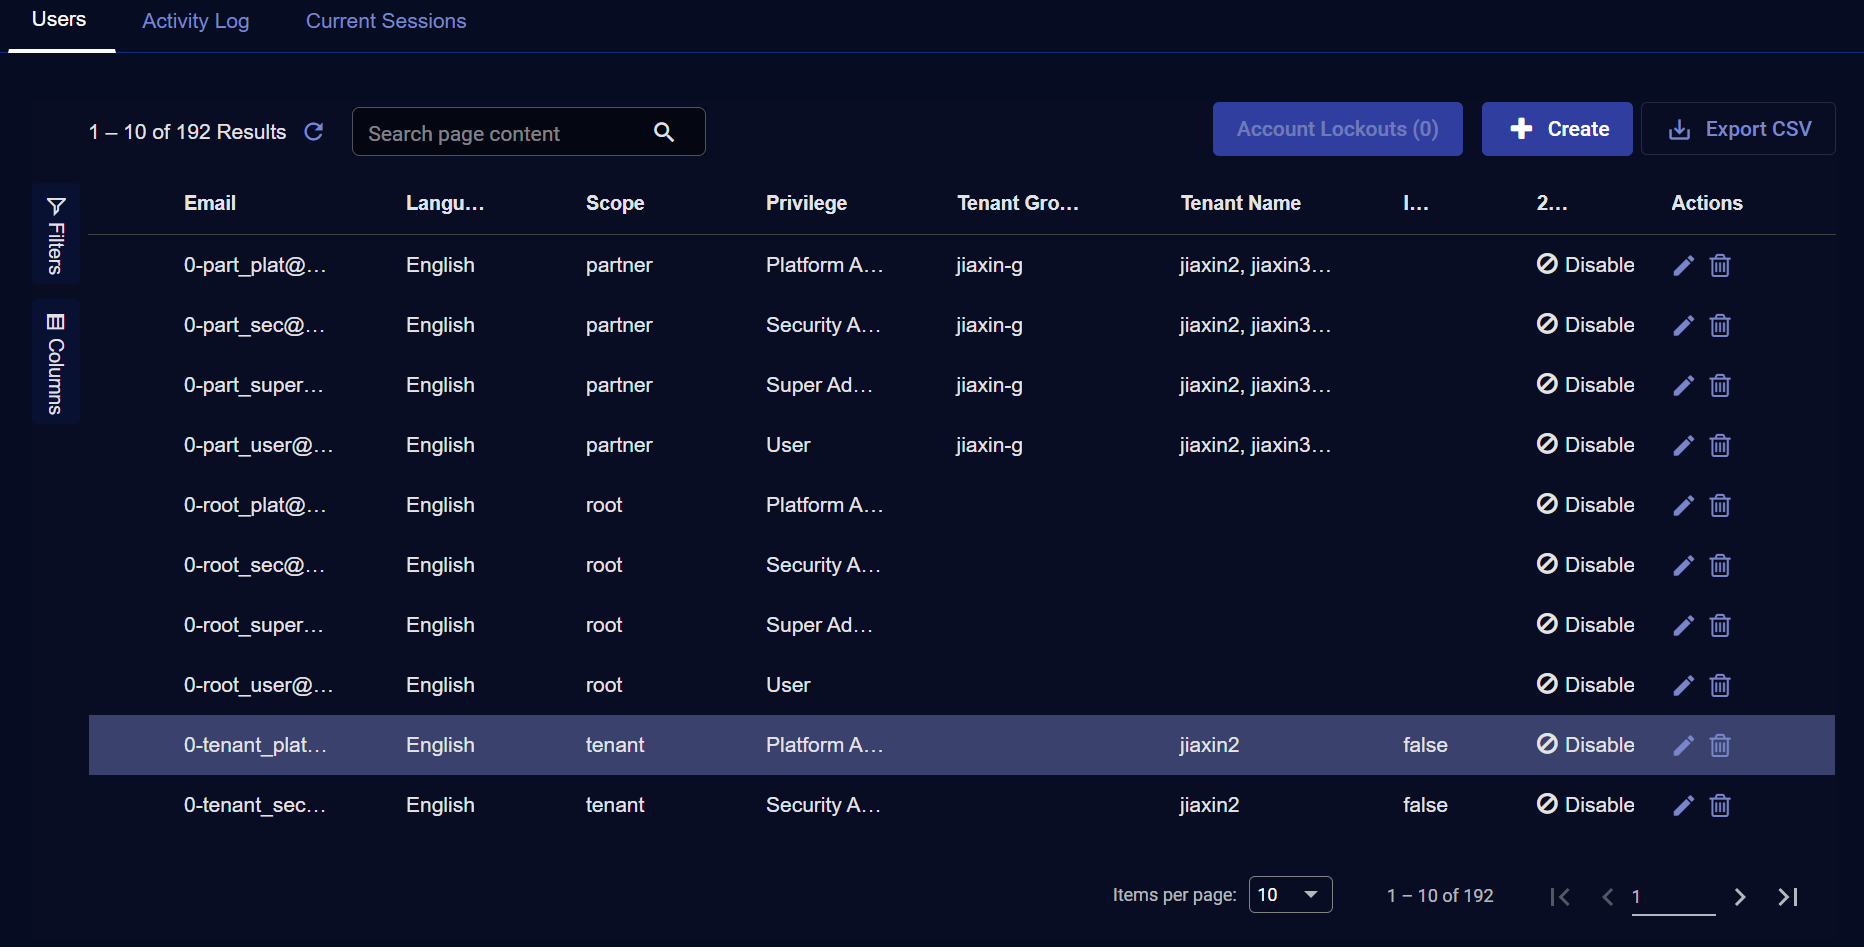
In this table you can:
- Click the Create button at the top of the list to add a new user. Adding a user is described in the following section.
- Click the
 button to edit the user.
 - Click the
 button to delete the corresponding user.
Only users with the built-in Super Admin profile assigned can edit or delete other users with the Super Admin profile. For all other users, the Edit and Delete icons do not appear next to users with the Super Admin profile assigned.
See the Tables page for more information on working with tables.
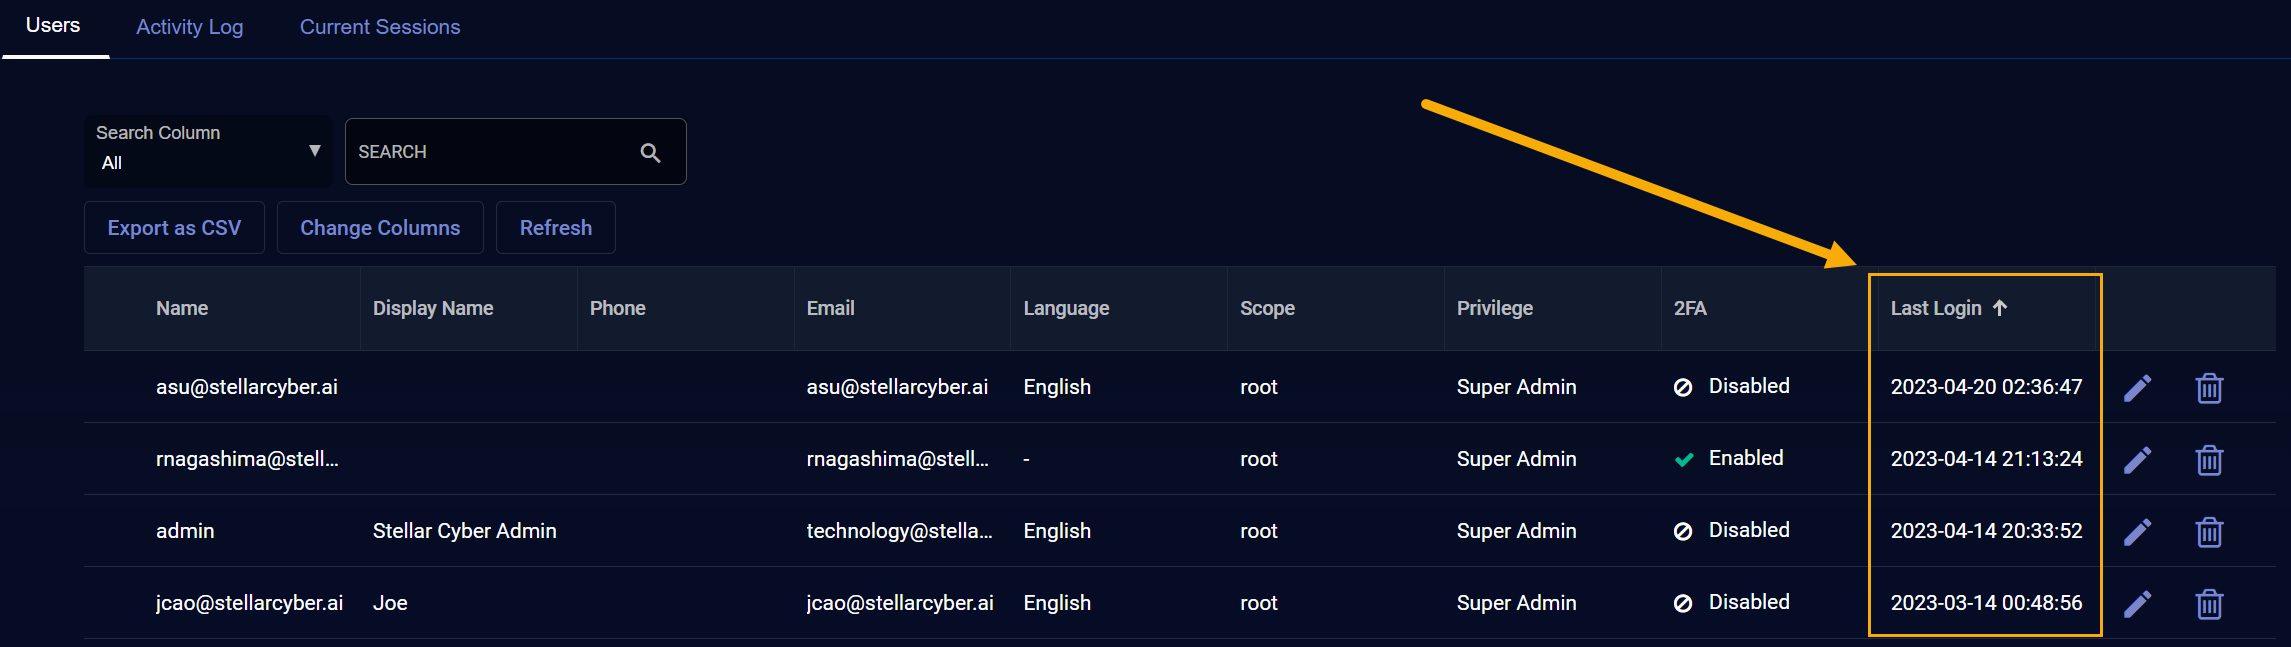
Detecting Dormant Users 
The Users List includes a Last Login column that makes it easy to detect users that have not logged in for a long time and manage those accounts according to your policy.
If the Last Login column does not appear in the Users List, you can use the Change Columns feature to add it. Note that if a user account has not logged in since this feature was introduced in v4.3.6, the Last Login field may simply show a dash (-) character.
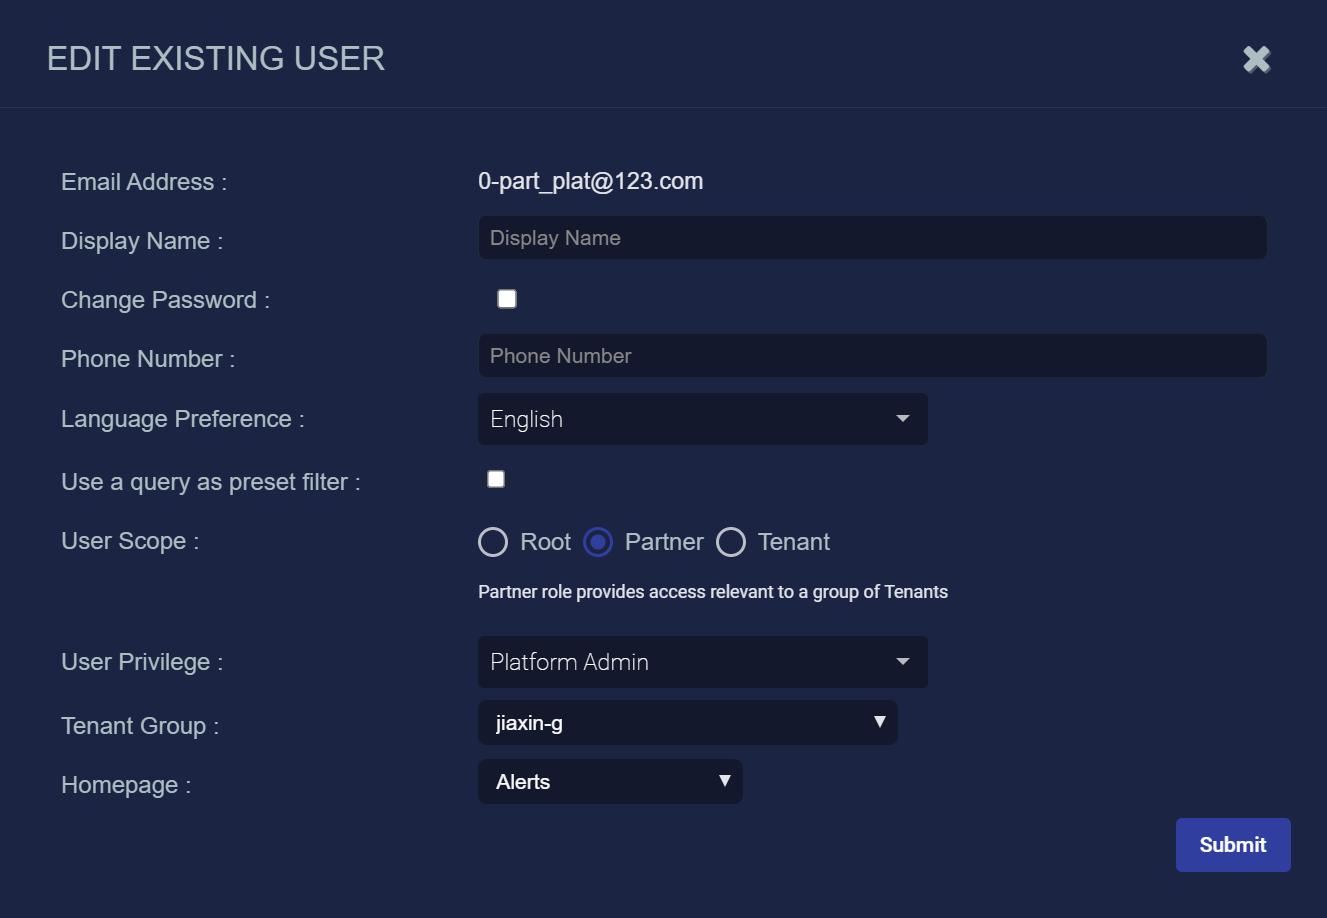
Adding or Editing a User
When you add or edit a user, a similar dialog box appears. The only difference is that you cannot change the User Name. This example shows the EDIT EXISTING USER box.
-
For Authentication Only SSO: All users must first be added manually in the data processor (DP). Subsequent to that manual entry, the user can log in with SSO.
-
For Authentication & Authorization SSO: All users are configured through the IdP.
-
For Local access (bypass) when SSO is enabled: If Stellar Cyber loses connectivity with your IdP, users configured for SSO cannot log in. As a preventive bypass method, manually create a new user in the DP with
rootscope and with a valid email address that has "+admin" appended to a valid user name, as follows:<user>+admin@yourorganization.com(joe+admin@yourorganization.com). The user you create must be able to receive a password reset email at<user>@yourorganization.com. This process an email alias for that valid user that Stellar Cyber uses to permit bypass of an SSO for local login. After you create this separate manual user account, that user can log in two ways:-
an SSO user with
<user>@yourorganization.com -
or as a local user at
https://Stellar Cyber DP address/login)using<user>+admin@yourorganization.com
If SSO is configured, it is recommended to keep an active administrative account in Stellar Cyber's user management.
-
You can enter or modify:
-
User Name—Each user has a unique name, and that name is case sensitive. The name cannot be changed after you add the user. This field does not support multibyte characters.
-
Display Name – Can be used to represent the user in displays instead of the User Name.
-
Password – The password assigned to the user. Appears when adding a new user.
-
Reenter new password – Verification for the password.
If you're using SSO, the password fields may not appear. See Logging In for details.
-
Phone Number – A phone number for the user.
-
Email address – This email address is used to send notifications to the user for password recovery. Each user must have a unique email address. You cannot use the same address for multiple users.
-
Language Preferences – Sets the display language for the Stellar Cyber UI. After you save the setting, the user must log out and log back in for the change to take effect. Supported languages are:
-
English
-
Spanish (Español)
-
Chinese (中文)
-
Japanese (日本語)
-
Korean (한국어)
-
-
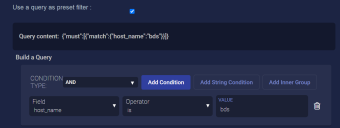
Use a query as preset filter – Enable this option to create an Interflow query that limits the data available to this user. You can build a complex query using standard AND/OR/NOT operators to match specified conditions and strings.
Use the Build a Query controls to create your query. Start by choosing your operator from the Condition Type dropdown. Then, use the Add Condition and Add String Condition buttons to add criteria for your query. The Add Condition button lets you select different Interflow fields and specify their values (for example, host_name in the query illustrated below). See the Interflow overview for information on the available fields.
As you add conditions, the Query content field updates to show the logic in place, as illustrated below. You can also use the Add Inner Group to nest logic within your query.
Once you have created your query, this user's Stellar Cyber displays will only be based on data matching the query.
-
User Scope – Must be Root, Partner, or Tenant.
-
Root – Allows full access to all Stellar Cyber functions, including user and license management.
-
Partner – Allows access to the specified tenant group. If you select Partner the Tenant Group drop-down appears.
Partner users can see all other partner users with the same Tenant Group assigned. Similarly, partner users can create additional partner users to manage the same Tenant Group.

-
Tenant – Allows access to the specified tenant. If you select Tenant, the Tenant drop-down and Use User as Tenant Default checkbox appear. See the Tenant overview page for information on tenants.
-
-
User Privilege – Select a profile. The profiles are defined on the Role Based Access Control page. See Role Based Access Control for details on configuring profiles.
-
Tenant Group – Appears if you choose Partner scope. Select the Tenant Group that the partner can access. The partner has write access for all tenants in this group and can view the data for those tenants. See Tenant Groups for more details.
-
Tenant – Appears if you choose Tenant scope. Select the name of the tenant. The user has read access to that tenant, and only that tenant.
-
Use User as Tenant Default – Appears if you choose Tenant scope. Set this user as the default user for the specified tenant.
-
API Access – Appears if you choose Super Admin privilege. Click Generate New Token to create a unique API token for this user. Copy the token and send it to the user. Stellar Cyber does not save the token. If you exit before saving the token, you must generate a new token.

-
Two-Factor Authentication – Enable to require this user to use two-factor authentication (2FA) the next time they log in.
-
Homepage – Set the page that will appear in Stellar Cyber whenever this user logs in. Note the following:
-
Any user with the Add User privilege can create a user with a homepage set.
-
Any user with the Edit User privilege can modify another user’s homepage.
-
Available pages are listed according the user scope and privilege selected in the Add/Edit User dialog box.
-
The Role-Based Access Control page includes a Customize Homepage privilege that specifies whether the current user is allowed to customize their own homepage, either from the controls at the top of the user interface or the Edit User dialog box.
-


A User is distinct from a Recipient. The Recipient can be used as the target of automated messages. See the Recipients page for more details.
Changing a User's Password
This option is not applicable when the server is configured for SSO.
To change a user's password (other than your own):
- Click System | Administration | Users. The table of users appears.
- Click for the user whose password you want to change. The Edit Existing User screen appears.
- Click the Change Password checkbox. The Trigger Password Reset button appears.
- Click Send Reset Link. An email is immediately sent to the user from support@stellarcyber.ai. The user has 24 hours to reset their password.
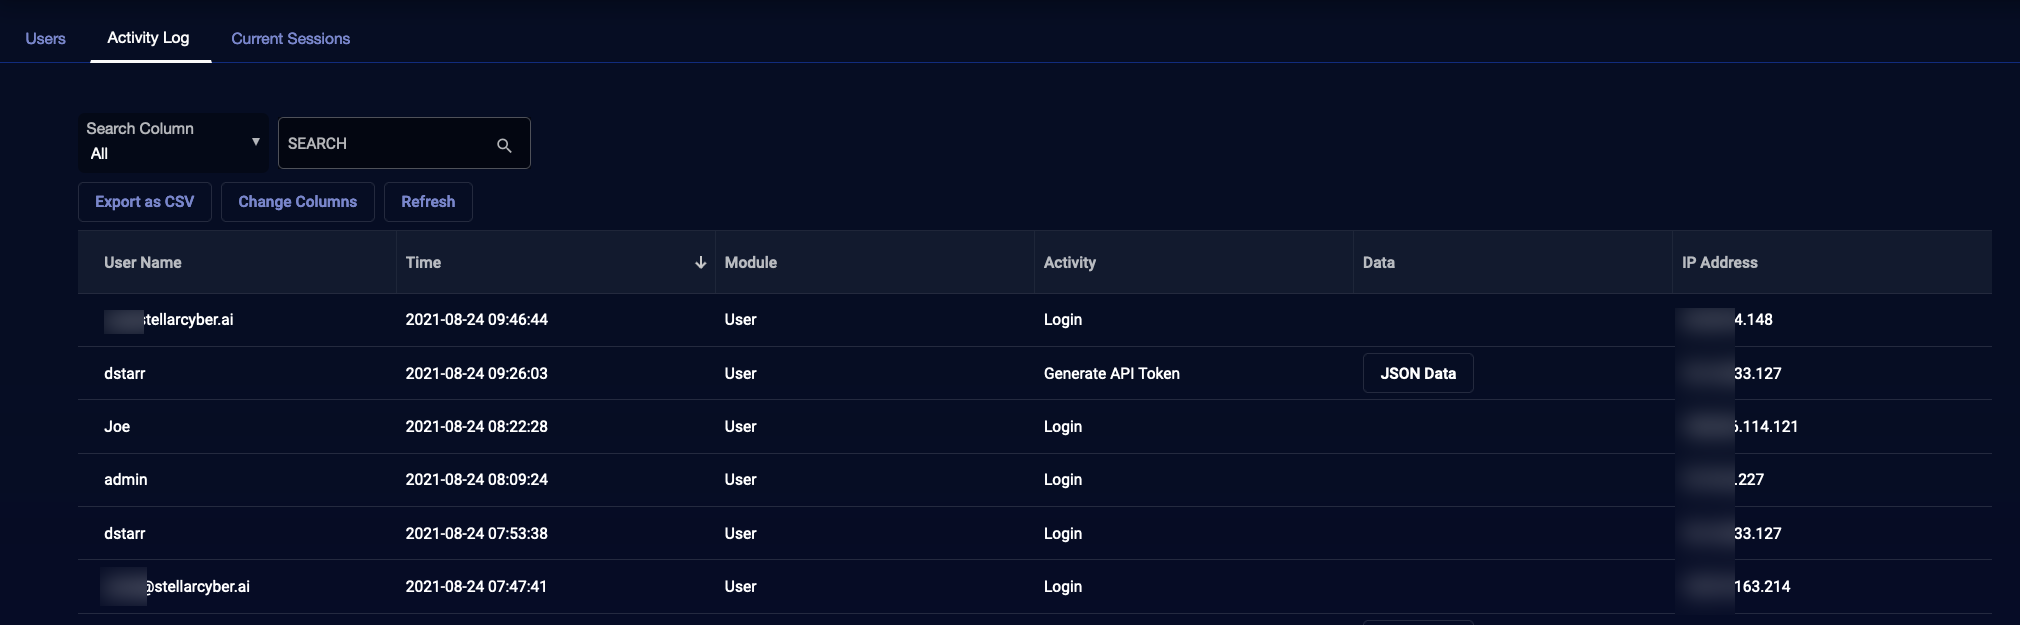
Activity Log Tab
Use the System | Administration | Users | Activity Log tab to monitor Stellar Cyber activity by user account. You can see at a glance which accounts are performing which tasks in Stellar Cyber in a searchable, sortable table similar to the example below.
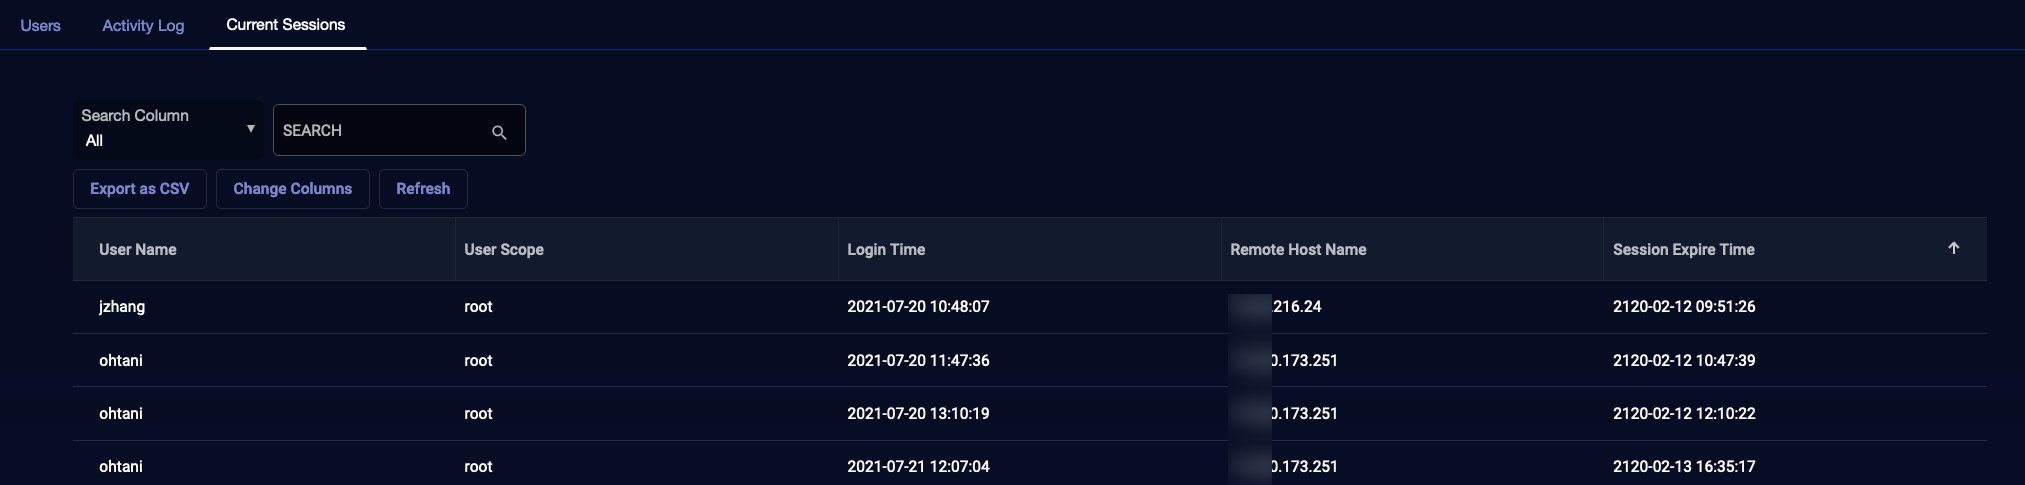
Current Sessions Tab
Use the System | Administration | Users | Current Sessions tab to see a table of active Stellar Cyber logins. You can see at a glance which accounts are logged in to the system in a searchable, sortable table similar to the example below.