Configuring Forescout Connectors
Use the Forescout connector to perform Respond actions on systems registered in your Forescout account. Forescout connectors in Stellar Cyber are used for response only, not collection of event data. This connector is supported with Forescout v8.2.2 and Forescout's EyeExtend Connect Module v1.9.0 or later. Refer to the following documentation, if needed, during this procedure:
Connect Plugin Application Building and Deployment Guide
The devices you want to use with this connector must be registered in the Forescout Enterprise Console (CounterACT devices) and associated with the application module that will be creating for communication to Stellar Cyber.
Connector Overview: Forescout
Capabilities
-
Collect: No
-
Respond: Yes
-
Native Alerts Mapped: No
-
Runs on: DP or Sensor
-
Interval: N/A
Collected Data
N/A
Domain
|
https://<Hostname or IP> where <Hostname or IP> is a variable from the configuration of this connector |
Response Actions
|
Action |
Required Fields |
|---|---|
|
|
Third Party Native Alert Integration Details
N/A
Required Credentials
-
Hostname or IP, Username, Password, and App Name
Let us know if you find the above overview useful.
Adding a Forescout Connector
To add a Forescout connector:
- Set up Stellar Cyber access in the Forescout Console
- Adding the connector in Stellar Cyber
- Test the Connector
- Use the Connector
Use our example as a guideline, as you might be using a different software version.
Preparing for Setup
Perform the following steps on the system from where you will be running the Forescout Enterprise Console:
-
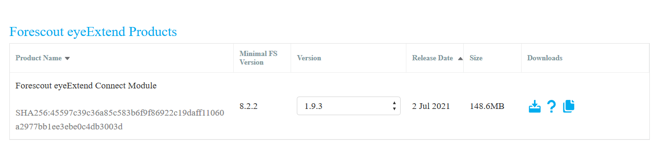
Open a browser and access the Forescout Customer Support portal Downloads page (https://forescout.force.com/support/s/downloads).
-
Download the eyeExtend Connect Module, v1.9.0 or later. This .fpi file allows you to install a web API connector to configure for communication with Stellar Cyber.
-
You will also need the StellarCyberActionAPI app to enable Stellar Cyber to trigger an action using the Connect framework. Access one of the following pages to download the StellarCyberActionAPI.zip file:
-
Before you proceed, you will need to make note of the following information to use throughout this procedure.
-
Host address for your Forescout Enterprise Manager and Connecting CounterACT Device (the CounterACT "device" is a middleman that forwards queries and requests to and from third-party instances)
-
An administrative login and password to that host console
-
You will create and use the following on both the Forescout side and Stellar Cyber side:
-
app module name
-
username for app module
-
password for that user
-
-
Setting up the Stellar Cyber App in Forescout
-
Log into the Forescout Enterprise Console as an administrative user.
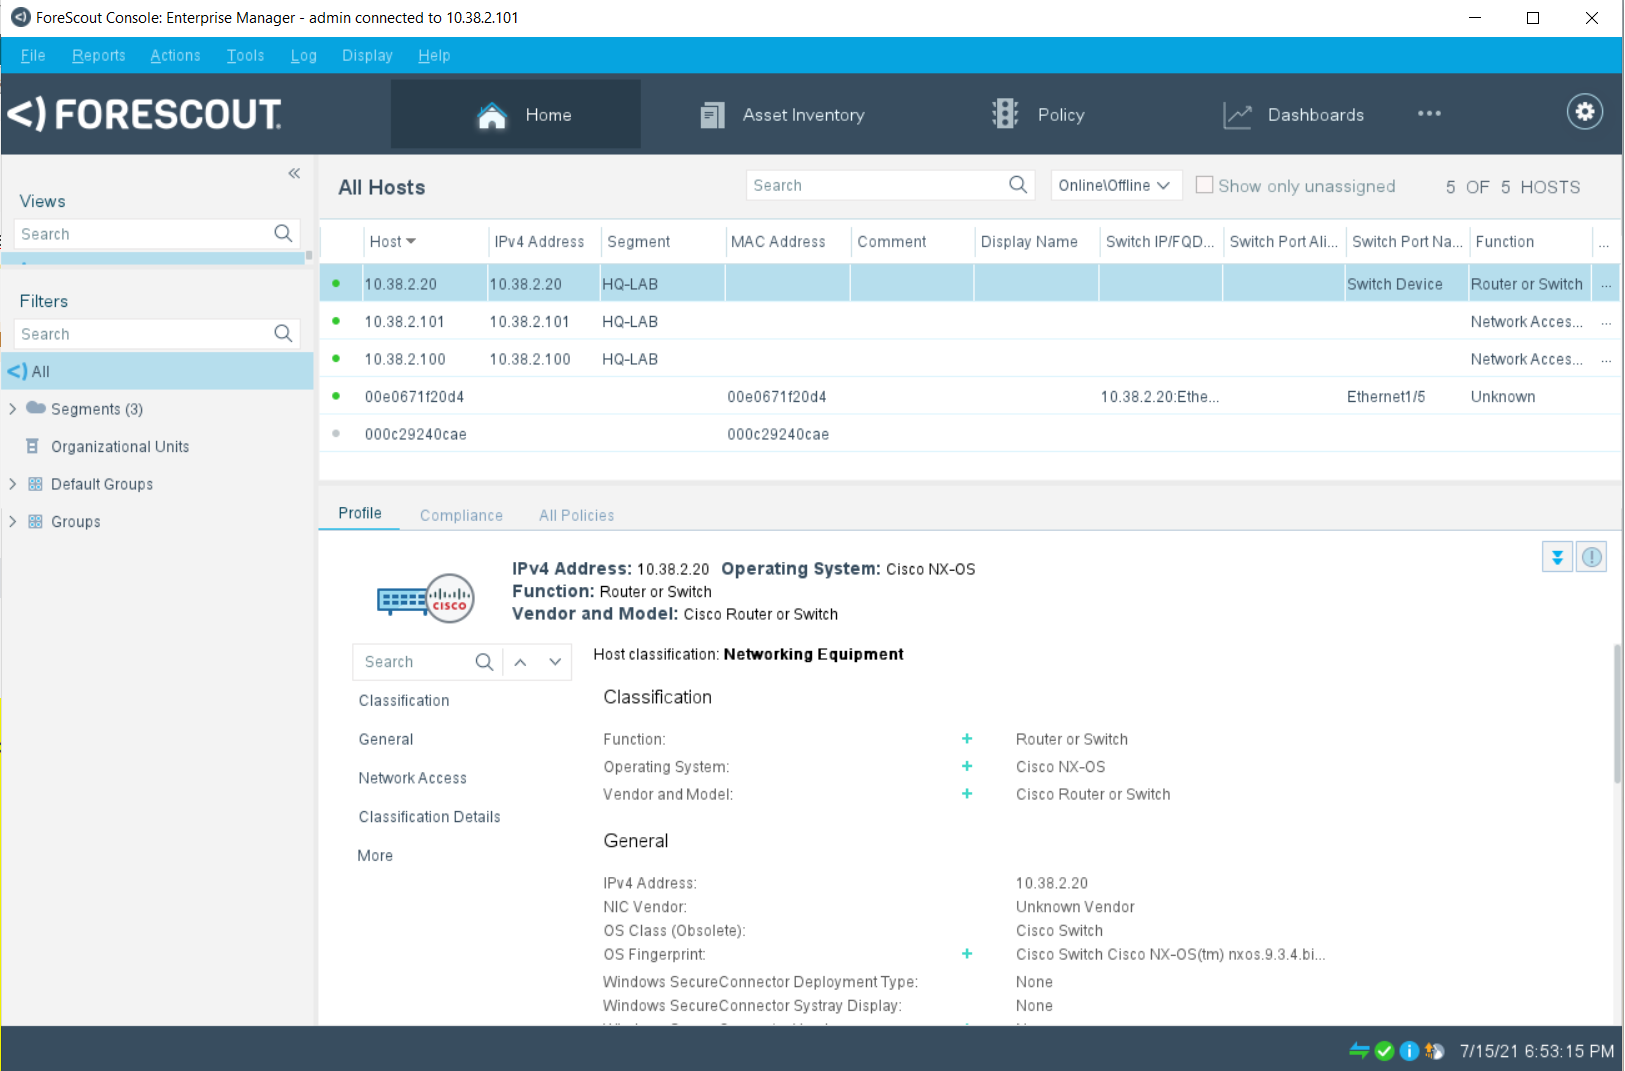
-
Use the Help>About menu to verify that your Forescout version is v8.2.2, or later.
-
From the Forescout Console, open the Tools > Options menu.
-
In the Options dialog that opens, select the Modules block.
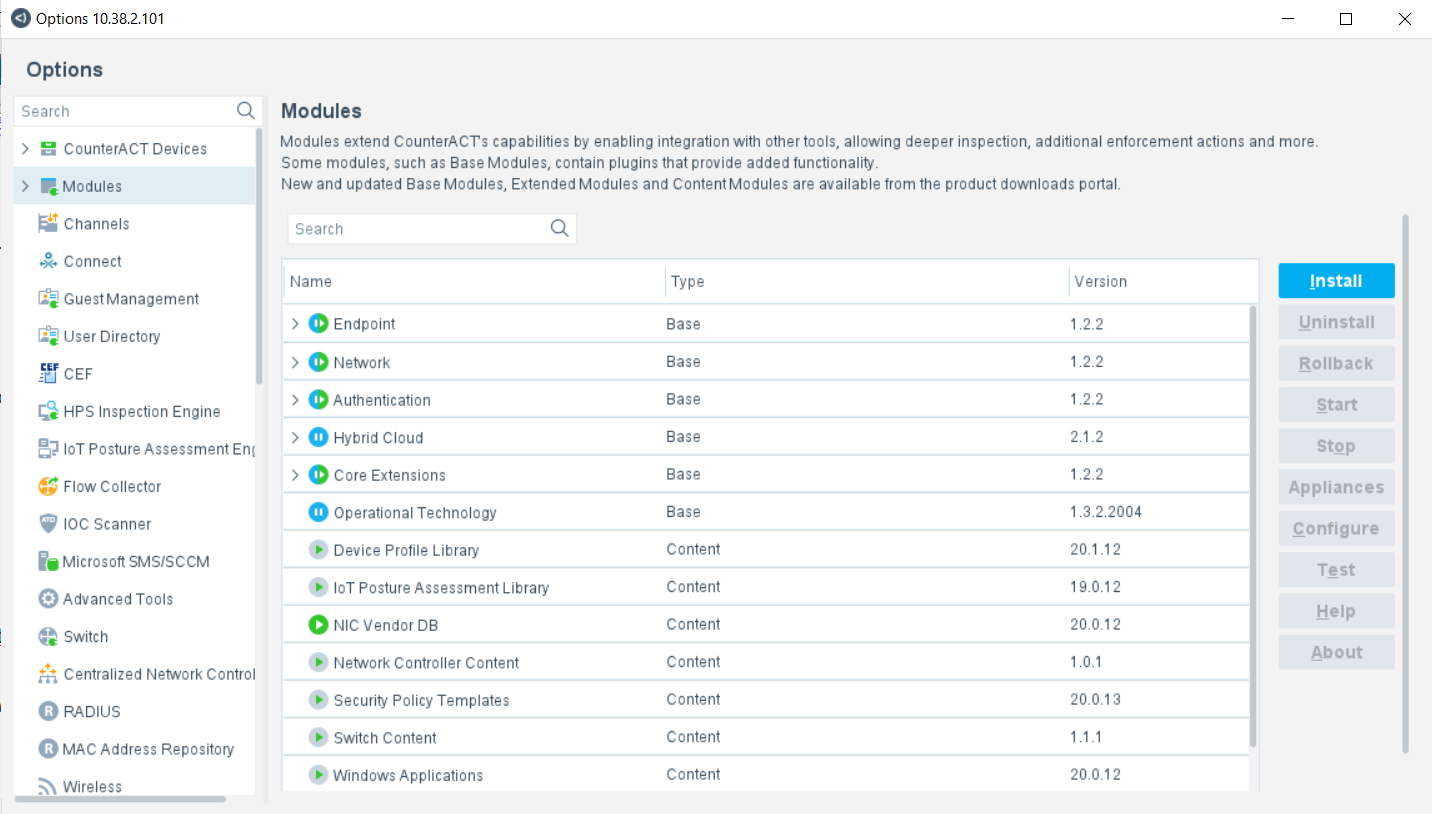
-
Click the blue Install button to begin the process of loading and installing the web connector file you downloaded above.
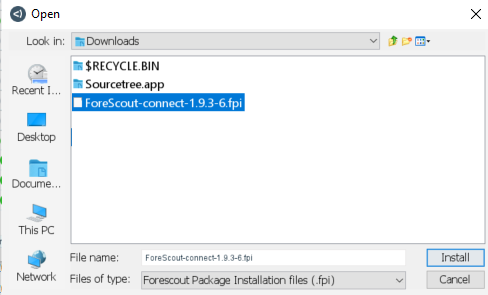
-
The install dialog displays. Check the box to Agree to the licensing terms, then click Install.
The installation begins immediately and cannot be interrupted or canceled.
-
When the installation completes, click the Close button and return to the Options>Modules window. Expand the Connect row and make sure all the services are running.

-
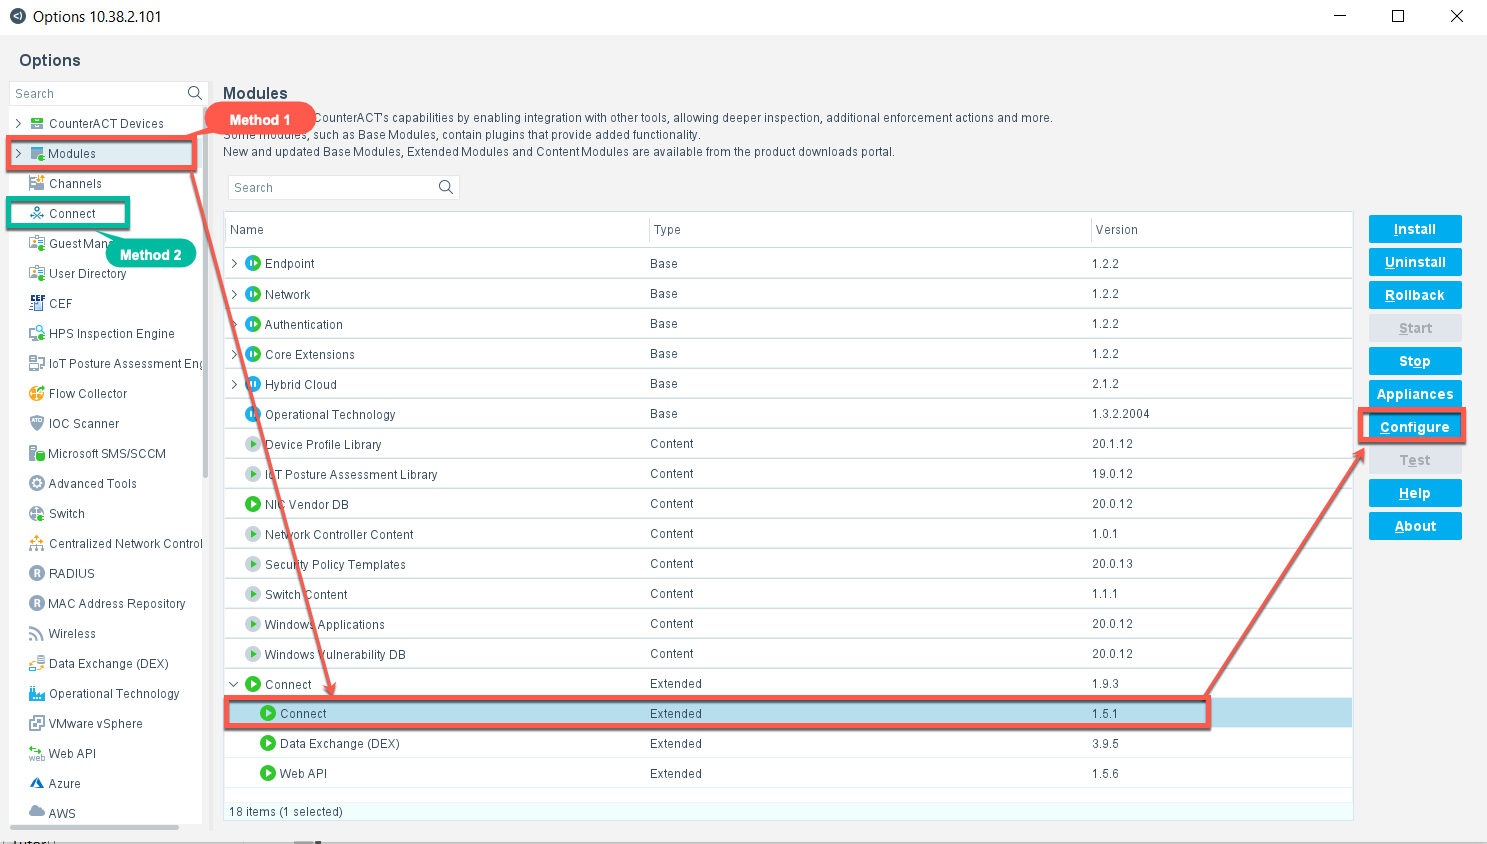
In the Forescout Console's Options dialog, access the Connect > Configuration pane. You can access this two ways:
-
Click Modules from the navigation list, then expand the Connect module and select the Connect row element, then click Configure.
-
Click Connect directly from the navigation list at the left of the dialog.
-
-
When the Connect configure pane is displayed, click Import and select the StellarCyberActionAPI.zip you had downloaded from GitHub, above, or your custom module.
-
When the import process has completed, click Close from the import dialog.
-
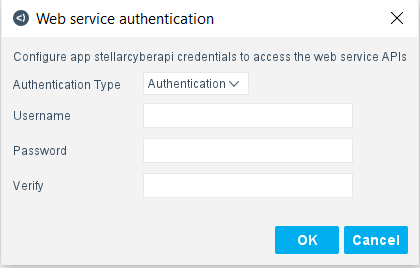
A dialog now displays that allows you to specify the username and password for this module to communicate with Stellar Cyber. Enter the username and password you want to use, and make note of those for use with the Stellar Cyber connector. Then click OK.
The password should not include non-ASCII special characters.
-
A system description dialog now opens, allowing you to optionally define custom sets of devices to associate with this application. Click Add to create at least one setup definition. In the dialog that displays, specify a name for the setup, then click Next.
-
The second pane allows you to specify which CounterACT Devices to associate with this app. After selecting a specific device or all of them, click Finish. The new application is added to the Connect pane. Click Apply to save the configuration.
-
Make note of the module Name displayed in the Connect dialog. This was loaded from the file you imported and is used when you configure the Stellar Cyber connector.
You are now ready to configure your Stellar Cyber Forescout Connector.
Adding the Connector in Stellar Cyber
With the configuration information handy, you can add the Forescout connector in Stellar Cyber:
-
Log in to Stellar Cyber.
-
Click System | Integration | Connectors. The Connector Overview appears.
-
Click Create. The General tab of the Add Connector screen appears. The information on this tab cannot be changed after you add the connector.
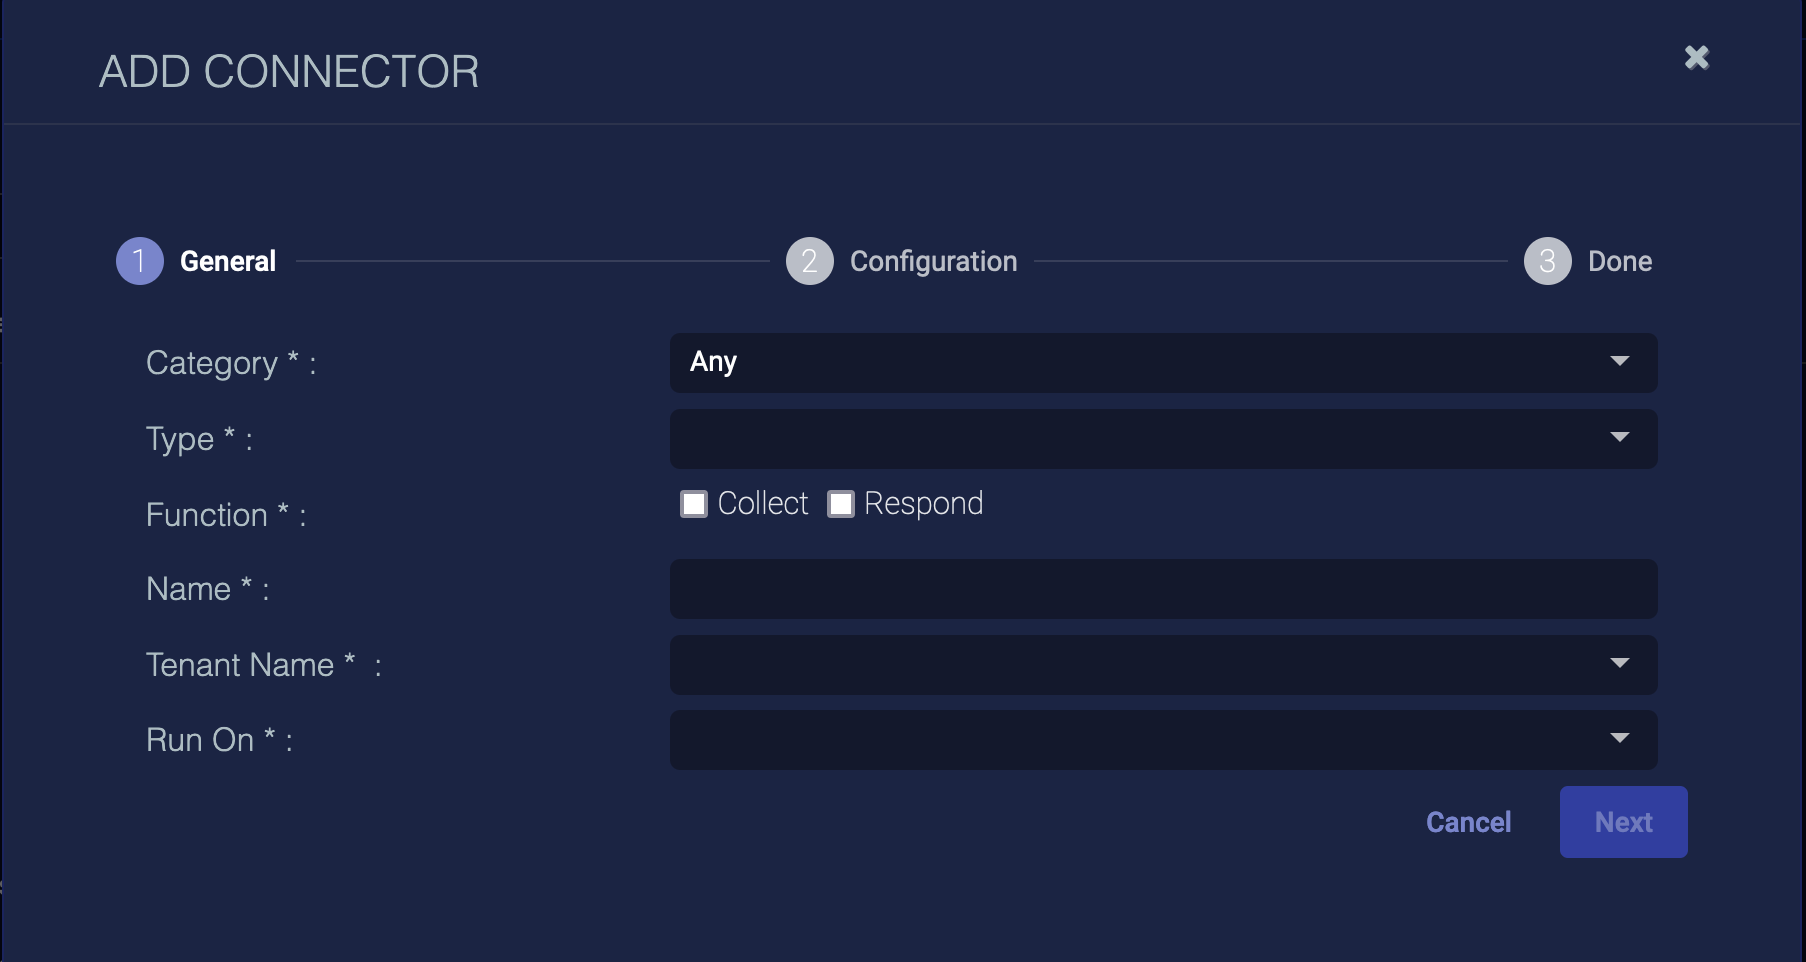
The asterisk (*) indicates a required field.
-
Choose Endpoint Security from the Category drop-down.
-
Choose Forescout from the Type drop-down.
-
For this connector, the supported Function is Respond, which is enabled already.
-
Enter a Name.
Notes:- This field does not accept multibyte characters.
- It is recommended that you follow a naming convention such as tenantname-connectortype.
The name must match the name of the module you imported in the previous section.
-
Choose a Tenant Name. The Interflow records created by this connector include this tenant name.
-
Choose the device on which to run the connector.
-
Certain connectors can be run on either a Sensor or a Data Processor. The available devices are displayed in the Run On menu. If you want to associate your collector with a sensor, you must have configured that sensor prior to configuring the connector or you will not be able to select it during initial configuration.
-
If the device you're connecting to is on premises, we recommend you run on the local sensor. If you're connecting to a cloud service, we recommend you run on the DP.
-
-
Click Next. The Configuration tab appears.
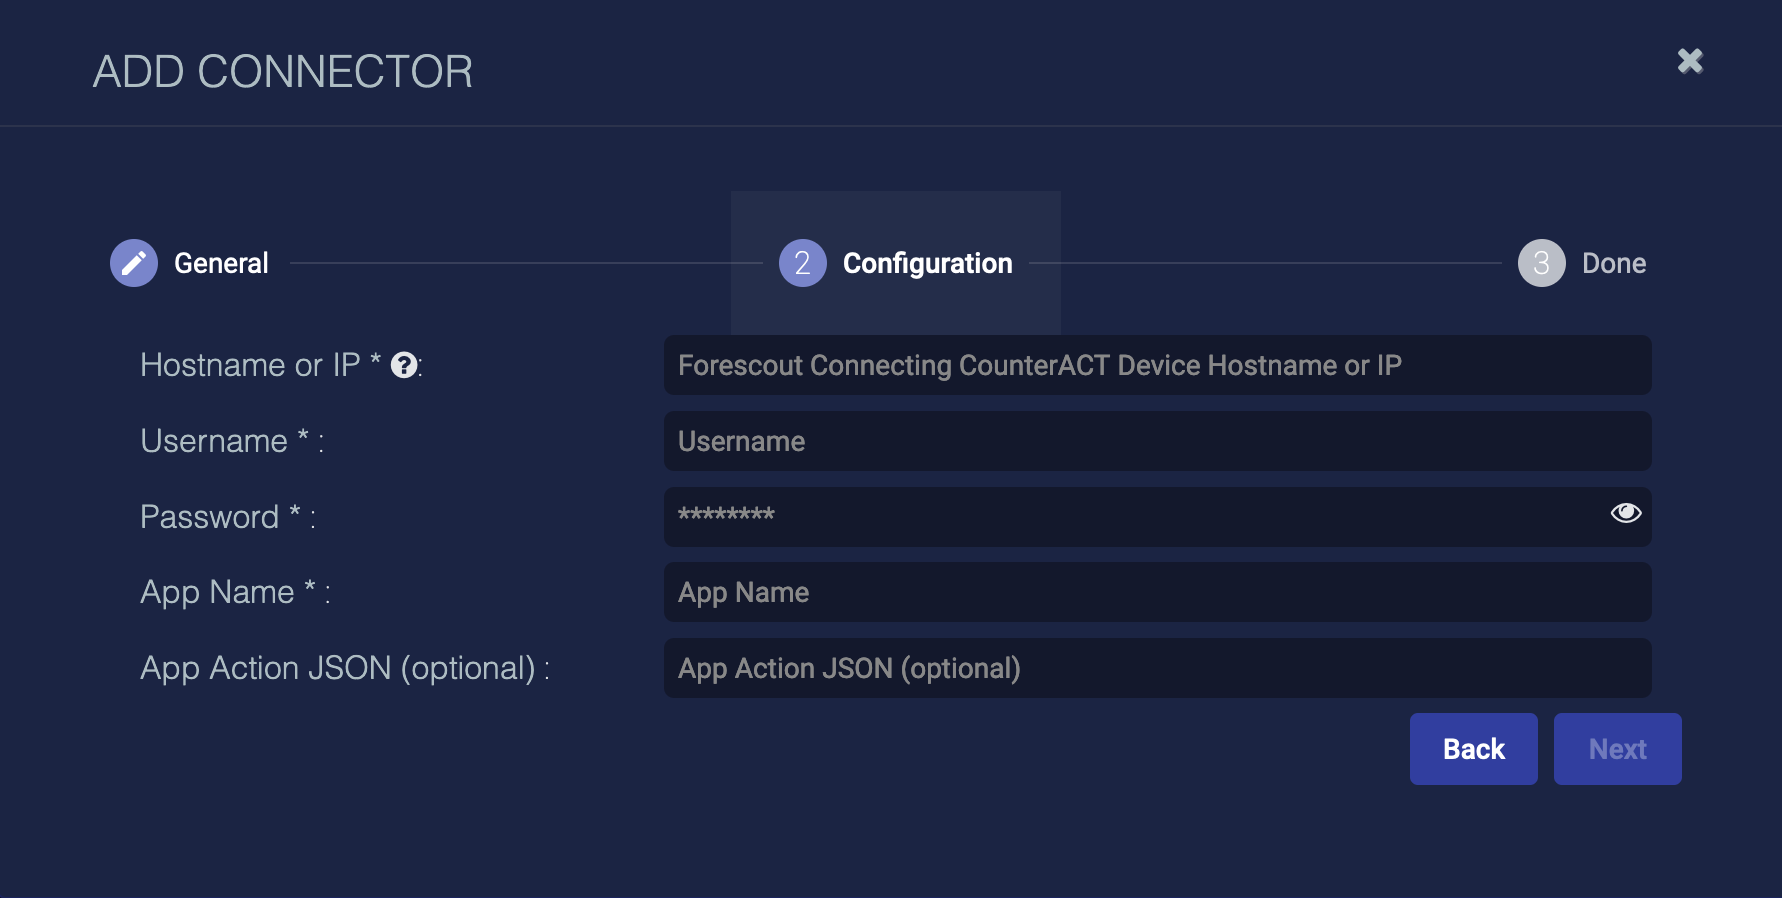
The asterisk (*) indicates a required field.
-
Enter the Hostname or IP. Do not include https in the Hostname. This is the address of the Forescout Connecting CounterACT Device; it forwards all the queries and requests to and from Stellar Cyber. (Forescout recommends that you not use the address of the Enterprise Manager Console.) The following parameters are the name and authentication attributes you used when you imported the action module.
-
Enter the Username you noted earlier.
-
Enter the Password you noted earlier.
-
Enter the App Name you noted earlier.
-
(Optional) App Action JSON. If there is a standard response action you want to take with this connector, or a default JSON parameters you want saved, you can add that now. The JSON content will be saved for use by anyone using the connector to run an External Action | Update Device action from the Event Details pane. You can alternatively enter JSON at the time you run the action but that JSON is not saved. For syntax guidance, refer to the section: Updating Devices with the Forescout Connector.
-
Click Next. The final confirmation tab appears.
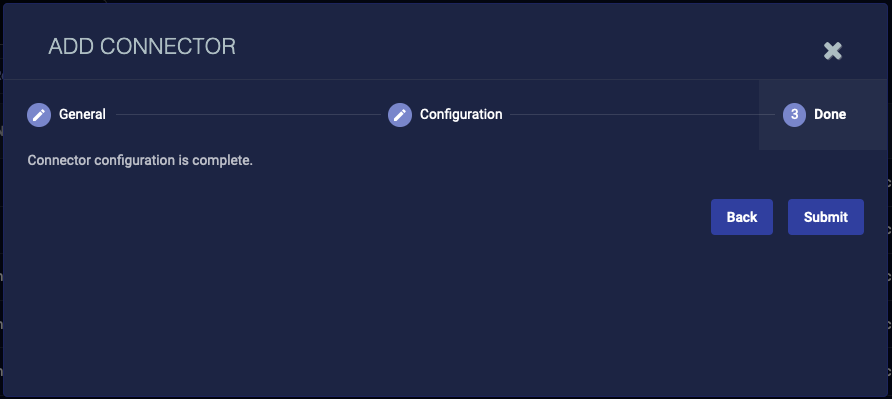
-
Click Submit.
The new connector is immediately active.
Testing the Connector
When you add (or edit) a connector, we recommend that you run a test to validate the connectivity parameters you entered. (The test validates only the authentication / connectivity; it does not validate data flow).
-
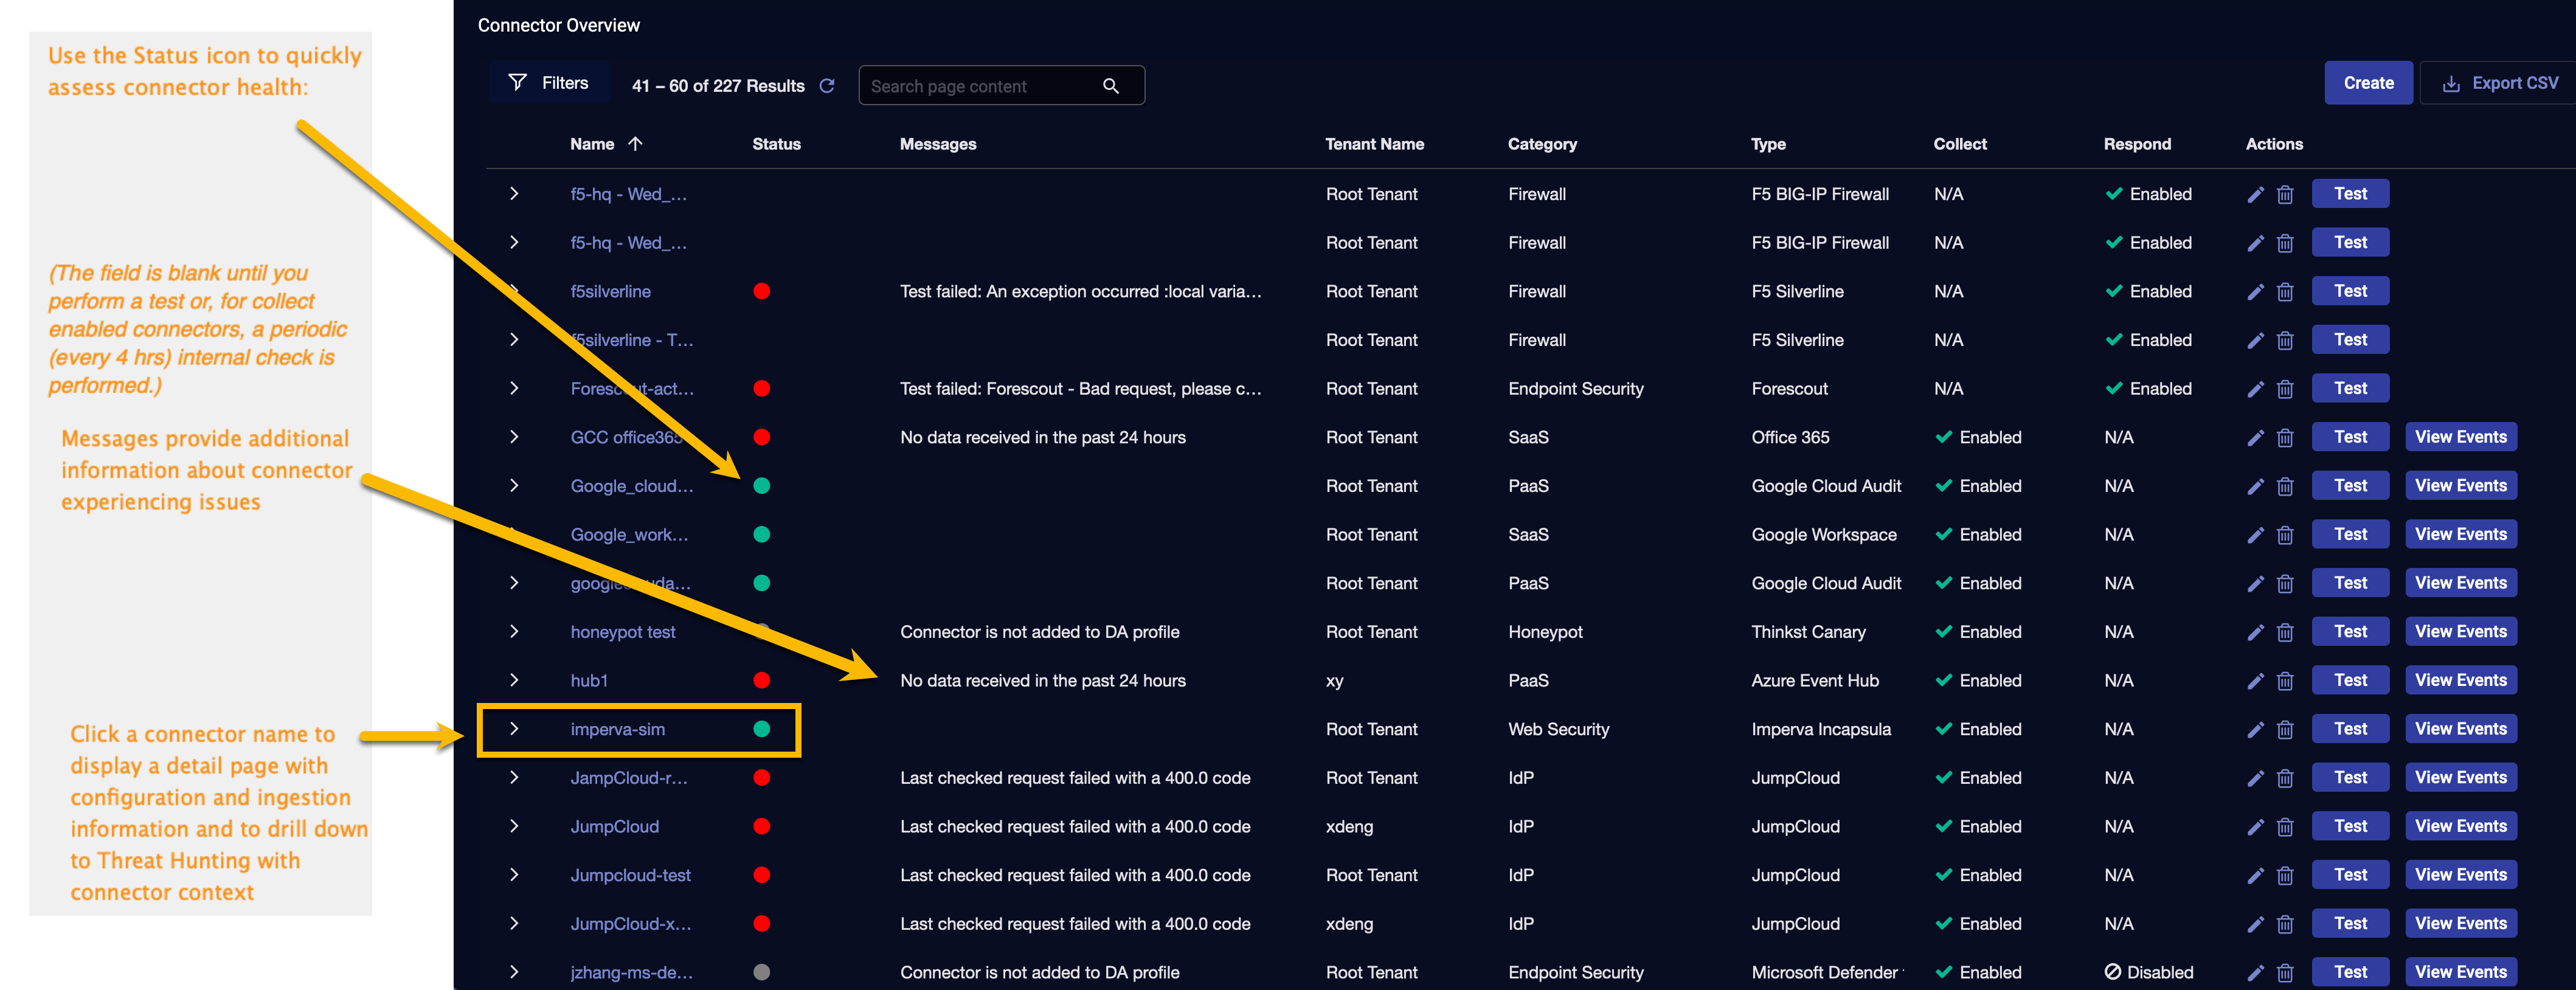
Click System | Integrations | Connectors. The Connector Overview appears.
-
Locate the connector that you added, or modified, or that you want to test.
-
Click Test at the right side of that row. The test runs immediately.
Note that you may run only one test at a time.
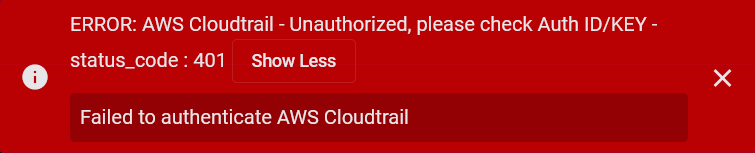
Stellar Cyber conducts a basic connectivity test for the connector and reports a success or failure result. A successful test indicates that you entered all of the connector information correctly.
To aid troubleshooting your connector, the dialog remains open until you explicitly close it by using the X button. If the test fails, you can select the button from the same row to review and correct issues.
The connector status is updated every five (5) minutes. A successful test clears the connector status, but if issues persist, the status reverts to failed after a minute.
Repeat the test as needed.


If the test fails, the common HTTP status error codes are as follows:
| HTTP Error Code | HTTP Standard Error Name | Explanation | Recommendation |
|---|---|---|---|
| 400 | Bad Request | This error occurs when there is an error in the connector configuration. |
Did you configure the connector correctly? |
| 401 | Unauthorized |
This error occurs when an authentication credential is invalid or when a user does not have sufficient privileges to access a specific API. |
Did you enter your credentials correctly? Are your credentials expired? Are your credentials entitled or licensed for that specific resource? |
| 403 | Forbidden | This error occurs when the permission or scope is not correct in a valid credential. |
Did you enter your credentials correctly? Do you have the required role or permissions for that credential? |
| 404 | Not Found | This error occurs when a URL path does not resolve to an entity. | Did you enter your API URL correctly? |
| 429 | Too Many Requests |
This error occurs when the API server receives too much traffic or if a user’s license or entitlement quota is exceeded. |
The server or user license/quota will eventually recover. The connector will periodically retry the query. If this occurs unexpectedly or too often, work with your API provider to investigate the server limits, user licensing, or quotas. |
For a full list of codes, refer to HTTP response status codes.
Updating Devices with the Forescout Connector
When an event has occurred on a host known to the Forescout connector, you can use this connector to perform an action on that host.
-
Access the Event Details Display:
-
Click Investigate | Threat Hunting. The Interflow Search tab appears.
-
Select the Indices for Traffic.
-
Select an event and click the More Info button.
-
-
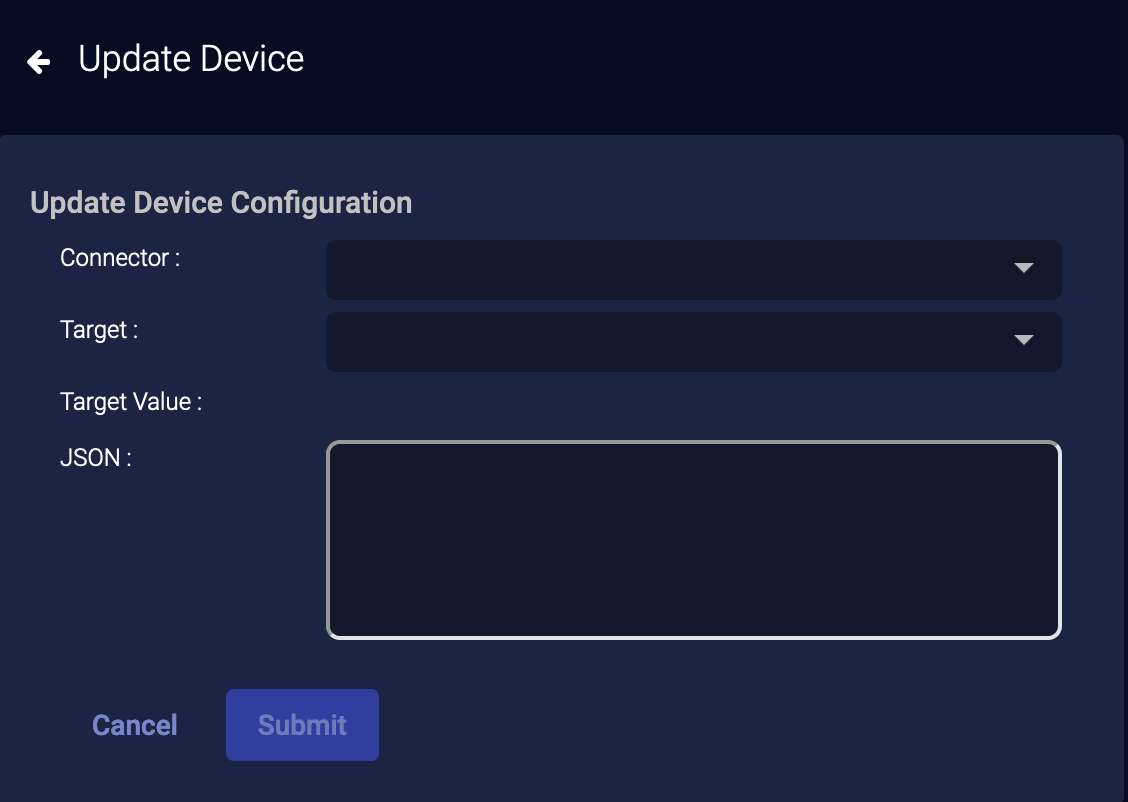
In the dialog that displays, click External Actions | Endpoint and choose Update Device.
-
From the Connector menu, select the Forescout connector.
-
The Target menu lists the addresses associated with this event. Select the host on which you want to run the Forescout connector update action. The target can be one of these: Source Host, Destination Host, Source MAC, or Destination MAC. The Target Value is updated automatically from the event data. These two fields are required default parameters for the Forescout action and should not be specified in the JSON added in the next step.
-
If your connector was created with default JSON, you can customize it now, or skip this step. Populate the JSON field with the action you want the connector to transmit to the Forescout app configured in the beginning of this procedure. Note that Stellar Cyber verifies general format of the JSON, not the logic. Following is an example based on ActionAPI's supported JSON properties:
{
"connect_actionapi_vlan_assign":true,
"connect_actionapi_vlan_assign_id":"vlan233"
}
Do not include the IP or MAC address, as that is added automatically based on your selection in the previous step. The JSON that is transmitted to Forescout will include the IP or MAC and the property tag, similar to the sample below.
{
"mac":"009027390a7c",
"properties":{
"connect_actionapi_vlan_assign":true,
"connect_actionapi_vlan_assign_id":"vlan233"
}
}
Refer to Forescout documentation for supported fields and syntax details.
-
Click Submit. The connector runs the update action one time.
For more information on working with the events and the actions on them, refer to Understanding Event Details.
