Creating Alert Exclusion Filters
Alert filters ignore events that you are not interested in. The filtered alerts do not appear in the Alert index. You can create alert filters from the System | Machine Learning | Exclusions menu or from the Event details.
Creating an Alert Filter from the System Menu
To create an alert filter from the System menu:
-
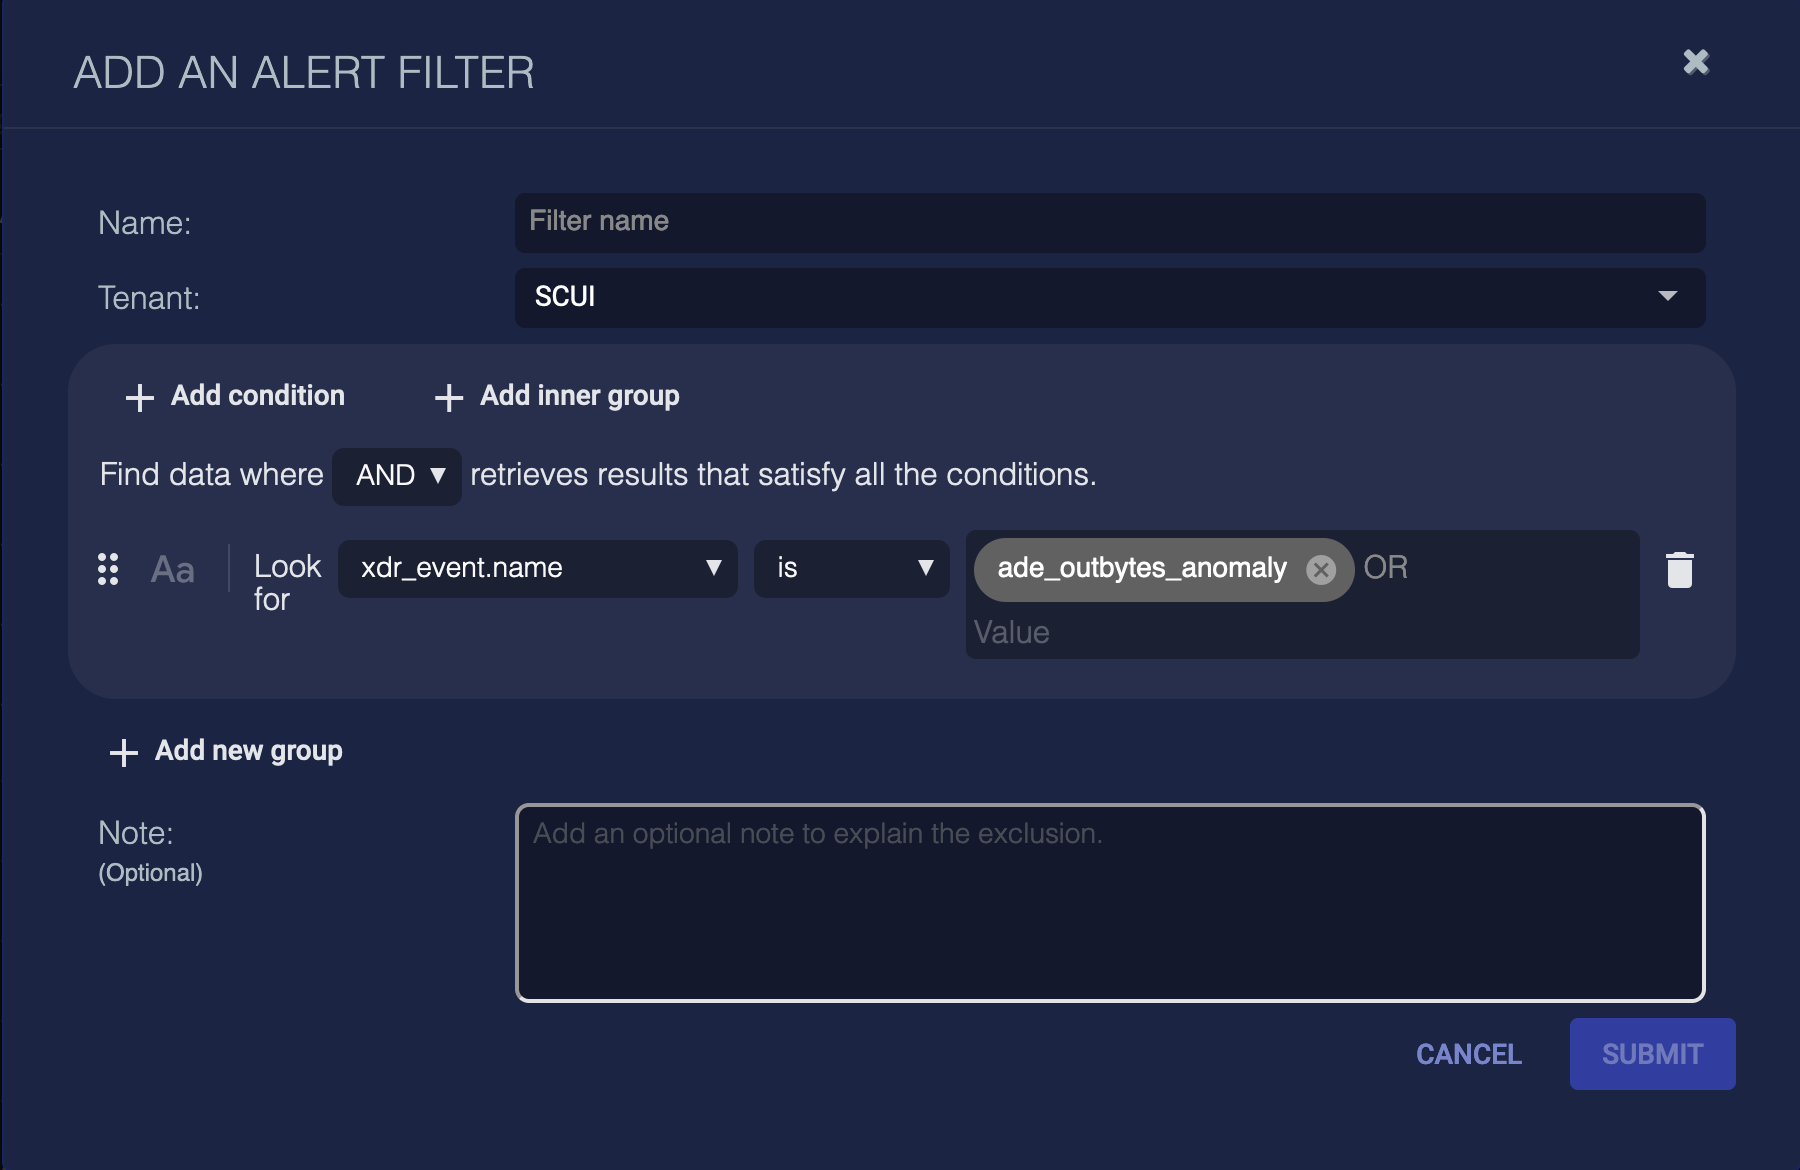
Click System | Machine Learning | Exclusions. The Alert Filters table appears.
-
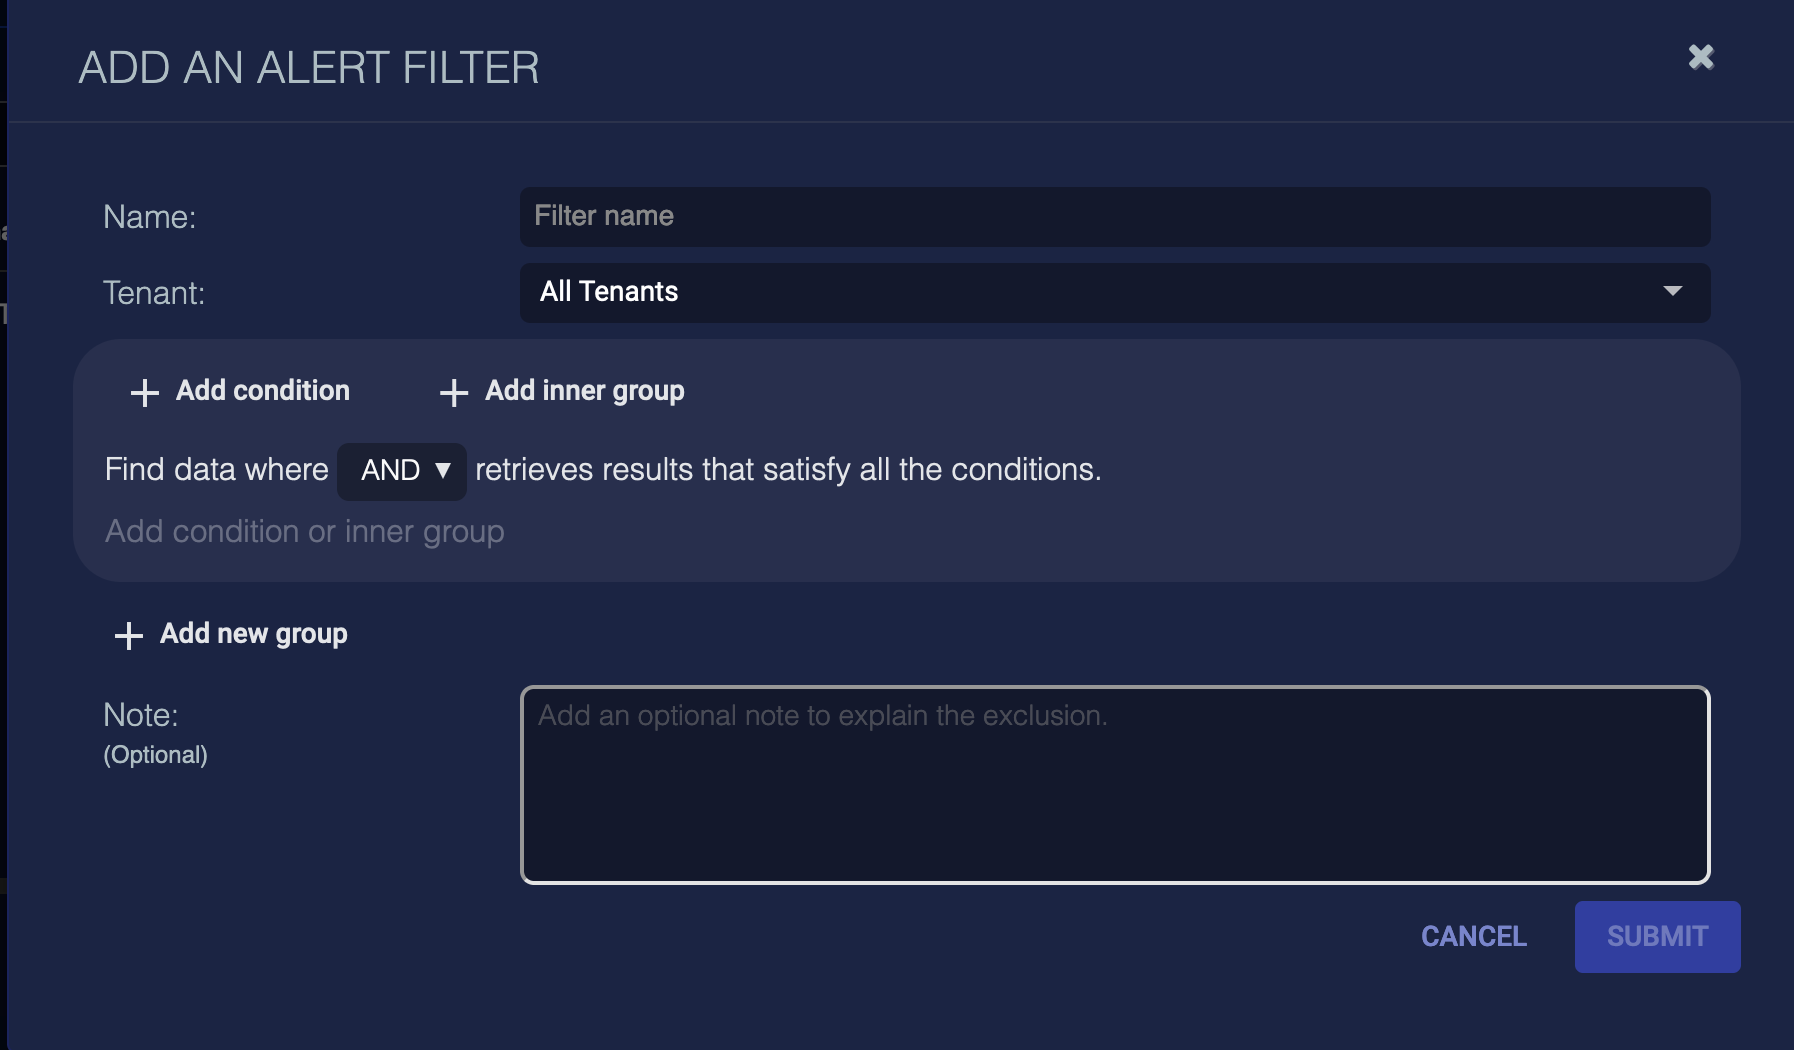
Click Create. The Add an Alert Filter screen appears.
-
Enter a Name for the filter.
-
Select a Tenant.
-
Click Add condition to start defining your condition. If an event meets any condition, it is ignored (filtered).
For details on adding conditions, see Adding Conditions and Groups and the other sections of this topic.
-
(Optional) Add a Note.
-
Click Submit. The filter is immediately added.
Keeping Track of Per-Tenant Alert Filter Statistics 
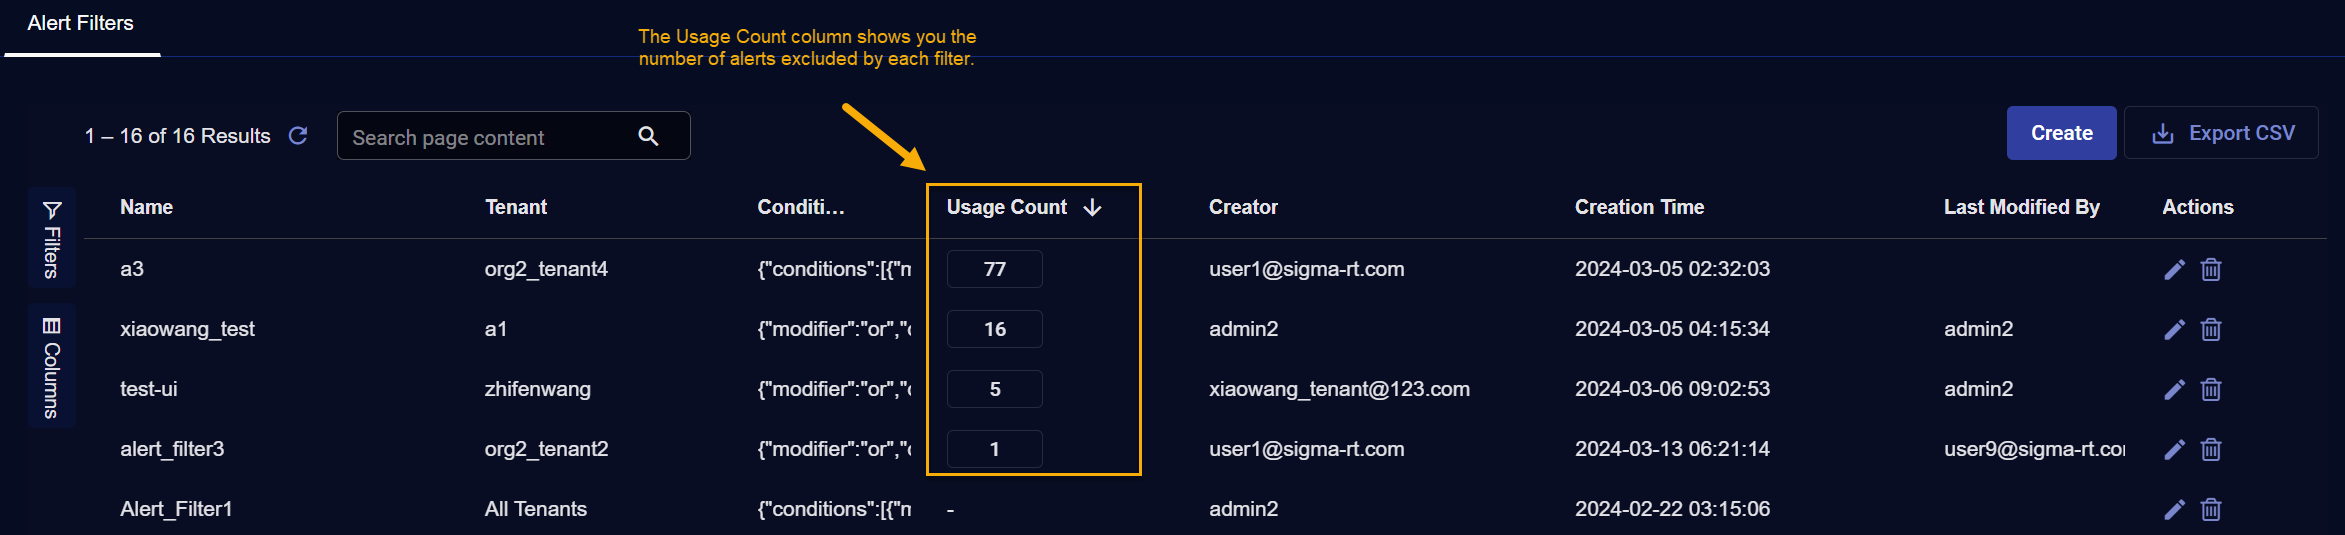
By default, the Alert Filters table includes a Usage Count column that helps you keep track of how many alerts have been excluded by an alert filter on a per-tenant basis. You use this feature as follows:
-
Navigate to the Alert Filters table under System | Machine Learning | Exclusions.
-
Locate the Usage Count column. If it does not appear, you can add it from the Column picker at the left of the table.
-
Click in the Usage Count column header to sort the table by the number of alert filters with the most hits. For example:
-
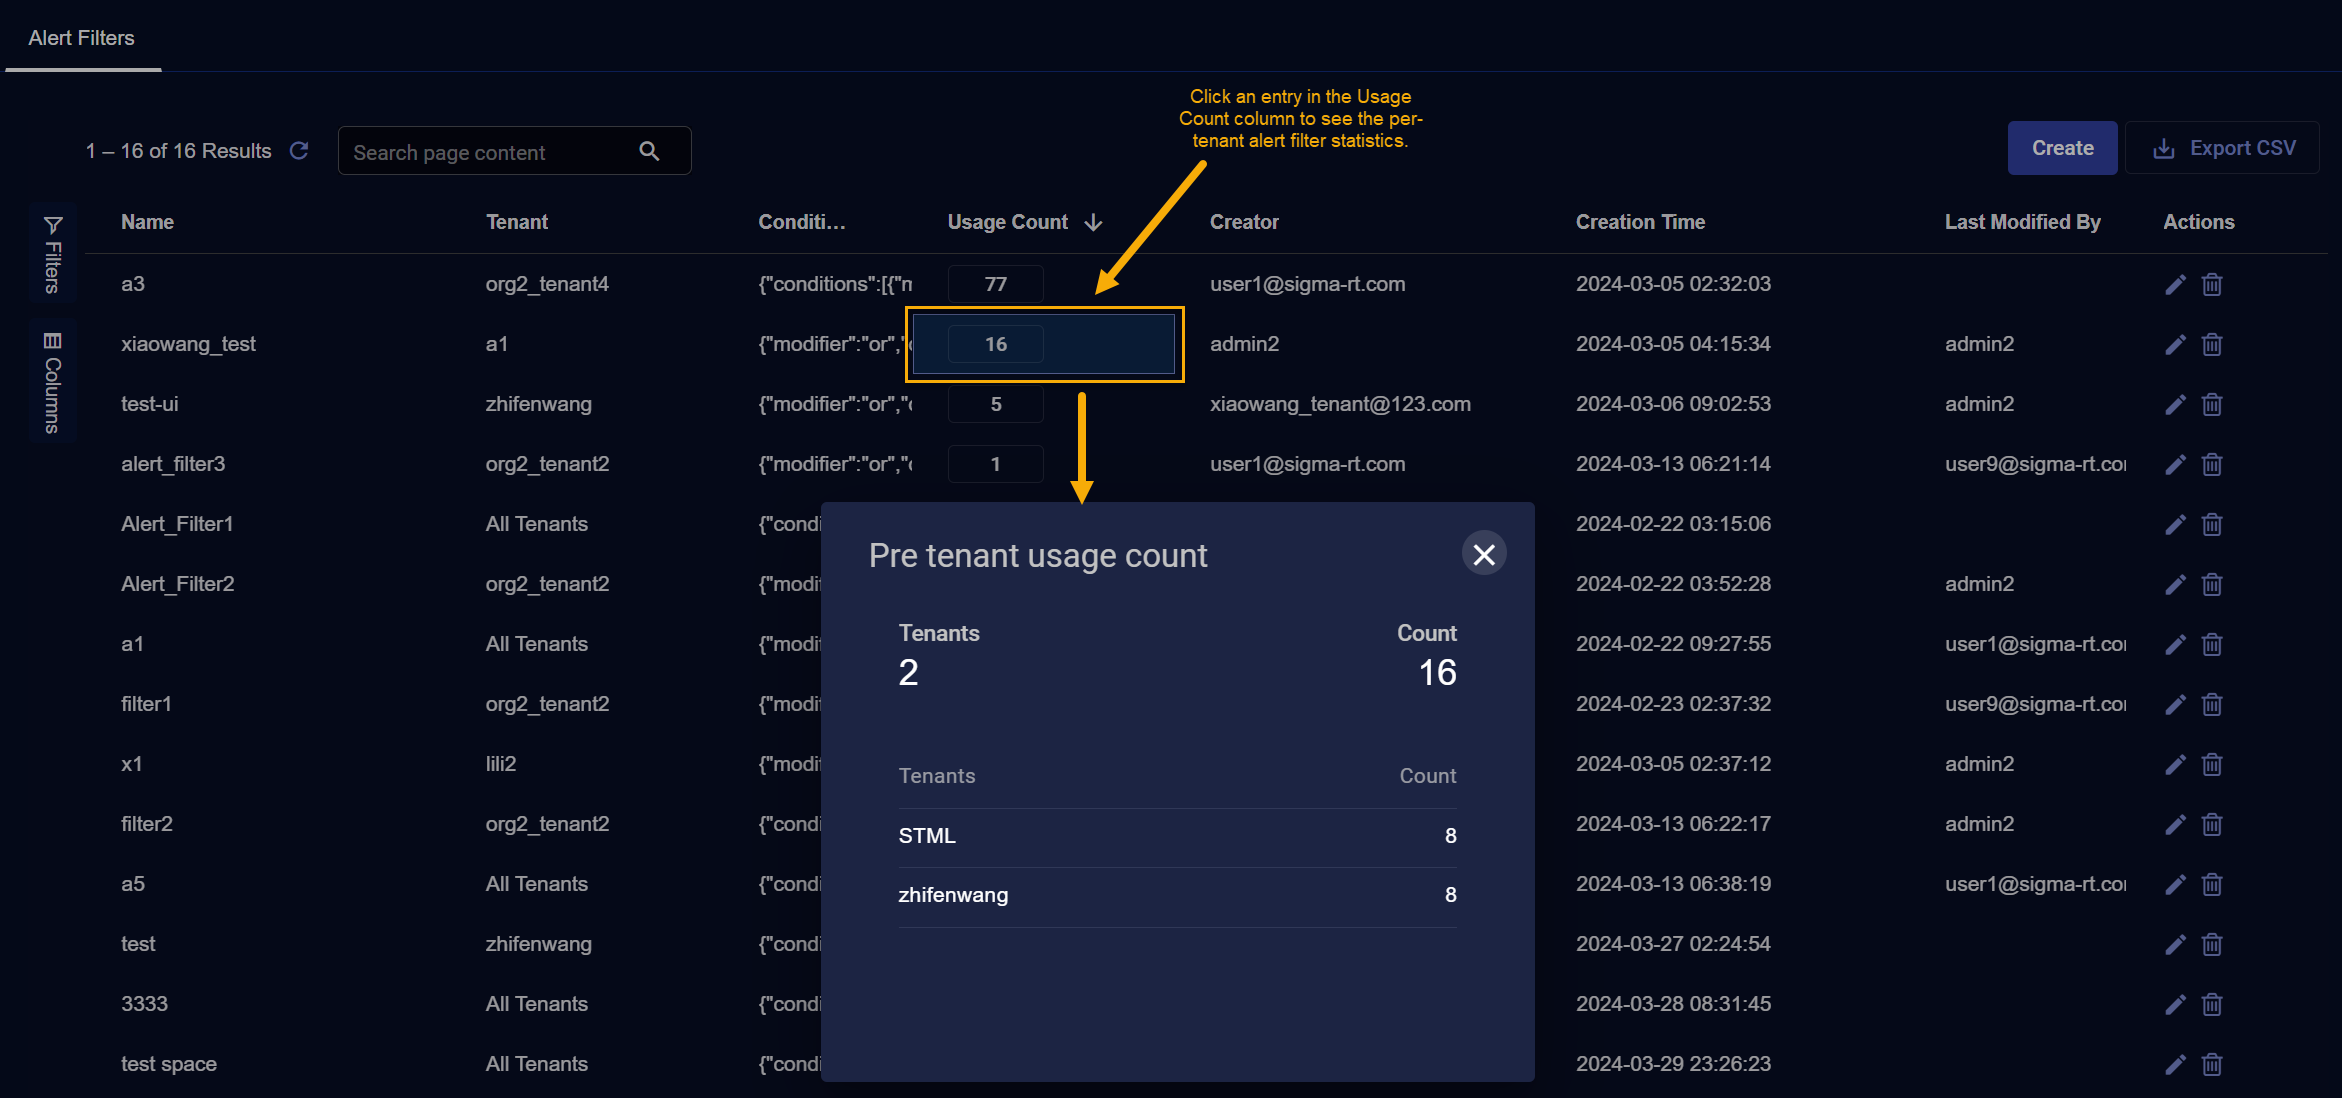
Once you've sorted the table so you can see the entries with non-zero values in the Usage Count column, you can click any entry in the column to see the number of alerts excluded by the filter broken out by tenant. For example:
Creating an Alert Filter from the Event Display
To create an alert filter from the event display:
-
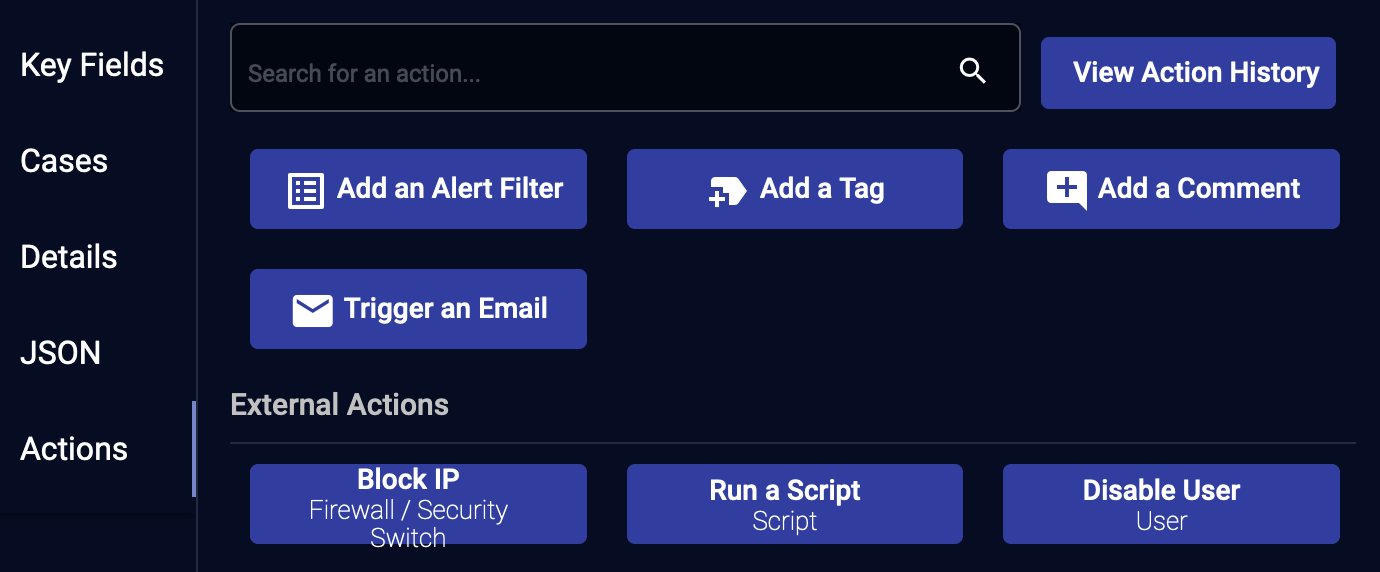
Click More Info for an event.
-
Click the Actions tab.
-
Click Add an Alert Filter. The Add an Alert Filter screen appears with fields pre-populated based on the selected alert.
-
Enter a Name for the filter.
-
Select a Tenant.
-
Click Add condition to start defining your condition. If an event meets any condition, it is ignored (filtered).
For details on adding conditions, see Adding Conditions and Groups and the other sections of this topic.
-
(Optional) Add a Note.
-
Click Submit. The filter is immediately added.
Adding Conditions and Groups
On the Add an Alert Filter screen, you can add conditions, inner groups, and new groups.
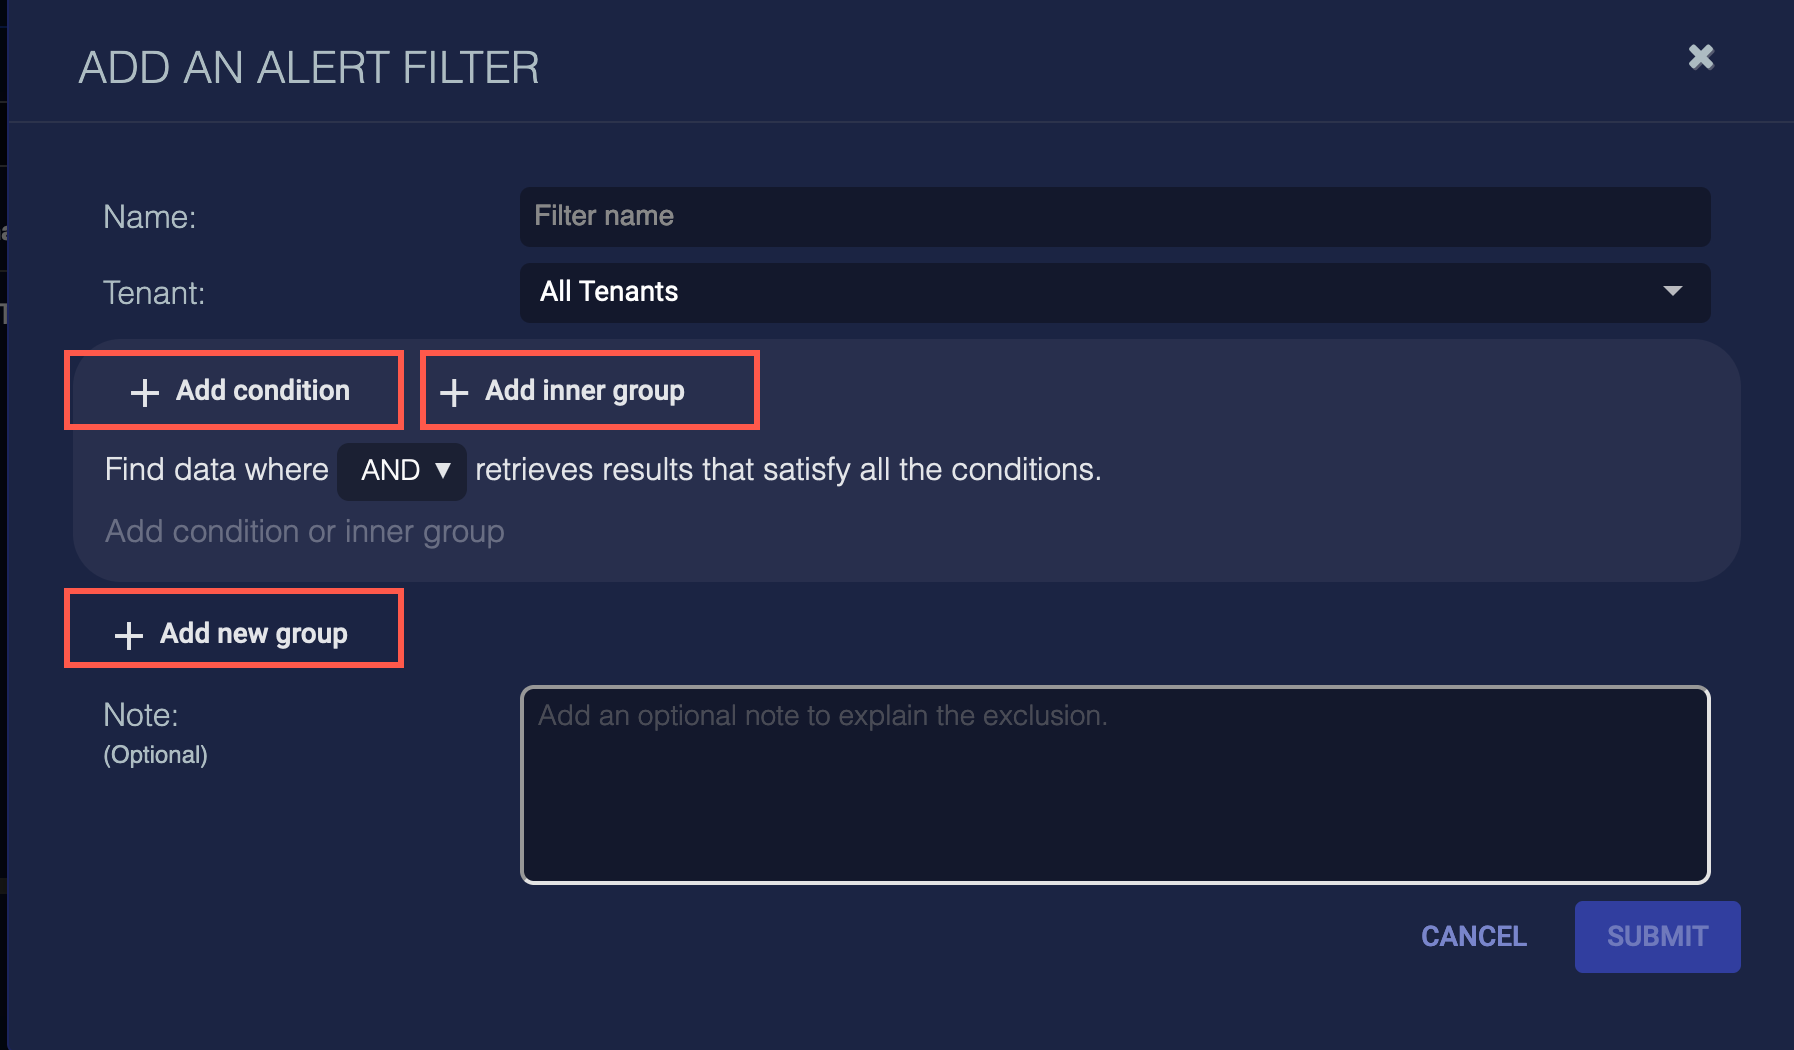
Click Add condition to add a condition.
-
Click Add condition again to add another condition. You can add as many conditions as you like.
-
When there are multiple conditions, you can drag and drop them to rearrange their order.
Click Add inner group to add an inner group to a condition.
-
Click Add inner group to add an inner group to an inner group (up to 10). This lets you nest conditions.
In general, new conditions are added to the top of the group, while inner groups are added to the bottom of the group.
Click Add new group to add a new group of conditions and inner groups. The relationship between groups is OR.
You can use the following modifiers with both conditions and inner groups to define the relationships between them:
-
AND—retrieves results that satisfy all the conditions
-
OR—retrieves results that satisfy at least one of the conditions
-
NOT—excludes results that satisfy the conditions
Adding a Condition
Click Add condition to add a condition.

A condition consists of:
-
Field
-
Operator
-
Value (singular or in some cases, multiple)
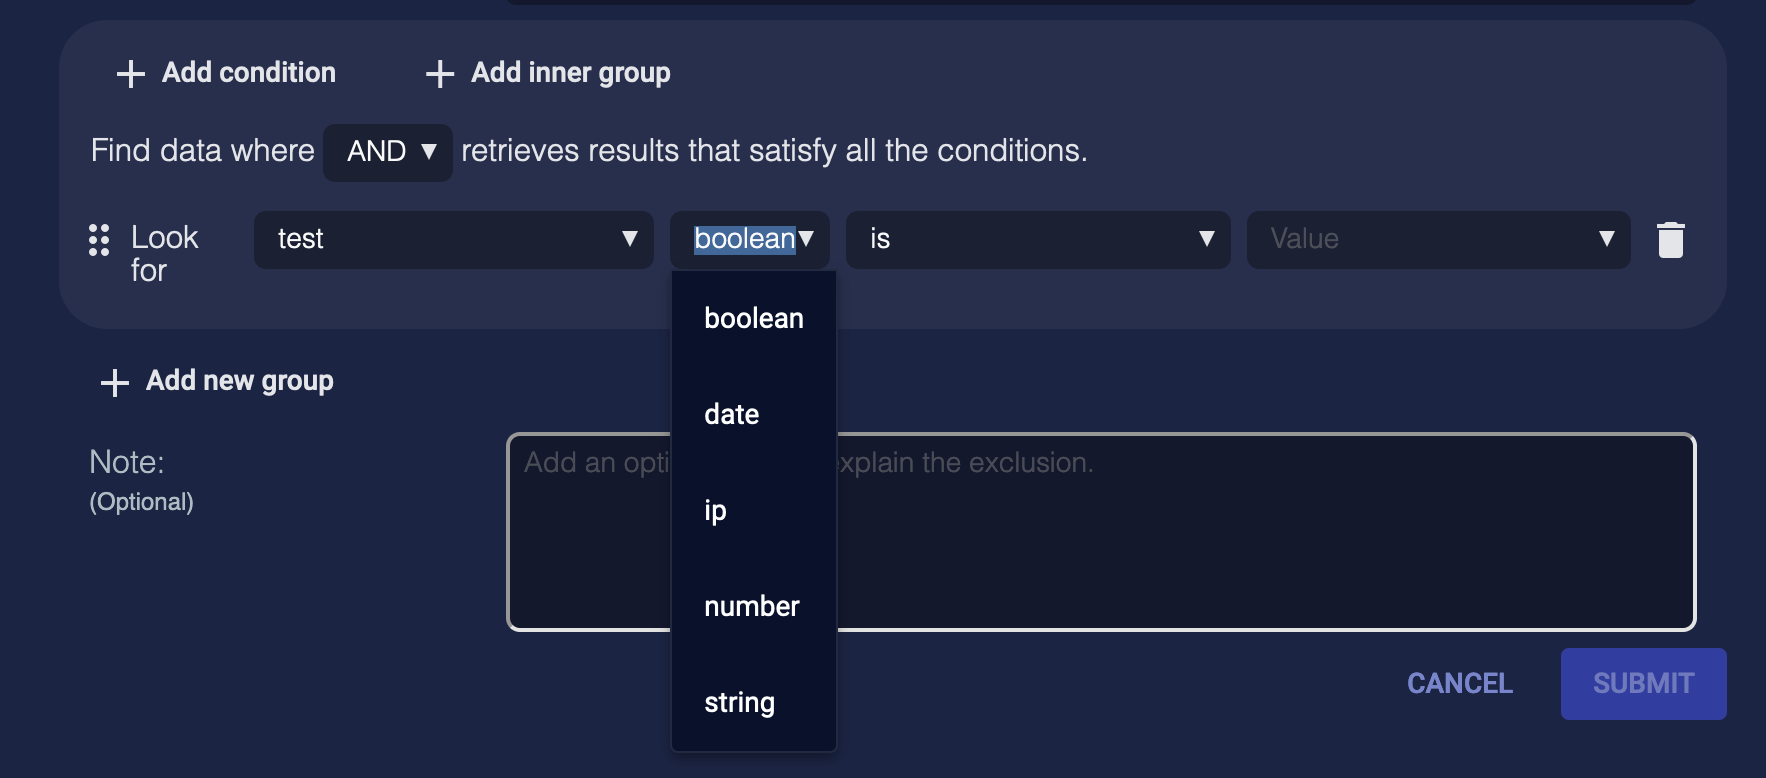
Fields can be one of the following five types:
Each field type has different operators as described in the following sections.
Adding a String Field
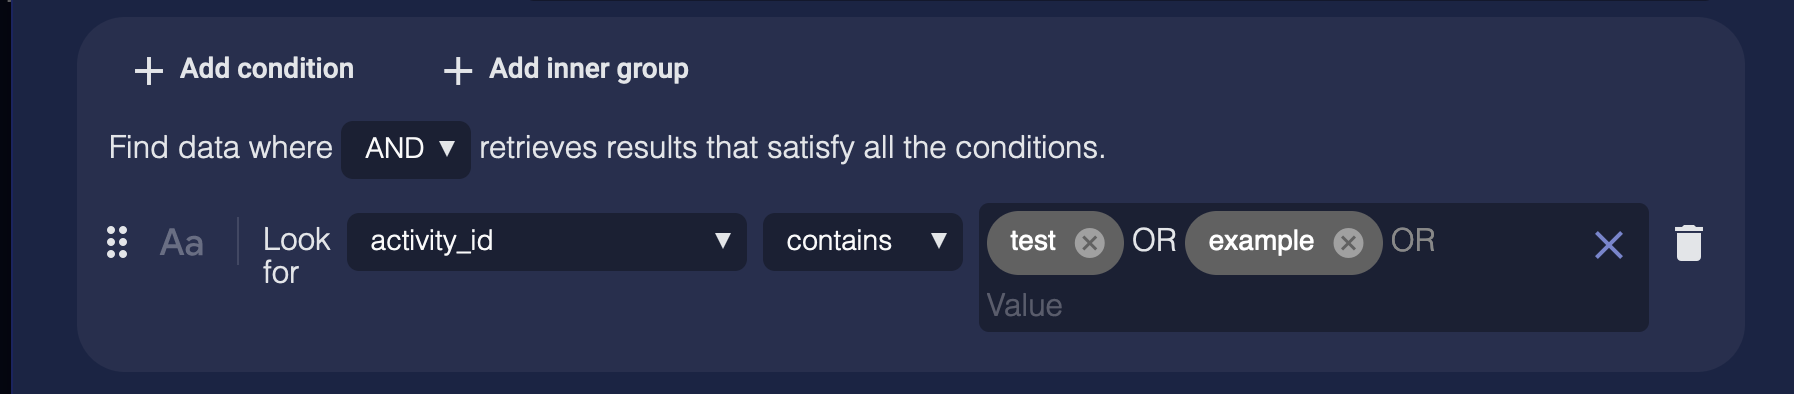
A string field, for example, activity_id, supports the following operators:
-
is
-
is not
-
contains
-
does not contain
-
starts with
-
ends with
-
field exists
-
field does not exist
-
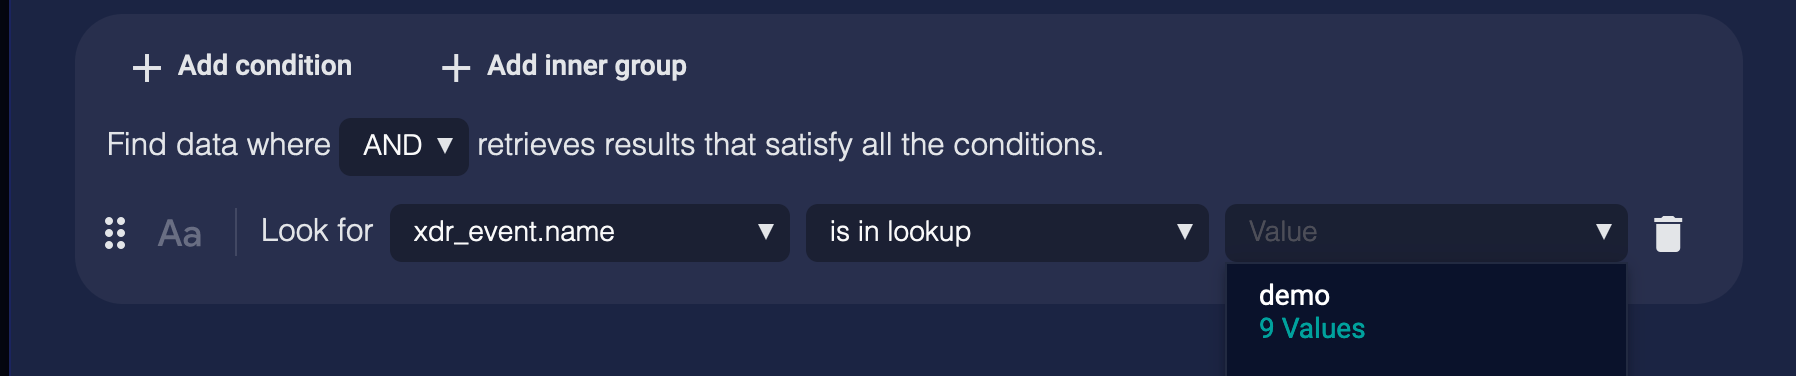
is in lookup
-
is not in lookup
Select an Operator and enter a Value.
There is no Value for the operators field exists and field does not exist. Enter the exact field name.

When you select a string field, the Aa icon displays. The icon toggles context-sensitivity. By default, case-sensitivity is off. When case-sensitivity is on, there will only be exact matches to the string, for example, test. When case-sensitivity is off, there may be several matches to the string, for example, test, Test, and TEST.
When the operator is is, is not, contains, or does not contain, you can enter multiple values. The relationship between the values is OR.
Adding a Number Field
A number field, for example, severity, supports the following operators:
-
is
-
is not
-
greater than
-
greater than or equal to
-
less than
-
less than or equal to
-
in range
-
field exists
-
field does not exist
-
is in lookup
-
is not in lookup
Select an Operator and enter a Value.
There is no Value for the operators field exists and field does not exist. Enter the exact field name.
When the operator is is or is not, you can enter multiple values. The relationship between the values is OR.

For the in range operator, select From and To values.

Adding a Date Field
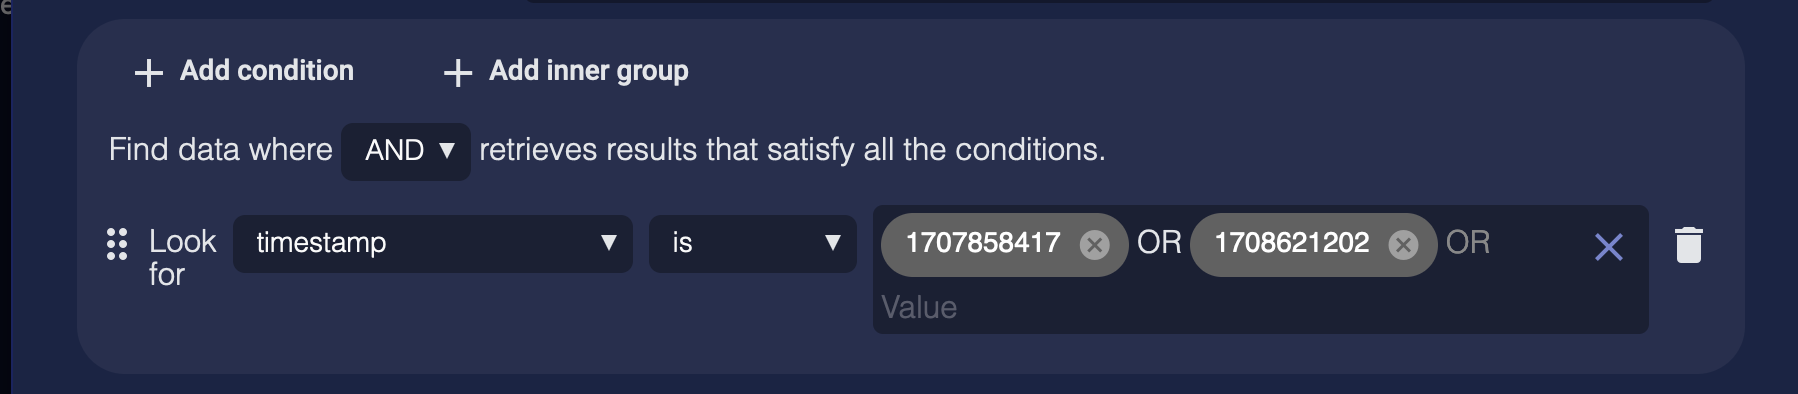
A date field, for example, timestamp, supports the following operators:
-
is
-
is not
-
greater than
-
greater than or equal to
-
less than
-
less than or equal to
-
in range
-
field exists
-
field does not exist
-
is in lookup
-
is not in lookup
The format for date is UNIX epoch, in seconds.
Select an Operator and enter a Value.
There is no Value for the operators field exists and field does not exist. Enter the exact field name.

When the operator is is or is not, you can enter multiple values. The relationship between the values is OR.
Adding an IP Field
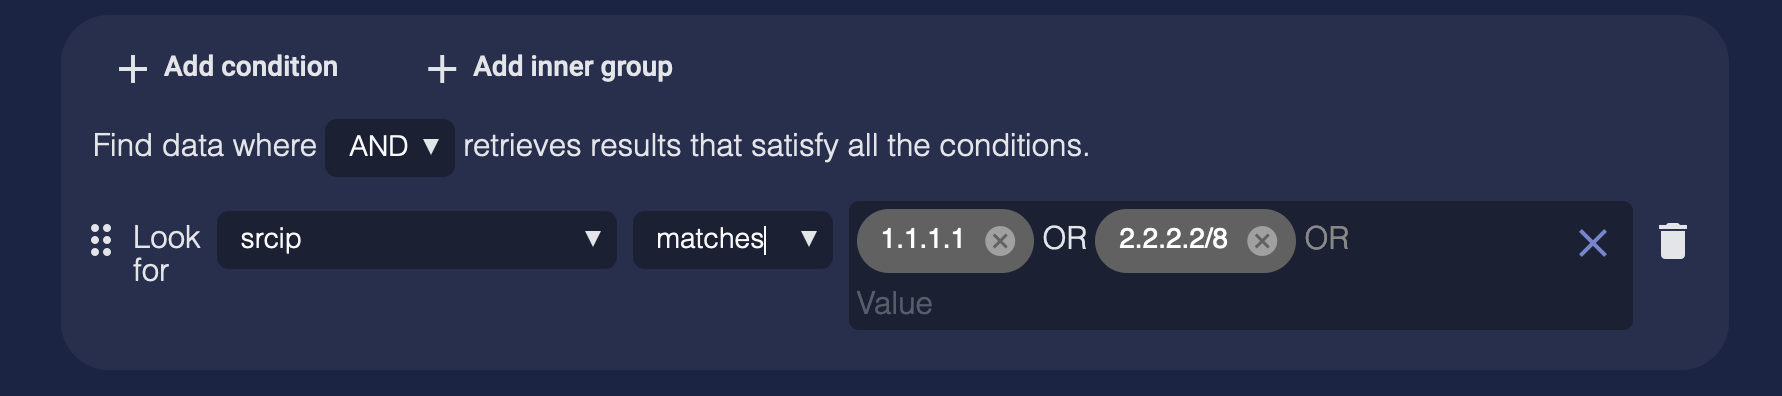
An ip field, for example, srcip, supports the following operators:
-
matches
-
does not match
-
field exists
-
field does not exist
-
is in lookup
-
is not in lookup
IP addresses with subnet masks are supported.
Select an Operator and enter a Value.
There is no Value for the operators field exists and field does not exist. Enter the exact field name.
When the operator is matches or does not match, you can enter multiple values. The relationship between the values is OR.
The values are validated as they are entered. An error message displays if the value is not an IP address format, for example, if it contains text.
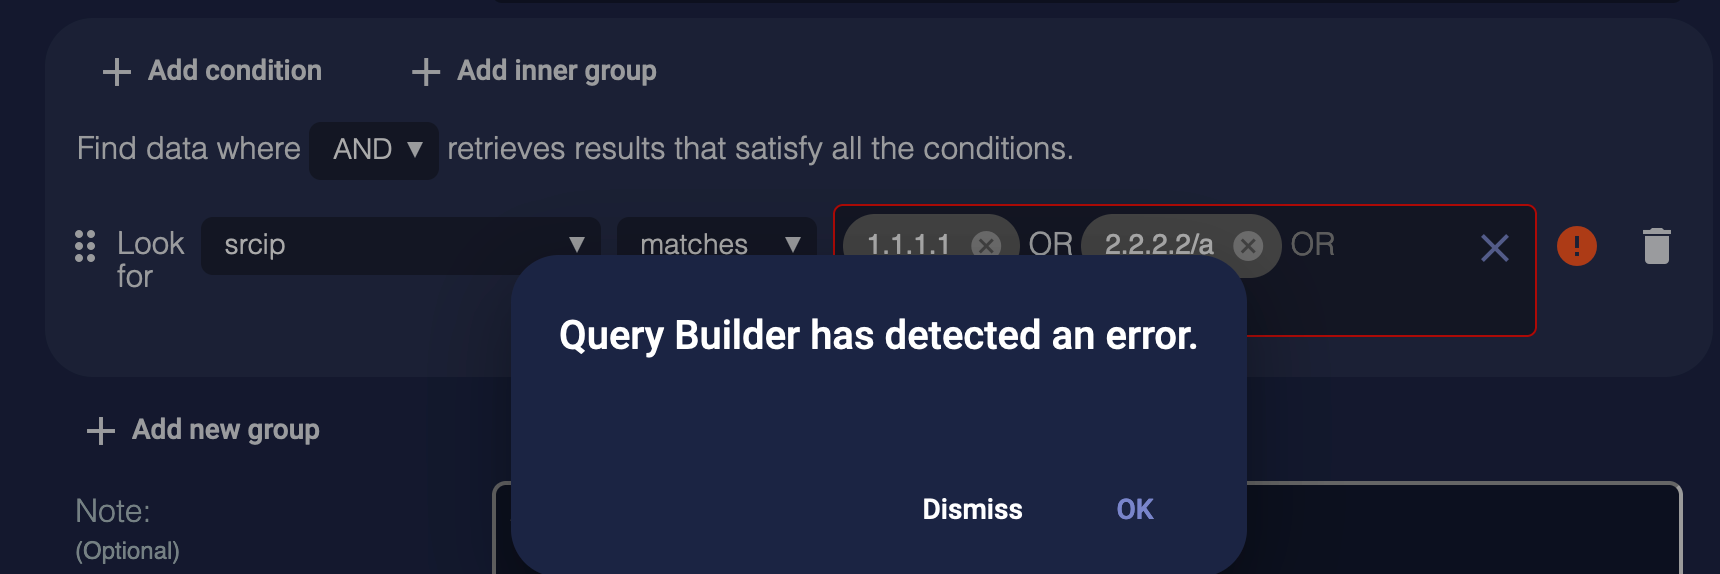
Click OK or Dismiss, and then correct the value.
Adding a Boolean Field
A boolean field, for example, lateral, supports the following operators:
-
is
-
is not
-
field exists
-
field does not exist
Select an Operator and enter a Value. The only values are false and true.
There is no Value for the operators field exists and field does not exist. Enter the exact field name.

Using Lookups
Pre-configured lookups can be used in conditions using the is in lookup or is not in lookup operators. They are supported for string, number, date, and ip fields.
The lookup operators let you configure a reusable dynamic list of values on which to query. Instead of configuring the same list of values over multiple filters, you can use a lookup. If you want to add or remove values, you just need to modify the lookup instead of modifying each filter.
The lookup terms are case-sensitive.
Adding Fields
To add the Field part of a condition, you can:
-
select a field from the drop-down list, using the scroll bars to find a field alphabetically
-
start typing a field name, for example, to find the field totalpackets in the drop-down list, you can type a few letters in the field, such as tot
-
type a field name that is not in the drop-down list, but that exists in the Stellar Cyber database, for example, lateral. The type might be automatically detected (as boolean in this example)
-
type a field name that is not known, for example, test, and then select the type
Resolving Errors
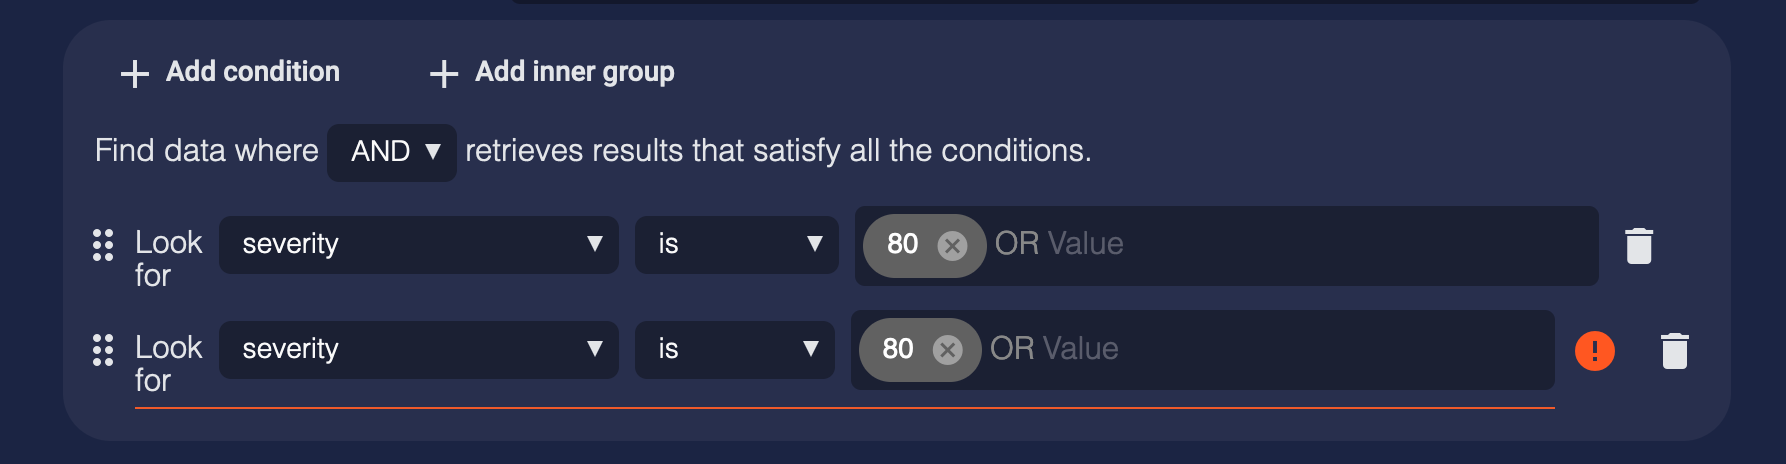
Invalid conditions are underlined in red and an error icon appears at the end of the condition.
For example, duplicate conditions cause an error:
Click the error icon to display the error message:
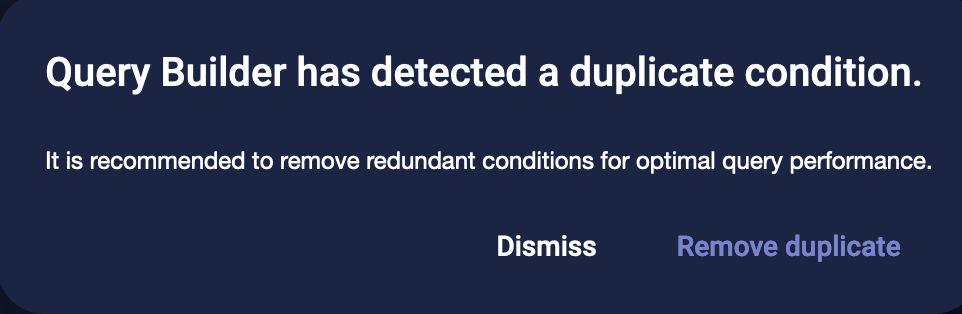
You can do the following:
-
Click Remove duplicate to allow the duplicate condition to be removed automatically
-
Click Dismiss to correct the duplicate condition yourself
Resolving Conflicts
If there are two or more alert filters with the same condition, such as a filter for All Tenants and other filters for specific tenants, the All Tenants filter will be applied first, then the specific tenant filters.
This tenant override behavior allows an MSSP admin to set up some general settings for All Tenants, then fine-tune with more refined settings for each tenant.
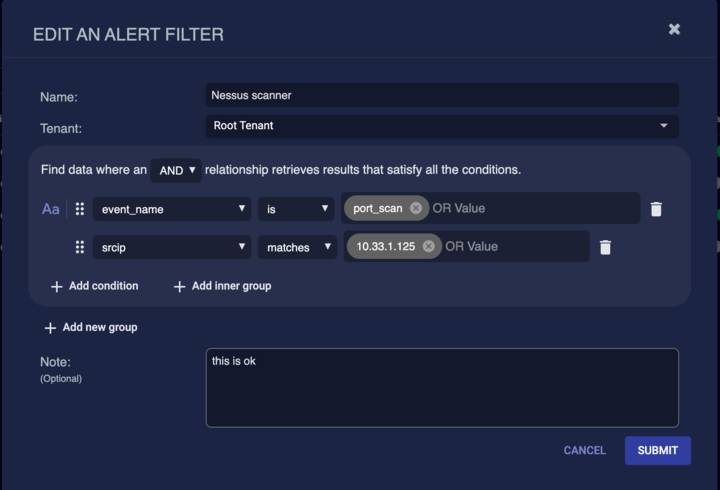
Alert Filtering Examples
The following example of alert filtering filters out a vulnerability scanner from triggering port scan alerts.
The following example filters specific tenants. After selecting All Tenants, you can add a condition, search for the tenant_name field, then enter one or more values for specific tenant names.

