Examples: Using the API with Tenants
You can use the Stellar Cyber API to perform the following tasks for tenants:
-
Create a new tenant
-
Delete an existing tenant
-
Update an existing tenant's settings
-
List all tenants
-
Retrieve a tenant's information using its tenant ID
Refer to Configuring API Authentication for general requirements to use the API.
Tenants API Syntax
The tenants API is available at the following location:
https://<DP url>/connect/api/v1/tenants
The table below lists the available methods for the tenants API, along with the corresponding syntax. Following the table, separate sections provide the schema for each method along with a corresponding example.
|
Task |
Method |
Syntax |
|---|---|---|
| GET | /tenants | |
|
GET
|
/tenants/{id} | |
| DELETE | /tenants/{id} | |
| POST | /tenants/ | |
| PATCH | /tenants/{id} |
Get All Tenants
The following example uses cURL with basic authentication to query for all tenants with a GET command using the following details:
-
Username:API Key – ohtani:N-YrP02Xl6yHO-1HW1gi1nems2g319Q3wLNpOAxWx9_ttbMw3pyB5qPvSVl3qt9CmgvOhHhtDCuEs5KcIn6mWw
-
Stellar Cyber DP IP Address –192.168.11.11
curl -k -u ohtani:N-YrP02Xl6yHO-1HW1gi1nems2g319Q3wLNpOAxWx9_ttbMw3pyB5qPvSVl3qt9CmgvOhHhtDCuEs5KcIn6mWw -i -H "Accept: application/json" -H "Content-Type: application/json" -X GET https://192.168.11.11/connect/api/v1/tenants
Values in bold are the values you must supply as part of a similar query.
Get a Specific Tenant
The following example uses cURL to query for a specific tenant with a GET command using the following details:
-
Username:API Key – ohtani:N-YrP02Xl6yHO-1HW1gi1nems2g319Q3wLNpOAxWx9_ttbMw3pyB5qPvSVl3qt9CmgvOhHhtDCuEs5KcIn6mWw
-
Stellar Cyber DP IP Address –192.168.11.11
-
Tenant ID – e4241ed4714c43df93bce83e847dfa0e
You can find the tenant ID in the System | Administration | Tenants page. Click the
 in the ID column and use the Copy to Clipboard command in the context menu that appears to copy the Tenant ID.
curl -k -u ohtani:N-YrP02Xl6yHO-1HW1gi1nems2g319Q3wLNpOAxWx9_ttbMw3pyB5qPvSVl3qt9CmgvOhHhtDCuEs5KcIn6mWw -i -H "Accept: application/json" -H "Content-Type: application/json" -X GET https://192.168.11.11/connect/api/v1/tenants/e4241ed4714c43df93bce83e847dfa0e
In response, the API returns configuration details for the specified tenant, similar to the following:
{"data":{"address":"","authentication_method":"system_default","contact":"","contact_email":"","contact_phone":"","cust_id":"f257fe53576a4dada621fcac940a9fb5","cust_name":"docs","ds_num":0,"info":"{}","ingestion_limit":"","mfa_enabled":false,"org_id":"default-organization","retention_group":"default","tgrp_name":"","ts_created":"1682412066","user_num":0}}
The "field":"value" pairs returned by the API are same options you set when creating a tenant manually in the System | Administration | Tenants page. and are described in the schema in Create a Tenant.
Delete a Specific Tenant
The following example uses cURL to delete a specific tenant with a DELETE command using the following details:
-
Username:API Key – ohtani:N-YrP02Xl6yHO-1HW1gi1nems2g319Q3wLNpOAxWx9_ttbMw3pyB5qPvSVl3qt9CmgvOhHhtDCuEs5KcIn6mWw
-
Stellar Cyber DP IP Address –192.168.11.11
-
Tenant ID – 55e521cdc5be4374bd42df5cdae628e1
You can find the tenant ID in the System | Administration | Tenants page. Click the
in the ID column and use the Copy to Clipboard command in the context menu that appears to copy the Tenant ID.
curl -k -u ohtani:N-YrP02Xl6yHO-1HW1gi1nems2g319Q3wLNpOAxWx9_ttbMw3pyB5qPvSVl3qt9CmgvOhHhtDCuEs5KcIn6mWw -i -H "Accept: application/json" -H "Content-Type: application/json" -X DELETE 'https://192.168.11.11/connect/api/v1/tenants/55e521cdc5be4374bd42df5cdae628e1'
In response, the API returns a success or failure message. Success messages appear as follows:
{"data":"Ok\n"}
Note: If you use the API to delete the last tenant in a Tenant Group, both the tenant and the now-empty Tenant Group are deleted.
Create a Tenant
This section describes how to create a new tenant in the API. The schema for the tenants API lets you specify all of the same configuration details you would when creating a new tenant in the user interface. The only mandatory field is the Tenant Name (cust_name). The available fields are as follows:
{
  "cust_name": "string",
  "contact": "string",
  "contact_email": "string",
  "contact_phone": "string",
  "address": "string",
  "info": "string",
  "retention_group": "string",
  "mfa_enabled": true,
  "authentication_method": "sso_saml",
  "sso_config": {
    "allow_clock_skew": true,
    "idp_certificate": "string",
    "idp_metadata": "string",
    "idp_callback_type": "string",
    "issuer_url": "string",
    "sso_config_method": "metadata",
    "sso_entry_point": "string"
  },
  "ingestion_limit": 0
}
Your call must have the header and the /connect/api/v1/tenants path, and must have at least the cust_name field, in addition to any optional fields shown in the schema above.
Note that the retention_group field cannot be used with the managed (SaaS) version of Stellar Cyber. Managed versions of Stellar Cyber have version numbers ending in s (for example, 5.2.0s).
Sample Create Tenant Script
Here is a sample Python script with arguments filled in. Note that any arguments that you don't supply values for are left at their default settings, as described in Managing Tenants
#!/usr/bin/env python
import json
import requests
headers={'Accept': 'application/json', 'Content-type': 'application/json'}
elastic_url ='https://192.168.11.11/connect/api/v1/tenants'
json_data = {
"cust_name": "My New API Tenant",
"contact": "Dev Ops",
"contact_email": "devops@fakecompany.com",
"contact_phone": "415-555-1212",
}
query = json.dumps(json_data)
response = requests.post(elastic_url, auth=('ohtani','N-YrP02Xl6yHO-1HW1gi1nems2g319Q3wLNpOAxWx9_ttbMw3pyB5qPvSVl3qt9CmgvOhHhtDCuEs5KcIn6mWw'), data=query, verify=False, headers = headers)
print (response.text)
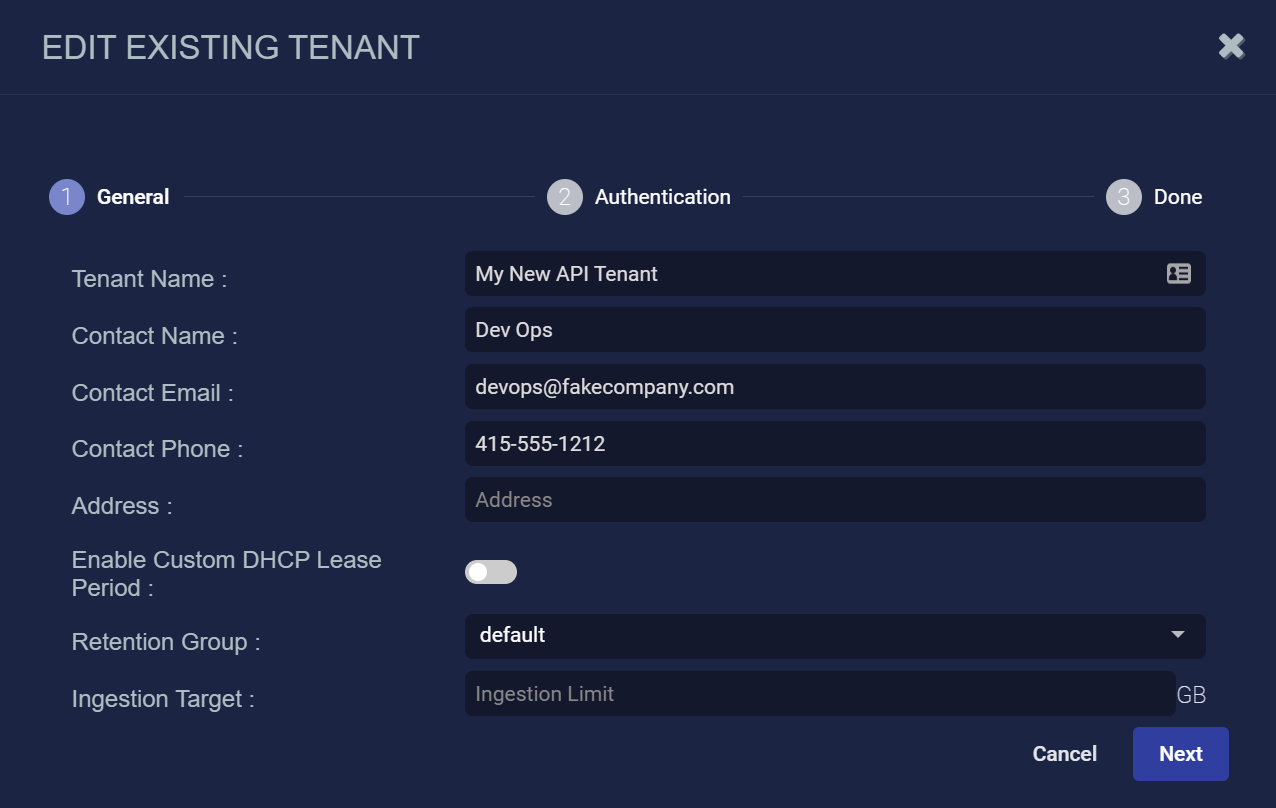
This example performs a POST call as the user ohtaniwith the API key shown in the text. The call is to the Stellar Cyber server at 192.168.11.11to create a tenant with the following fields:
-
cust_name – My New API Tenant
-
contact– Dev Ops
-
contact_email – devops@fakecompany.com
-
contact_phone – 415-555-1212
All other fields for the tenant are left at their default values. Here's how the tenant appears in the user interface after we created it in the API:
Update a Tenant
This section describes how update the settings for an existing tenant. You can use a PATCH to the tenants API to change any of the configuration details available when creating a new tenant in the user interface. The only mandatory fields are the Tenant ID and the Tenant Name (cust_name). The available fields are as follows:
{
  "cust_name": "string",
  "contact": "string",
  "contact_email": "string",
  "contact_phone": "string",
  "address": "string",
  "info": "string",
  "retention_group": "string",
  "mfa_enabled": true,
  "authentication_method": "sso_saml",
  "sso_config": {
    "allow_clock_skew": true,
    "idp_certificate": "string",
    "idp_metadata": "string",
    "idp_callback_type": "string",
    "issuer_url": "string",
    "sso_config_method": "metadata",
    "sso_entry_point": "string"
  },
  "ingestion_limit": 0
}
Your call must have the header and the /connect/api/v1/tenants/<tenant_id> path, and must have at least the cust_name field, in addition to any optional fields shown in the schema above that you want to change.
Note that the retention_group field cannot be used with the managed (SaaS) version of Stellar Cyber. Managed versions of Stellar Cyber have version numbers ending in s (for example, 5.2.0s).
Sample Update Tenant Script
This script takes the tenant we created in Create a Tenant and changes the contact name. Note that any arguments that you don't supply values for are left at their existing settingsManaging Tenants
#!/usr/bin/env python
import json
import requests
headers={'Accept': 'application/json', 'Content-type': 'application/json'}
elastic_url ='https://192.168.11.11/connect/api/v1/tenants/046b8eeceac549a2aefa579a180dfb45'
json_data = {
"cust_name": "My New API Tenant",
"contact": "James Dean",
}
query = json.dumps(json_data)
response = requests.patch(elastic_url, auth=('ohtani','N-YrP02Xl6yHO-1HW1gi1nems2g319Q3wLNpOAxWx9_ttbMw3pyB5qPvSVl3qt9CmgvOhHhtDCuEs5KcIn6mWw'), data=query, verify=False, headers = headers)
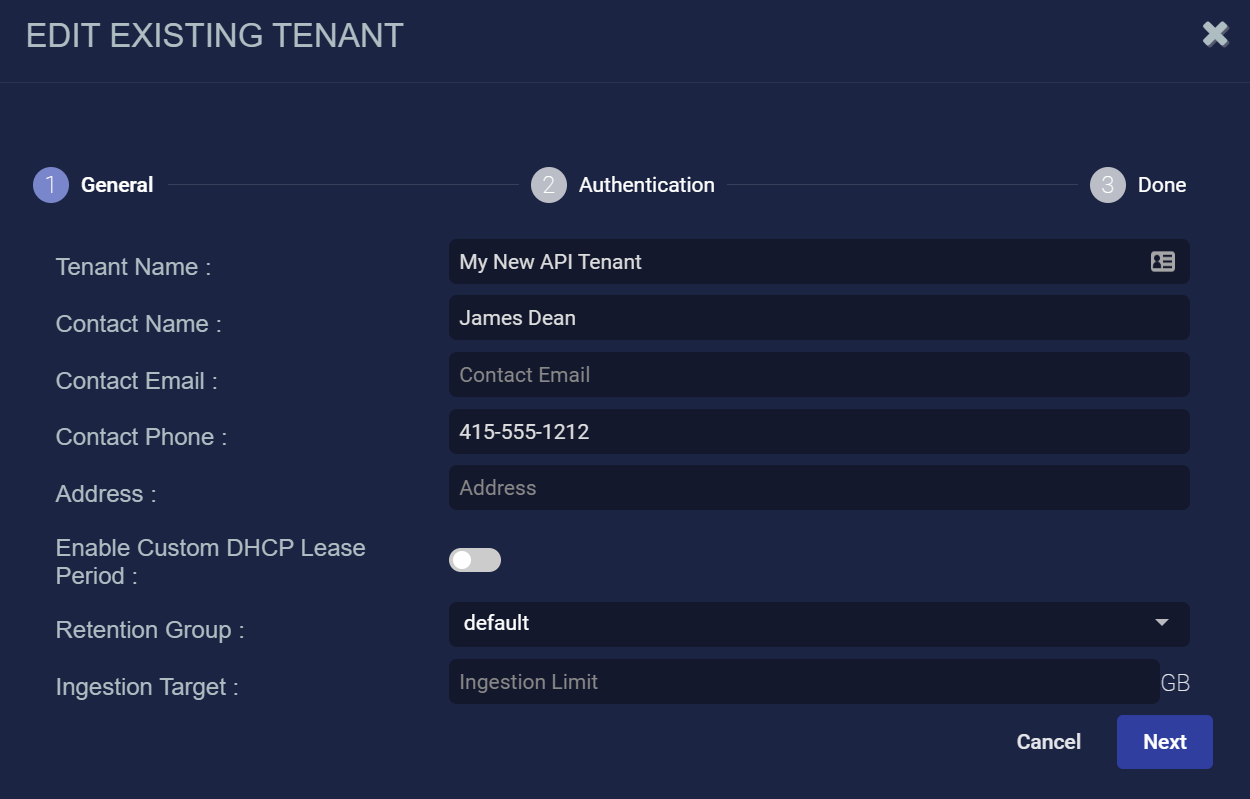
print (response.text)This example performs a PATCH as the user ohtaniwith the API key shown in the text. The call is to the Stellar Cyber server at 192.168.11.11to patch the tenant's contact name to James Dean:
-
Tenant ID – 046b8eeceac549a2aefa579a180dfb45
The Tenant ID can be retrieved from the System | Administration | Tenants page and included in the URL.
-
cust_name – My New API Tenant
-
contact– James Dean
All other fields for the tenant are left at their existing values. Here's how the tenant appears in the user interface after we patched it in the API: