Creating New Alert Types 
In addition to the alert types provided by Stellar Cyber, you can create your own custom alert types. Once you've created a custom alert type, you can add it to an automated threat hunting playbook.
-
Navigate to the Alerts page and select Create.
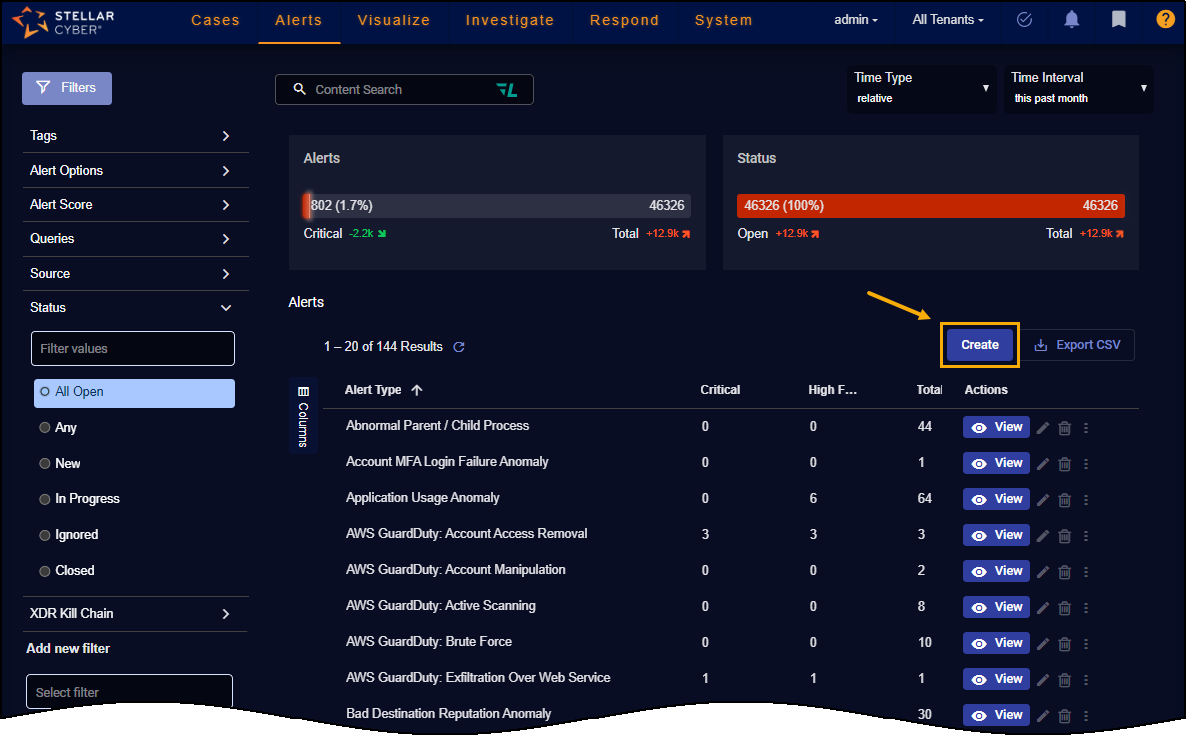
The Create an Alert Type dialog box appears.

-
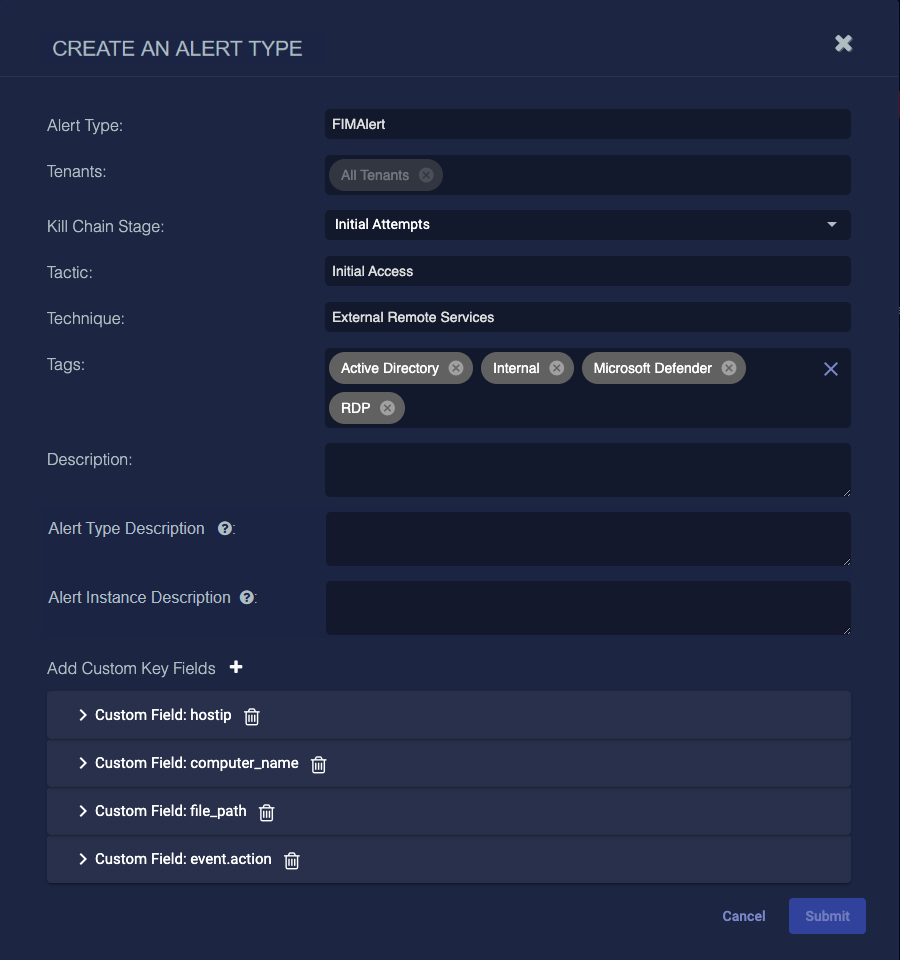
Supply the following information in the Create an Alert Type dialog box:
-
Alert Type (Required) – Supply a unique, alphanumeric name for the custom alert type. This name identifies the alert type across the system and communicates the nature or focus of the alerts it generates.
-
Tenants (Required) – Either set to All Tenants or select the tenant groups and tenants that will have access to this custom alert type. For information on how your tenancy determines which alert types are visible to you, refer to Which Custom Alert Types Can I See and Act Upon?.
-
Kill Chain Stage – Choose the applicable XDR Kill Chain stage to which the custom alert type corresponds. This stage helps classify alerts according to a structured threat progression model, supporting better threat detection and response strategies.
-
Tactic – Choose the tactic associated with this alert type. Tactics represent the goal or objective behind an attacker’s behavior, such as credential access or lateral movement. Available options depend on the selected Kill Chain Stage.
-
Technique – Choose the technique used to carry out the chosen tactic. Techniques define how attackers achieve their goals and provide additional specificity for detection. The list of techniques is filtered based on the chosen Kill Chain Stage and Tactic.
If you set a value for any one of the fields—Kill Chain Stage, Tactic, or Technique—you must set all three. The system enforces valid combinations.
-
Tags – Apply tags to help categorize, filter, and search for this alert type. Tags can represent threat categories, response actions, or affected environments. Tags become mandatory if Kill Chain Stage, Tactic, and Technique are not defined.
-
Alert Type Description – Optionally supply an alphanumeric description for the custom alert type. This field defines the overall purpose or behavior of the alert type and applies to all alert instances that belong to it. The text appears prominently near the top of the Alert Type dashboard when viewing grouped alerts, and it also populates the
xdr_event.descriptionfield in each alert instance—but only when the Alert Instance Description field is left empty.The description is static and does not support dynamic variables. It's intended to help users quickly understand the function of the alert type at a glance. The maximum length is 200 characters, including spaces.
-
Alert Instance Description – Optionally define a dynamic description that is rendered uniquely for each alert instance. This field supports merge fields—placeholders wrapped in double curly braces (
{{ }})—that are replaced with actual values drawn from the JSON data in an alert record at runtime. When populated, this field overrides the Alert Type Description and is written to thexdr_event.descriptionfield in the alert record. The dynamically rendered description appears both in the Alert Details side panel and in the alert instance table on the Alert Details page.This field enables you to embed contextual information specific to each event, such as the affected tenant, user, IP address, or host. For example, entering
Malware alert triggered in {{tenant_name}}.could produceMalware alert triggered in Acme Corp.when rendered. The maximum length is 200 characters, including spaces. Common Merge Fields for Alert Instance Descriptions
You can use any available JSON field from the alert record as a merge field. Below are common examples:
Merge Field Description {{srcip}}Source IP address triggering the alert {{dstip}}Destination IP address {{srcip_username}}Hostname of the source IP address {{event_name}}Name of the triggering event {{severity}}Alert severity level {{report_id|int}}Report ID (Note: Add the intfilter to render the ID number as an integer.)** You can use the
intfilter to render numeric field values as integers; for example,report ID 60735526. Otherwise, by default, they're rendered as floating point numbers such asreport ID 60735526.0, which would be an incorrect report ID number. To know if a field type is an integer or not, check if the field is tagged with a hashtag (#) in Details view of the Interflow record for an alert instance. If it is, include theintfilter here to render it correctly as an integer. -
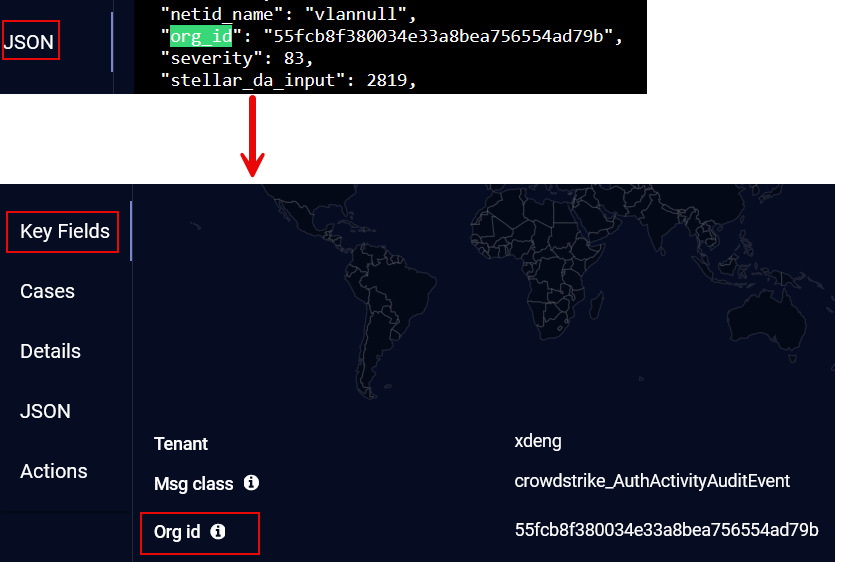
Add Custom Key Fields – You can add key fields to the custom alert type to make them more prominent and readily accessible during alert analysis. Any field in the JSON tab of an alert can be promoted to the Key Fields tab.
Select the plus sign (
 ) next to Add Custom Key Fields and then select the right angle bracket (
 ) to expand a Custom Field.
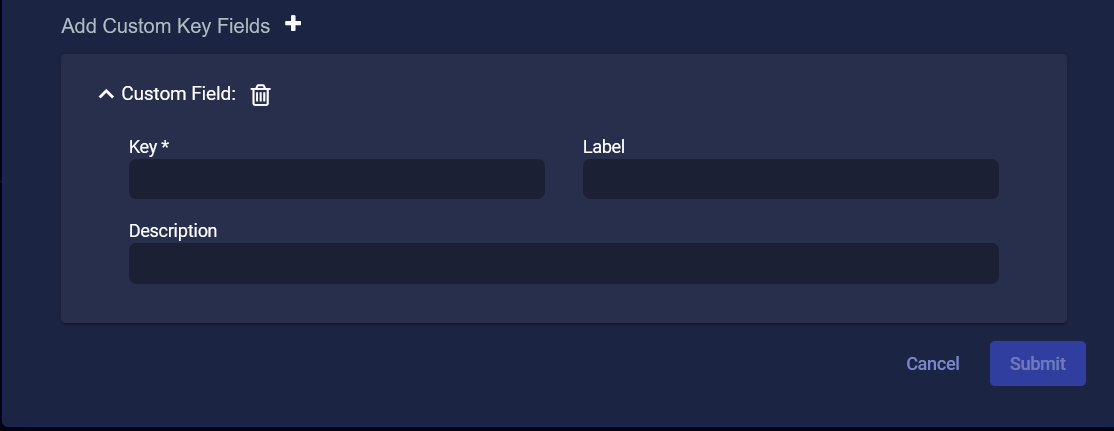
The asterisk (*) indicates a required field.
-
Enter the Key. This is a field in the JSON data; for example,
hostip. -
(Optional) Enter a Label. This is what appears in the user interface; for example,
Host IP. -
(Optional) Enter a Description. This is what appears in the user interface when you hover over the key field; for example,
The host IP address.
In the following example alert type, four custom fields were created:
-
-
-
Select Submit to add the custom alert type to the list.
Show All Alert Types to See Your New Alert Type
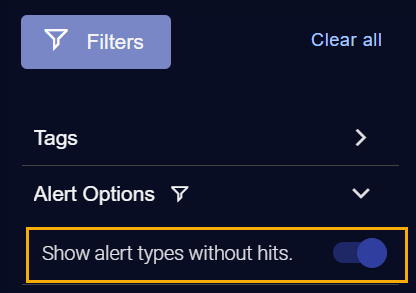
Your custom alert type will only appear in the list right away if the Show alert types without hits option is enabled under Filters | Alert Options, as illustrated below. Because you just created the alert type, it likely won't have any hits yet.
Adding the Custom Alert Type to a Playbook
Once you've created a custom alert type you can add it to an Automated Threat Hunting playbook. You can either do this directly from the Respond | Automation page, or you can drill to a pre-filled template for a new playbook using the custom alert type as follows:
-
Create the custom alert type using the procedure in the previous section.
-
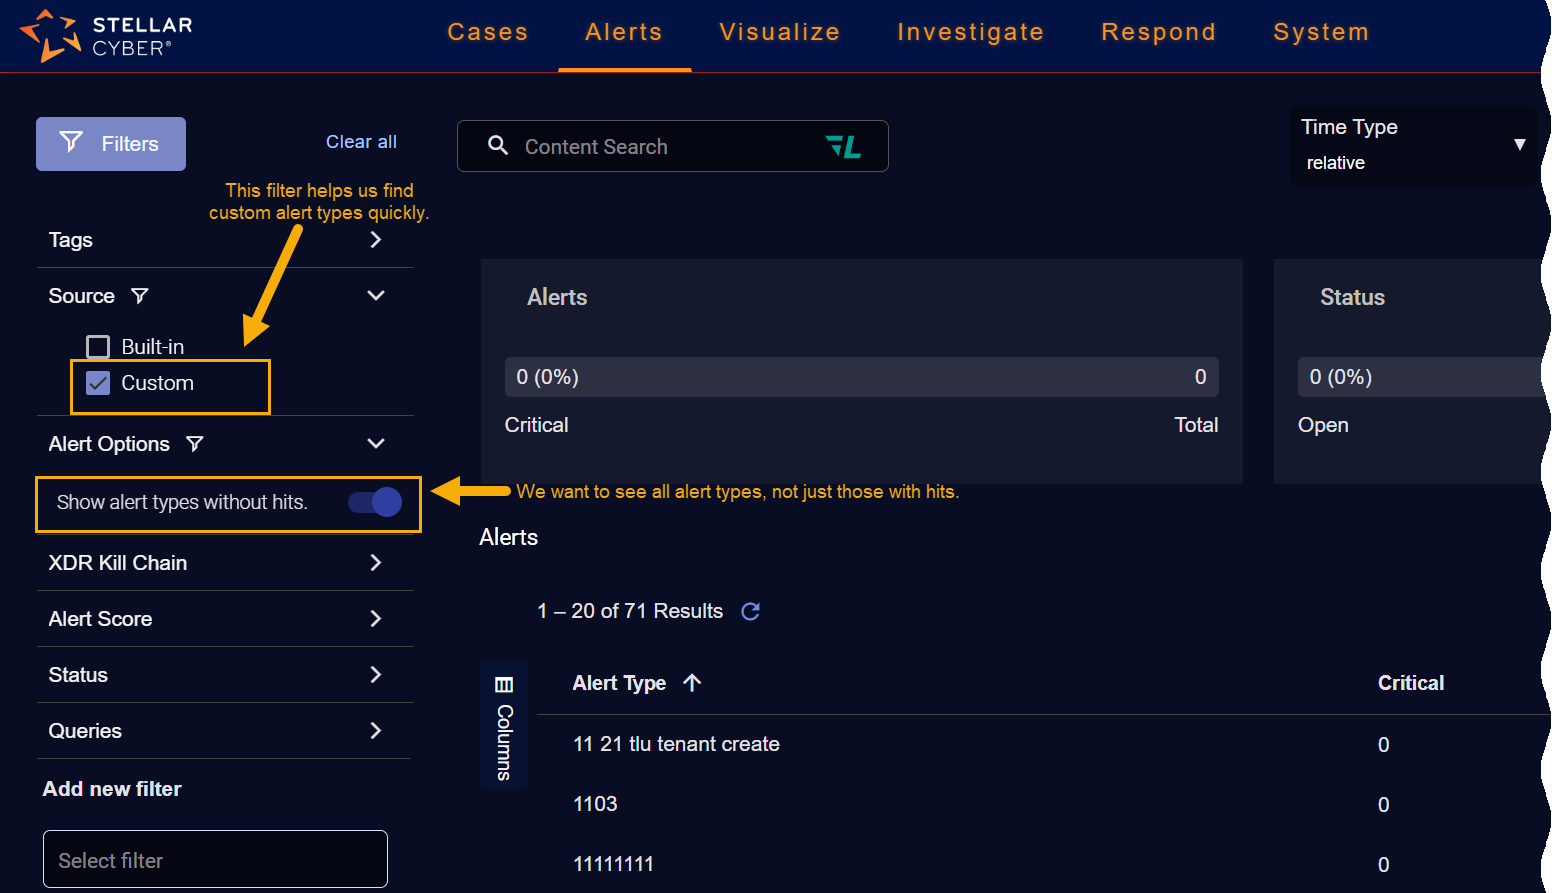
Ensure that the Alert options | Show alert types without hits option in the Filters panel is enabled and locate your new custom alert type in the Alerts table.
You can make it easier to find custom alert types by setting the Source filter in the Alert Types panel to Custom as in the figure below.
-
We just created the custom alert type named AutoEx. Now we can click its three-dot menu
 and use the + Add Playbook option to launch the standard ATH Playbook workflow with the template pre-filled to use our custom alert type.
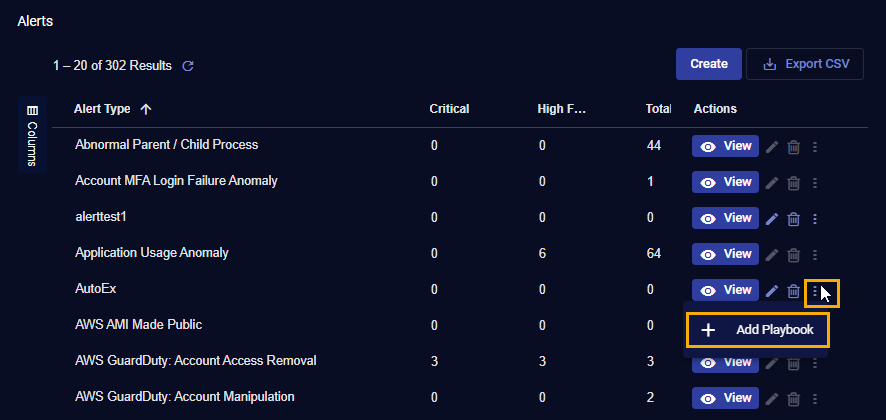
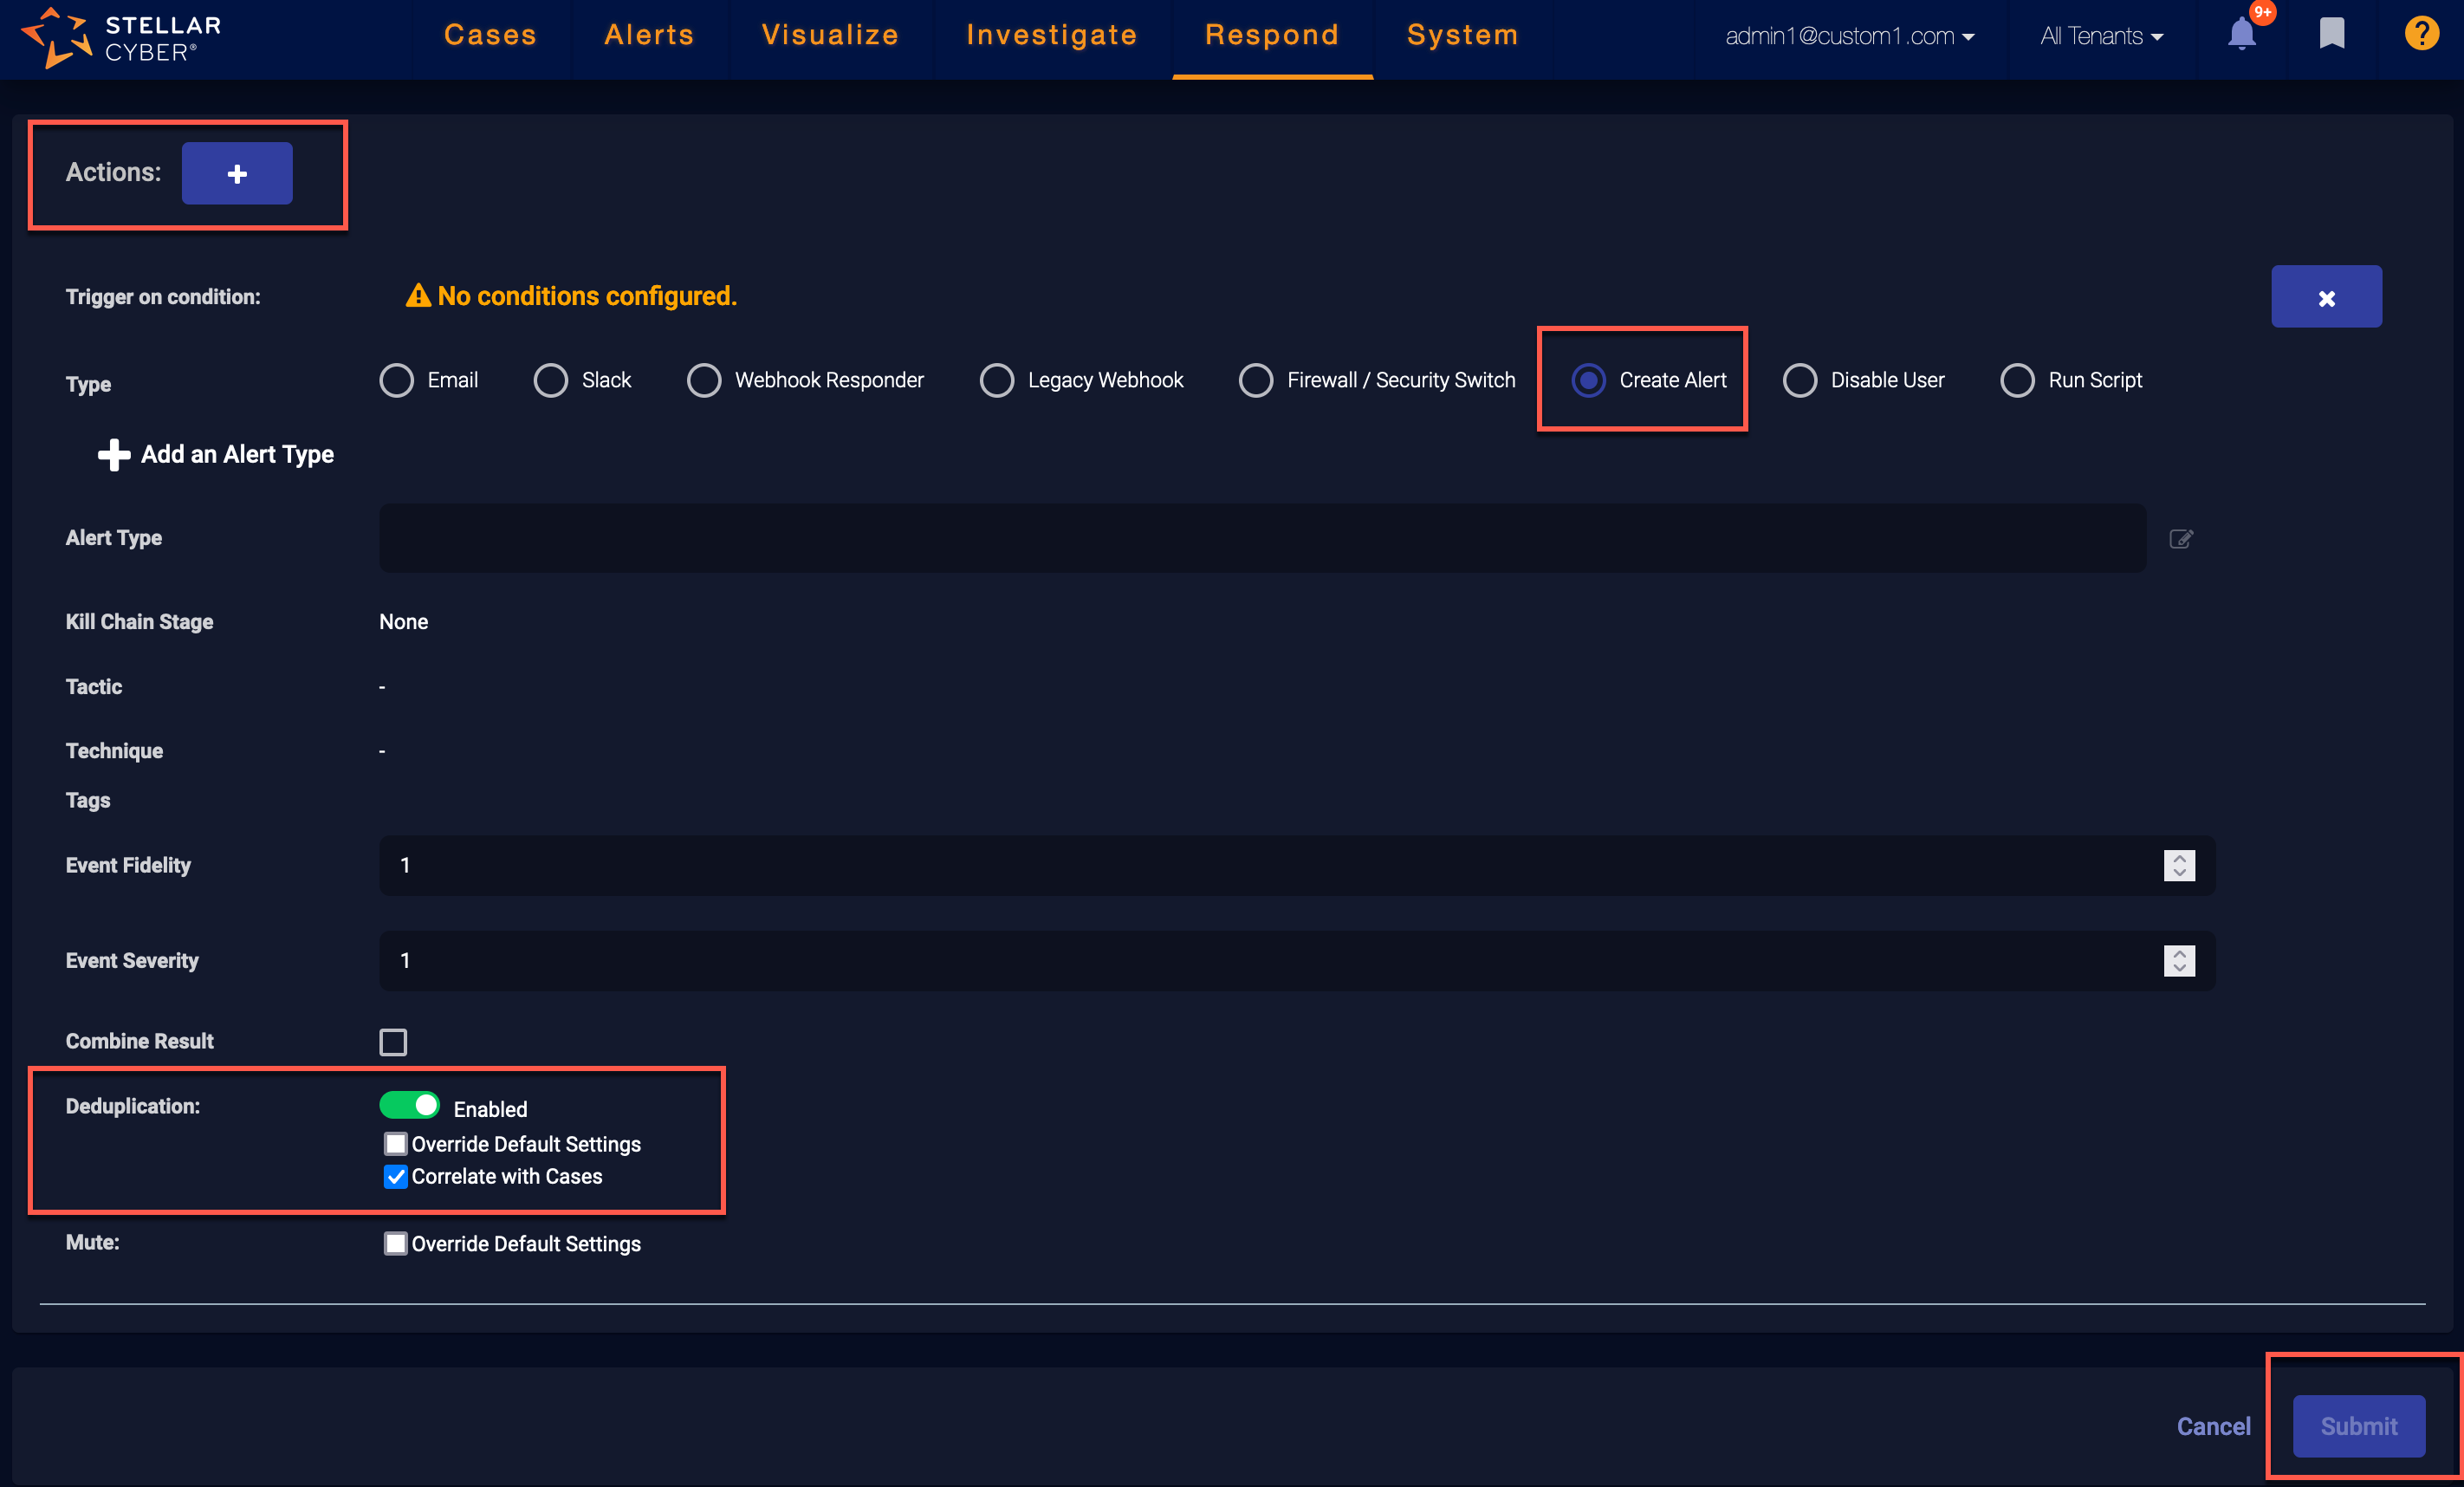
When you start a playbook using this technique, the template is automatically pre-filled with the Actions section populated based on the alert type settings:
-
Type is set to Create Alert
-
Alert Type is set to the selected alert type.
-
Kill Chain Stage, Tactic, Technique, Tags, and Description are all pre-filled based on the custom alert type settings.
Editing Custom Alert Types
You can edit a custom alert type using its standard Edit button at the right of its entry in the Alerts table. Keep in mind, however, that once a custom alert type is assigned to a playbook, you cannot delete its assigned Tenants or Tenant Groups.
Which Custom Alert Types Can I See and Act Upon?
The policy of Stellar Cyber is to restrict access to different objects based on ownership and tenancy. In general, you can only see and act upon custom alert types that were created by or assigned to a tenant or tenant group to which you are logged in as. Start by checking your Tenancy at the upper right of the display. For example, the user below is logged in with the STML tenant.

You can always see alert types set to All Tenants. From there, your tenancy determines which custom alert types you can see and act upon, as follows:
-
If you are logged in with a tenant and the tenant owns the alert type.
-
If you are logged in with a tenant and the tenant list for the alert type includes the tenant.
-
If you are logged in with a tenant and the alert type is assigned to a tenant group that includes that tenant.
-
If you are logged in with a tenant group and the alert type is assigned to that group.
-
If you are logged in with a tenant group and a tenant in the tenant group owns the alert type.
-
If you are logged in with a tenant group and a tenant in the alert type’s tenant list is in the tenant group.
About Deduplication for Custom Alerts
To reduce noise and focus attention, Stellar Cyber automatically deduplicates multiple instances of the same custom alert if they fire within a small window of time (five minutes, by default). Stellar Cyber performs this deduplication by discarding fields that are always different between separate alerts, calculating a hash, and monitoring future events for matches.
You can override the default settings for deduplication of alerts created as part of an ATH Playbook and specify your own time window. Refer to Create Alert Action .
Certain fields are always different between two Interflow records, even if those records represent multiple iterations of the same alert. Because of this, they are discarded before the hash used to identify duplicate alerts is calculated. For that reason, the following fields are not considered when calculating the hash used for deduplication:
Exact matches between:
-
stellar_index_id
-
stellar_uuid
-
timestamp
-
timestamp_utc
-
write_time
-
xdr_event
-
index
-
id
-
type
Fields containing the following substrings:
-
stellar
-
time
-
date
-
index
About Correlating Alerts with Cases
The raw type of Automated Threat Hunting (ATH) custom alerts can be correlated with cases. A custom alert type is raw if there is no aggregation or correlation.
In addition, the following built-in correlation alert types use ATH correlation rules for detection and are correlated with cases:
-
Exploited C&C Connection
-
External/Internal Exploited Vulnerability
Alerts are correlated with cases if the Correlate with Cases checkbox is selected. The resulting deduplicated alerts are included in cases.
To correlate alerts with cases:
-
Navigate to Respond | Automation.
-
Select Create to create a new ATH Playbook.
-
Scroll to the Actions section. and select Create Alert.
-
Set Deduplication to Enabled and select Correlate with Cases.
-
Select Submit.
