Adding the Data Lake Elasticsearch Disk
This is part of Installing a Data Processor in Proxmox VE (Cluster).
This procedure adds the Elasticsearch data disk to the DLm from the datalake pool.
Sizing
Size the disk to leave headroom in the ZFS pool. Two constraints interact:
- Elasticsearch halts writes at its flood-stage watermark — 95% of the filesystem.
- ZFS performance degrades as a pool approaches 80% capacity.
The reference datalake pool in this document provides approximately 12.1 TiB usable. A 10240 GiB (10 TiB) disk is used: at Elasticsearch's flood stage the pool sits at roughly 81%, aligning both limits.
Capacity planning note. Stellar Cyber's system requirements recommend 12 TB or more for the Elasticsearch disk at production ingestion volumes. Seven 1.92 TB SSDs cannot deliver this with safe ZFS headroom — 12 TB (decimal) is approximately 92% of the pool. Deployments ingesting at those volumes require additional disks. Size the disk from your capacity planning figures and the pool's usable capacity, not from the disk count alone.
Important: Maintain Uniform DL-Worker Specifications
All DL-Workers in a cluster must be provisioned with exactly the same specification — CPU, memory, and disk size must all be identical. Mixing DL-Worker sizes within the same cluster is not supported. Elasticsearch distributes shards evenly across data nodes and assumes uniform capacity, so a mismatched worker can become a bottleneck or fill up disproportionately.
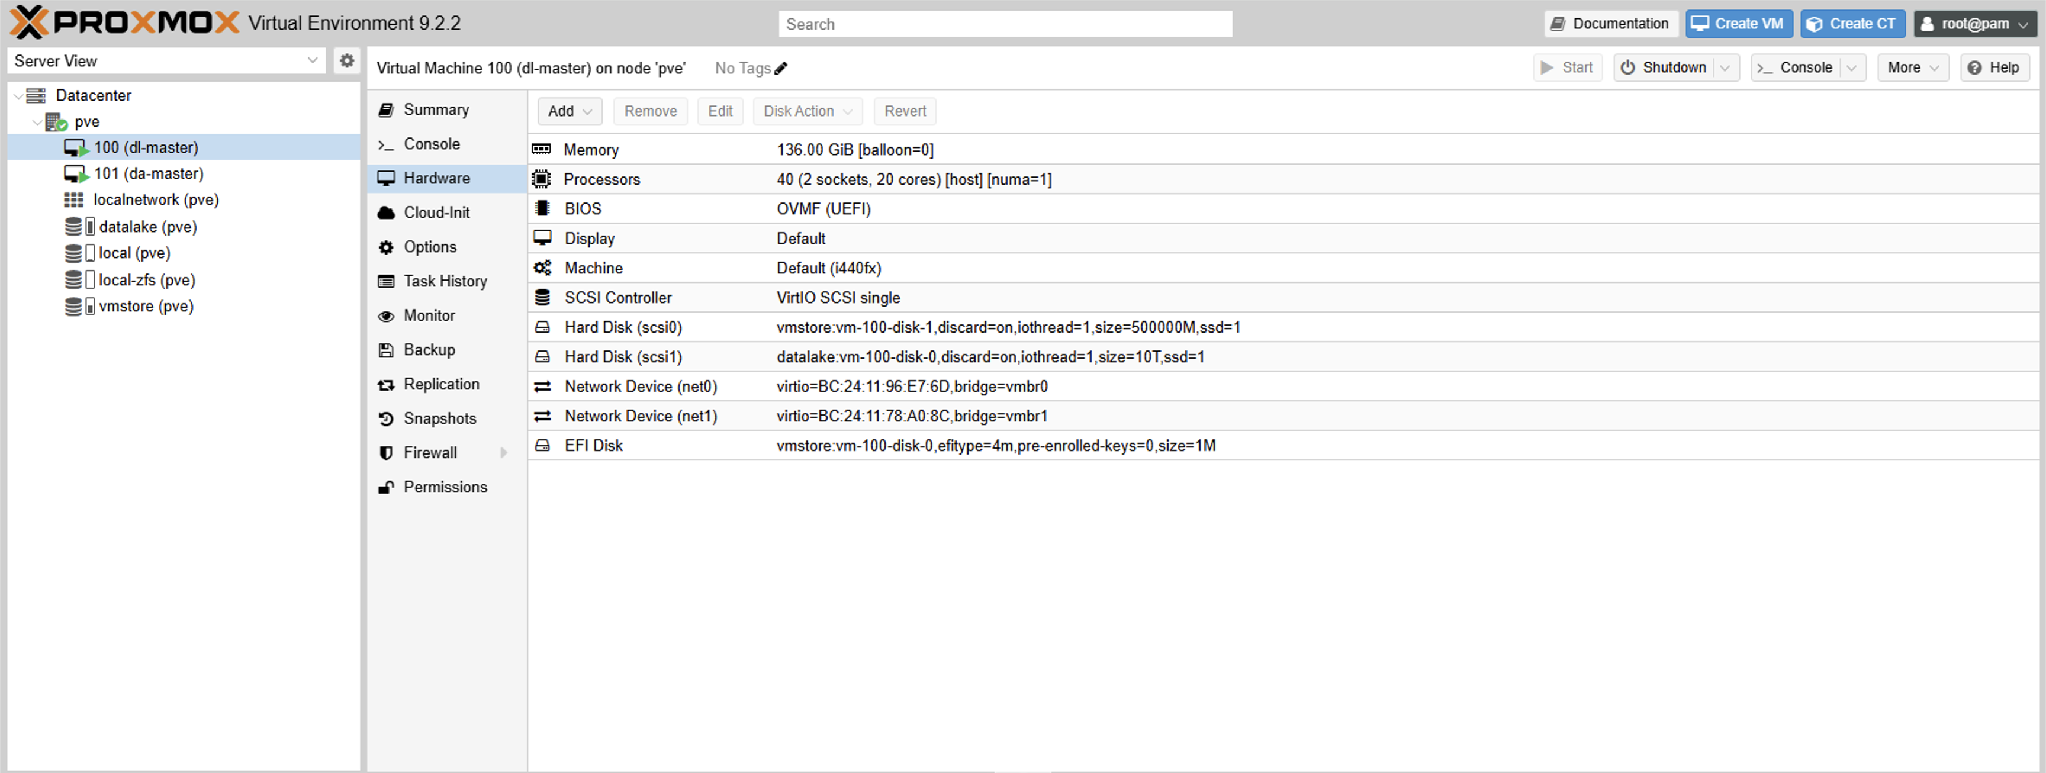
Add the Disk
qm set 100 --scsi1 datalake:10240,discard=on,ssd=1,iothread=1
qm config 100 | grep scsi1
The disk hot-plugs into the running VM.
discard=on is required. Without it, space freed when Elasticsearch deletes indices is never returned to the ZFS pool.
root@pve:/var/lib/vz/import# qm set 100 --scsi1 datalake:10240,discard=on,ssd=1,iothread=1
update VM 100: -scsi1 datalake:10240,discard=on,ssd=1,iothread=1
scsi1: successfully created disk 'datalake:vm-100-disk-0,discard=on,iothread=1,size=10T,ssd=1'
root@pve:/var/lib/vz/import# qm config 100 | grep scsi1
scsi1: datalake:vm-100-disk-0,discard=on,iothread=1,size=10T,ssd=1
root@pve:/var/lib/vz/import#
Present the Disk to Stellar Cyber
- Open a console connection to the DLm and log in.
-
Verify the new storage is visible:
show storage
DataProcessor(DL-master)> show storage
NAME    MAJ:MIN RM   SIZE RO TYPE MOUNTPOINT
sda       8:0    0 488.3G  0 disk
sda1      8:1    0 488.1G  0 part /
sda14     8:14   0     4M  0 part
sda15     8:15   0   135M  0 part /boot/efi
sdb       8:16   0    10T  0 disk
--------------------------
Stellar Storage Configuration:
DataProcessor(DL-master)>
The new disk appears as
sdb.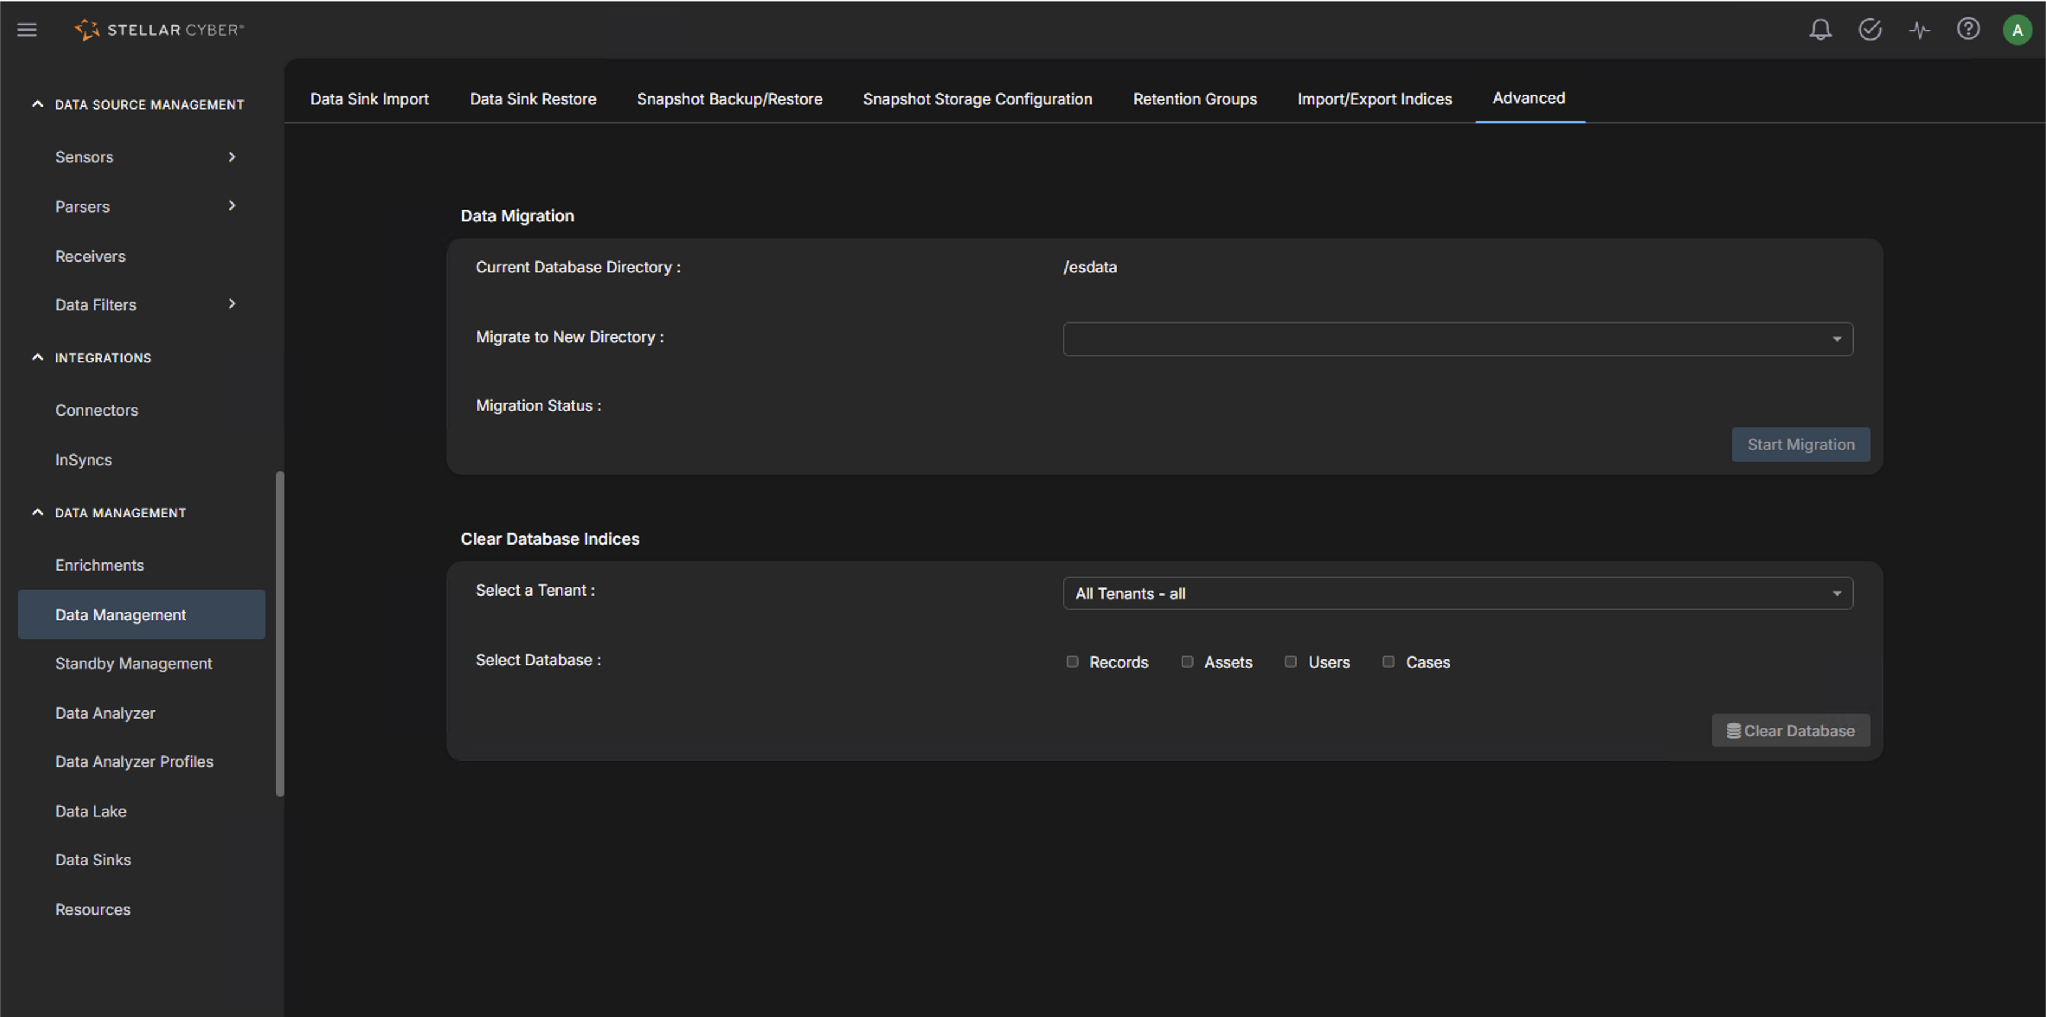
-
Add the disk for Elasticsearch use:
add storage blk sdb
-
Type Y at the format warning:
Add the storage will erase and format the selected disk, make sure you
select the correct disk. Continue? [Y/n]: Y
Success
-
Verify with
show storage. The disk is now mounted at/opt/stellar/es-data-lvm.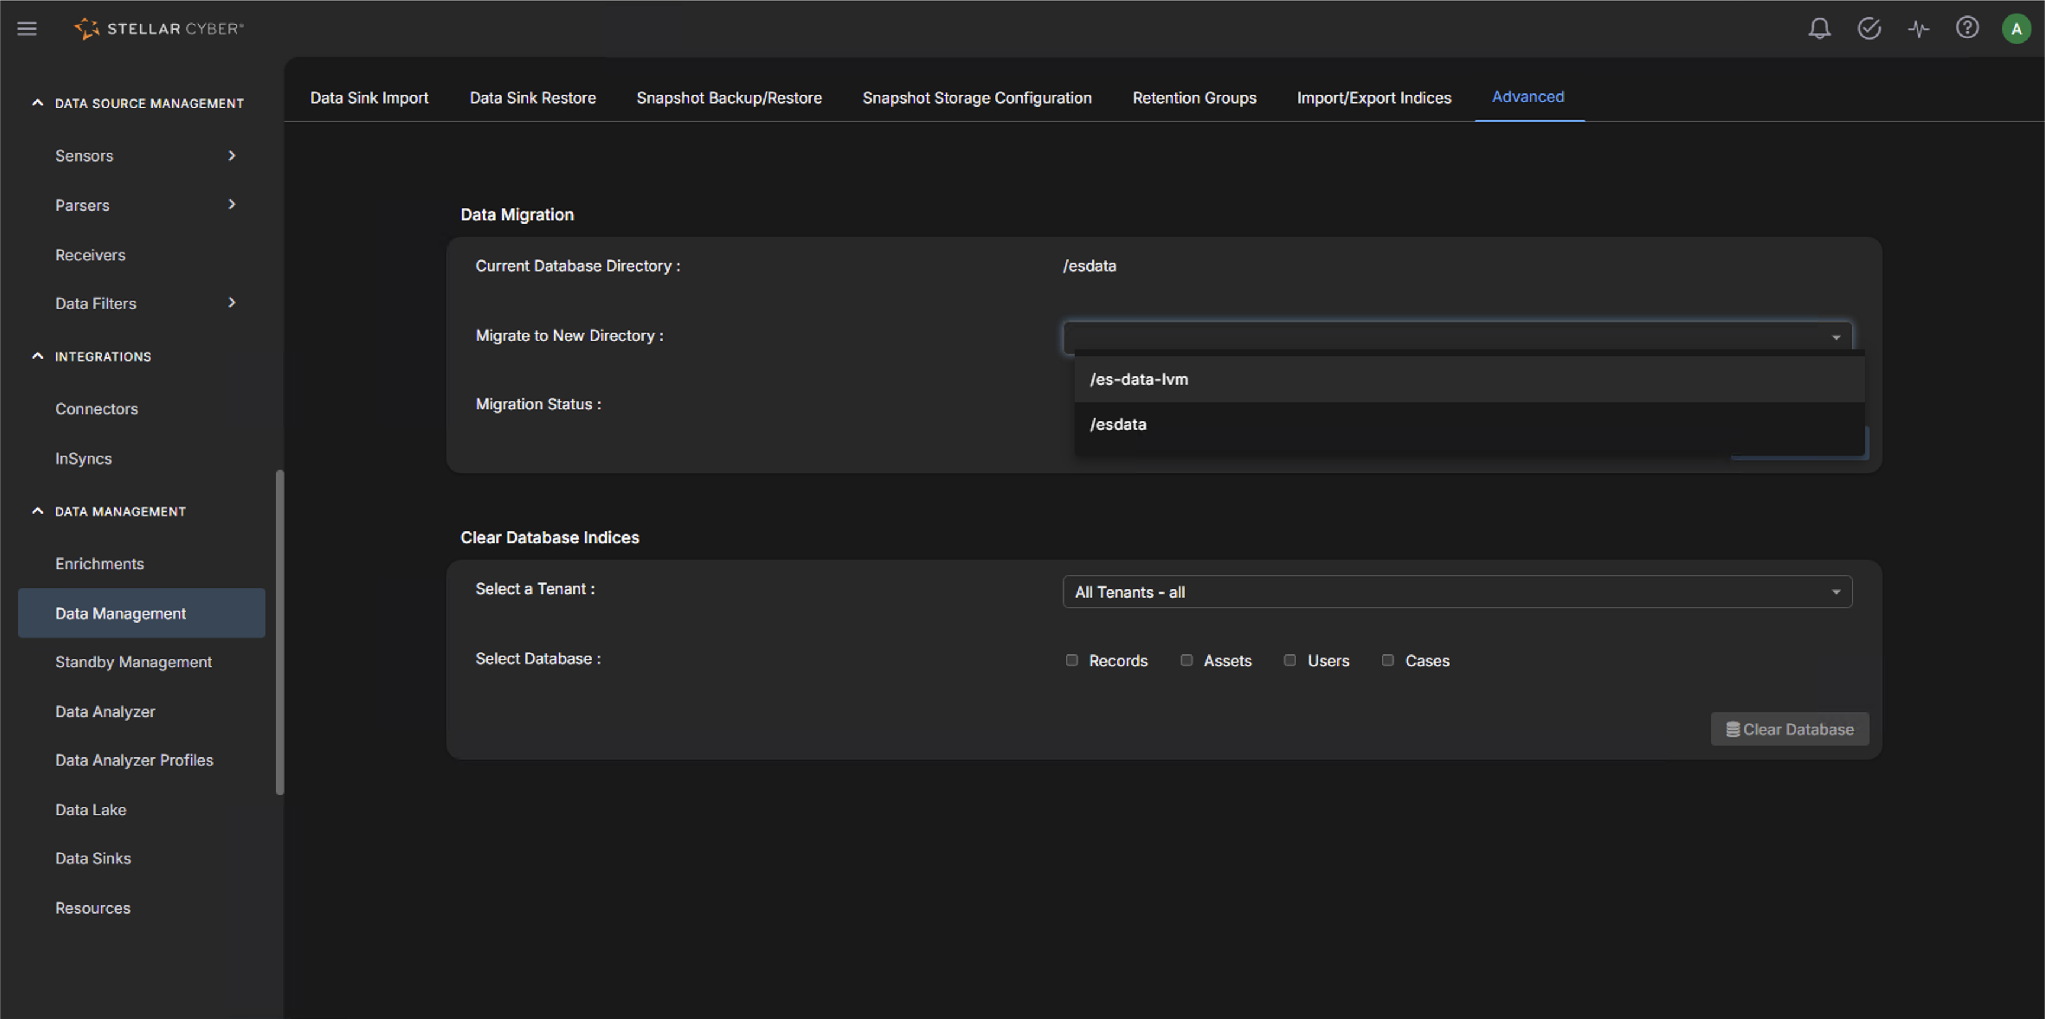
-
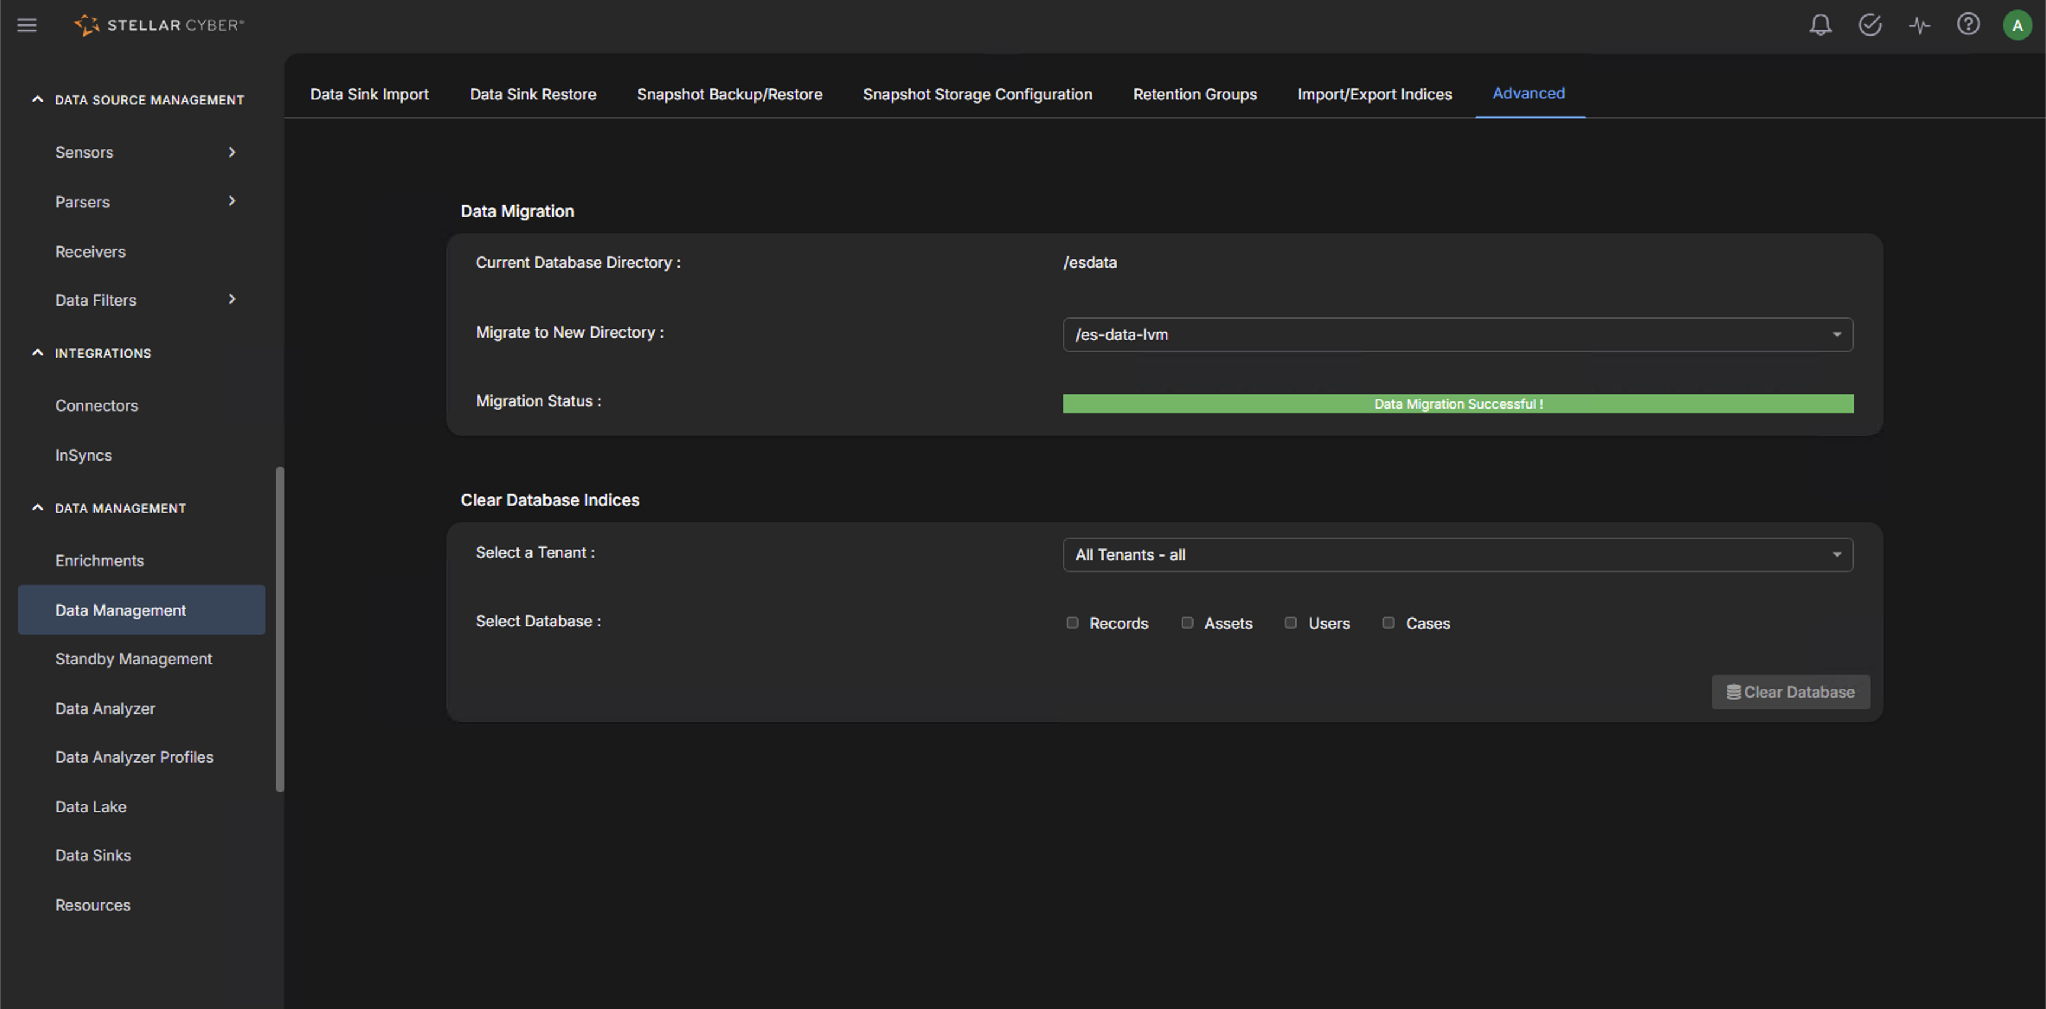
In the DLm UI, navigate to System | DATA MANAGEMENT | Data Management | Advanced, select /es-data-lvm in Migrate to New Directory, and click Start Migration.
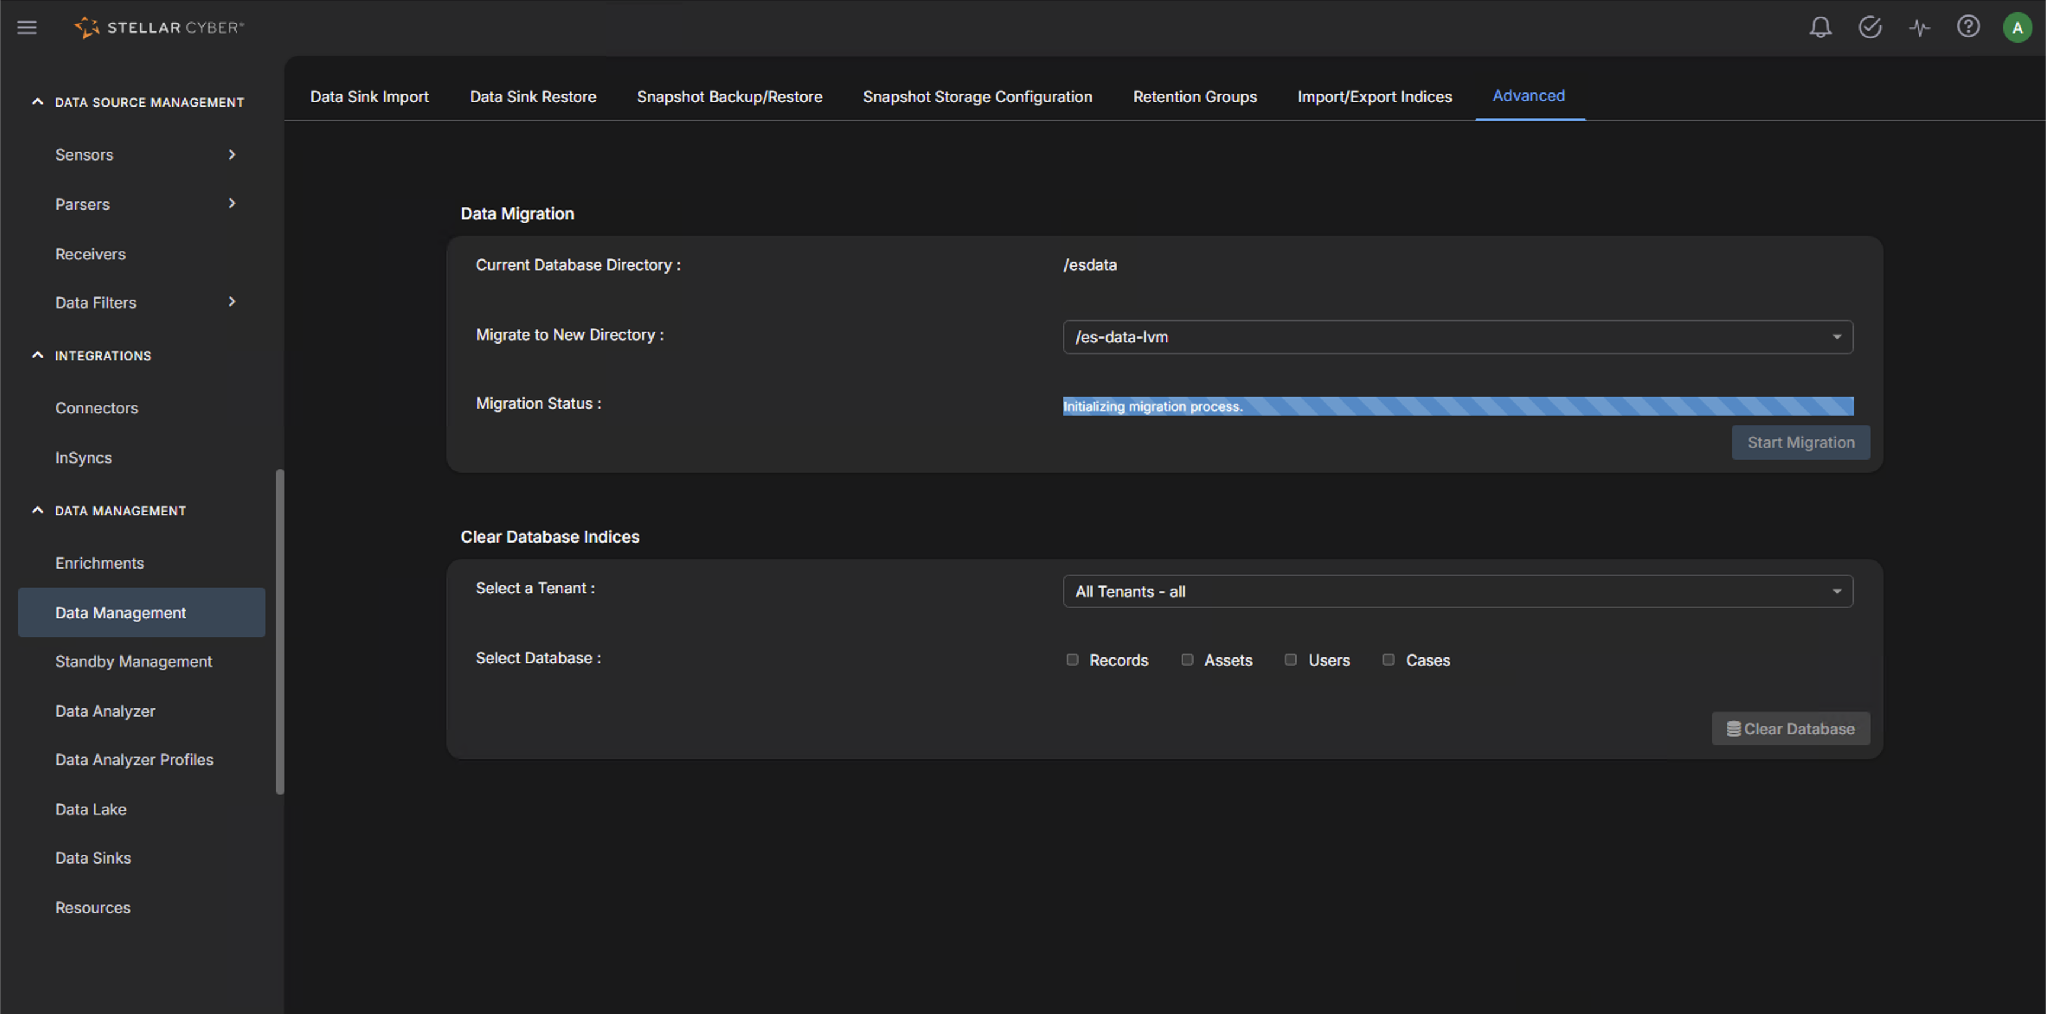
-
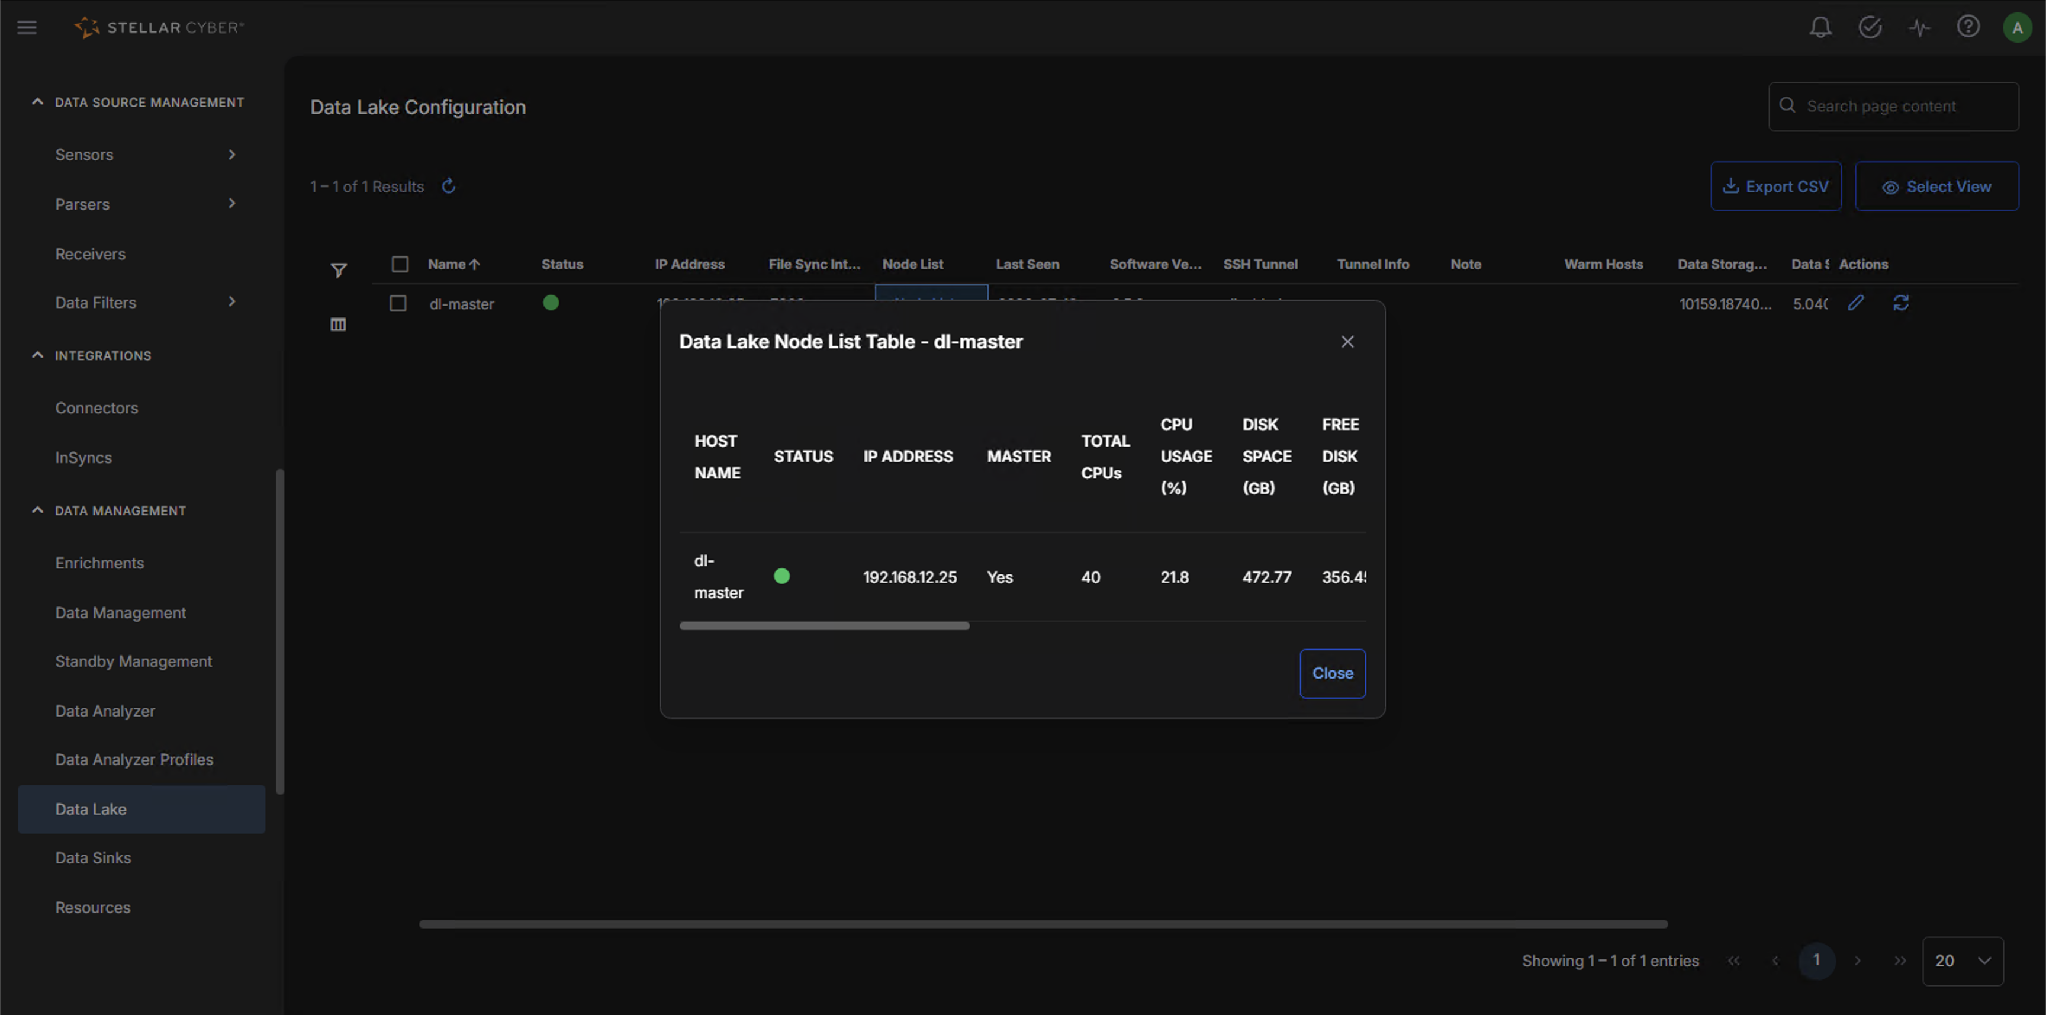
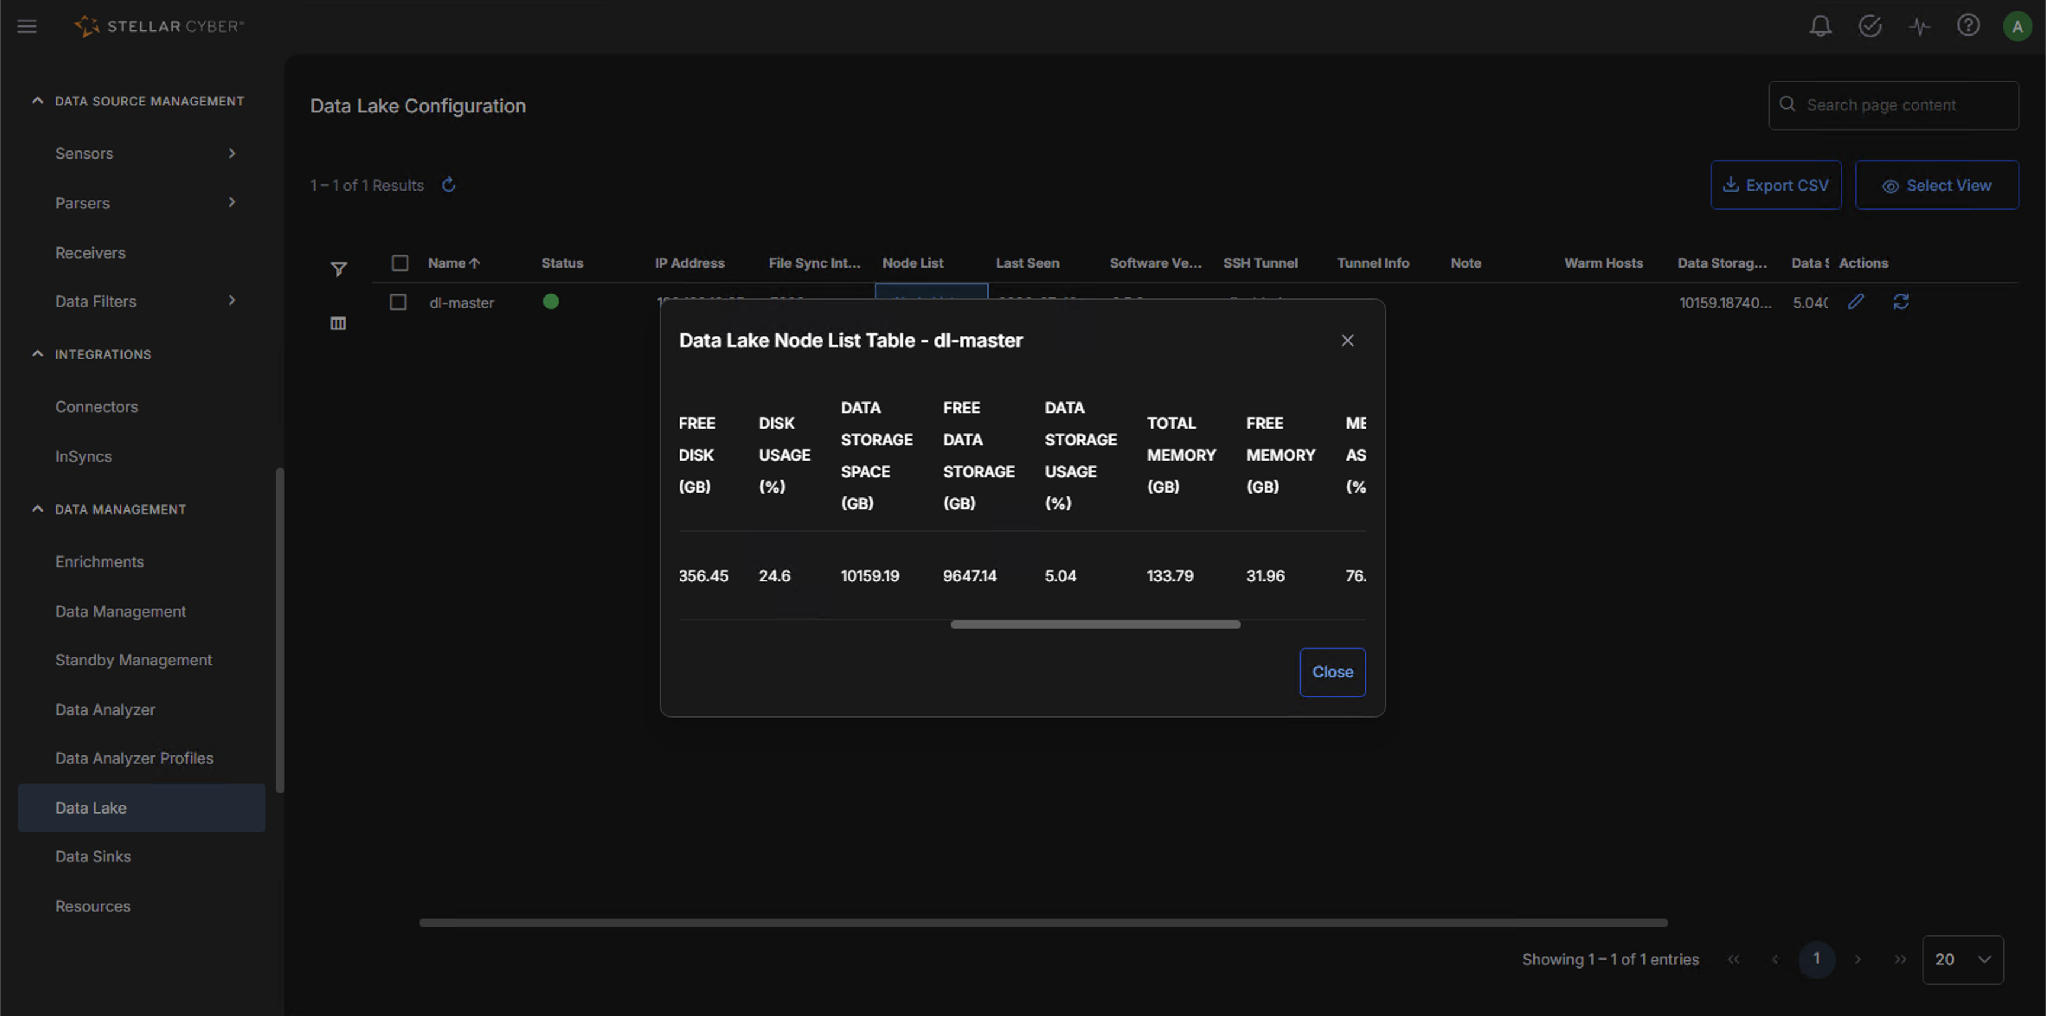
Once migration completes, navigate to System | DATA MANAGEMENT | Data Lake → Node List and verify Data Storage Space shows the expected capacity.
- A 10240 GiB disk reports approximately 10159 GB of Data Storage Space after LVM and filesystem overhead. The Disk Space and Free Disk columns in the Node List refer to the VM's 500 GB system disk, not the Elasticsearch disk.
Next, check the default receiver configuration and sensor profile.
