Configuring Data Processor Resources
You manage Data Processor resources in the System | Data Processor | Resources page. A Resource in Stellar Cyber refers to a host system on which one of the Stellar Cyber data processor components runs.
Each resource can be designated to perform one of the specific roles within the cluster:
- AIO—This is an "All In One" installation of Stellar Cyber where all components run on the same physical server.
- DR-master—The resource serves as a Data Analyzer master.
- DL-master—The resource serves as a Data Lake master.
- DR-worker—As a Data Analyzer worker, the resource works with the Data Analyzer master to provide expanded capabilities.
- DL-worker—As a Data Lake worker, the resource works with the Data Lake master to provide expanded capabilities.
- resource—An unassigned resource.
The designation "DR" instead of "DA" for the roles of Data Analyzer is used on this screen for legacy purposes. The former name of the role was Data Refinery.
This screen provides a way for the system administrator to view the resources and set certain parameters. Resource records are not created using the tools in this screen. They will appear automatically as new data processor equipment is installed.
Resource Pool Table
When you select the System | Data Processor | Resources option, Stellar Cyber displays a list of the currently deployed DP resources, as shown in the example below:
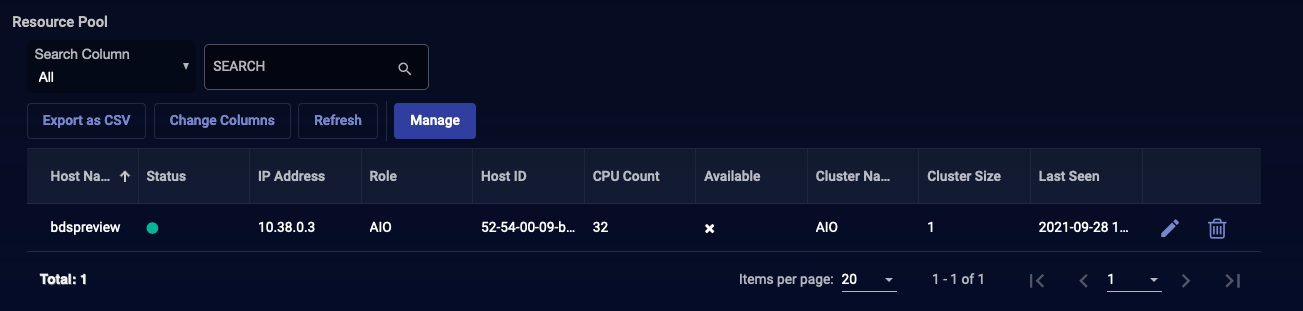
Each resource is listed with the configurable settings listed in the next section, as well as the following additional columns:
- Status—The last known status of the resource. The green icon indicates ready status.
- Available—If a resource is assigned, this column shows the icon, indicating that it is not available for other assignment.
- Last Seen—The last time that the resource was in communication with the data processor.
- Note—Information related to the resource status.
You can perform the following tasks in the Resource Pool table:
-
Create an SSH tunnel to the resource (described below)
-
Click
 to edit the data resource. The dialog box described in the next section appears.
 -
Click
 to delete the data resource.
See the Tables page for more information on working with tables.
Editing a Resource
Clicking a resource's ![]() button displays a dialog box similar to the following:
button displays a dialog box similar to the following:
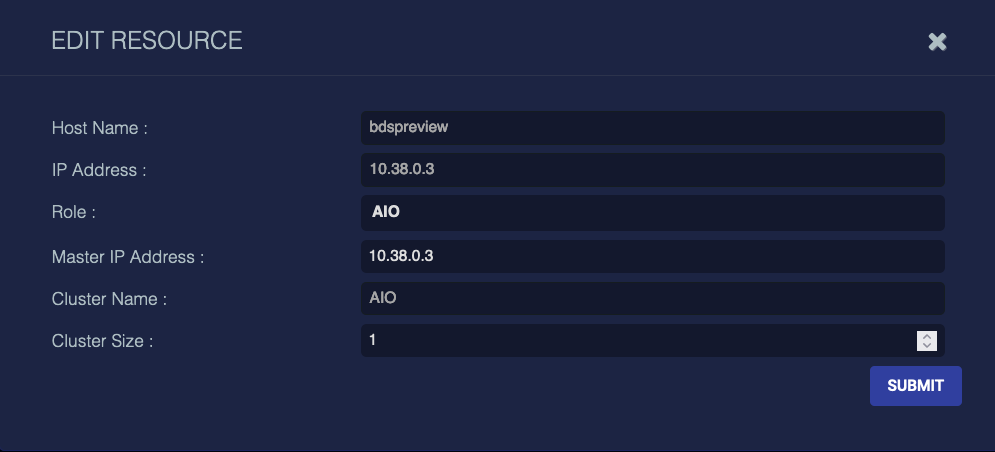
The Edit Resource dialog box has the following fields:
- Host Name—(read only) Each resource is identified by an arbitrary name that is assigned at installation time.
- IP Address—(read only) The IP address of the resource that is used within the cluster. It is assigned as part of the installation procedure. This is not the IP address used by the Stellar Cyber user interface.
- Role—A selection box to choose one of the roles above.
- Master IP Address—The IP address of the resource that has the master role for the role type. If the role is of a "worker" type this will be different from the IP address above.
- Cluster Name—(read only) The name of the cluster. This value is set by the installation procedure.
- Cluster Size—The number of resources in the cluster.
- Data Lake IP Address—The IP address of the Data Lake within the cluster. All resources that are not Data Lake resources need to have connectivity to the Data Lake.
After the fields have been entered as desired, click the Submit button to save the settings and make them effective. Alternatively, you can click the button in the upper right corner to dismiss the dialog box and discard all changes.
Manage/Secure SSH
You can use the Manage button located above the table to create an SSH tunnel for technical support access to a resource. The dialog box below appears when you select the SSH Tunnel option from the manage button's menu.

The fields in this dialog box include:
-
Resource—Use this menu to select the resources associated with this data processor to which you would like to establish an SSH tunnel. (Note: Access the Sensor Overview to create an SSH tunnel to those devices.)
-
Support Port—The TCP/UDP port of the host to connect to.
-
Customer Support Host—If selected, you can enter a host name (DNS or IP address) to connect to.
-
User Name—The user name.
-
Password/Reenter Password—The password to use for authentication.
-
Available Operation—This provides the selection of Enable or Disable. This allows a given tunnel to be deactivated without deleting its record.
Click the Submit button to establish the SSH tunnel. Alternatively, you can click the button in the upper right corner to dismiss the dialog box and discard all changes.
