Using Tables 
Tables appear on many different screens in many different contexts, from tables of users to tables of events. This page describes how tables work in Stellar Cyber.
Common Controls
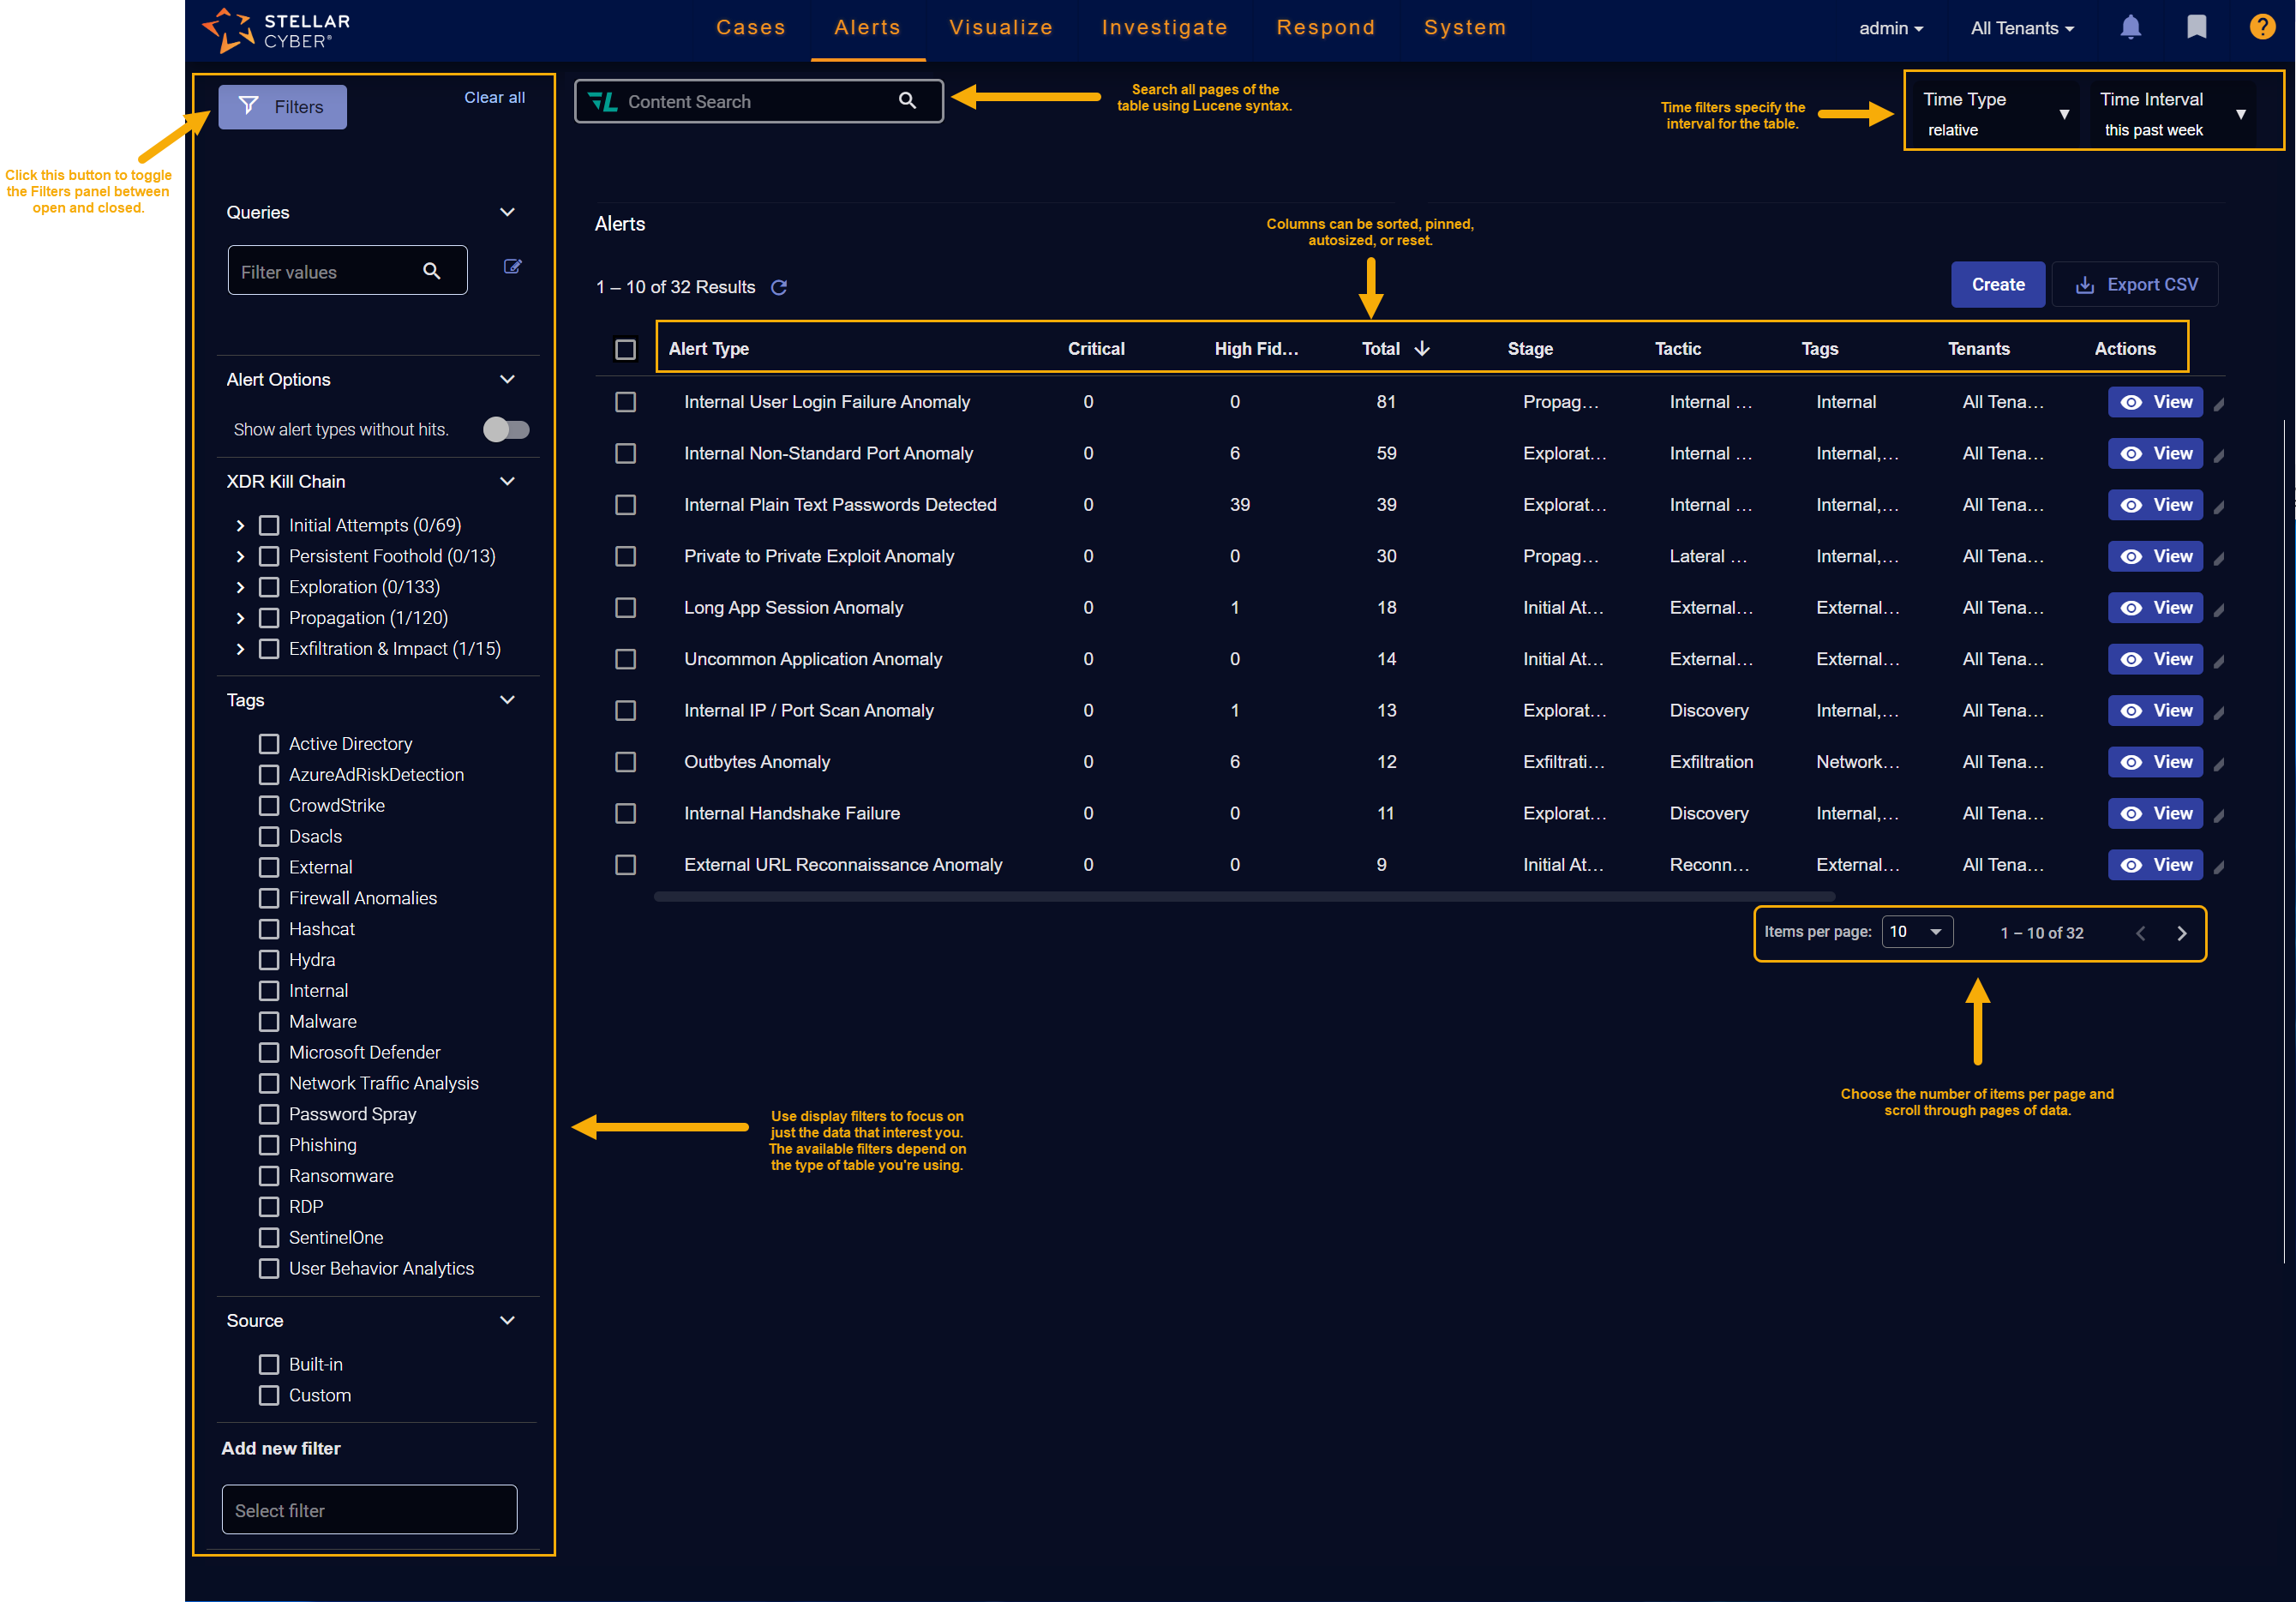
Several controls appear on most tables, allowing you to control the table itself:
-
Use Search to use Lucene syntax to search within all pages of table (not just the currently displayed page).
-
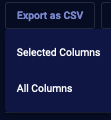
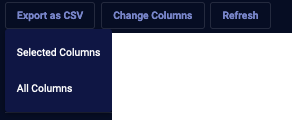
Click Export as CSV to download the table as a CSV file, suitable for import to a spreadsheet application. You can choose to export the table with the displayed columns only, or all columns, even if not displayed.
You can export up to 100,000 rows of a table displaying Interflow data (for example, the table available in the Alerts page). For all other tables (for example, the System | Collection | Sensors table), there is no export limit.
-
Click the column name to sort the table on that column. The
 and
and  buttons tell you which column is being sorted on, as well as the direction of the sort.
 -
Tables listing alerts include an Add to Case button that lets you either create a new case based on the selected alerts or add them to an existing case.
-
Hover over a column heading until the cursor changes to a pointed hand. Then, click and drag to rearrange columns in the table.
-
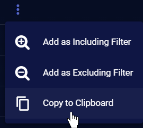
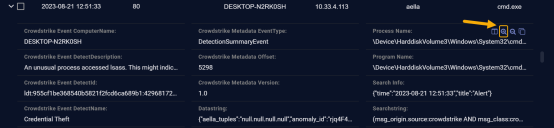
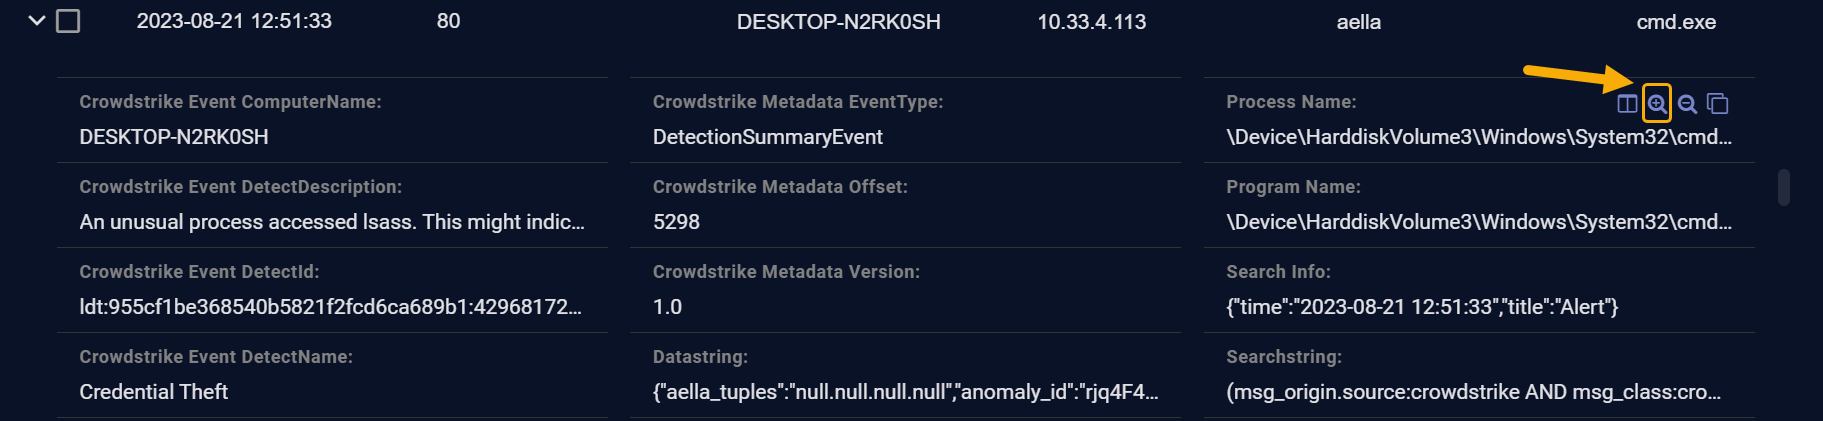
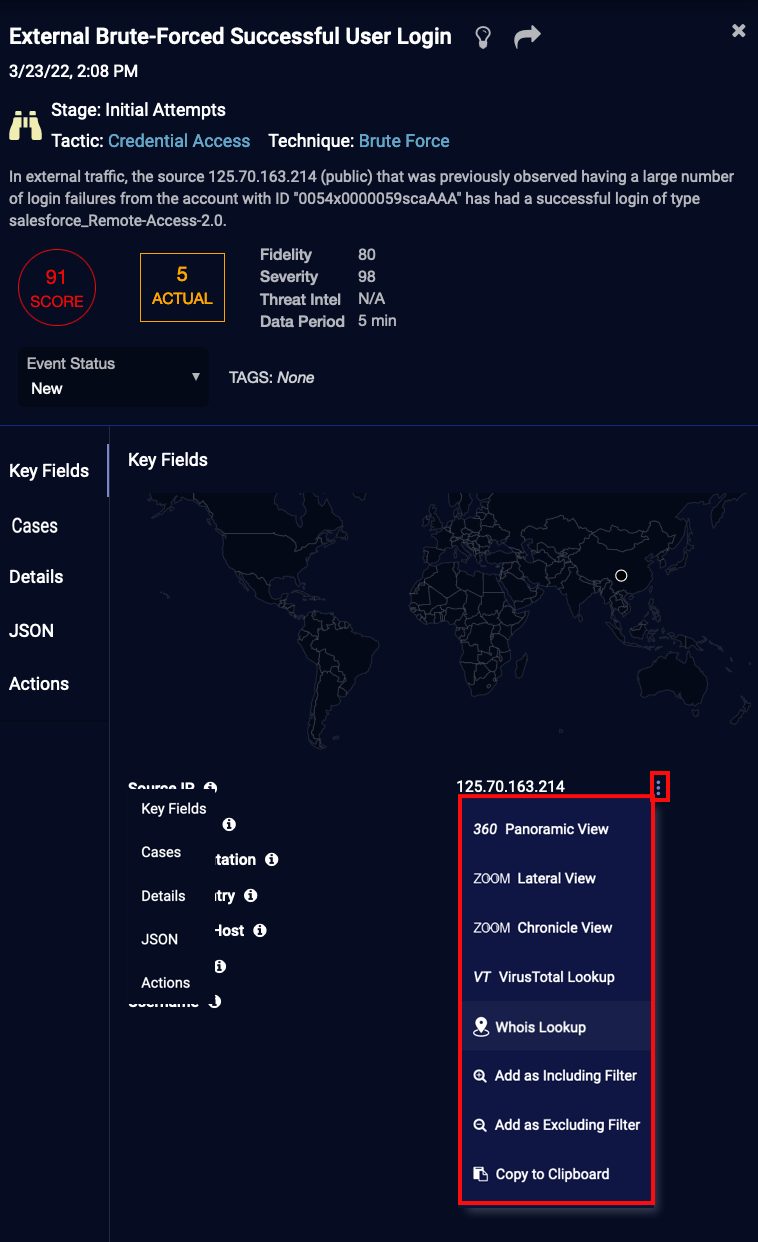
Click a cell to see additional actions you can perform, from copying the contents of the cell to the clipboard to using the cell data as an include or exclude filter. The exact actions depend on the table and cell data type; see the example below:
Not all cells provide this functionality. If the cursor changes to a pointing hand, you can click for additional actions.
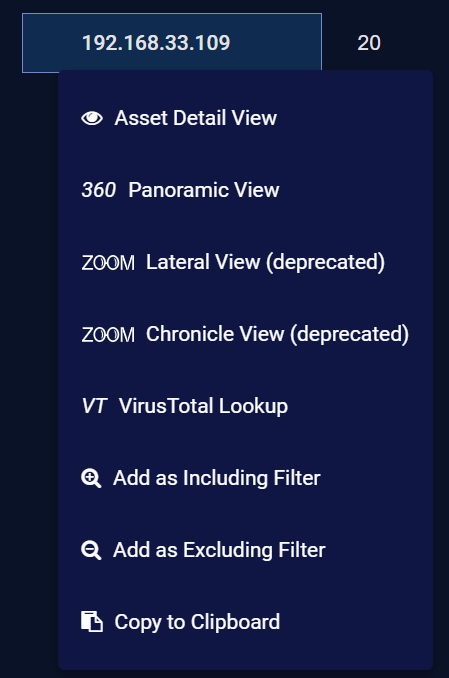
Depending on the type of data displayed, you may have access to more complex options for drilling elsewhere in Stellar Cyber, as described in Performing Field Actions and illustrated below.

-
Click the refresh button
 to refresh the table.

Column Controls
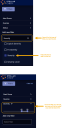
Stellar Cyber tables include a handy set of column controls in each column header. When you hover your cursor over a column heading, the cursor turns into a pointing hand and a "hamburger" menu  appears , giving you access to different column actions. The column actions available vary depending on the type of table displayed. The basic column size and position options are always available. Additional actions can appear in multiple tabs (Filter and Column Selector, for example), as summarized in the figure below.

The following column controls can appear:
|
Column Control Tab |
Column Controls Available |
|---|---|
| Column Position & Size |
|
| Column Filter | Use the standard time filter controls to limit the column entries to just those found in the specified time window. |
|
Column Selector |
Check the boxes of the columns to display in the table. You can also click the top box to select all or select none.. You can also use the Search box to find the entry for the column heading that interests you. |
Actions
Several controls allow you to perform actions on the items in the table:
-
Click Create to add an item. The item added depends on the table; the Create button only appears on tables where you can add items. For example, it appears on the User, Tenant, and Automated Threat Hunting Playbooks tables, because you can add all of those items. It does not appear on any events tables, because you cannot add events.
-
Click
 to edit an item.
 -
Click
 to delete an item.
 -
Click to see more information about an event in the events table.
Bulk Actions
Event tables allow you to perform bulk actions on multiple events at once. To modify multiple events, click the checkboxes next to the events you want to modify. The bulk actions become available, as illustrated below.
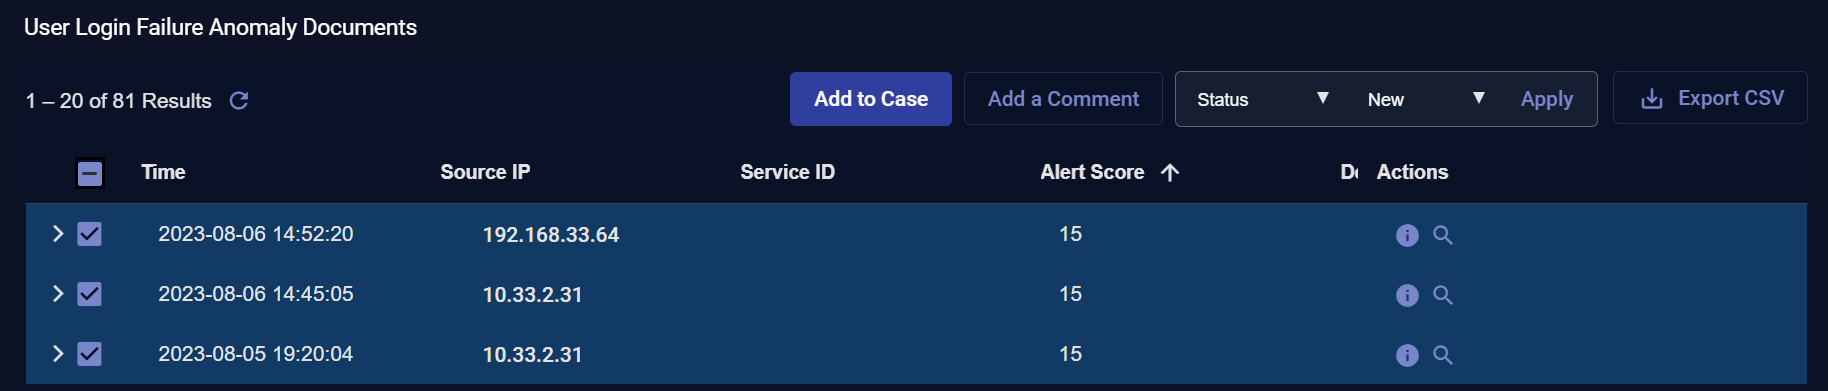
Depending on the table and data displayed, you can:
- Add to a case
- Add a comment
- Change event status
- Change event tags
- Change the assignee
Add a Comment
To add comments to the selected events:
- Click Add a Comment. The ADD A COMMENT dialog box appears.
- Enter your comment.
- Click Submit. The comment is immediately added to the selected events.
To remove a comment, simply apply a blank comment.
Change Event Status
To change the status of the selected events:
- Choose Event Status in the bulk actions drop-down.
- Choose the new status.
- Click Apply. The new status is immediately applied to the selected events.
The default event status filter is All Open. So if you change the status of events to Closed or Ignored, they disappear from the view.
Change Event Tags
To change the tags of the selected events:
- Choose Event Tags in the bulk actions drop-down.
- Choose the tag from the drop-down.
- Click Apply. The tag is immediately applied to the selected events.
You can also Delete or Clear All tags.
Change the Assignee
To change the assignee on the selected events:
- Choose Assignee in the bulk actions drop-down.
- Choose the new assignee.
- Click Apply. The new assignee immediately replaces the old assignee.
Table Navigation
Tables in Stellar Cyber include standard controls to move between multiple pages of data. As illustrated in the figure below, you can use the following tools to speed your way through multiple pages of data:
-
See the total number of table entries across all pages.
-
Change the number of entries per page.
-
Scroll forward or backward a single page of data.

Using Table Filters and the Search Bar
You can also set filters directly from table cells. Once set, they appear in the Filters panel. This section provides some tips on using the global search bar, table filters, and the filters panel to find what you're looking for:
Searching for a Specific Interflow Key and Value
You can search for Interflow keys with specific values in a table in several ways:
-
Find the key and value in a table and use the Filter For button to search for matching records. Once you add a term as a filter in this way, it automatically appears in the Filter Panel at the left of the display, too. For example, in the figure below, we're searching for Process Names matching the displayed value.
-
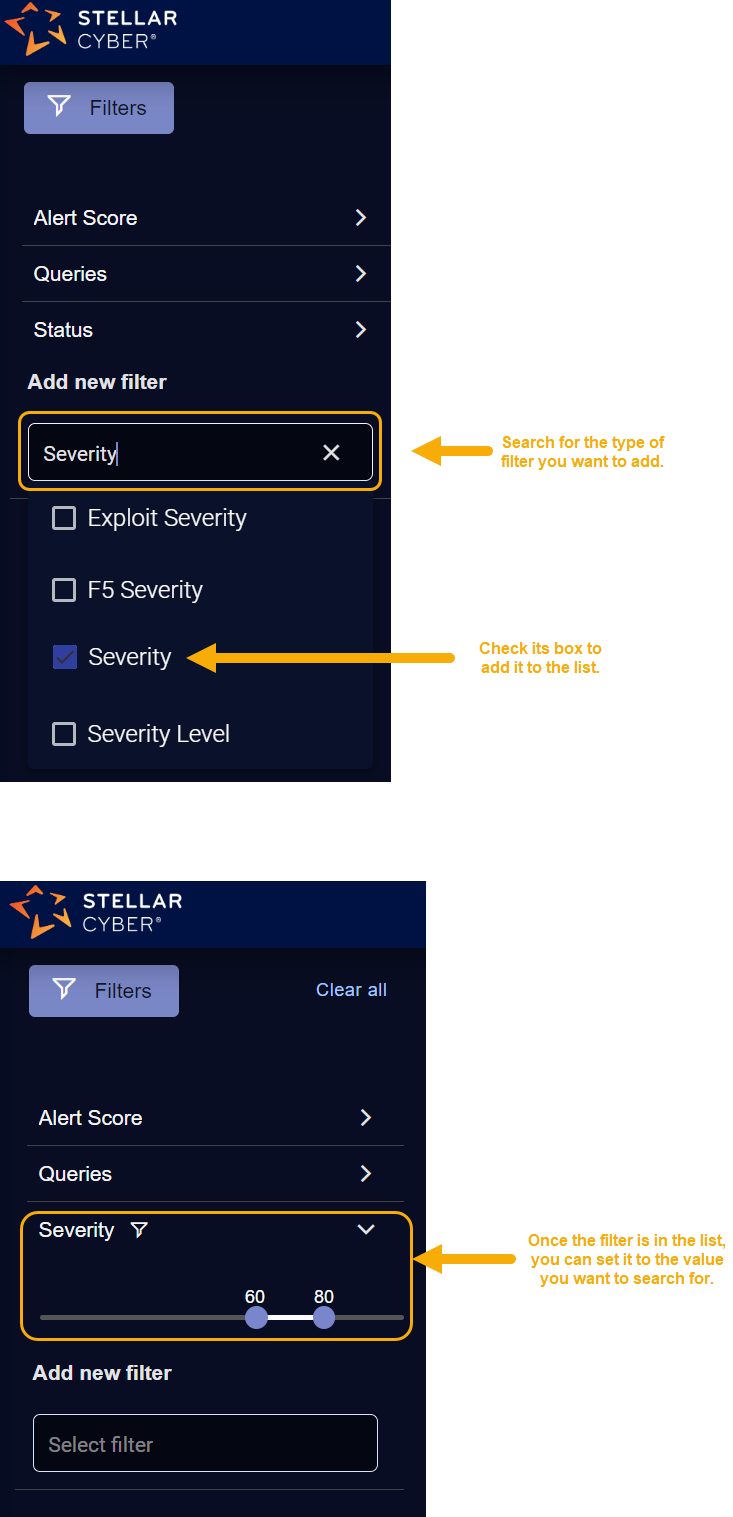
Add the Interflow key directly in the Filter Panel. If the attribute you want to search for is not already listed in the panel, you can use the Add new filter functionality to add it. Then, supply the value in the field. For example:
Searching for a Value Without a Key
If you know the value you want to search for but aren't certain of the Interflow key (for example, a number), your best route is the global search bar at the top of all Stellar Cyber pages. Take advantage of the full Lucene syntax to search for partial matches, fuzzy matches, and so on.
Excluding Values from a Table
Sometimes, it can be useful to narrow a search by temporarily excluding all records with a certain Interflow key value. This is the perfect time to use the Filter Out button in a table cell. For example, in the figure below, we're excluding all records matching the selected Host Name:

Removing Some Filter Criteria
You can remove individual filter criteria from the current search by clicking their standard delete (X) icons in the filter panel. For example:

Removing All Filter Criteria
You can remove all filter criteria by clicking the handy Clear all button at the top of the filter panel. For example:
![]()
Searching for a Specific Alert Type
You can search the Alerts table for all alerts of a specific type using either the global search bar or a table filter in the Alert Type column:
-
Use the global search bar to search the Alerts table for all alerts of a specific type by including the Interflow key of xdr_event.display_name followed by the name of the Alert Type you want to search for in quotation marks. For example, to search for the Recently Registered Domains alert type, you would enter the following in the search bar:


-
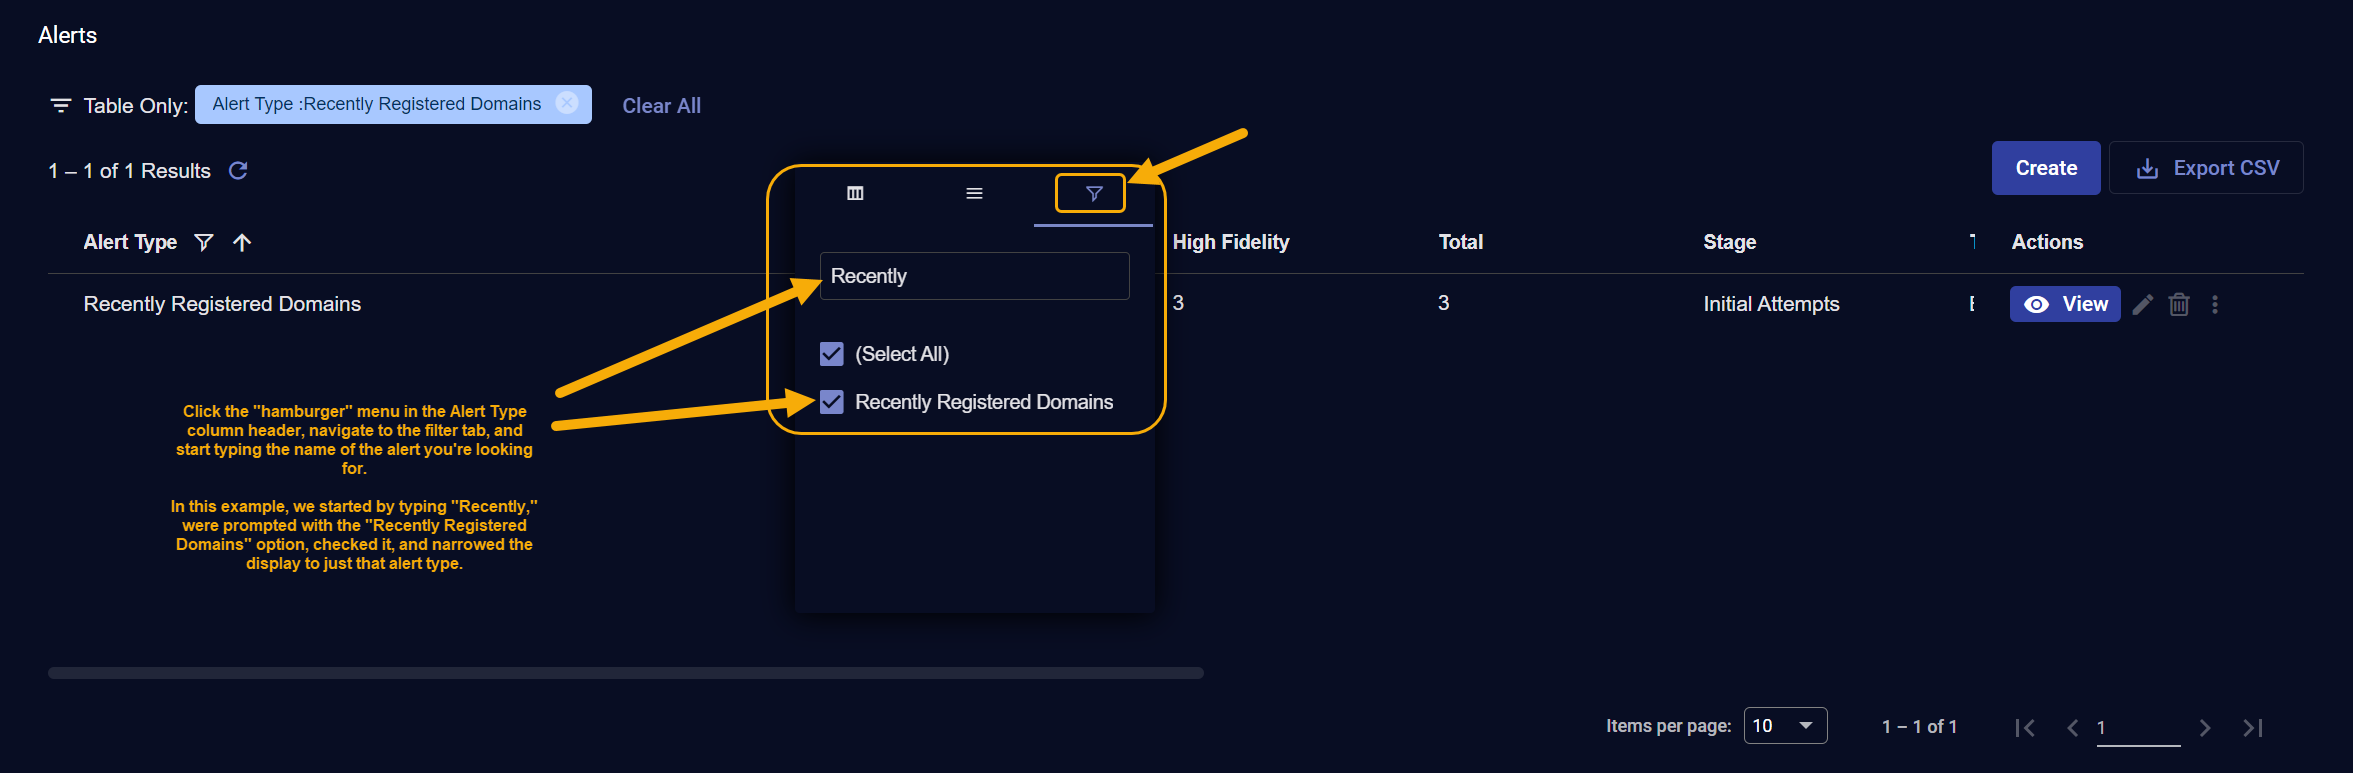
Use a table filter in the Alert Type column as follows:
-
Click the "hamburger" menu in the Alert Type column header.
-
Navigate to the Filter tab in the context menu that appears.
-
Start typing the name of the alert type for which you want to search in the text box.
-
When the matching alert type appears, click its box to apply the filter.
The filter appears at the top of the table, as in the figure below:

-
Search Tips
-
When using table data as a filter, be aware of whether the data includes multiple values. For example, the figure below shows values of both modular_sensor and Linux_agent for the data_sources Interflow key. Rather than using the Filter For button to add this entire term as a search filter, try manually supplying one or the other in the Filters panel at the left of the display.


Other Filters that Affect Data Display (Tenant Selection & Indices)
As you navigate Stellar Cyber, notice these primary settings that affect data visibility in conjunction with the other settings you make in both the toolbar and the filters panel.
Tenant Filter
The Tenant selection menu is displayed at the top of the Stellar Cyber interface. While the tenant selection is not in the filter controls, selecting a tenant filters the results just as any other filter. You can also select All Tenants to essentially remove that filter. If your role is a tenant admin or user, your tenant is automatically selected and cannot be changed. This maintains privacy between tenants.
If you change a filter from All Tenants to a specific tenant, it is possible that the data displayed under All Tenants is not in scope for the tenant you selected. In that case, an error page displays to advise of the cause with a link to the Stellar Cyber home page. Navigate to your original location and perform the desired action with the desired tenant, which ensures the objects visible to that tenant are available for display.
Indices
The Data Lake stores data in indices. Each index is used for a different purpose depending on what the source of data is. For example, there is one index for Linux events and another for Syslog records. When building your filter, remember that:
- The search results always display data from a single index.
- The filter controls do not include a control for which index is used to produce the results. This parameter is usually supplied invisibly by the current page.
- On the XDR Kill Chain Home Page the Alerts index is used. Other pages might use a different index depending on their function.
- The Investigate | Threat Hunting page defaults to the Alerts index; a menu is available from this page for you to change the index to match the threat type you are investigating. Select one or more indices to complement the filter you set in the toolbar.
Can't Use Table Buttons?
If you see buttons at the top of a table that are grayed out and unavailable, it's likely that you need to select one or more items in the table to enable them. Try checking the boxes of a few items in the table and see if the buttons become available.
Tables in Previous Releases
The 4.3.7 release significantly updated and improved table functionality. Releases prior to 4.3.7 continue to use the table functionality described below:
Common Controls
Several controls appear on most tables, allowing you to control the table itself:
-
Use Search to search within the table. This search, unlike the one at the top of most pages, searches only within the table. You can use SEARCH COLUMN to limit your results to data from a single column.
-
Click Export as CSV to download the table as a CSV file, suitable for import to a spreadsheet application. You can choose to export the table with the displayed columns only, or all columns, even if not displayed. (Selected in this menu refers to those you selected from the Column selector button.)
You can export up to 100,000 rows of a table displaying Interflow data (for example, the table available in the Alerts page). For all other tables (for example, the System | Collection | Sensors table), there is no export limit.
-
Click Change Columns to choose which columns to display. Click Reset Columns at the top of the Change Columns drop-down to reset to the factory default columns.
-
Click the column name to sort the table on that column. The
and buttons tell you which column is being sorted on, as well as the direction of the sort. -
Tables listing alerts include an Add to Incident button that lets you either create a new incident based on the selected alerts or add them to an existing incident.
-
Hover over a column heading until the cursor changes to a crosshair
 . Then, click and drag to rearrange columns in the display.
 -
Hover over a table cell and click
 to see additional actions you can perform, from copying the contents of the cell to the clipboard to using the cell data as an include or exclude filter. The exact actions depend on the table and cell data type; see the example below:
For tables of data, a more complex menu is available, as described in Performing Field Actions.
-
Click Refresh to refresh the table. This control appears on tables with contents that are dynamic.
Actions
Several controls allow you to perform actions on the items in the table:
-
Click Create to add an item. The item added depends on the table; the Create button only appears on tables where you can add items. For example, it appears on the User, Tenant, and Automated Threat Hunting Playbooks tables, because you can add all of those items. It does not appear on any events tables, because you cannot add events.
-
Click
to edit an item. -
Click
to delete an item. -
Click to see more information about an event in the events table.
Bulk Actions
Event tables allow you to perform bulk actions on multiple events at once. To modify multiple events, click the checkboxes next to the events you want to modify. The bulk actions become available, as illustrated below.

Depending on the table and data displayed, you can:
- Share with the community
- Add a comment
- Change event status
- Change event tags
- Change the assignee
Add a Comment
To add comments to the selected events:
- Click Add a Comment. The ADD A COMMENT dialog box appears.
- Enter your comment.
- Click Submit. The comment is immediately added to the selected events.
To remove a comment, simply apply a blank comment.
Change Event Status
To change the status of the selected events:
- Choose Event Status in the bulk actions drop-down.
- Choose the new status.
- Click Apply. The new status is immediately applied to the selected events.
The default event status filter is All Open. So if you change the status of events to Closed or Ignored, they disappear from the view.
Change Event Tags
To change the tags of the selected events:
- Choose Event Tags in the bulk actions drop-down.
- Choose the tag from the drop-down.
- Click Apply. The tag is immediately applied to the selected events.
You can also Delete or Clear All tags.
Change the Assignee
To change the assignee on the selected events:
- Choose Assignee in the bulk actions drop-down.
- Choose the new assignee.
- Click Apply. The new assignee immediately replaces the old assignee.
Table Navigation
Tables in Stellar Cyber include standard controls to move between multiple pages of data. As illustrated in the figure below, you can use the following tools to speed your way through multiple pages of data:
-
See the total number of table entries across all pages.
-
Change the number of entries per page.
-
Jump to the first or last page of data.
-
Scroll forward or backward a single page of data.
-
Enter a specific page number to display. You do this by typing in the page number and then clicking elsewhere in the display. Stellar Cyber automatically navigates to the specified page number.

