Installing a Windows Server Sensor
The Windows Server Sensor (agent) runs as a Windows service in a compatible Windows Server system. The Server Sensor observes events within the Windows Server system and sends Interflow data records to the data processor.
The captured events are:
- Hardware
- Security
- System
- Windows Firewall
- Windows Defender
- PowerShell
- File Integrity Monitoring (if enabled in the Sensor Profile)
The Windows Server Sensor provides the following key capabilities:
-
If the sensor has coverage over the domain controller, Stellar Cyber enriches data with the relationship between users and IP addresses.
-
If the sensor has coverage over the DHCP server, Stellar Cyber sees the relationship between hostnames and IP addresses, and so can track assets when the IP address changes.
-
Windows Server Sensor provides the data foundation for Stellar Cyber's machine learning alerts that use the Windows Events index.
Although you can also provide coverage of Windows logs using other visibility tools such as the ManageEngine Log Collector or Winlogbeat, the logs provided by these tools are not normalized, enriched, and stored in the Windows Events index used for machine learning alert generation (except for ManageEngine ADAudit Plus logs) and cannot be used for machine learning alert generation.
In addition, the Windows Server Sensor provides the following advantages over alternative solutions:
-
Windows Server Sensor provides easier deployment and maintenance.
-
Windows Server Sensor provides granular filtering at the edge through the Stellar Cyber user interface.
-
By using the Windows Server Sensor, you do not need to deploy another modular sensor to forward logs from ManageEngine or Winlogbeat.
-
Windows Server Sensor Processes
The Windows Server Sensor launches the following processes:
|
Name in Task Manager |
Name in Services App |
Description |
|---|---|---|
|
aella_conf_win_srv.exe |
Windows Agent Sensor Conf |
Handles Windows Server Sensor configuration |
|
aella_ctrl_win_srv.exe |
Windows Agent Sensor Ctrl |
Monitors other services, and can stop or start them based on the configuration |
|
aella_diagnostics_win_srv.exe |
Windows Agent Sensor Phonehome |
Sends Windows Server Sensor logs to DP |
|
aella_winlog.exe |
Windows Agent Sensor Logbeat |
Sends Windows events to DP |
|
aella_filebeat.exe |
Windows Agent Sensor Filebeat |
Sends log files from Windows DHCP server (if installed and running) to DP |
|
aella_fim.exe |
Windows Agent Sensor FIM |
Provides file integrity monitoring services, as configured in the Sensor Profile |
Exclude Server Sensor from AV/EDR Scanning
Stellar Cyber recommends that you prevent potential conflicts by configuring any anti-virus or EDR software installed on the same host as the Server Sensor to exclude the Server Sensor installation directories from scanning. The directories to exclude are as follows:
|
Server Sensor Type |
Folders/Files to Exclude from AV/EDR Scanning |
|---|---|
| Windows |
C:\ProgramData\Stellarcyber C:\Program Files\Aella C:\Windows\Stellar_syswatcher.exe (sensors running pre-4.2.2 versions) |
Possible False Positives from FireEye PROCGUARD
During installation of the Windows Server Sensor, it is possible that FireEye PROCGUARD may report the following alert – Attempted LSASS access by aella_conf_win_srv.exe detected. After investigation, Stellar Cyber has determined that this is a false positive and that the aella_conf_win_srv.exe service does not interact with C:\\Windows\\system32\\lsass.exe on the host machine.
About Sysmon in this Release
Unlike previous Window Server Sensor releases, releases from 4.2.2 onwards do not download and install the stellar_syswatcher (Microsoft Sysmon64) service due to potential system crashes in certain older operating systems (Windows 2008R2 and 2012, although possibly others).
Note the following:
-
Upgrades of Windows Server Sensors leave the existing version of stellar_syswatcher intact and do not upgrade it. You can continue to use the existing Sysmon service safely.
-
You can install the latest version of Sysmon (v13.31 at this writing) manually if you want the Windows Server Sensor to report Sysmon events to the DP. This is recommend for improving visibility on Windows systems. However, Stellar Cyber strongly recommends that you test your installation in a non-production environment to verify operations before moving to production.
Supported Systems
The Windows Server Sensor is supported on Windows Server 2008 R2 and later. The Server Sensor is only available in 64-bit.
When the system sleeps, the connection drops, and no data is collected. The connection is re-established when the system wakes. To avoid this, configure Windows to Never sleep.
The host Windows Server into which the Windows Server Sensor is installed must meet the following minimum requirements, regardless of whether it is a physical or virtual server:
| Component | Specification |
|---|---|
| Host CPU | Xeon Core 2 virtual cores (2.0 GHz or more) |
| Host RAM (GB) | 8 |
| Host SSD (GB) | 128 |
| OS | Windows Server 2008 R2 (or later) |
Update Windows Server Software Before Installing Windows Server Sensor
It's a good idea to use Windows Update to make sure your Windows Server software is up to date before installing the Windows Server Sensor. For example:
-
The Windows Server Sensor software includes the AI_ChainedPackageFile.vc_redist.x64.exe redistributable from Microsoft. Successful installation of this redistributable requires the following prerequisites from Microsoft, installed either in the order below or as part of a standalone package (KB2919355 is a prerequisite of KB2999226).
PowerShell Requirements for 4.3.x Releases 
Depending on the Windows Server Sensor version you are installing or upgrading to, PowerShell may or may not be required:
-
Starting with the 4.3.4 release, PowerShell is no longer required for Windows Server Sensor installs or upgrades.
-
You can perform a clean installation of the 4.3.4+ Windows Server Sensor on a target system without PowerShell installed.
-
The 4.3.1, 4.3.2, and 4.3.3 versions are all supported for direct upgrades to 4.3.4+. Each of these versions required PowerShell for its initial installation. You can still upgrade these versions directly to 4.3.4+ even if PowerShell was removed after the 4.3.1/4.3.2/4.3.3 sensor was installed.
-
If you must perform an interim upgrade to a pre-4.3.4 version before upgrading to 4.3.4+, PowerShell must remain installed until the version to which you are upgrading no longer requires it (4.3.4 and later)
-
-
For all pre-4.3.4 versions, the host Windows Server must be running PowerShell 2.0 or greater. In nearly all cases, a supported Window Server version will already have a version of PowerShell installed by default that meets this requirement. If for some reason, however, your Windows Server is not running PowerShell 2.0 or greater (for example, due to a Windows Group Policy Objects exclusion), the Server Sensor installation will fail with details in the installation logs.
Open Firewall Ports
The sensor requires open firewall ports in order to communicate.
Obtaining the Windows Server Sensor Installer
The Server Sensor is distributed as an MSI file. There are two methods for acquiring the software install package. The same software is delivered with either method.
From Production Web Server
The software can be downloaded from the production server directly by using one of the following URLs.
-
For 64-bit Windows:
https://acps.stellarcyber.ai/release/4.3.7/datasensor/windows-x64.msi
https://acps.stellarcyber.ai/release/4.3.7/datasensor/windows-x64.msi.sha1
Contact Stellar Cyber support (support@stellarcyber.ai) for login credentials.
Installation links point to the most recent release. To download a different version, simply substitute the version you want for the version specified in the link.
The file is saved to the local Downloads folder.
From the Stellar Cyber UI
The MSI file to install the Windows Server Sensor can also be downloaded directly from Stellar Cyber via the System | Deployment | Agents main menu options. On the screen that displays, select the Windows tab. The screen will appear as in the following image.
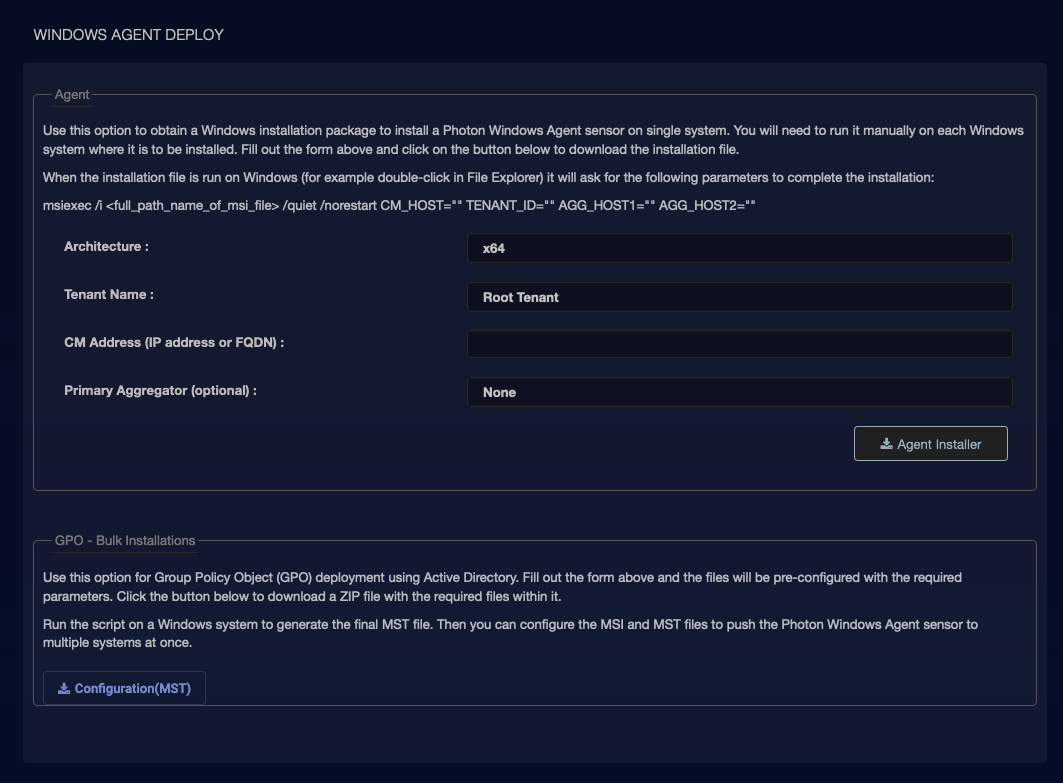
Complete the fields and then click the Agent Installer button. The file is saved in the local Downloads folder.
Alternatively, you can use the Configuration/MST button to download a pre-configured MST file which can be used to load the Server Sensor via the Group Policy Object feature of Active Directory.
This feature is described on the Agent page.
Installation
Use the following procedure to install the Windows Server Sensor after you download the msi file:
During the installation, a Windows command prompt window may appear. Do not close this window manually – the installation wizard closes it automatically when the installation is complete.
To avoid installation issues, complete any pending updates for the host Windows machine before upgrading the Server Sensor.
- Open the Downloads folder.
- Right-click the msi file.
- Select Properties. The Properties window opens.
- Click Unblock in the Security section. Some Windows systems automatically block files you download.
- Click OK.
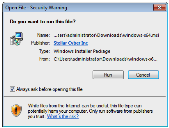
-
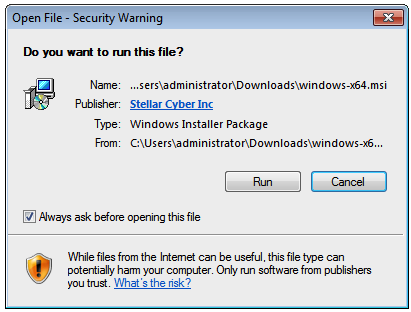
Double-click the msi file to open it and start the installation. If you see a dialog box asking you to verify that you want to run this file, click Run.
-
Choose the path for the agent installation when prompted by the installer.
The only supported path is
C:\Program Files\Aella. An error message occurs if you try to install at a different path. -
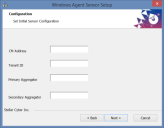
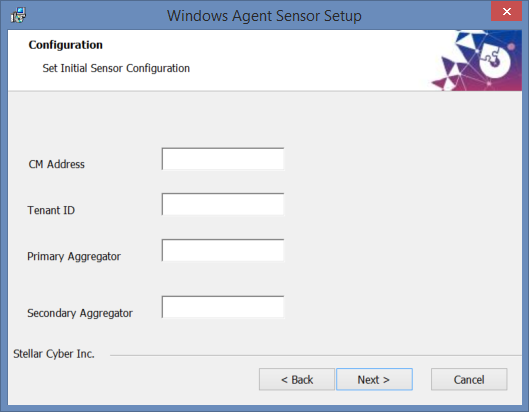
Use the screen below to configure the following agent options when prompted by the installer. Note that any options you don't specify in the dialog box can be set later on from the Server Sensor CLI:
-
CM Address – Specify the IP address of the DP managing the Server Sensor. The agent will automatically add itself to the DP specified here in the Collect | Sensor Overview page.
-
Primary Aggregator – If you are configuring this Server Sensor to forward data to an aggregator before it is sent to the DP, you can enter the primary aggregator's IP address here.
-
Secondary Aggregator – If you are configuring this Server Sensor to forward data to an aggregator, you can enter the secondary aggregator's IP address here.
The wizard does not prevent you from specifying a Secondary Aggregator if the Primary Aggregator is left empty. However, a Secondary Aggregator specified without a Primary Aggregator is ignored and not applied to the installation.
-
Tenant ID – If this sensor is to be assigned to a tenant, you can specify the Tenant's ID here. You can get the Tenant from the User Management screen. If you do not specify a tenant, the sensor is assigned to the root tenant.
-
- The installer installs the Server Sensor. When complete, the Server Sensor is installed as a service.
To verify the installation:
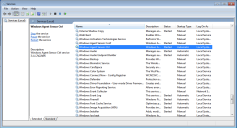
- Open the Services app.
-
Look for Windows Agent Sensor Ctrl.

Configuring the Server Sensor in the CLI
The Server Sensor installation wizard provides you with the ability to configure the IP address of the sensor's CM (Data Processor) and its tenant assignment, if any. If you did not set these options from the installation wizard, you can do so using the Server Sensor's CLI.
To run the Server Sensor's CLI, find the Windows Agent Sensor Command Line Interface entry in the Windows Start Menu. If it does not appear at first, use the Find function.
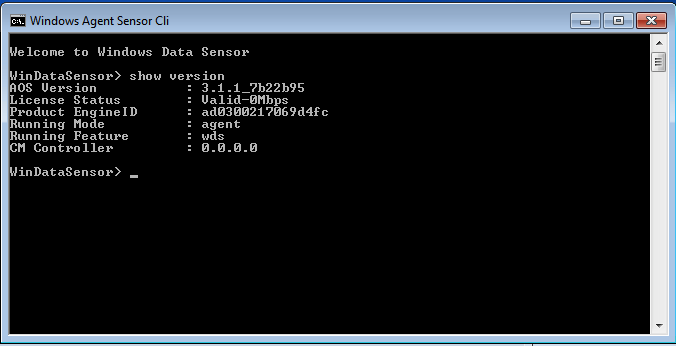
After starting the Windows Server Sensor CLI, a terminal window appears as below. This window lets you enter CLI commands to the Server Sensor. Enter the show version command to verify the functioning of the sensor. In response, the sensor displays output similar to the following:
Use the CLI to configure the following settings:
- If the sensor is to be assigned to a tenant and you didn't specify the ID in the installation wizard, enter the command
set tenant_id <tenant-id>where the<tenant-id>is replaced by the tenant ID. - Enter
show cmto see if the DP's address is already configured. If it is not, use theset cm <ip-addr>command to specify the IP address the agent uses to reach the management interface of the Data Processor. For a DP cluster, this is the IP address of the DL-master's management interface. For a single DP deployment, this is simply the DP's management IP address. You can supply either an IP address or a DNS name for the<ip-addr>. -
If the sensor has coverage over the DHCP server, you can send the DHCP server logs to a device sensor with the log forwarder feature enabled so that they can be used to enrich assets with DHCP data. Use the following command to forward DHCP logs to a specified device sensor:
set dhcp_log enable ip <sensor ip address>For the
<sensor ip address>, supply the IP address of a device sensor (Network, Security, or Modular) with the log forwarder feature enabled in its sensor profile. - Verify the data entry with the
show versioncommand. - Enter the
quitcommand to close the CLI.
Authorizing the Server Sensor
You must authorize the sensor when it appears in the network.
You can authorize multiple sensors at a time. So if you're installing multiple sensors, install them all, then authorize them all at once.
Upgrading the Server Sensor
Stellar Cyber recommends that you upgrade the Server Sensor from the Sensor Overview page using these instructions.
Note that when you upgrade a Windows Server Sensor from the Sensor Overview page, all configuration settings are preserved across the upgrade, including the CM IP address, aggregator addresses, tenant ID, log level settings, and DHCP server log settings.
Downgrading the Server Sensor
You cannot install an old Windows Server Sensor over a newer version. To downgrade a Windows Server Sensor:
- Uninstall the existing Windows Server Sensor.
- Install the older version.
Uninstalling the Server Sensor
Stellar Cyber recommends that you remove the Windows Server Sensor using the Change button in the Programs and Features control panel instead of the Uninstall button.
Using the Change button gives you access to the following additional uninstall options that ensure the program and all its data are removed completely:
-
Remove Data Files
-
Remove Scheduler Task
If you are planning on reinstalling a 4.2.2+ Windows Server Sensor, Stellar Cyber recommends that you leave these items unchecked.
If you want to uninstall completely, you should check these boxes.
During the uninstallation, a Windows command prompt window may appear. Do not close this window manually – it closes automatically when the uninstallation is complete.
Installing Microsoft Sysmon v13.31 Manually
As described in About Sysmon in this Release, the 4.3.7 release of the Windows Server Sensor does not install the Sysmon service with stellar_syswatcher. Use the following procedure to download Sysmon from Microsoft, install it manually, and verify operations:
-
Install and authorize 4.3.7 of the Windows Server Sensor using the instructions earlier in this topic.
-
Download the latest version (v13.31) of Sysmon from Microsoft and extract it to the system where you want to install it.
-
Install Sysmon64 with the stellar_syswatcher.xml configuration file.
-
Verify that Sysmon events are received properly in the DP's aella-adr index.
Install Sysmon64 with stellar_syswatcher
After downloading and unzipping the installer for Sysmon64 to the target system, you can install it as follows:
-
Open a command prompt as an administrator (right-click the cmd.exe file in Windows Explorer and choose Run as administrator).
-
Change directories to the directory where you unzipped the Sysmon64.exe installer.
-
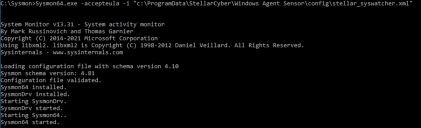
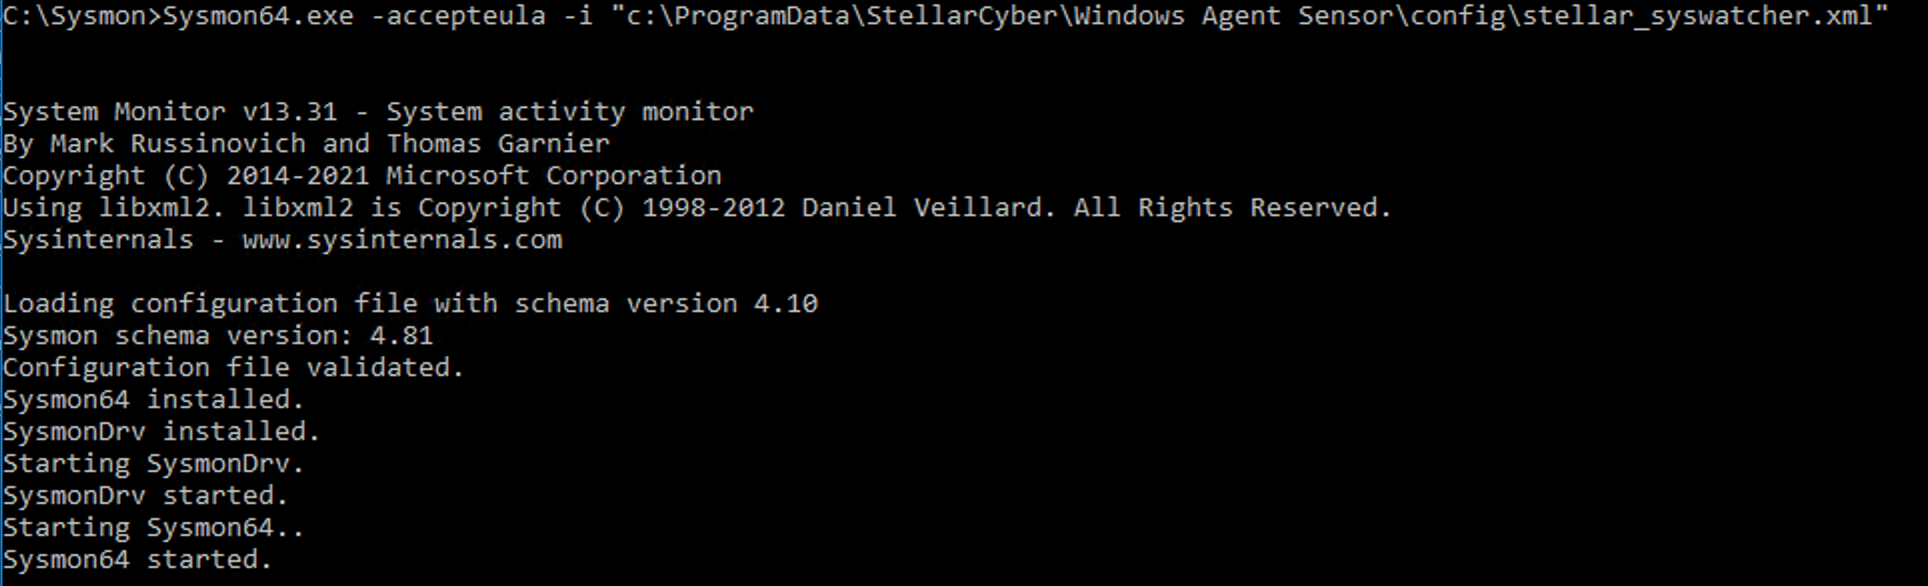
Install Sysmon64.exe with the stellar_syswatcher.xml configuration file using the following command:
Sysmon64.exe -accepteula -i "c:\ProgramData\StellarCyber\Windows Agent Sensor\config\stellar_syswatcher.xml"
In response, the system installs and starts the Sysmon64 utility:
Restart the winlogbeat Service if the Windows Server Sensor is Already Installed
-
If you install Sysmon after the Windows Server Sensor, you must restart the winlogbeat service so that it works with Sysmon.
-
If you install Sysmon before the Windows Server Sensor, Sysmon works with winlogbeat without a restart.
Verify Sysmon64 Installation
You can verify that Sysmon64 was installed correctly by performing the following tasks:
-
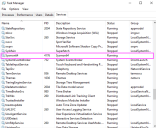
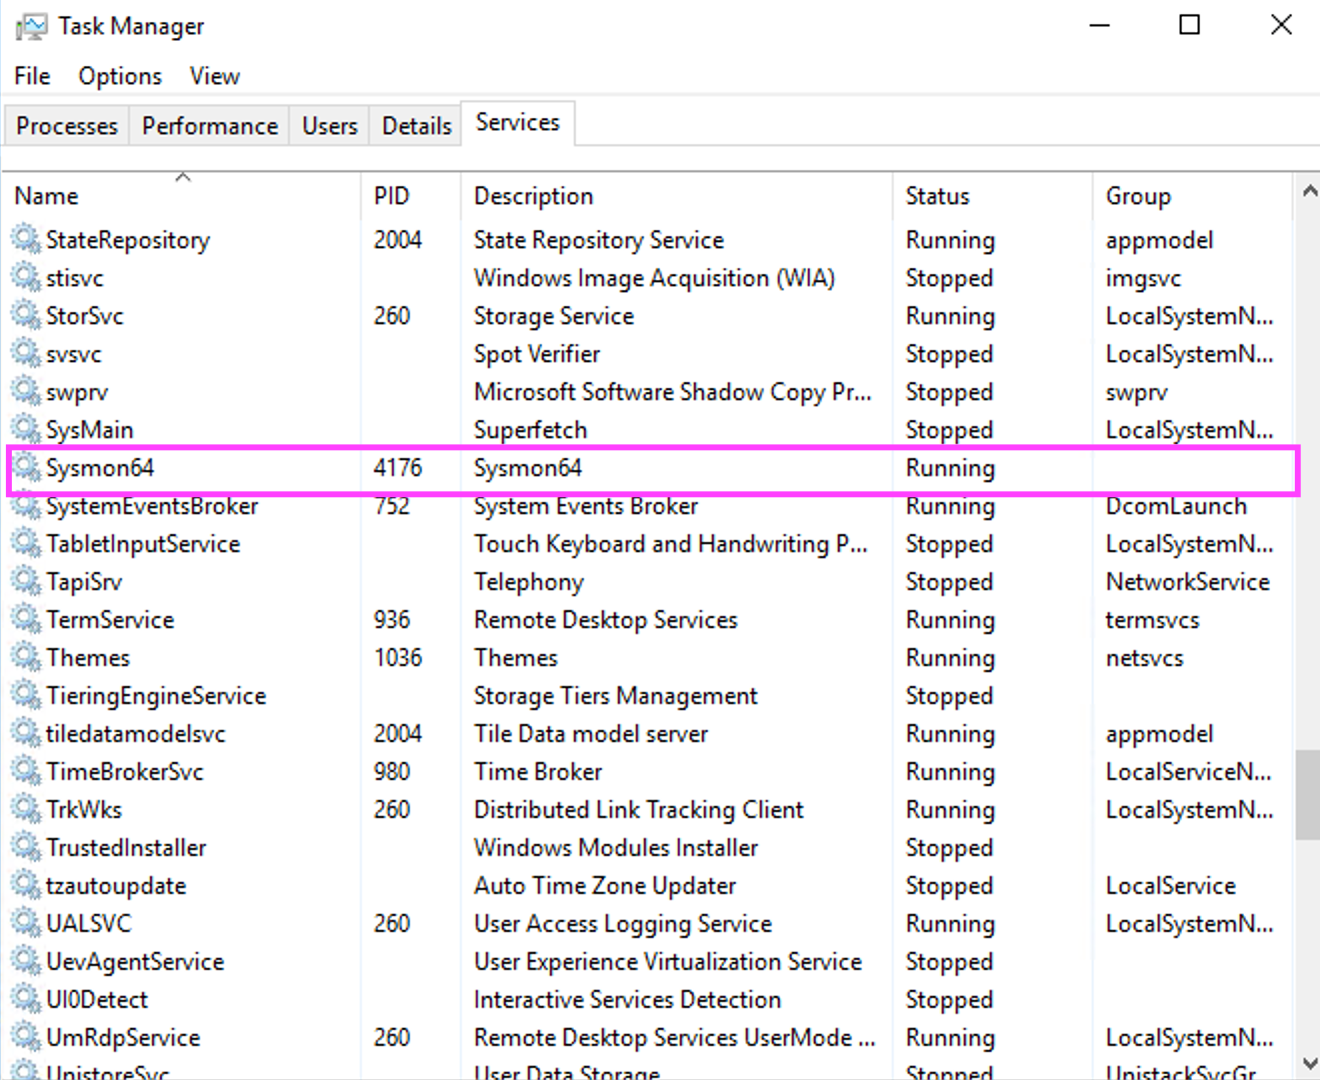
Open the Task Manager (Ctrl-Alt-Del -> Task Manager) and verify that the Sysmon64 service appears in the list.
-
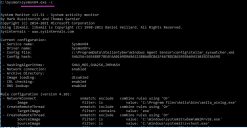
Return to the command prompt and run sysmon64.exe -c to view its current configuration. Verify that the configuration you see matches the configuration shown below:
-
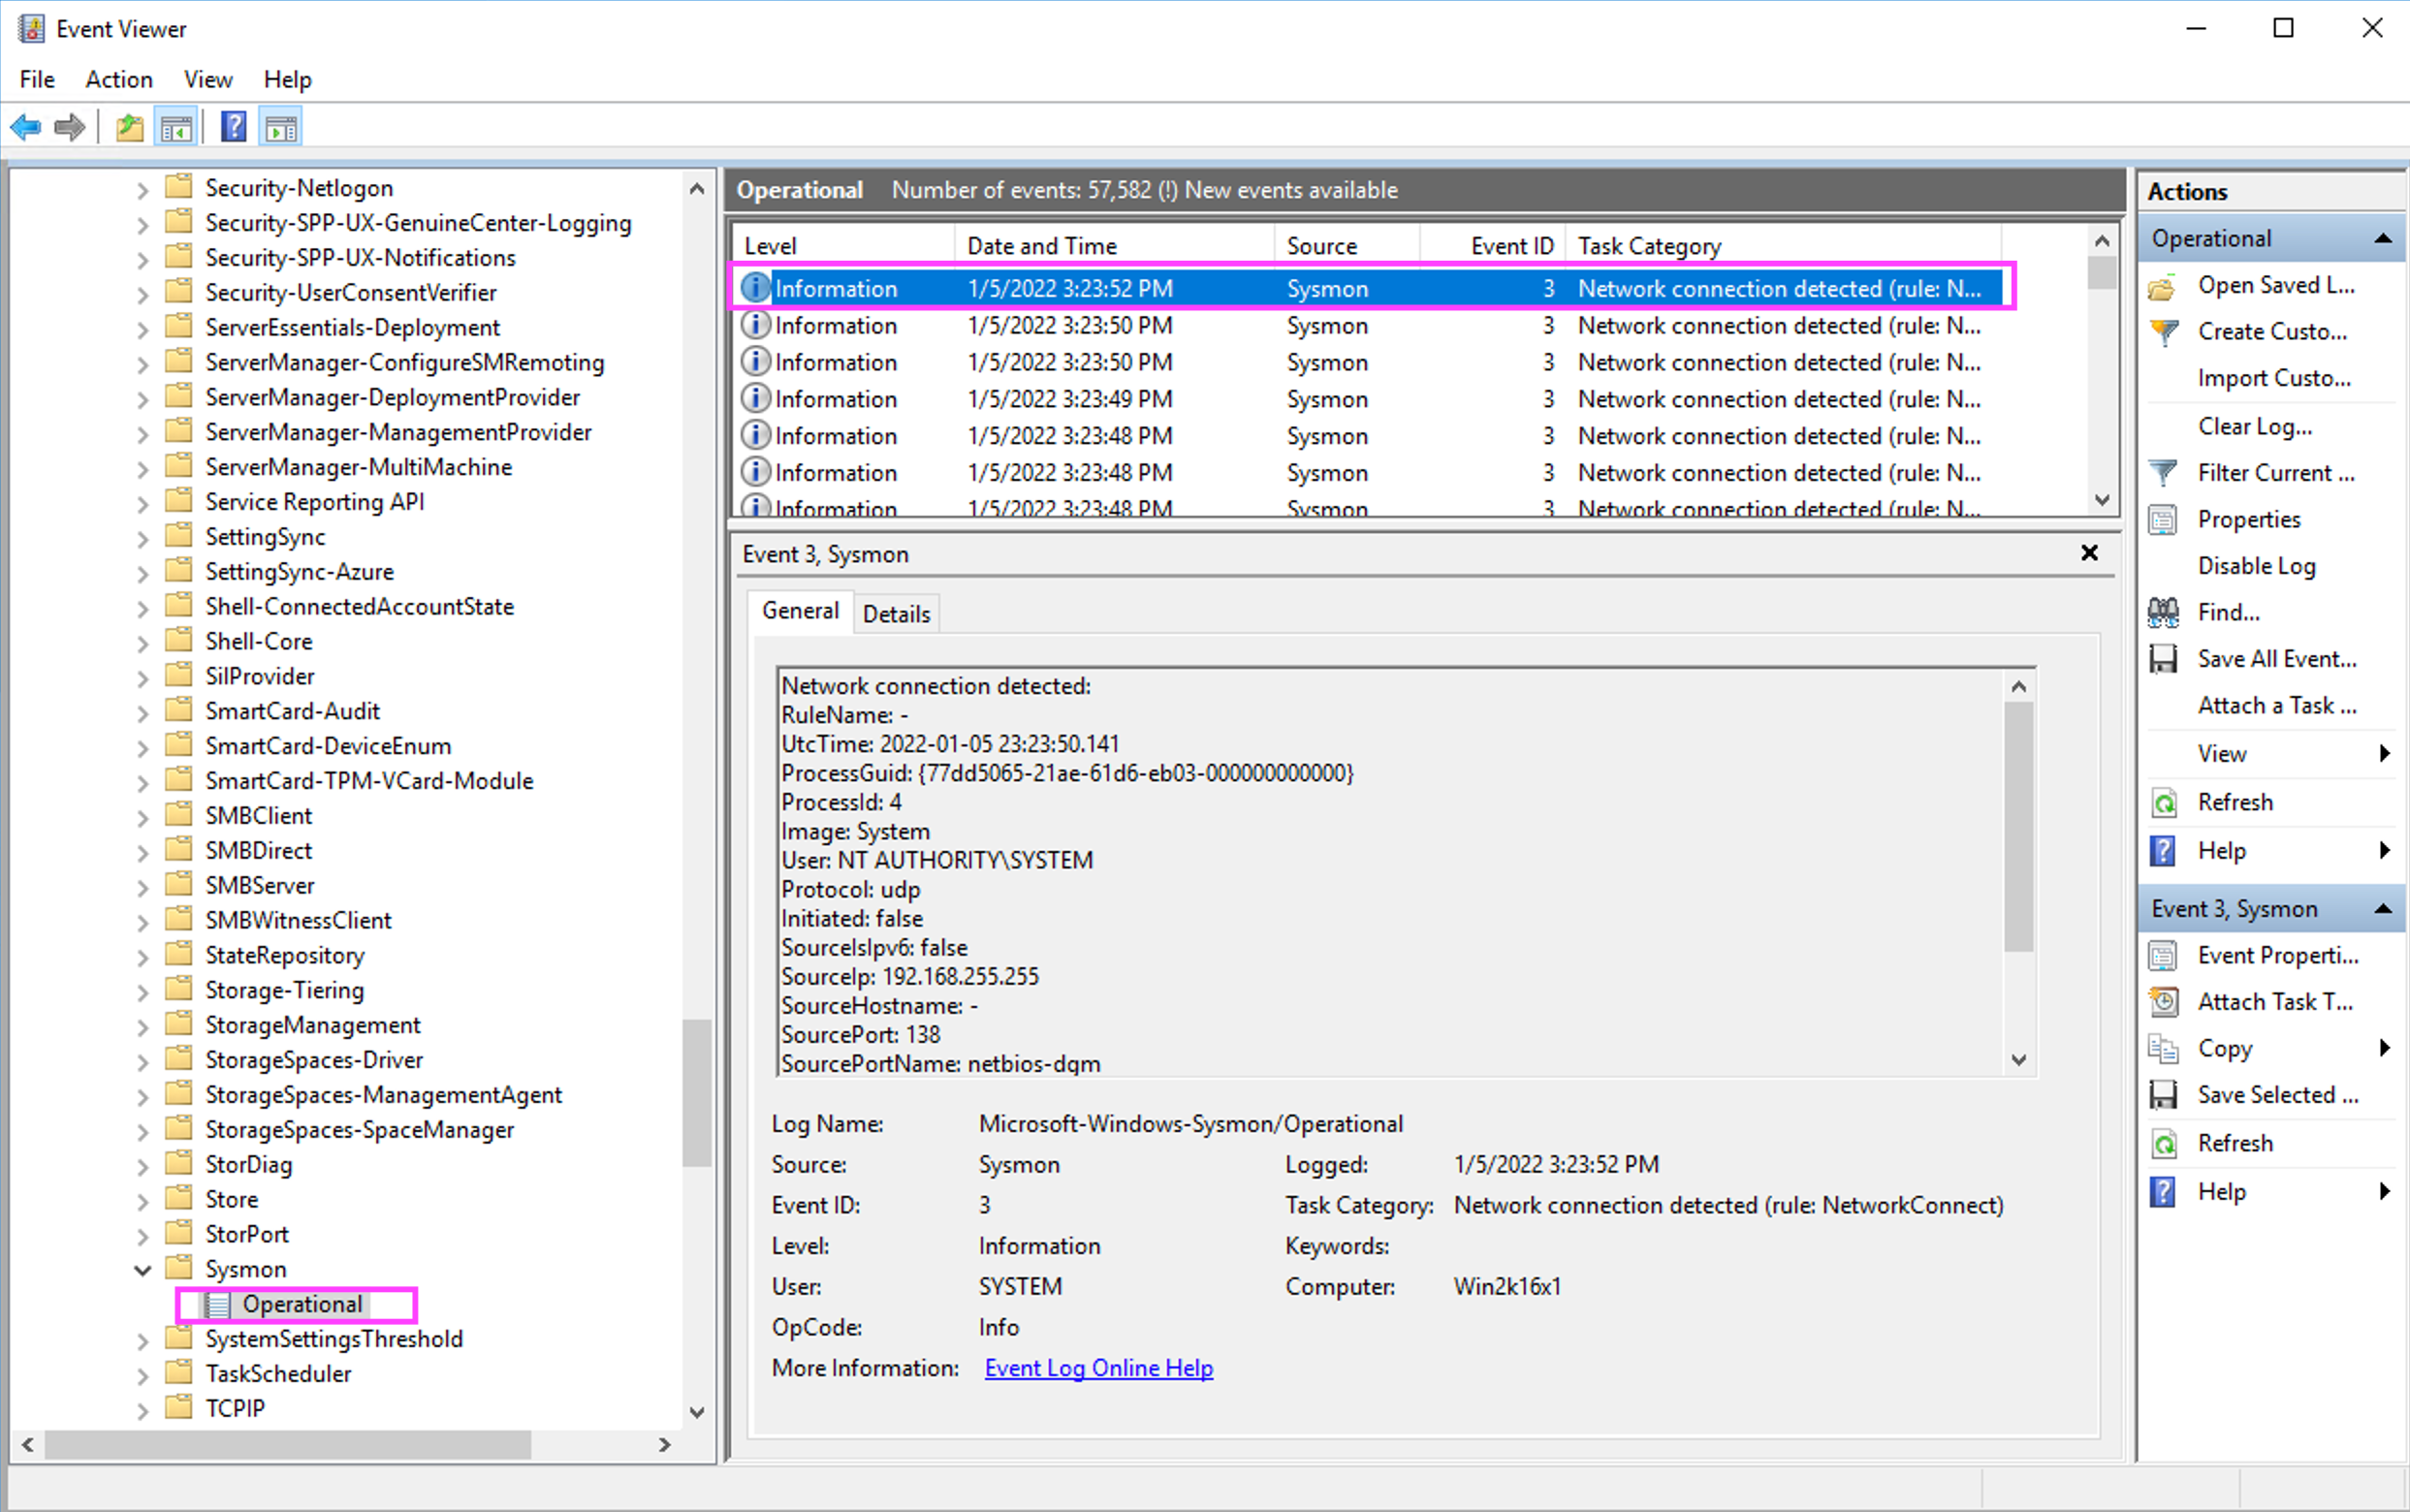
Open the Windows Event Viewer and navigate to the following path in the left navigation pane:
Applications and Services Logs | Microsoft | Windows | Sysmon | Operational
-
Verify that Network connection detected (Event ID 3) events appear in the list as highlighted in the figure below:


Verify Sysmon Events are Received on DP
You can verify that the manually installed Sysmon64 service is successfully sending events to the DP with the following procedure:
-
Connect to the DP managing the Windows Server Sensor and navigate to the System | Collection | Sensors page.
-
Take note of the name of the sensor where you installed the Sysmon64 service. For example:
-
Navigate to the Investigate | Threat Hunting page.
-
Set the Indices dropdown to Windows Events.
-
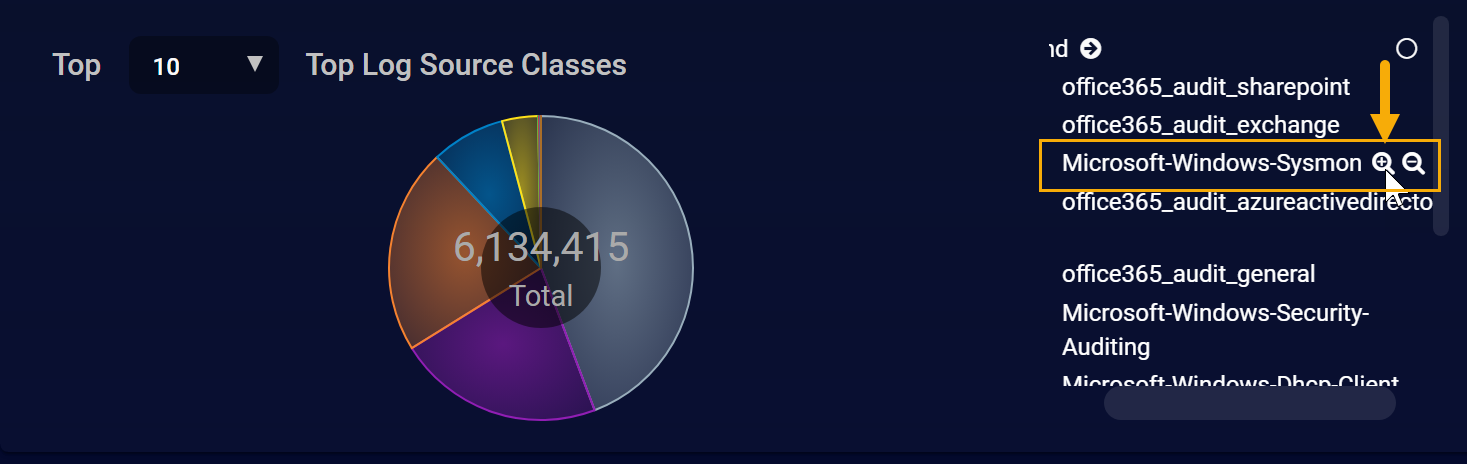
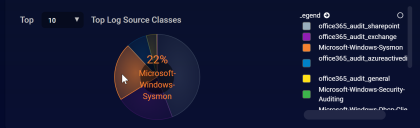
Locate the Top Log Source Classes panel and verify that it includes Microsoft-Windows-Sysmon, as in the figure below:
-
Click the button next to the entry for Microsoft-Windows-Sysmon in the Legend to use it as a filter. For example:

-
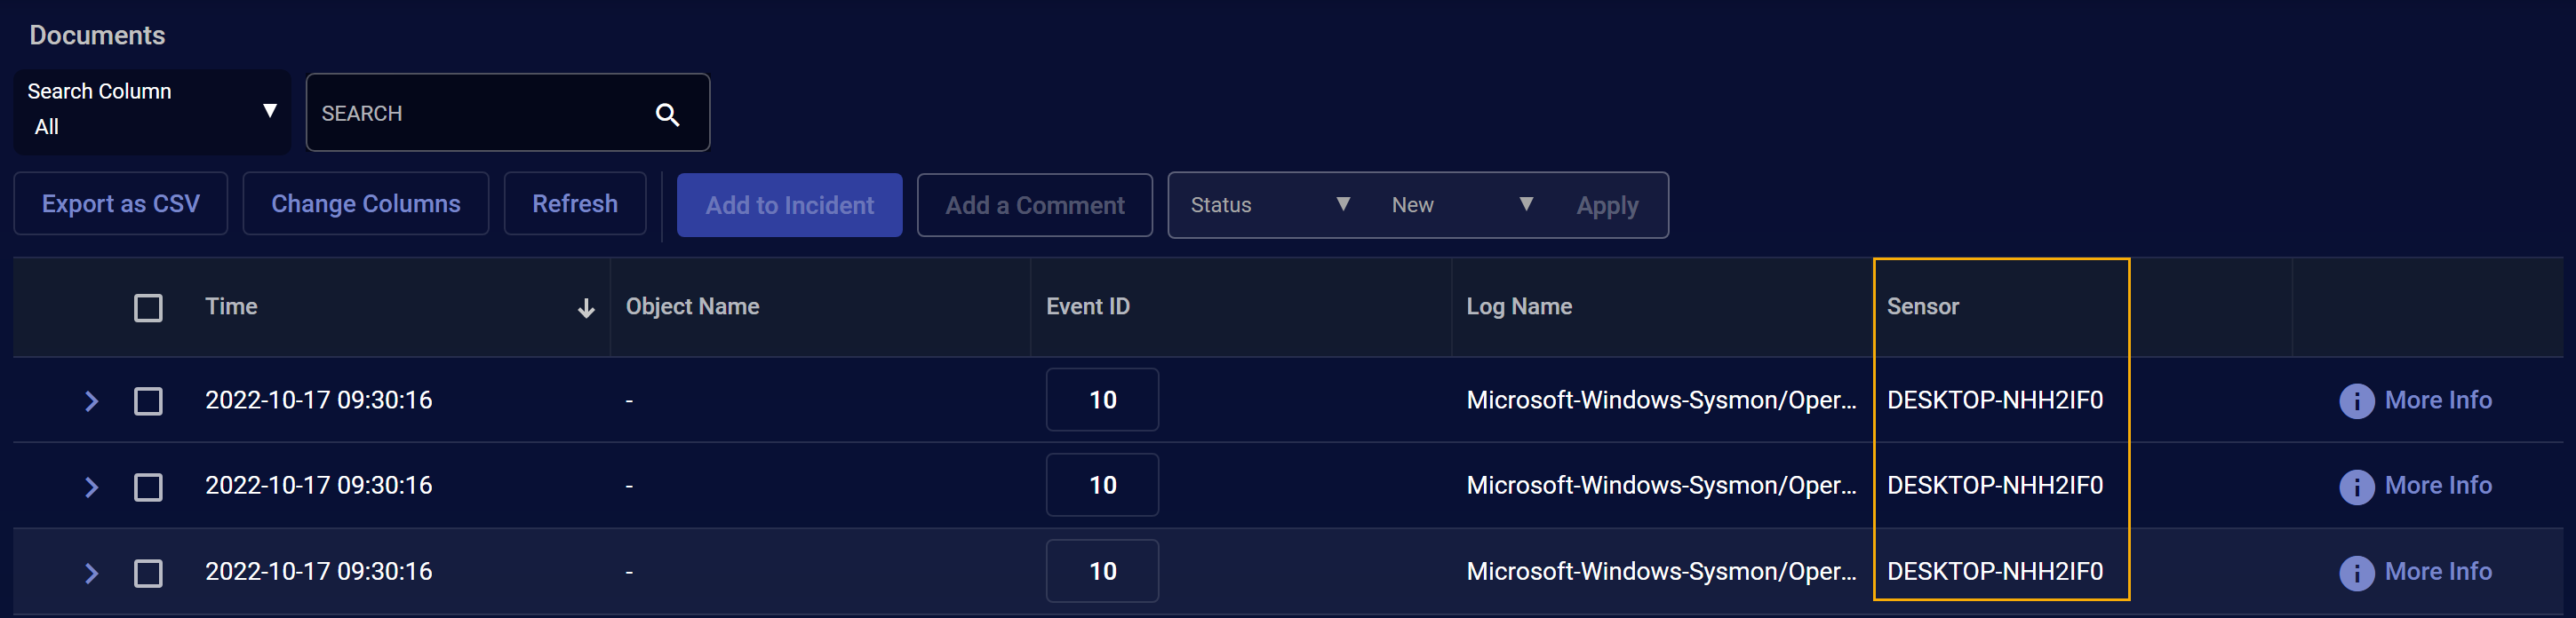
Scroll down to the Documents table.
-
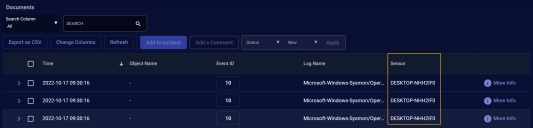
Use the Change Columns button to add the Sensor column to the display if it is not already there.
-
Sort by the Sensor column and scroll to the entries for the sensor you identified at the start of this procedure to verify that it passes the Sysmon filter. For example: