ATH Example: Pass the Hash
We will create a threat hunting playbook that looks for a pass-the-hash attack.
Configure the Alert
We want an alert that runs a query every 5 minutes on the Alerts index.
To configure the alert:
- Click Respond | Automation.
- Click the Create button to add a playbook.
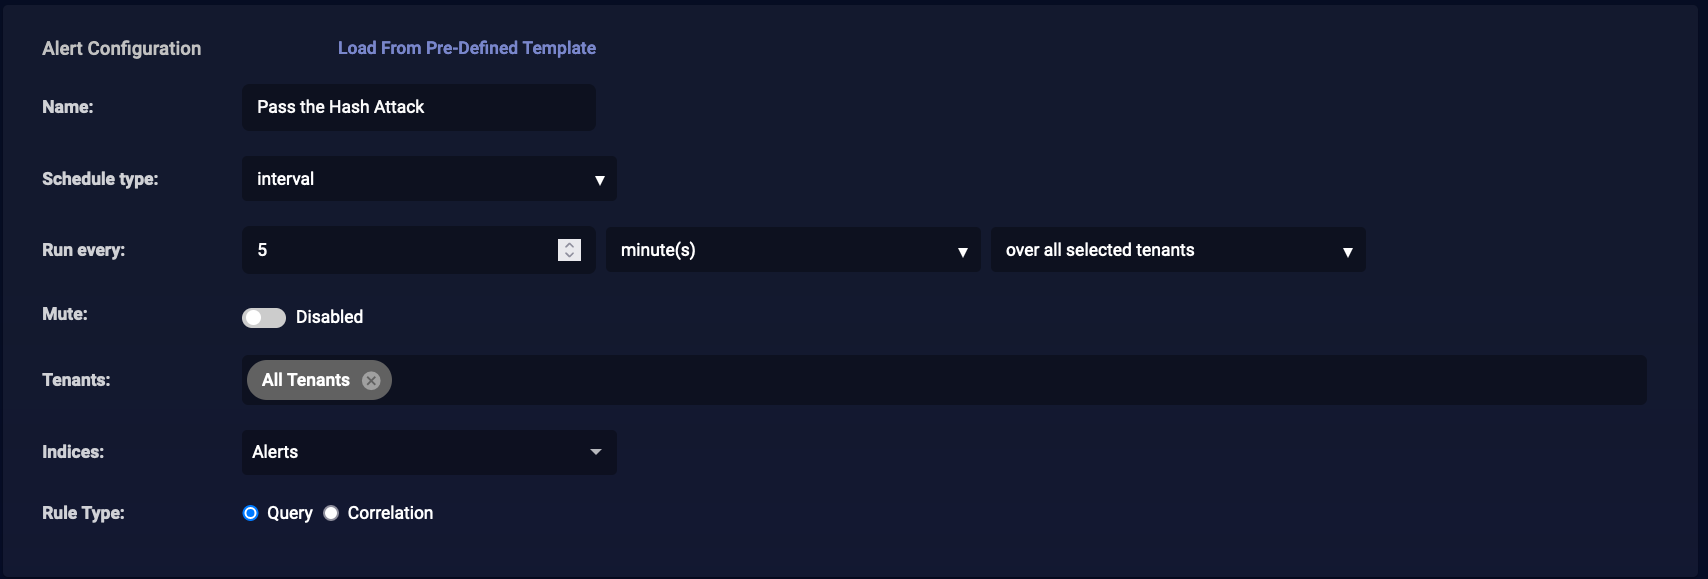
- Enter a name for the playbook. We entered Pass the Hash Attack.
- Set the Schedule type to interval.
- Set it to run every five minutes over all selected tenants.
- Choose the tenants and tenant groups on which to run. We chose All Tenants.
- Set the index to Alerts.
- Leave the Rule Type as Query.
Build a Query
We want a query that looks for logins using cached credentials (the hash). We don't care if the logins were successful or not.
To build the query:
- Click New Query. The screen changes to Build a Query.
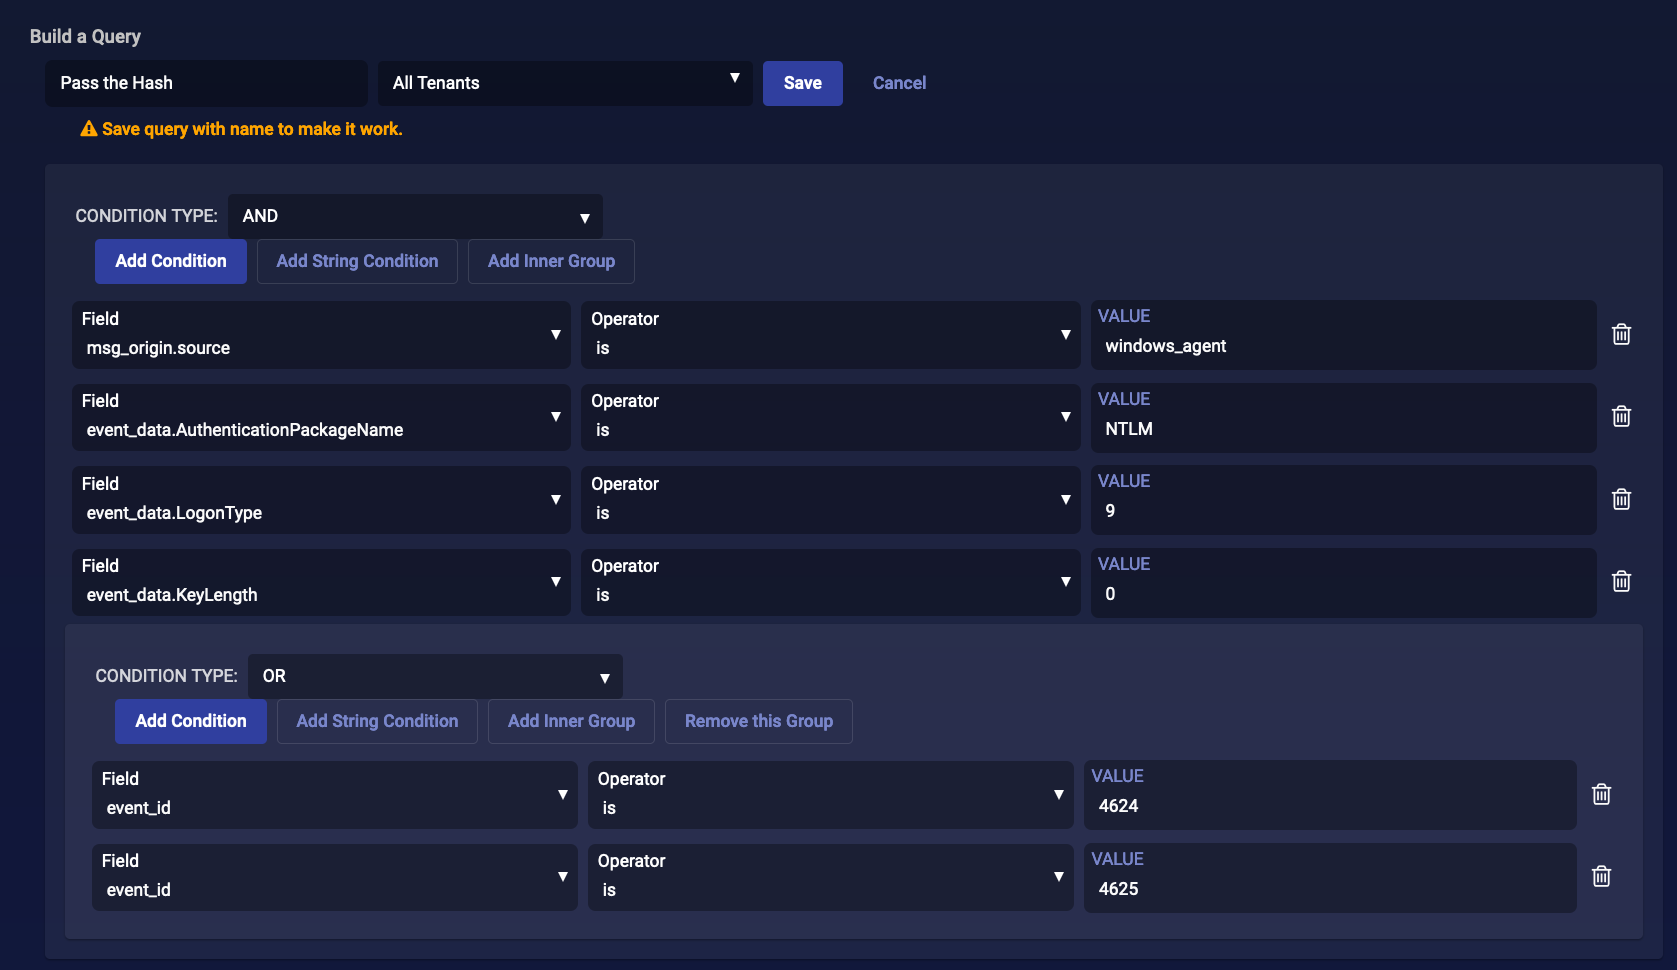
- Enter a Query Name. We entered Pass the Hash.
- Click Add Condition.
- Enter msg_origin.source in the Field.
- Leave the Operator as is.
- Enter the windows_agent for the Value.
- Click Add Condition.
- Enter event_data.AuthenticationPackageName in the Field.
- Leave the Operator as is.
- Enter NTLM for the Value. NTLM is the NT LAN Manager.
- Click Add Condition.
- Enter event_data.LogonType in the Field.
- Leave the Operator as is.
- Enter 9 for the Value. This logon type indicates a logon using cached credentials.
- Click Add Condition.
- Enter event_data.KeyLength in the Field.
- Leave the Operator as is.
- Enter 0 for the Value. This indicates that no session key was requested.
- Click Add Inner Group.
- Change the Condition Type to Or.
- Enter event_id in the Field.
- Leave the Operator as is.
- Enter 4624 for the Value. This indicates a successful login.
- Within that inner group, click Add Condition.
- Enter event_id in the Field.
- Leave the Operator as is.
- Enter 4625 for the Value. This indicates a failed login.
- Click Save to save the query. The screen changes to display the saved query in Domain Specific Language (DSL).


Configure a Condition
We want a condition that triggers our actions if there are any hits.
To configure this condition:
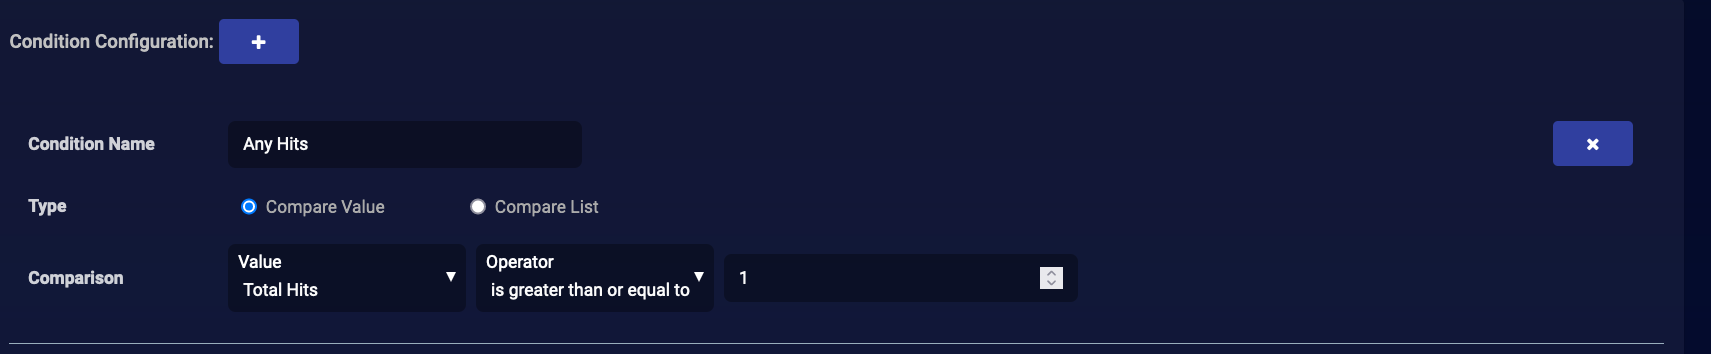
- Enter a Condition Name. We entered Any Hits.
- Select Compare Value for the Type.
- Set the Comparison to Total Hits, is greater than or equal to, and 1.
Configure Actions
You can configure any number of actions to take place if your playbook gets the specified number of hits.
For our example we want an email:
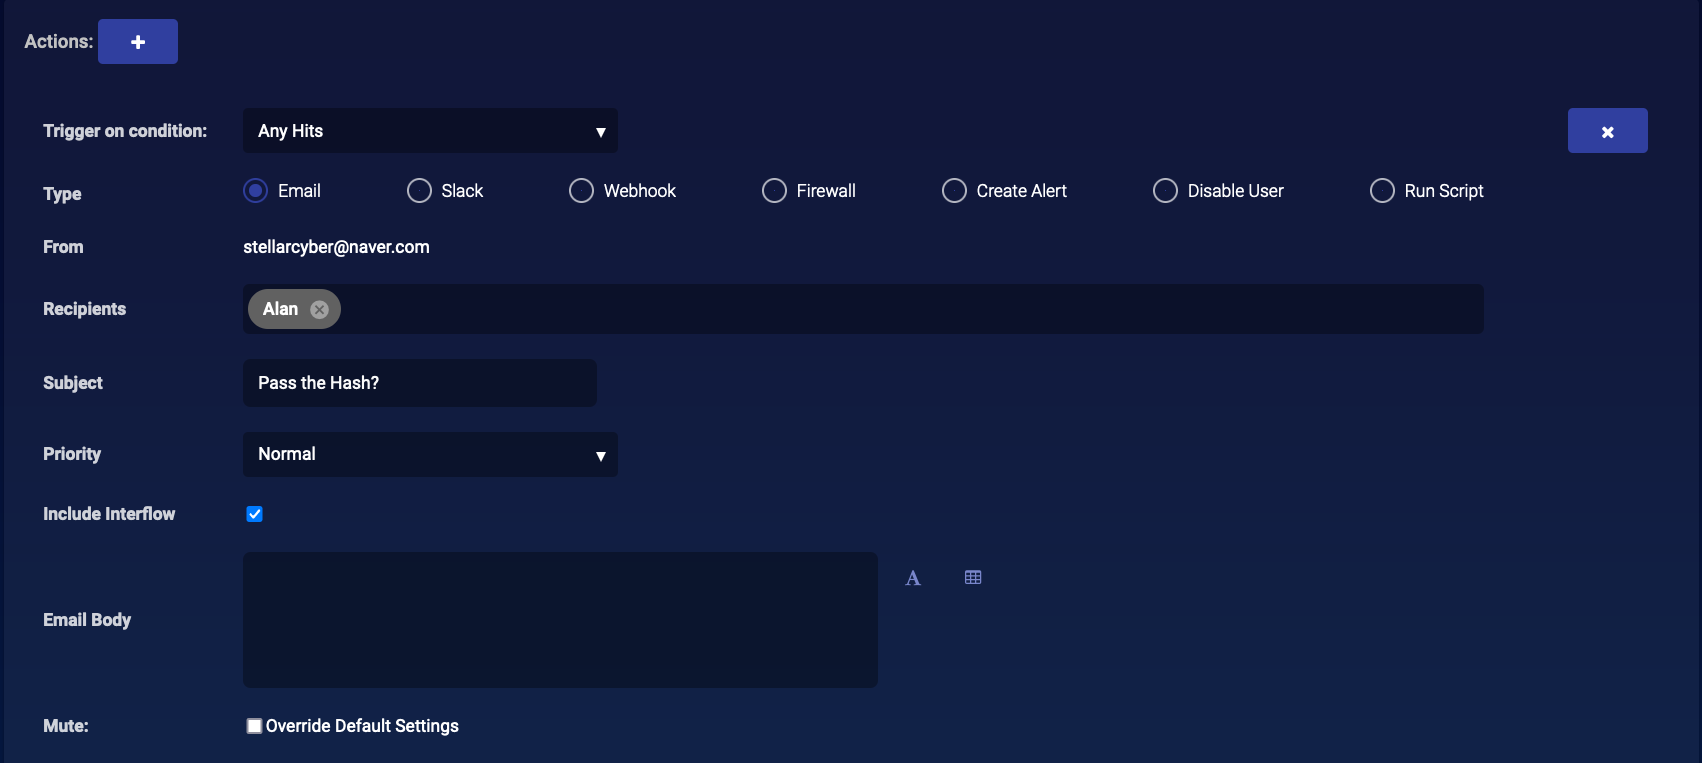
- Choose the trigger condition you entered. Ours is Any Hits.
- Choose Email for the Type.
- Choose Recipients. To add a new recipient, see Adding a Recipient.
- Enter a Subject. We entered Pass the Hash?.
- Set your Priority.
- Click in the check-box for Include Interflow if you want the Interflow included with the email.
- Enter your Email Body. We included a short sentence explaining why the recipient is getting the email.
See Configure Actions for details on configuring each type of action.
Save & Run the Playbook
Click Submit to save and immediately run the playbook. Your new playbook is displayed in the playbook list.
