Automated Threat Hunting
Automated Threat Hunting (ATH), accessible from the Respond | Automation menu, is a key aspect of Stellar Cyber’s architecture to enable automated response, creation of data, or other actions. Stellar Cyber automatically notifies you via whatever method you configure when it finds a possible threat. The system includes more than 50 playbook templates; Stellar Cyber is always developing more.
A playbook consists of:
-
A schedule, defined in the alert configuration.
-
The query or correlation you want to run.
-
Conditions you set for triggering an action.
-
Actions to take for possible threats discovered.
As of v4.3.0, the availability of certain components (such as charts, correlations, ATH rules) with tenant visibility settings has changed. Specifically, the top level component cannot have a less restrictive visibility than its children components.
-
For any component, such as a query you create, with visibility set to All Tenants, then all its sub-components (such as a lookup list) must also be set to All Tenants.
-
Similarly, if a component is set for a specific tenant, then all its sub-components must be specified for either that tenant or All Tenants.
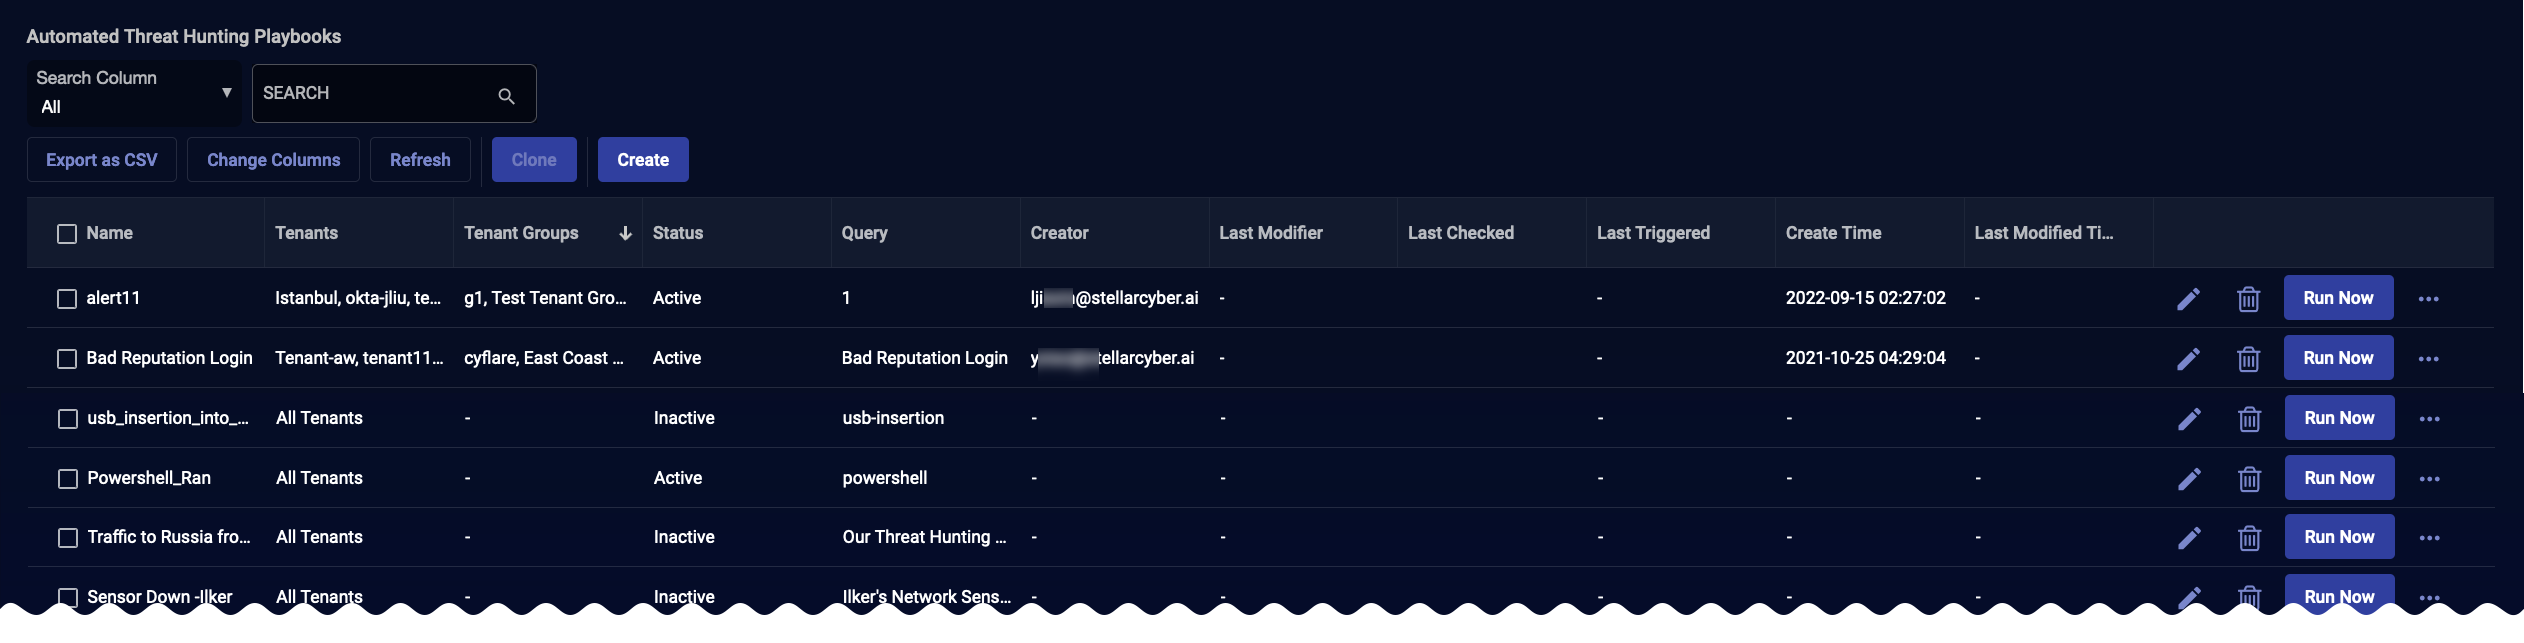
Playbook List
Stellar Cyber displays the playbook list by default. The list starts with two default playbooks and includes any that you create or load from a template.
The visible playbooks are restricted to those accessible to the currently active tenant. The columns for Tenant and Tenant Group are displayed only for Partner users and Root users.
Playbook Actions
You can create a new playbook using the following techniques:
-
Creating: To open editor with blank fields and define a completely new playbook, click the Create button.
-
Cloning: To use an existing playbook as a template, select one or more check boxes at the start of a row and then click the Clone button. The playbook(s) are duplicated and named the same as the original with a timestamp added. Edit the copy to customize it, as needed.
-
From a Custom Alert Type in the Alerts Page: As described in Creating New Alert Types, you can use a custom alert type's Add Playbook option in the Alerts list to create a new playbook pre-filled with the settings from the custom alert type.
For each playbook in the list, you can:
-
Click
 to edit the playbook. The configurations in the Edit dialog box are identical to those in the Add dialog box.
 -
Click
 to delete the playbook. You must confirm the deletion. (You cannot delete the default playbooks.)
 -
Click Run Now to run the playbook immediately, regardless of the schedule, and take any configured actions. You can do this whether the playbook is active or not. Running the playbook now does not reset the schedule.
-
Click and Disable or Enable to immediately disable or enable the playbook.
-
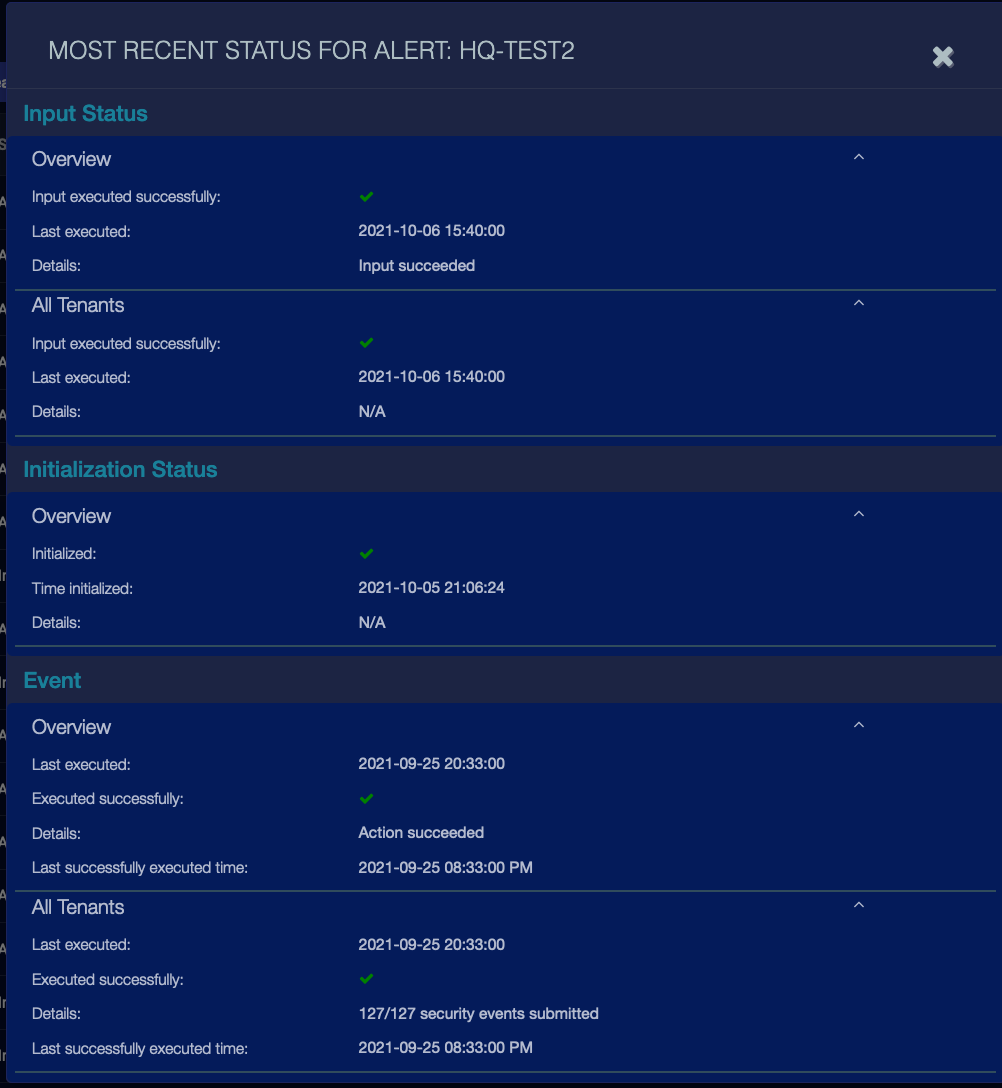
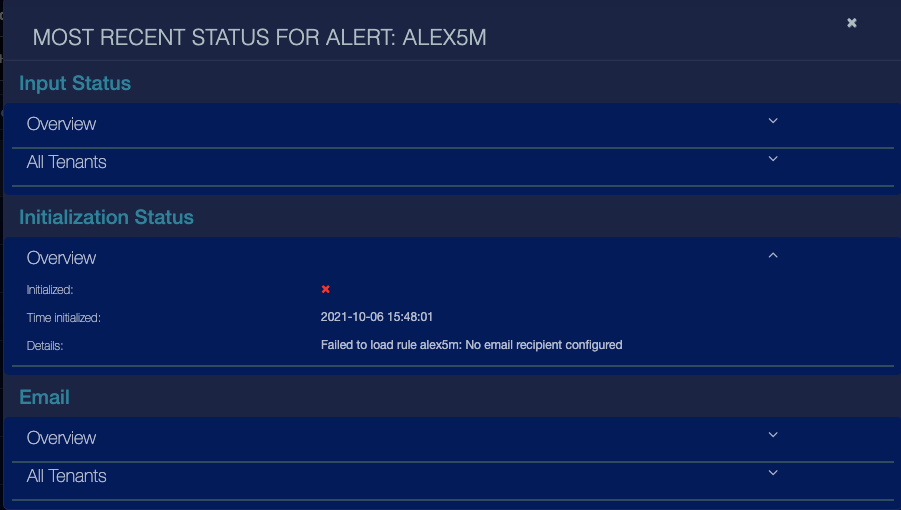
Click and Last Status to see the results of the last time the playbook ran. The screen is similar to the following.

For newly created playbooks, a basic validation is done when you first save your configuration and when the playbook is run. The result of this validation is displayed in the Last Status dialog section titled Initialization Status.
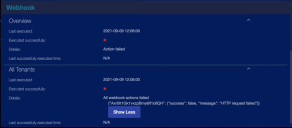
In cases where the action failed and that failure generated a log file, you can use the Show Logs button to examine the log detail.
-
Click and Restore Default to reset the edited values of a factory defined playbook to the factory default values. This action does not affect whether you have enabled or disabled the playbook, or other attributes displayed in the table of automations. It only affects the playbook configuration.

Default Playbooks
Stellar Cyber includes default playbooks for common threat hunts so you can focus on your custom threat hunts. The default playbooks have a creator of System.
You can edit the default playbooks to add recipients, actions, or anything else. You can disable them, but you cannot delete them. The default playbooks are:
-
Data Ingestion Anomaly for Network and Security Sensors
-
Description—a data ingestion anomaly has been reported at least once
-
Frequency—every 5 minutes
-
Indices—aella-ser-*
-
event_name—ade_outbytes_anomaly
-
Action—email to every user with the Super Admin profile
-
-
Data Ingestion Anomaly for Agent Sensors
-
Description—a data ingestion anomaly has been reported at least once
-
Frequency—every 5 minutes
-
Indices—aella-ser-*
-
event_name—ade_outbytes_anomaly
-
Action—email to every user with the Super Admin profile
Creating or Editing a Playbook
When you select the Create button from the Respond | Automation playbook list, or from an Alerts table, a fresh playbook editor is displayed. If you edit a playbook, the same screen is displayed, with the entries pre-populated. The steps are the same, whether you are adding or editing and whether you opened it from the Respond or Alerts menu.
-
Define the name and schedule and specify the tenant and index in the Alert Configuration panel.
-
Create or load your query or correlation in the Build a Query or Build a Correlation panel.
-
Define your conditions in the Condition Configuration panel.
-
Define the actions in the Configure Actions panel.
-
Save the playbook. The playbook is automatically enabled.
Use the remainder of this topic as a guide for how to work with each section of the playbook page. For specific examples, refer to:
- Create a playbook that looks for too many half-opened sessions
- Create a playbook that looks for sensors that haven't transmitted data for a while.
- Create a playbook that looks for pass-the-hash attacks.
- Create a playbook that sends an email or Slack message whenever an incident's score exceeds a specified threshold.
- Create a playbook that uses nested calculations to block a port-scanning source IP address.
Alert Configuration
The Alert Configuration screen is at the top of the dialog box:

We strongly recommend that you select one of the templates to start. You can modify the template as much as you want.
-
Click the Load From Pre-Defined Template button.
-
Select a template.
-
Click Submit. The playbook is immediately populated with the template settings.
-
Enter a name for the playbook. The name is automatically the template you loaded; you can change it.
-
Select the Schedule type. You can select anything from interval (to specify minutes) to monthly.
Scheduled times entered as part of Daily, Weekly, and Monthly schedules are expressed in UTC and not the timezone of your browser.
-
Use the Run every options to specify when you want the playbook to run given the type of schedule you selected in the previous step. For example, if you chose Monthly in the previous step, you can use the Run every options to specify on which day of the month to run the playbook.
In previous releases, if you chose Per Tenant, you could only send an email as the action. This restriction is no longer in place – you can now use either the Email or Create Alert action when Per Tenant is selected.
-
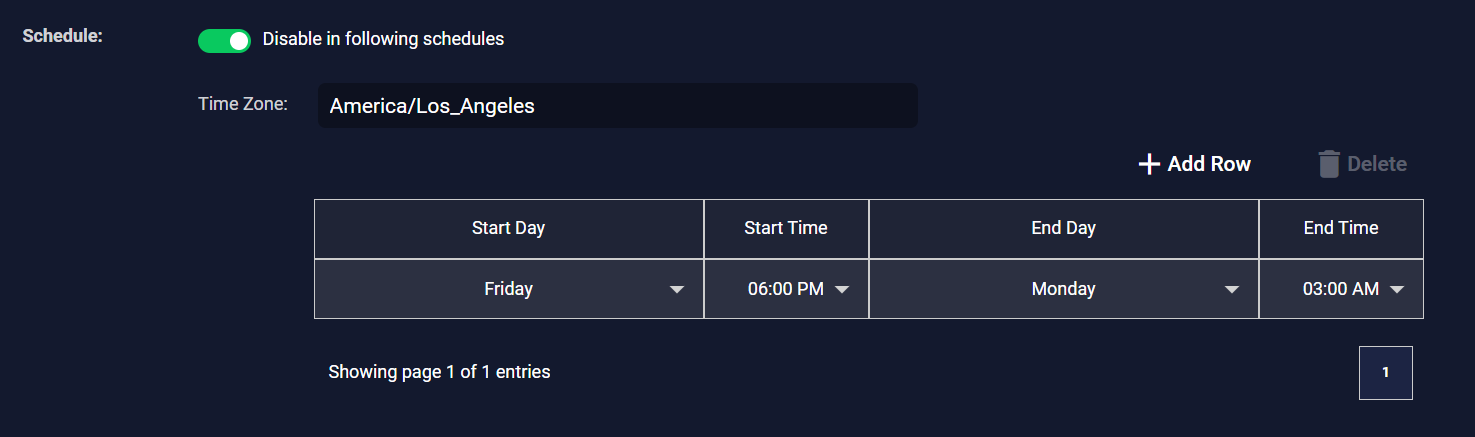
Use the optional Schedule settings to disable the playbook during specific time windows (for example, you could restrict the playbook to running only during business hours in Europe).

-
Click the Disable in following schedules option to turn the option on.
-
Choose the time zone from the dropdown.
-
Use the table that appears to schedule windows of time where the playbook does not run. For example, in the figure below, we are excluding weekends:

If you need to, you can delete rows by selecting them and clicking the Delete button.
If you have trouble getting the schedule rows to display the available options, try double-clicking.
-
-
You can use the Mute feature to temporarily silence alert generation from the playbook for a specified amount of time. Toggle the Mute | Disabled slider to Enabled and use the adjacent fields to specify for how long you would like to stop the alert from triggering.
You can also mute individual actions associated with the playbook. Note that Alert level mutes take precedence over Action level mutes. If the alert is muted, no actions will be triggered. If the alert is unmuted, you can mute individual actions.
-
Select the tenants or tenant groups on which to run.
Sending an alert to a tenant group has the same performance impact as sending alerts to each individual tenant.
-
Select the index.
-
Select the rule type. The default for this template is Query, which we did not change. If you select Correlation, you can load a correlation or create a new one.
Build a Query
The Build a Query screen appears if you select the Query rule type. This is the query we want to run on the specified tenant.
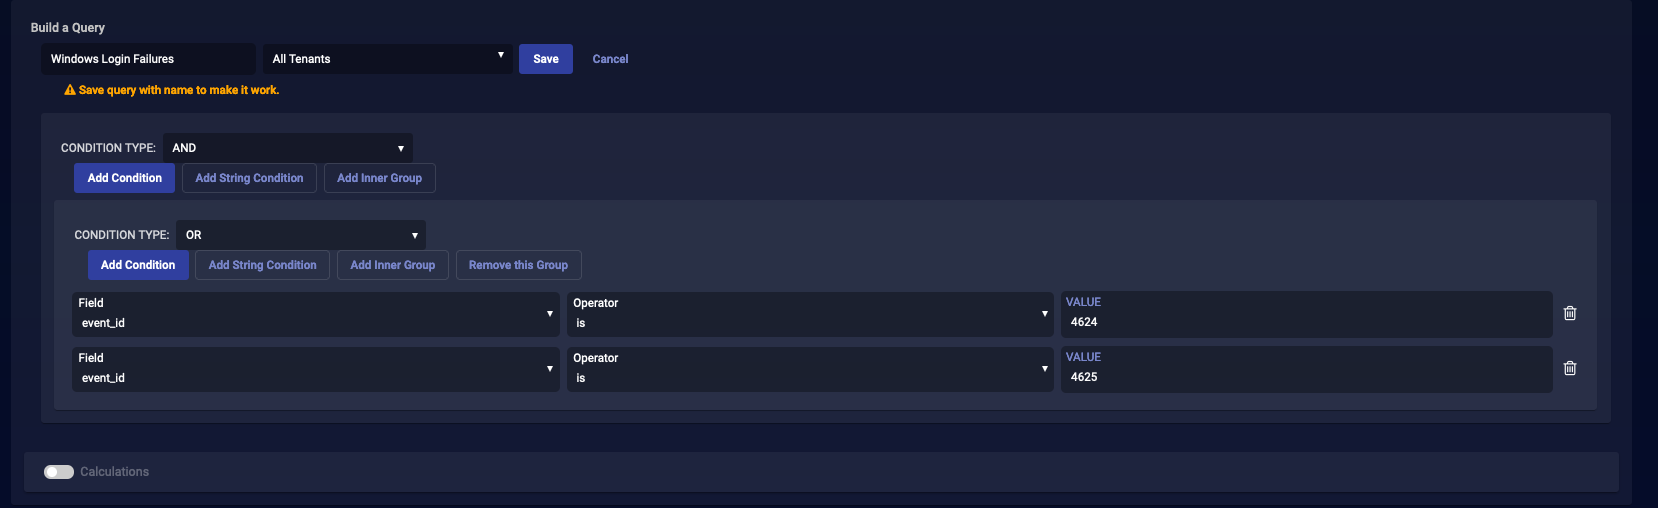
The template built a query for us, but we want to change it. To edit (or build) your query:
-
Enter a name for the query. The name is automatically the template you loaded. The query name is listed in the Automated Threat Hunting Playbooks list for easy reference.
Special characters are not permitted in name fields for Queries, Lookup lists, Reports/Dashboards. Letters, underscores, spaces, dashes, numbers and periods are permitted.
-
Build your query. In this example, we’re looking for specific Windows events. Event ID 4624 is any Windows login, and 4625 is any Windows login failure.
-
Save the query. The screen changes to display the saved query in Domain Specific Language (DSL).


From this screen you can:
-
Click on the saved query to load another saved query
-
Click the Edit button to return to the Query Builder screen
-
Click the Delete button to delete the query
-
Click the New Query button to build another query
-
Click the Calculations toggle to add one or more equations (if you add an equation, you can include a CSV file with an email action).
Refer to ATH Example: Blocking a Port Scanning Source IP for an example using multiple nested calculations.
For more details on Queries, refer to Using Queries and the Query Builder.
Build a Correlation
The Correlation screen appears if you select the Correlation as the rule type, above. Our main example uses a simple query, but you can also configure a correlation.
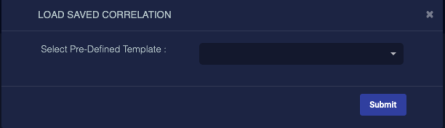
To load a saved correlation:
-
Click the Load Saved button.
-
Choose the saved correlation.
-
Click Submit.

Your correlation is immediately displayed.
For this correlation example, we will create our own correlation.
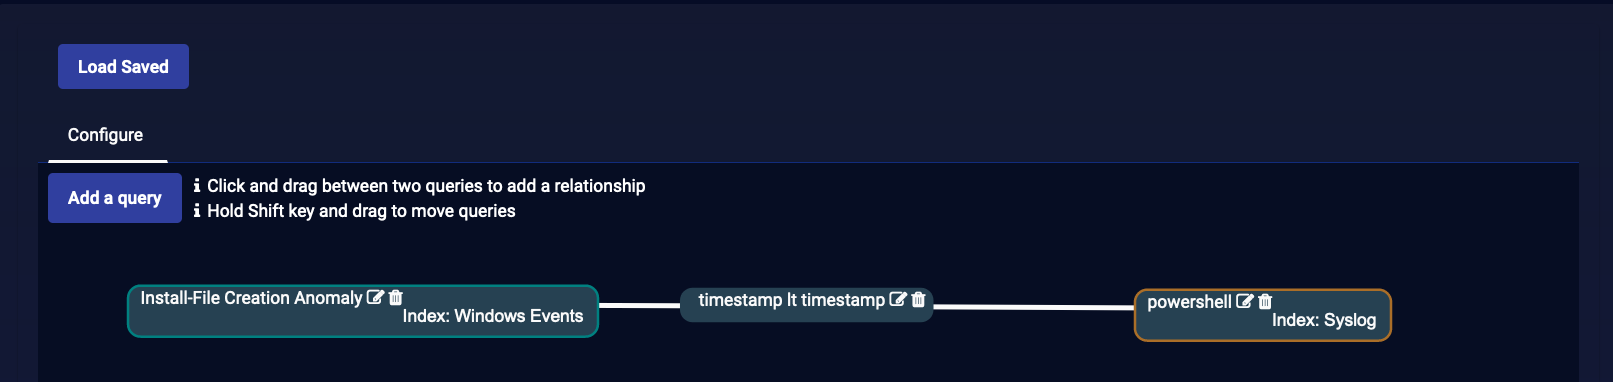
To create a correlation:
-
Click Add a query. We added two queries
-
Click the button on each query to edit the details.
When you create a correlation for use in an Firewall action, ensure that Grouping is not toggled in this dialog. In addition, the list of Extracted Fields (see above image) must include srcip and dstip in the query object for the host on which you want to perform the Firewall action. That same query object must be enabled with the Active setting when you perform the Firewall action configuration, below.

-
Add a relationship.
-
Continue with the rest of the playbook configuration.

Condition Configuration
The template built a condition for us:
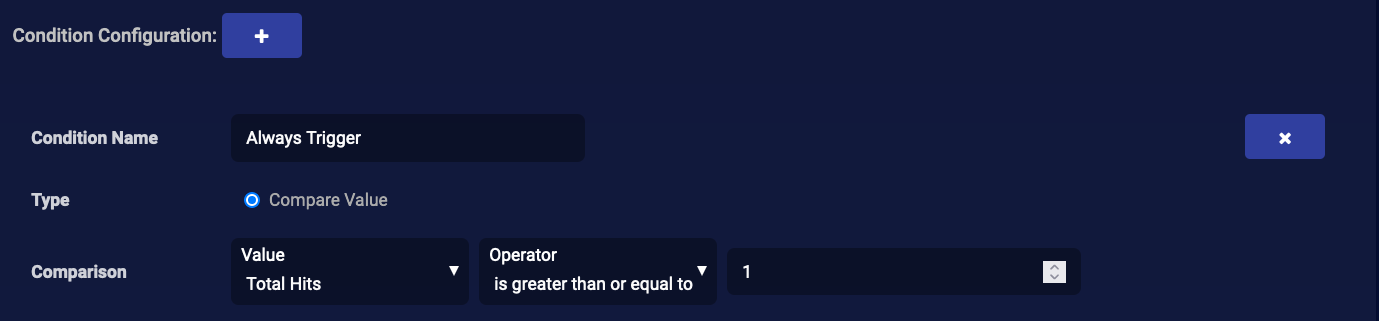
This condition takes action if we get any hits from our query. In this example we changed the name to Always Trigger and kept the template’s configuration.
Configure Actions
You can configure any number of actions to take place if your playbook gets the specified number of hits. Those actions are:
You can also temporarily mute an action if you find that you are receiving too much "noise" from it.
Email Action
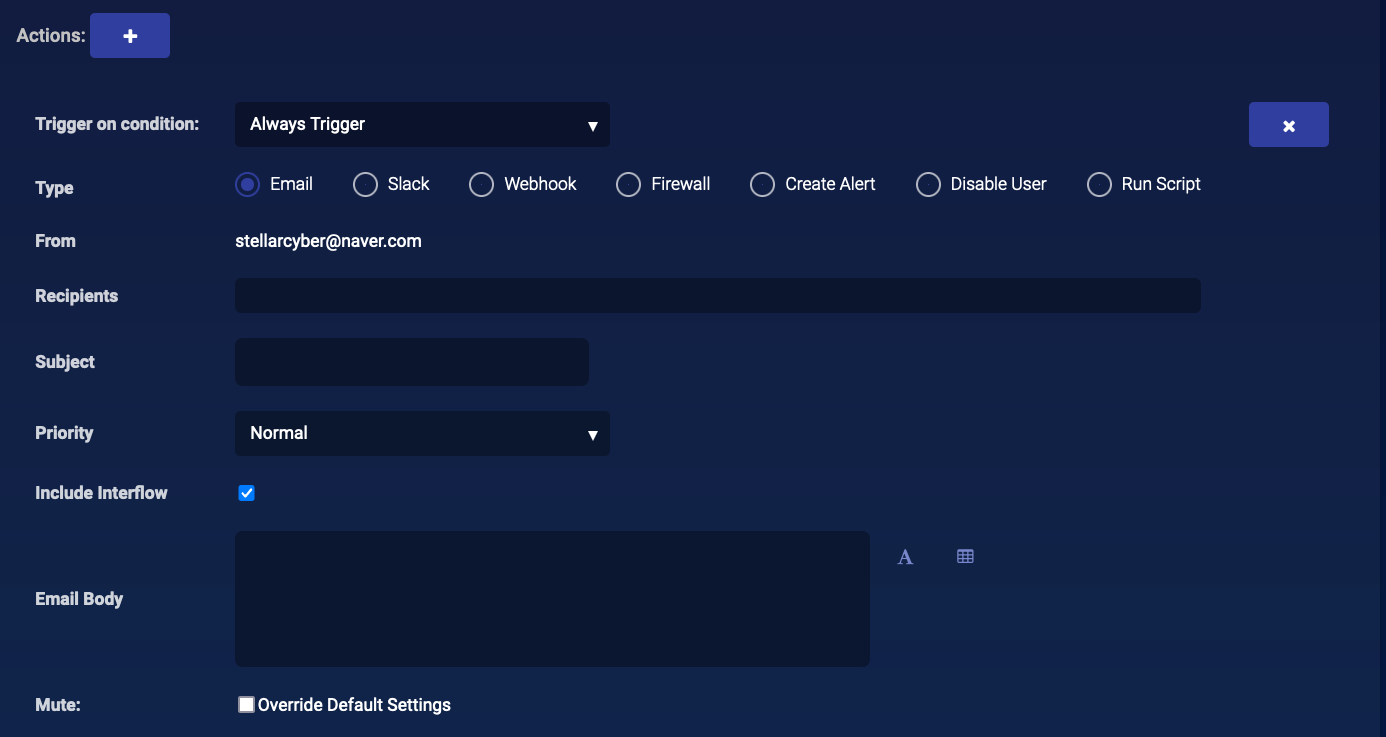
Sending an email is the default action, so Stellar Cyber automatically selects it and populates the Subject and Email Body. To send an email as an action:
-
Select the Trigger on condition.
-
Ensure that Email is selected for the Type.
-
Choose Recipients. To add a new recipient, see Adding a Recipient.
-
Edit the Subject. The subject can contain alphanumeric characters, spaces, and underscores.
-
Include the Interflow data if you want. Choose Include Interflow to have the Interflow data appended to the email.
-
If you added a calculation when building a query, you can choose Include CSV of Calculation Results to attach a CSV file to the email. If you have multiple calculations, the results for the first calculation are included.
-
Edit the Email Body if you want.
Slack Action
Before you add a Slack action, make sure you enable incoming webhooks in Slack and create an incoming webhook for use with Stellar Cyber. Refer to this article in the Slack API documentation for details.
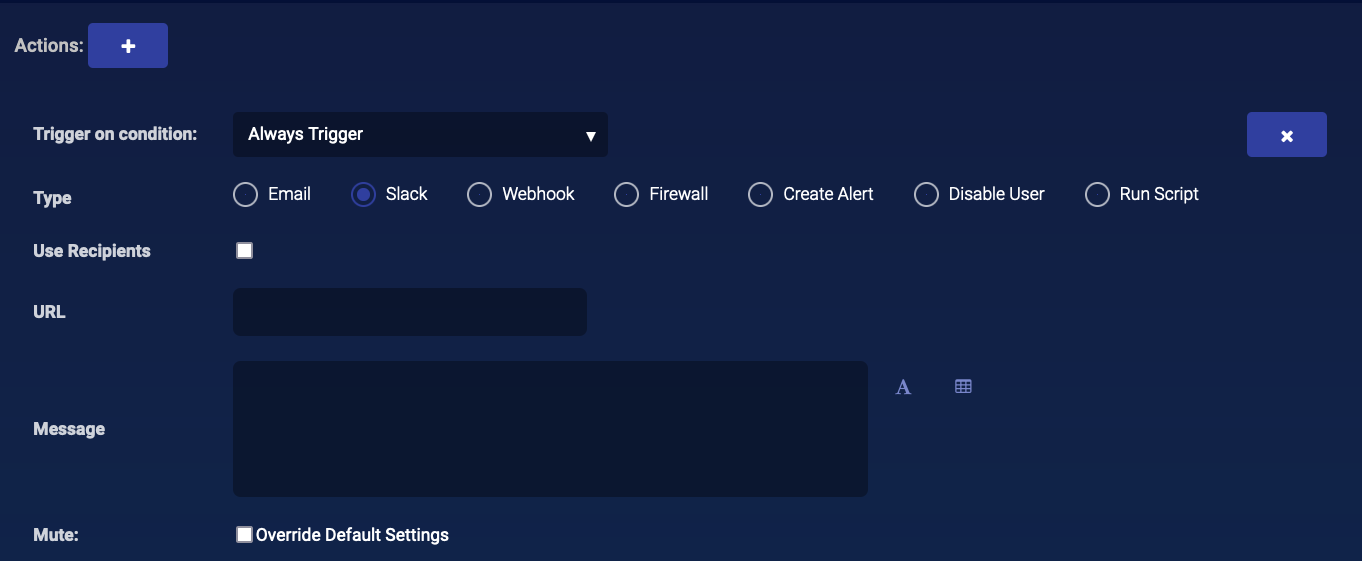
To configure a Slack message as an action:
-
Click the button to add an action. Another action appears below the existing action.
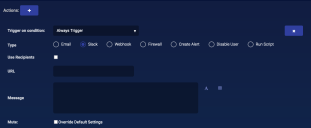
-
Select the Trigger on condition.
-
Select Slack for the Type.
-
If the recipient is already in Stellar Cyber, select Use Recipients and select the recipients for the message.
-
If the recipient is not in Stellar Cyber, enter the URL you created in Slack for incoming webhooks. That incoming webhook is associated with the Slack channel where the message will be posted.
-
Add the message to be sent.
Legacy Webhook Action
To create a legacy webhook rule for an action:
-
Click the button to add an action. Another action appears below the existing action.
-
Select the Trigger on condition.
-
Select Legacy Webhook for the Type.
-
Select Use Recipients if the recipient is already in Stellar Cyber, if desired and applicable for the webhook. Select the Recipient if you do so.
-
For versions prior to
-
Enter the username without the @ or period (.) characters.
-
Enter the password without any non-alphanumeric characters except for the underscore (_).
-
-
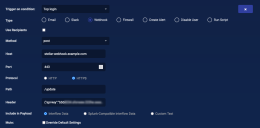
From

-
-
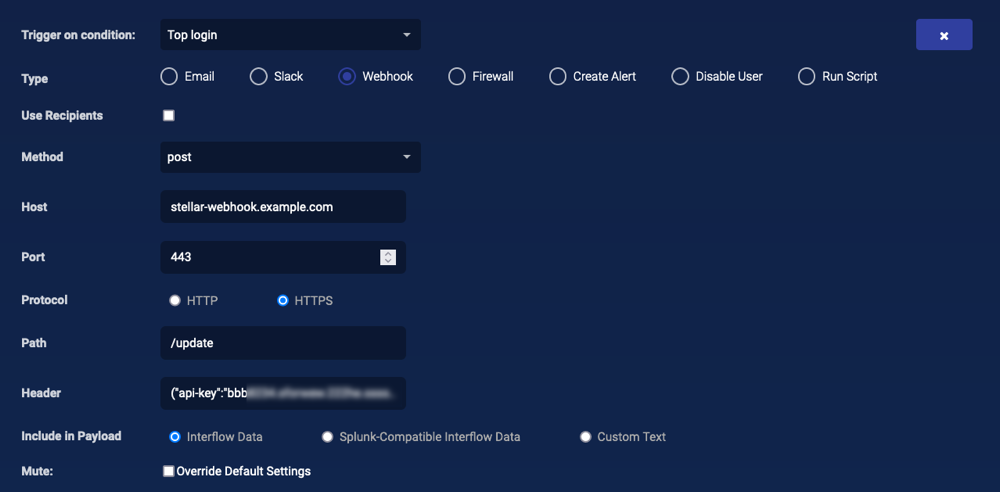
Choose the Method (Put or Post).
-
Specify the Host the webhook is accessing. Do not include the http scheme; that is specified below.
-
Specify a mandatory port number.
-
Select whether the method needs to use HTTP or HTTPS.
-
Provide the Path to the webhook action.
-
For the Header field, enter the header the webhook action expects.
-
Select the data you want to package with the webhook (Interflow, Splunk-compatible Interflow, or Custom Text.
If you select Custom Text message, enter the Body of the text. You can also use the Select a Variable and Define a Result Table options to help populate the Body of the text. Keep in mind, however, that most webhook destinations expect valid JSON and that the Define a Result Table simply creates a body with one line of text per hit. You must insert
{""}characters as necessary to create valid JSON from the text created by the Define a Result Table feature:-
The entire body of the text must be enclosed in
{ }. -
The values must be between
{{#ctx.payload.filtered}}and{{/ctx.payload.filtered}}tags. -
Commas must be used to separate lines.
-
The body is formatted using Mustache Templating.
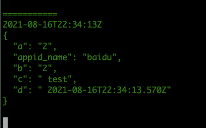
Here is an example of properly formatted JSON for the Body:
Copy{"a":"{{ctx.payload.filtered_total}}",
"b":"{{ctx.payload.hits.total.value}}",
"c" : " test",
{{#ctx.payload.filtered}} "appid_name": "{{_source.appid_name}}",
{{/ctx.payload.filtered}} "d": " {{ctx.trigger.scheduled_time}}"}This code creates the following:
-
-
Specify whether you want to override the playbook's mute settings and mute just this action.
-
Click Submit.

Firewall / Security Switch Action 
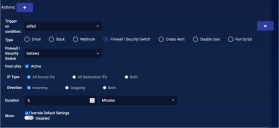
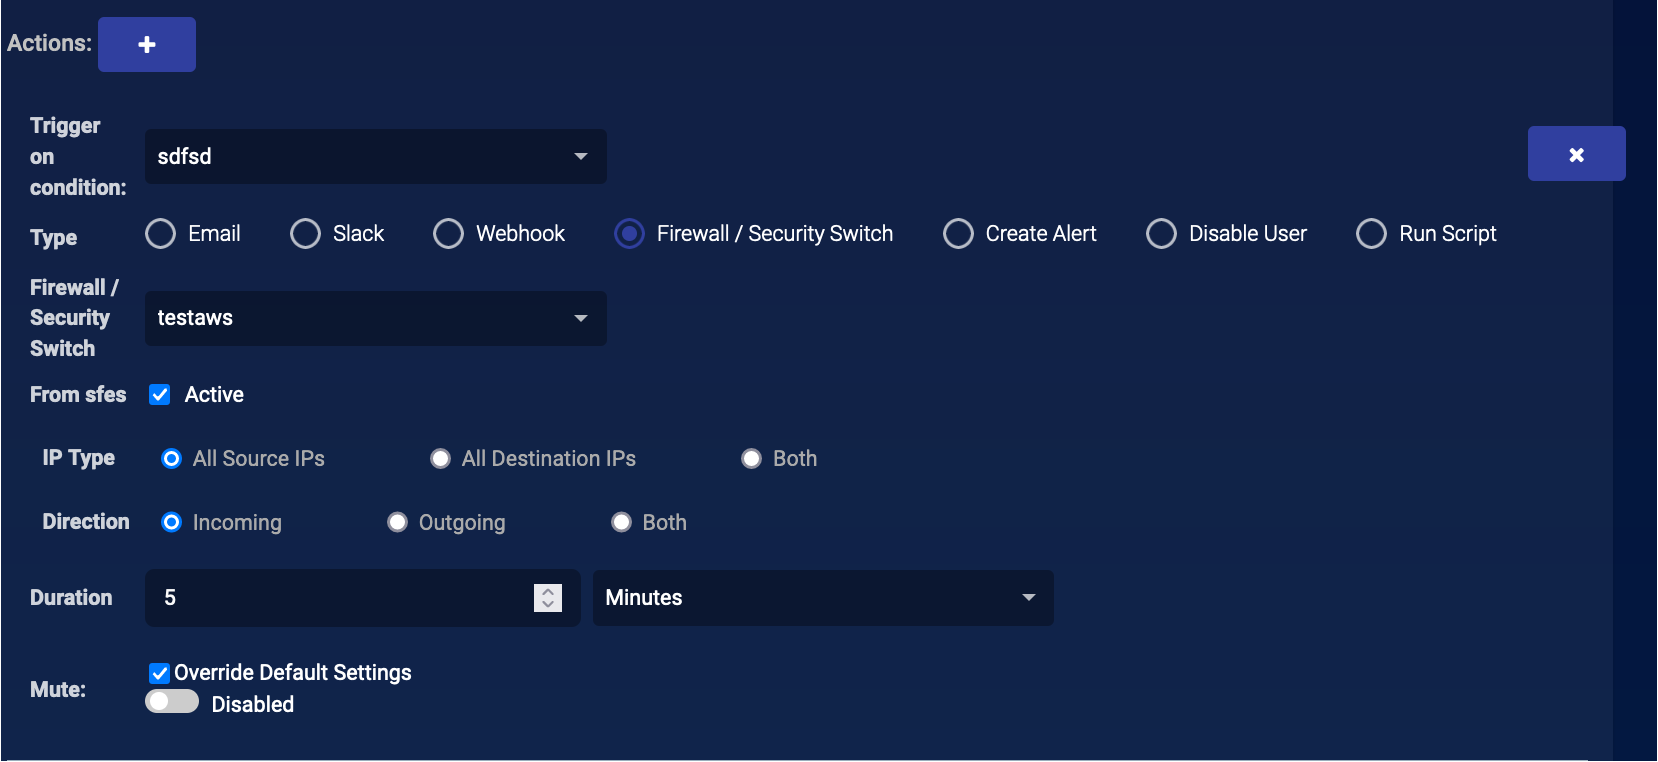
To create a firewall rule as an action:
When you create a correlation for use in an Firewall action, Grouping must be toggled OFF in the correlation query editor. In addition, that query must include srcip and dstip for the host on which you want to perform the Firewall action. You must ensure that the Active box is enabled for this same host in the list displayed below the connector selection menu.![]()
-
Click the button to add an action. Another action appears below the existing action.
-
Select the Trigger on condition.
-
Select Firewall / Security Switch for the Type.
-
Select the desired connector from the Firewall / Security Switch drop-down.
-
The query objects with host addresses are listed below with an Active checkbox. Enable this checkbox to make the addresses from that query object active for response actions. You may see more than one query object listed here. If so, you need only enable the Active boxes that include the extracted srcip/dstip on which you want to perform the action.
-
Adjust the directional selectors needed, depending on the type of firewall you choose, the IP / traffic configuration options are automatically adjusted. For example, with Meraki Firewall actions, the Incoming and Both fields are disabled for Direction, since Meraki is always Outgoing.
-
Set a duration for the rule.
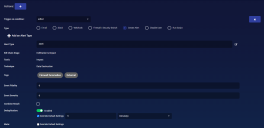
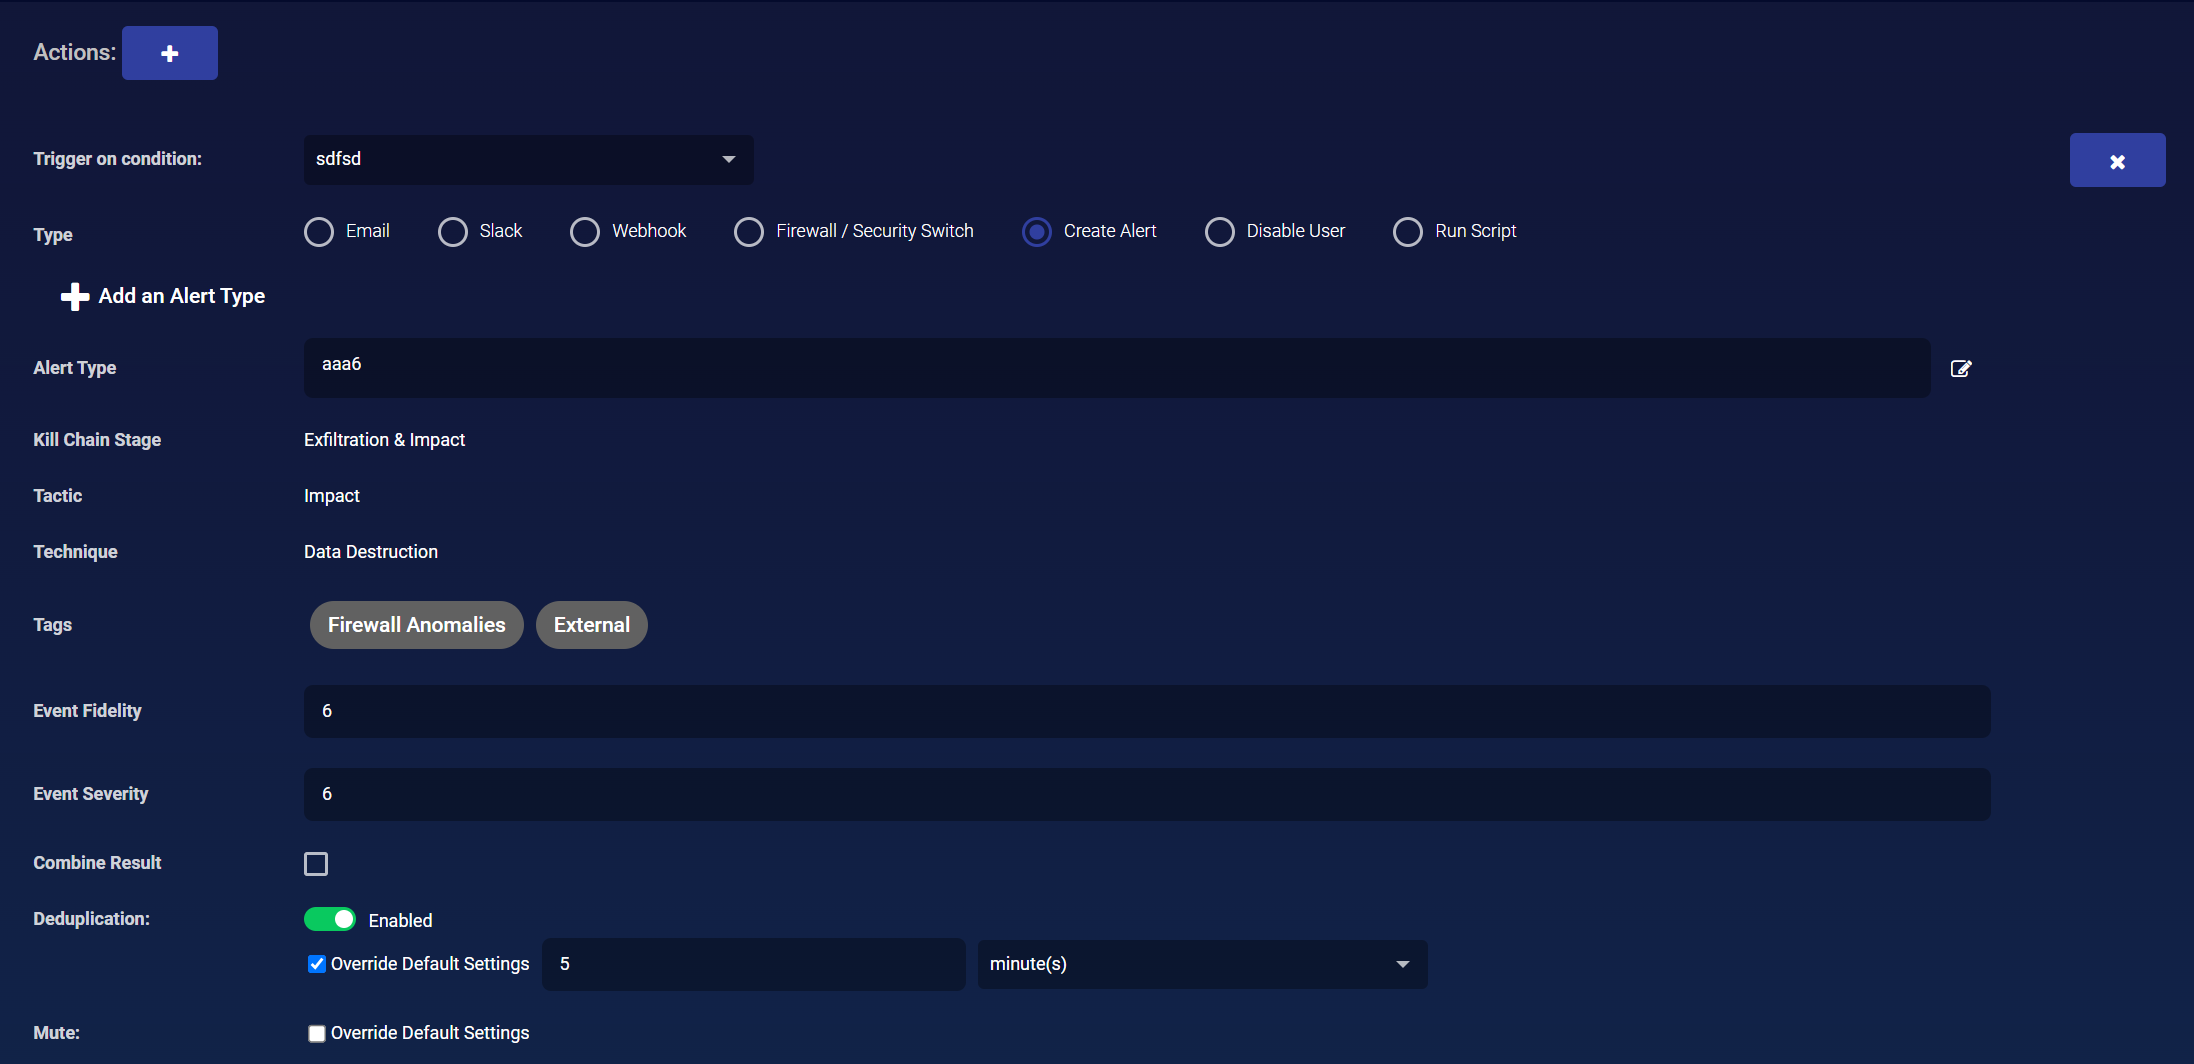
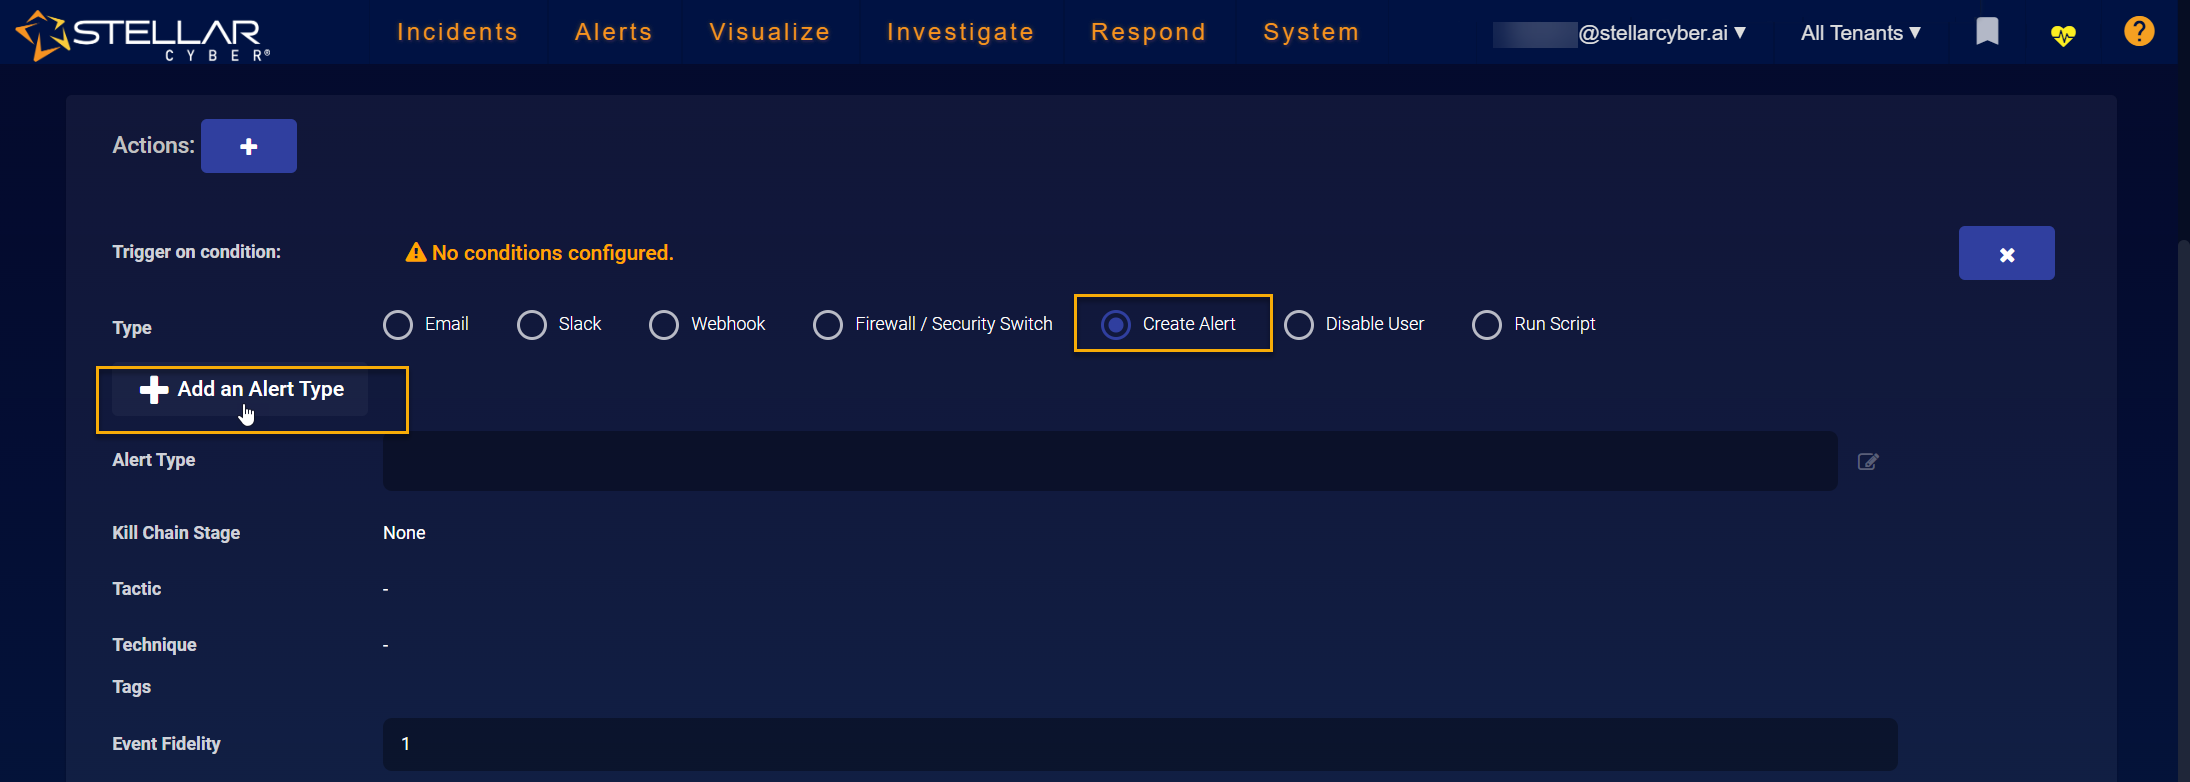
Create Alert Action
You can either select an existing alert type from the Alert Type dropdown or create a new one using the procedure below.
If you drilled to the ATH Playbook workflow from a custom alert type in the Alerts page, the Type is already set to Create Alert and the Alert Type, Kill Chain Stage, Tactic, Technique, and Tags fields are all pre-filled based on the custom alert type's settings. Refer to Creating New Alert Types for details.
-
Click the button to add an action. Another action appears below the existing action.
-
Specify the Trigger on condition.
-
Set the Type to Create Alert.
-
Specify the Alert Type.
If you launched the ATH Playbook workflow from a custom alert type in the Alerts list, you do not need to perform this step. These settings are already configured based on the custom alert type from which you launched the workflow.
You can either select an existing alert type from the dropdown or add a new one by clicking the Add an Alert Type button to launch the standard workflow to add a new custom alert type.

-
Enter the Event Fidelity and Event Severity.
Make sure that you configure an Event Fidelity greater than or equal to 1 in order for alerts triggered by the playbook to appear in the Alerts list. Alerts with an Event Fidelity of zero are not listed in the Alerts display.
-
Click Combine Result to combine multiple records in that time period into a single event. This reduces the number of events generated for a single actual event.
Refer to How Deduplication Works with the "Combine Result" Option for details on the interaction between these two options.
-
Use the Deduplication options to specify how multiple instances of this alert within a small time window are deduplicated.
To reduce noise and focus attention, by default, Stellar Cyber deduplicates multiple instances of the same custom alert that fire within the rule's Run every time window (that is, from the time the rule ran last to the time of its current iteration).
As illustrated below, you can set the following options for deduplication of custom alerts:
-
Toggle the feature on (Enabled) or off (Disabled). By default, it is enabled.
-
Use the Override Default Settings option to specify a custom time window within which multiple instances of the same alert are deduplicated.
By default, custom alerts are deduplicated within a rule's Run every time window. The Override Default Settings options let you specify a custom time window.
 Stellar Cyber performs this deduplication by discarding fields that are always different between separate alerts, calculating a hash, and monitoring future events for matches.
 Refer to About Deduplication of Custom Alerts for details on which fields are not considered for deduplication, how to identify deduplicated alerts in JSON and how the deduplication timer works together with both the Run every setting for the ATH Playbook as a whole and the Combine Result option.
-
-
Check the Correlate with Cases option if you would like Stellar Cyber to create a new case based on the alert.
-
Specify whether you want to override the playbook's mute settings and mute just this action.

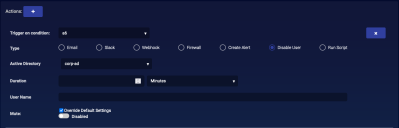
Disable User Action
To disable a user as an action:
-
Click the button to add an action. Another action appears below the existing action.
-
Specify the Trigger on condition.
-
Select Disable User for the Type.
-
Select the Active Directory connector for the action from the Active Directory drop-down.
-
Set how long you want to disable the user in the Duration field. You can choose Minutes, Hours, Days, or even Forever.
-
Use the User Name field to specify one or more users to block. You can specify users with a combination of the following techniques:
-
Select one or more users from the prepopulated dropdown list.
-
Type a username or objectSID directly into the User Name field.
An objectSID typically appears in a format similar to the following example:
S-1-5-21-1068523723-946037408-1232828536-51066
Note: You can only block users in the same domain as the selected Active Directory connector.Check the success of User Disable actions in the User Actions tab of the Respond | Actions page.
-
-
Specify whether you want to override the playbook's mute settings and mute just this action.

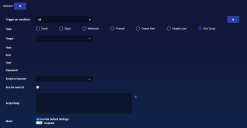
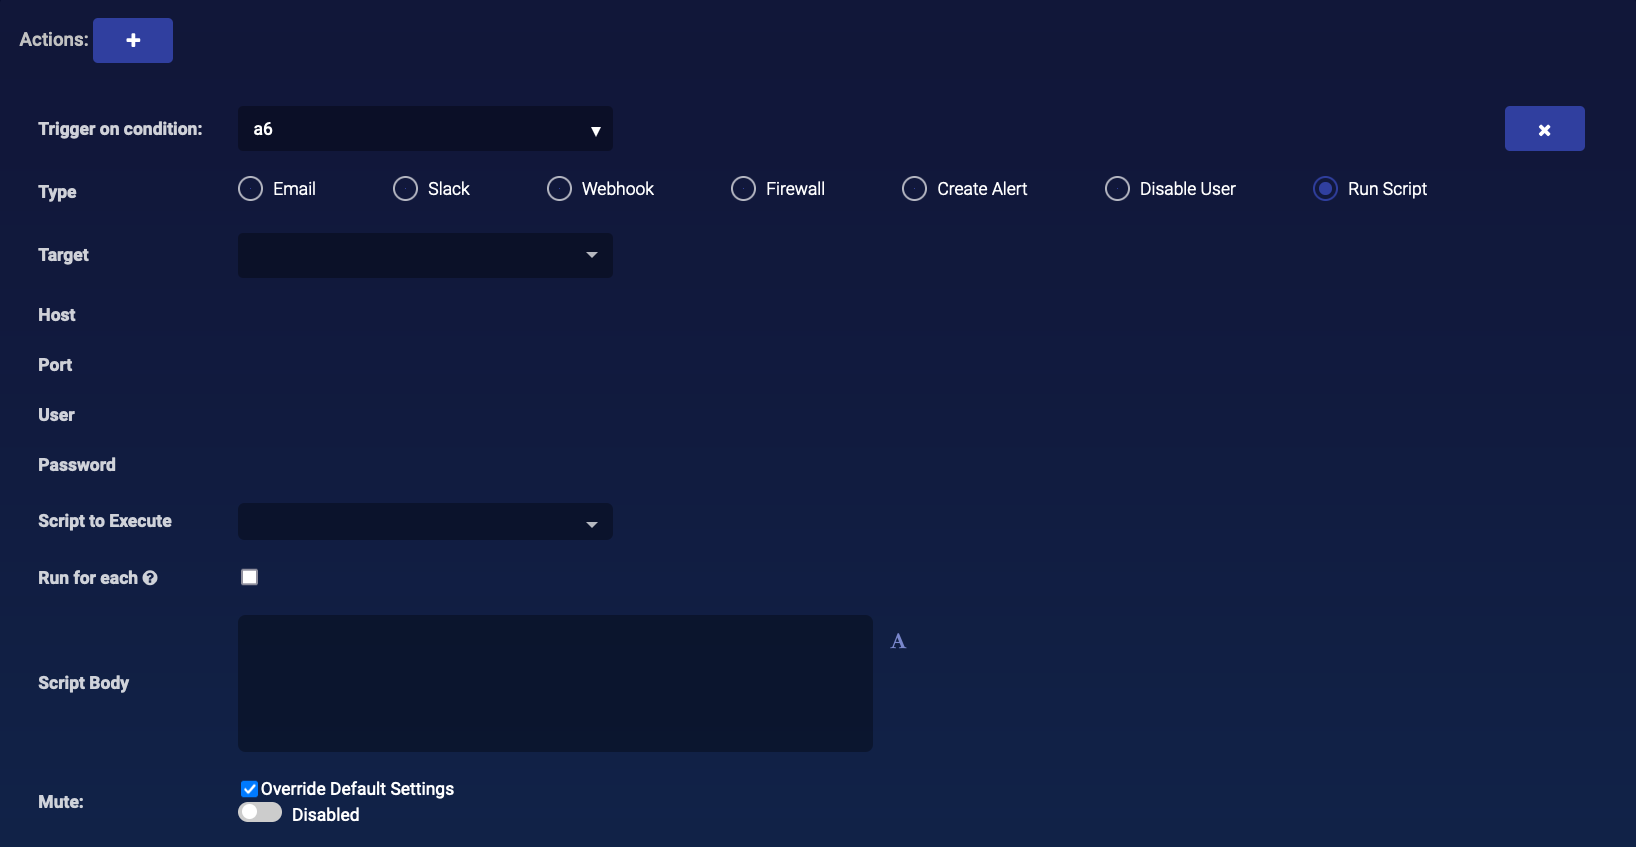
Script Action
To run a script via SSH as an action:
-
Click the button to add an action. Another action appears below the existing action.
-
Select the Trigger on condition.
-
Select Run Script for the Type.
-
Select the Target from the drop-down. Stellar Cyber fills in the details for that target. The target must be a remote host already in Stellar Cyber. If not, you can create a new remote host.
-
Select the Script to Execute. The script is automatically entered in the Script Body. The script must already be in Stellar Cyber. If not, you can create a new script.
-
Select Run for each if you want the script to run for each hit the playbook finds. If there are many hits, running the script for each of them can take a significant amount of time. Leave this unchecked to run only once each time the playbook runs.
If your script uses
_sourcevariables, you must select Run for each. If you leave it unchecked you can only use thectx.payload.filtered_total,ctx.payload.hits.total, andctx.execution_timevariables. -
You can edit the Script Body.
-
Click Submit.
The playbook is added. Stellar Cyber automatically enables the new playbook and displays the playbook list.
Muting Actions
You can use the Mute feature in the Actions panel to temporarily halt specific individual actions associated with a playbook. Click the Override Default Settings checkbox and toggle the Mute | Disabled slider to Enabled . Then, use the adjacent fields to specify for how long you would like to stop the action from triggering.
About Deduplication of Custom Alerts
Stellar Cyber deduplicates custom alerts by discarding fields that are always different between separate alerts, calculating a hash, and monitoring future events for matches. Because the following fields are always different between separate records, they are not considered when calculating the hash used for deduplication:
Exact matches between:
-
stellar_index_id
-
stellar_uuid
-
timestamp
-
timestamp_utc
-
write_time
-
xdr_event
-
index
-
id
-
type
Fields containing the following substrings:
-
stellar
-
time
-
date
-
index
Identifying Deduplicated Alerts
If an alert has been deduplicated, there are additional fields in its JSON record indicating that the document represents multiple alerts firing repeatedly over a period of time. The key field to look for is ath_deduplication. For example:
"ath_deduplication": { // <-- if this field exists, the alert has been deduplicated
  "first_time_utc": "2023-01-25 07:34:49 UTC",
  "first_timestamp": 1674632089999,
  "last_time_utc": "2023-01-25 07:59:50 UTC",
  "last_timestamp": 1674633590521,
  "repeat_count": 6 // <-- repeat count in the time window ^
},
This record indicates that there have been six identical alerts in the time window. Note that Stellar Cyber continues to update this document if new instances of the same alert arrive in the time window. You can also see the timestamps for the first and last identical alerts represented by this document.
How the Deduplication Interval Works with the "Run every" Setting
When you configure an ATH Playbook, you supply a Run every setting that specifies how often the rules in the playbook run. The two settings work together as follows:
|
Settings of "Run every" and Deduplication Time Window |
Results |
|---|---|
| "Run every" is greater than deduplication time window |
Deduplication is performed over the configured time window. Because the deduplication window is smaller than the "run every" window, that means there can be multiple alerts over the "run every" interval. For example, suppose an ATH Playbook is configured to run once a week with a deduplication time window set to one day. As you can see below, the alerts in each of the deduplication time windows (represented by dots on the timeline) would be reduced to a single identical alert per deduplication window. In this example, that would mean a total of seven alerts for the "run every" interval of one week:
|
| "Run every" is less than the deduplication time window | In this case, because alerts are deduplicated over a time window that is greater than the ATH Playbook's "run every" interval, only one identical alert per "run every" interval is created. |
|
"Run every" and deduplication time window are identical |
This is the default configuration and results in only a single identical alert per "run every" interval. |

How Deduplication Works with the "Combine Result" Option
You can enable both the Combine Result and Deduplication options for a playbook. Keep in mind the following if you do so:
-
The Combine Result option has a higher priority than Deduplication. Deduplication is not performed until after results are combined.
-
Because of this, if both options are enabled, deduplication has no effect when the deduplication window is less than or equal to the Run Every window. This is because the Combine Result feature ensures that there is only a single alert document in each Run Every window.
-
Looked at another way, if you enable both Combine Result and Deduplication, then deduplication will only take place if the deduplication window is greater than the Run Every window. In this case, the deduplication window cover multiple iterations of the rule, meaning that there would potentially be multiple combined alerts in the deduplication window to be deduplicated.
