Viewing User Actions
The Respond | Actions | User Actions tab displays the user actions taken by Stellar Cyber. If a user is disabled manually from the Event Display or automatically by Automated Threat Hunting, that action appears here.
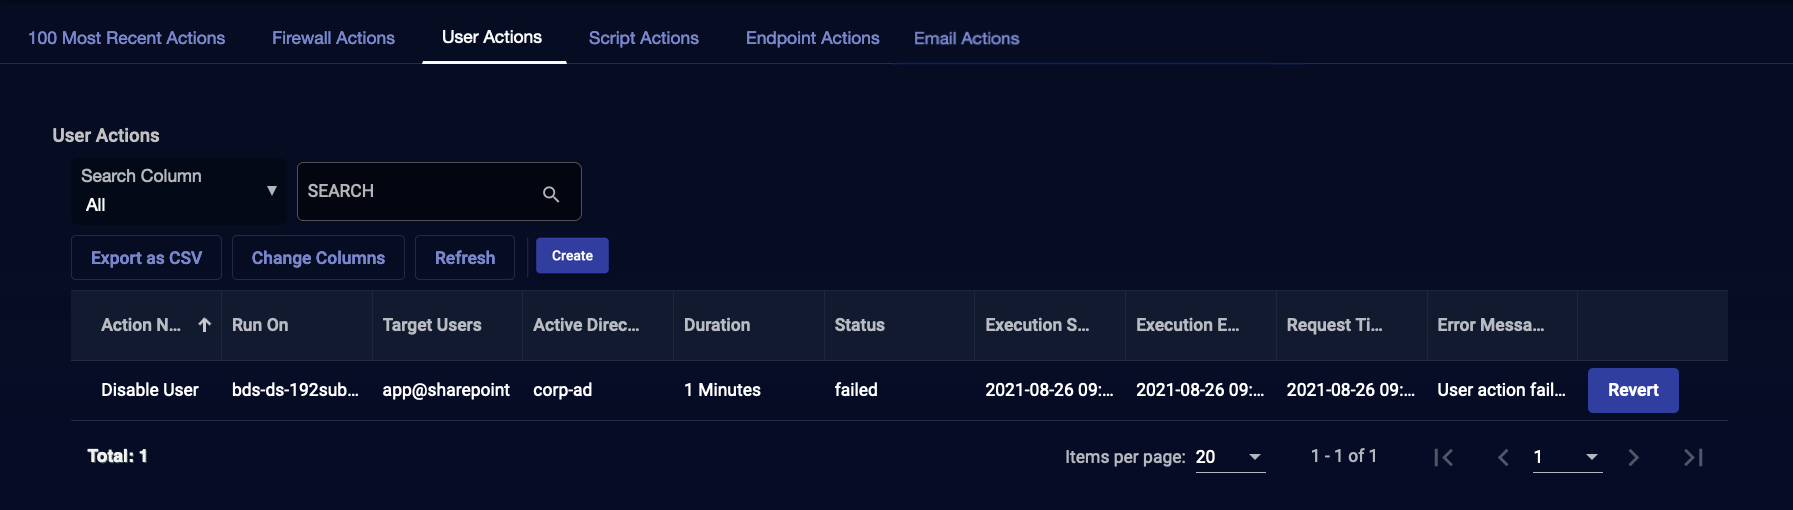
The Status can be:
- Waiting—The action is queued. This should take less than a minute.
- In Progress—The action is being communicated to the firewall.
- Succeeded—The action was successfully implemented on the firewall.
- Failed—The action failed. An Error Message relayed from the firewall provides details.
- Expiring—The action is being removed from the firewall.
- Expired—The action is no longer active.
You can revert some actions using the Revert button.
You cannot revert (or edit) a failed action. If the action failed, you must recreate the action.
See the Tables page for more information on working with tables.
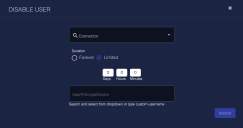
Create a Disable User Action
To create a Disable User action:
-
Click Create. The DISABLE USER screen appears.
-
Choose a Connector from the drop-down. You can select either Active Directory or
-
Choose a Duration of either Forever or Limited. If you choose Limited, then enter Days, Hours, and Minutes.
-
Choose a user name from the UserPrincipalName drop-down or type the name of the user to disable.
-
Click Submit. The request to disable a user is sent. Check the Status column in the table to see if the request succeeded or failed. Then check the Error Message column.

