Configuring a Data Aggregator
If you have firewalls between your data sensors and the data processor (DP), you must open ports on each firewall to allow the sensors to reach the DP. Instead, you can install a data aggregator to collect TCP traffic from the sensors and send it to the DP. Then you only have to open ports between the aggregator and the DP. The aggregator acts as a proxy to forward traffic from other sensors to the DP.
Important: Stellar Cyber recommends that you deploy an aggregator using a Modular Sensor with the Aggregator feature enabled in its Sensor Profile rather than using the purpose-built aggregator image. Installation of aggregators using the purpose-built images is officially a deprecated feature, although the images are still available.
You must open ports on the firewall to allow the:
- Aggregator to reach the DP and other sensors
- DP to communicate with the aggregator
- Sensors to communicate with the internet and the aggregator
The aggregator is a single point of failure for your sensors. We strongly recommend that you install and configure a secondary aggregator.
When you install the aggregator, the DP automatically discovers it, as with any sensor:
-
If you are using a Modular Sensor with the Aggregator feature enabled (recommended), it appears in the System | Collection | Sensors | Sensor list.
-
If you are using a purpose-built aggregator image, it appears in the System | Collection | Sensors | Aggregator (deprecated) list..
If you have a sensor that cannot connect to the DP, use the set aggregator command to add up to two aggregators to the sensor.
Configuring the Aggregator
You configure the aggregator differently depending on whether you are configuring a Modular Sensor with the Aggregator feature enabled (recommended) or using a purpose-built aggregator image. See the sections below:
Configuring a Modular Sensor with the Aggregator Feature Enabled (Recommended)
Configuring an aggregator deployed using a Modular Sensor consists of the following steps, each of which is described in detail below the summary:
-
Create a Modular Sensor profile for the aggregator in the System | Collection | Sensor Profiles tab. Ensure that the Aggregator feature is enabled in the Modular Sensor profile.
-
Assign the Modular Sensor profile to the sensor to be used as an aggregator.
Creating a Modular Sensor Profile with the Aggregator Feature Enabled
-
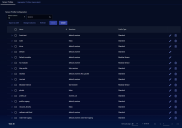
Click System | Collection | Sensor Profiles. The Sensor Profile Configuration page appears, with the Sensor Profiles tab displayed by default.
-
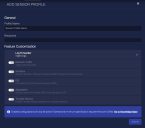
Click Create and select Add Modular Sensor Profile. The ADD SENSOR PROFILE screen appears.
- Enter the Profile Name. We recommend that you establish a naming convention so you can easily understand the intent of each profile by looking at the name. This field can only contain alphanumeric characters, underscores, spaces, and dashes.
-
Choose at least one Receiver. Each sensor profile must have at least one receiver, which is the destination of the data it collects. You can add one receiver of each type: packet and JSON.
See the Receiver configuration page for more information on creating and maintaining receivers.
-
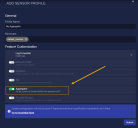
Customize the settings for the profile. Since we will use this profile to configure modular sensors as aggregators, we must make sure the Aggregator feature is enabled, as in the figure below:
Refer to Configuring Modular Sensor Profiles for details on the different Modular Sensor feature available in a profile.
- Click Submit. The profile is active immediately.
Assigning a Modular Sensor Profile to a Sensor
To assign a Modular Sensor profile to a sensor:
-
Navigate to the System | Collection | Sensors page.
-
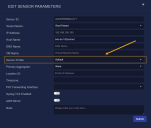
Click sensor's
 icon to edit its settings. The Edit Sensor Parameters dialog box appears.
 -
Use the Sensor Profile dropdown to assign the Modular Sensor profile with the Aggregator feature enabled that you configured in the previous procedure.
-
Click Submit. The profile is immediately assigned to that aggregator.
Configuring a Purpose-Built Aggregator (Deprecated)
Configuring an aggregator deployed using one of the purpose-built aggregator images consists of the following steps:
-
Create a sensor profile for the aggregator in the System | Collection | Sensor Profiles | Aggregator Profiles (deprecated) tab.
-
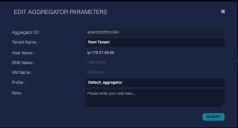
Assign the profile to the aggregators.
Creating a Profile for a Purpose-Built Aggregator
To create an aggregator profile for a purpose-built aggregator:
-
Navigate to the System | Collection | Sensor Profiles page and click on the Aggregator Profiles (deprecated) tab.
-
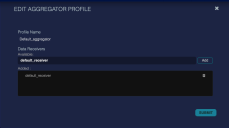
Click Create to add a new profile. The Add Aggregator Profile screen appears. You can also click
 to edit a profile. A similar screen appears.
 -
Choose a Profile Name. You cannot edit the Profile Name after you submit the profile.
-
Choose a data receiver from the Available drop-down. You can add one JSON receiver.
-
Click Add. The receiver appears in the Added box.
-
Click Submit. The profile is immediately added and appears in the list.
Assigning a Profile to an Aggregator
To assign an aggregator profile to an aggregator:
Configuring Sensors to Use an Aggregator
-
Click on System | Collection | Sensors. The Sensors page appears.
-
Click
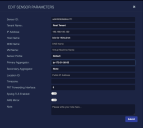
 to edit a sensor. The Edit Sensor Parameters screen appears.
 -
Choose a Primary Aggregator from the drop-down.
-
Choose a Secondary Aggregator from the drop-down.
-
Click Submit. The sensor immediately starts sending traffic to the primary aggregator.
When you finish configuring all of the sensors, you can remove the associated open ports from your firewall.
Aggregator Settings Retained When Sensor Moves to New DP
If you use the set cm command on a sensor to move it to a different DP, keep in mind that the primary and secondary aggregator settings are retained across the move. If you need to change the aggregator(s), too, you can repeat the procedure in Configuring Sensors to Use an Aggregator to change the aggregator(s) used by the sensor.
