Using Queries and the Query Builder
Queries in Stellar Cyber provide an advanced capability for searching the database. You can build and execute complex queries, and save them for future use. This allows you to build a library of queries that you can use in your analysis. You can also use saved queries for the Threat Hunting Correlation Search.
Unlike the Search tool, queries are supported by a Query Builder to help you construct queries. Queries are also faster. A simple search looks for the term everywhere. Using a query, you can specify a field to search for the term, greatly increasing the speed. For example, instead of searching for china and getting every place where that term appears, you can build a query for srcip_geo.countryName: china and get a list of only places where the source IP address country is China.
The currently selected query is combined with the overall filter settings in Stellar Cyber when the search results are extracted. See the Filters page for more information.
Although the query tool is present at the top of the screen along with the other filter tools, it also appears in other contexts within the system. For example it is used on both the Visualize and Automation pages to create data structures that select specific data sets.
Query Tool
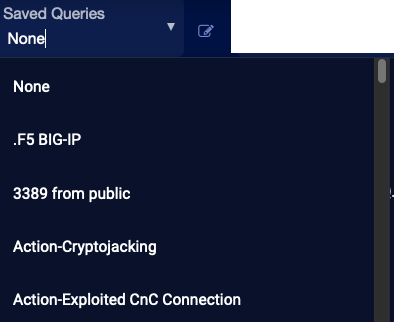
On screens that present data that can be affected by the current search results, the query tool appears. The left portion is a drop box to call up a list of saved queries.
When you select a saved query, the query is executed and the page updates with the query results.
The None query that appears at the top of the list is a special case that removes any effect on the search results. It is selected by default.
Click the Add button at the top of the tool, to open the Query Builder.
The Query Builder
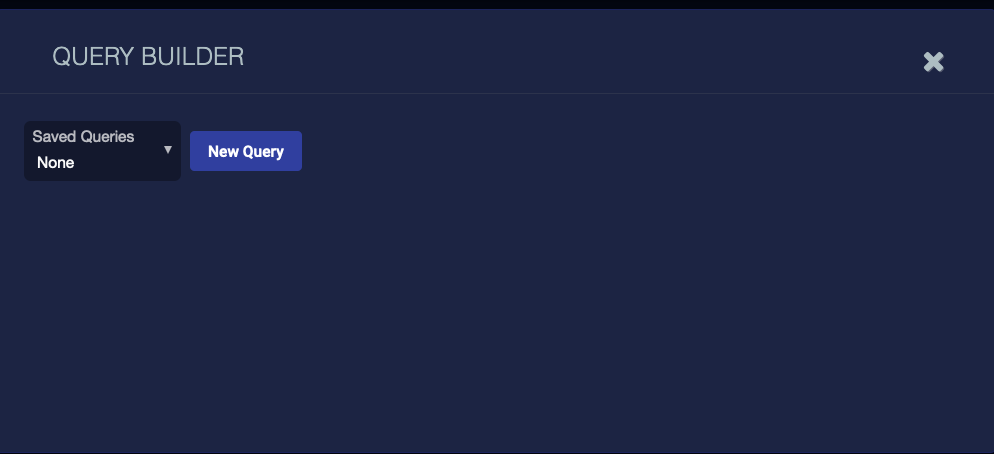
Clicking the Open Query Builder button to the right of the query tool brings up the Query Builder dialog box as shown. You can:
- Create a new query
- Edit a previously saved query
- Delete a previously saved query
Create a New Query
To create a new query:
-
Click on the New Query button. The Query Builder screen expands.
-
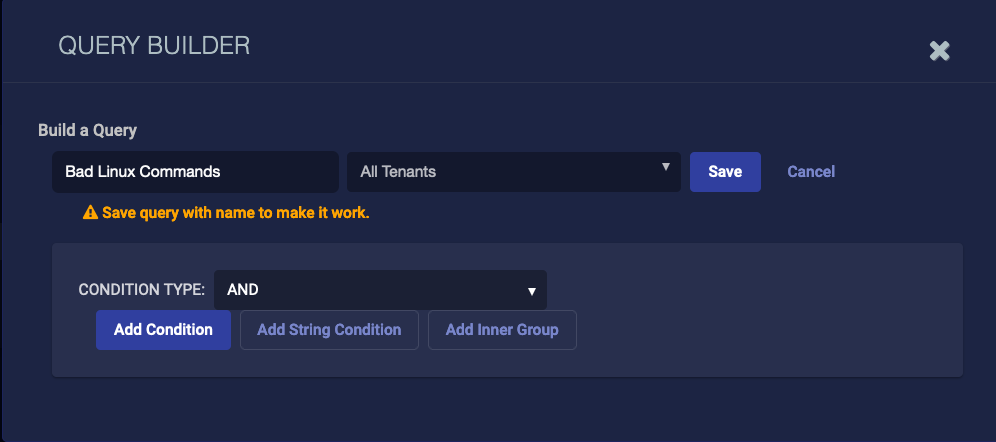
Enter a name for the query. Our query is named Bad Linux Commands.
Special characters are not permitted in name fields for Queries, Lookup lists, Reports/Dashboards. Letters, underscores, spaces, dashes, numbers and periods are permitted.
-
Choose the tenant. We chose All Tenants. The saved query will be available for all of this tenant's users.
-
Choose a Condition Type. We chose And.
-
Click Add Condition. Our query has two conditions.
-
Enter your conditions. We're looking for Linux devices that have command anomaly events. Both conditions must be true because the Condition Type is And.

-
Click Save.
Edit a Previously Saved Query
To edit a previously saved query:
-
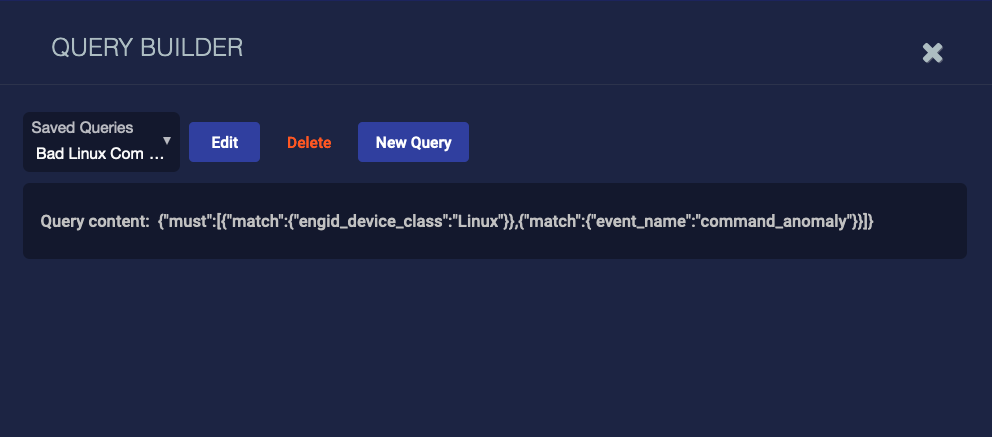
Click on the Saved Queries drop box and select the query. If you start typing the query name, Stellar Cyber narrows the queries accordingly. When you select the query, the display changes to show the query in JSON Domain Specific Language (DSL) form. You can edit the DSL form of the query directly.
-
Click the Edit button to see the Build a Query screen.
-
Enter a new name for your query.
Special characters are not permitted in name fields for Queries, Lookup lists, Reports/Dashboards. Letters, underscores, spaces, dashes, numbers and periods are permitted.
-
Choose the tenant.
-
Add conditions.
-
Click Save.
If the query tool on the main screen has a saved query selected and you click the Open Query Builder button to the right, the Query Builder dialog opens with the selected query in edit mode.
Changing Query Access between Root Tenant and All Tenants
When Stellar Cyber is deployed as a Managed Security Service Provider (MSSP), the root tenant is the MSSP itself and the sub-tenants are its customers. Each customer of the MSSP is assigned its own logically isolated environment so that security events, logs, configurations, and activities of one tenant are not accessible to another. However, the root tenant has overarching control and visibility into all tenant environments.
When you are logged in to the root tenant, you can create queries that can be used by the root tenant only, by a specific sub-tenant, or by all tenants. When you set the share scope for a query as All Tenants, then all tenants can access the query to see data in charts, dashboards, and Automated Threat Hunting (ATH) rules. When you set the share scope as Root Tenant, then only the root tenant can use the query. Finally, if you are logged in as a sub-tenant user, any queries you create are only accessible within your environment.
It's possible to edit a query created by a root tenant to change its share scope from All Tenants to Root Tenant, and from Root Tenant to All Tenants, even if the query is currently in use.
To see a list of all configured queries, navigate to System | Configuration | Queries.
To change the share scope of a previously configured query, select the Edit icon in the Actions column. If the existing query has a share scope of Root Tenant, you can change it to All Tenants, which allows the root tenant and all sub-tenants that the MSSP manages to access the query. If the existing query has a share scope of All Tenants, you can change it to Root Tenant.

This revokes access to it by the sub-tenants. If the query is in use by one or more tenants, a confirmation prompt appears, explaining that the query is in use and that the change will impact existing charts and reports and that ATH rules using the query will no longer function. To continue with the change of scope, select Confirm.

Delete a Previously Saved Query
To delete a previously saved query:
-
Click on the Saved Queries drop box and select the query. If you start typing the query name, Stellar Cyber narrows the queries accordingly. When you select the query, the display changes to show the query in JSON DSL form. Click the Edit button on the Saved Query tool to edit the DSL form of the query directly.
- Click Delete.
Query Builder Fields
Following are details on the individual buttons and fields in the Query Builder.
Query Name
We recommend that you choose a name that makes the query easy to find.
Special characters are not permitted in name fields for Queries, Lookup lists, Reports/Dashboards. Letters, underscores, spaces, dashes, numbers and periods are permitted.
Condition Type
The options are And, Or, and Not. These boolean operators are applied when the new condition is entered.
Condition Type does not apply for the first condition.
Add Condition
Adds a new condition to the query. The condition includes Field, Operator, and Condition Parameters.
Add String Condition
A String condition searches a simple string value.
Add Inner Group
More complex queries might require Inner Groups. Inner Groups are multiple conditions evaluated as a unit. They are equivalent to parenthetical terms in mathematics.
Clicking this button adds another row to the query, with its own set of conditions.
Field
The field is the data object in the Interflow record to be tested by the condition. There can be a large number of objects in an Interflow record, and the drop-box provides some of them. You can also enter the field name.
See the Interflow overview page for more information on possible field selections.
Operator
The Operator defines the relationship between the Field and the Condition Parameter. The options are:
-
is (default)
-
is exactly
-
contains

-
does not contain
-
field exists
-
field does not exist
-
is in lookup (see Working with the Lookups Table )
-
is not in lookup
-
starts with
-
ends with
Special characters are permitted and automatically escaped.
Condition Parameter
The value the condition field will be tested against.
Remove This Group
This button appears inside an Inner Group. Clicking this button removes the Inner Group.
Remove
This button appears to the right of the condition parameter. Clicking it removes the condition.
