Configuring SentinelOne Connectors
This connector allows Stellar Cyber to collect data from external sources and add the records to the data lake.
SentinelOne integration with Stellar Cyber provides advanced threat detection and response capabilities, combining AI-powered endpoint protection with real-time threat intelligence and automated response workflows to improve incident response and threat mitigation.
A SentinelOne connector allows you to collect logs, discover assets, and see vulnerabilities. If you enable Respond options on this connector, with the correct type of user account, you can perform the following endpoint response actions:
Rate limits for the SentinelOne connector are detailed in Guidance on SentinelOne Connector Rate Limits.
The following error from SentinelOne, 503 Service Temporarily Unavailable, is treated by Stellar Cyber as the following error, 429 Too Many Requests, and is not shown on the DP connector list. This will be addressed in a later release.
This connector is improved to use less memory. Under certain scenarios if there is an error reaching the third-party API, some duplicate messages may be sent.
Stellar Cyber connectors with the Collect function (collectors) may skip collecting some data when the ingestion volume is large, which potentially can lead to data loss. This can happen when the processing capacity of the collector is exceeded.
Connector Overview: SentinelOne
Capabilities
-
Collect: Yes
-
Respond: Yes
-
Native Alerts Mapped: Yes
-
Runs on: DP
-
Interval: Configurable
Collected Data
|
Content Type |
Index |
API |
Mapped to |
|---|---|---|---|
|
Host (Agents) |
Assets |
https://<sentinelone region url>/web/api/v2.1/agents |
|
|
Threats |
Syslog, Alerts |
https://<sentinelone region url>/web/api/v2.1/threats |
Yes |
|
Vulnerabilities This content type needs the Applications View Risks permission. See Obtaining SentinelOne Credentials for details. |
Scan |
Three related API calls are used for this data: https://<sentinelone region url>/web/api/v2.1/agents https://<sentinelone region url>/web/api/v2.1/installed-applications https://<sentinelone region url>/web/api/v2.1/private/installed-applications/<app id>/cves |
|
|
Support added for the following in v4.3.5: The following content types require an upgraded subscription (STAR), as well as permissions. See Obtaining SentinelOne Credentials for details. |
|
||
|
Alerts |
Syslog | https://<sentinelone region url>/web/api/v2.1/cloud-detection/alerts |
|
|
Deep Visibility (Events) |
Syslog | https://<sentinelone region url>/web/api/v2.1/dv/events?queryId={query_id} |
|
|
Events (Threat Events) |
Syslog | https://<sentinelone region url>/web/api/v2.1/threats/{threat id}/explore/events?limit=1000 |
|
|
Rogues |
Syslog | https://<sentinelone region url>/web/api/v2.1/ rogues/table-view |
|
|
Threat Notes |
Syslog | https://<sentinelone region url>/web/api/v2.1/threats/{threat id}/notes?limit=1000 |
|
|
Support added for the following in v5.3.0: |
|
||
|
Activities |
Syslog | https://<sentinelone region url>/web/api/v2.1/activities |
|
|
Support added for the following in v6.0.0:
|
|
||
|
Misconfigurations |
Syslog | /web/api/v2.1/xspm/findings/misconfigurations/graphql |
|
|
Unified Alerts |
Syslog | /web/api/v2.1/unifiedalerts/graphql |
|
Domain
|
<Host URL> where <Host URL> is a variable from the configuration of this connector |
Response Actions
|
Action |
Required Fields |
API |
|---|---|---|
|
agentRealtimeInfo and agentRealtimeInfo.agentId |
https://<sentinelone region url>/web/api/v2.1/agents/actions/disconnect revert: https://<sentinelone region url>/web/api/v2.1/agents/actions/connect |
|
|
agentRealtimeInfo and agentRealtimeInfo.agentId |
https://<sentinelone region url>/web/api/v2.1/agents/actions/initiate-scan |
|
|
msg_origin.source is 'Sentinel_endpoint' or msg_origin.source is 'Sentinel' and threatInfo and threatInfo.threatId are valid |
https://<sentinelone region url>/web/api/v2.1/threats/mitigate/kill |
|
|
msg_origin.source is 'Sentinel_endpoint' or msg_origin.source is 'Sentinel' and threatInfo and threatInfo.threatId are valid |
https://<sentinelone region url>/web/api/v2.1/threats/mitigate/quarantine revert: https://<sentinelone region url>/web/api/v2.1/threats/mitigate/un-quarantine |
|
|
msg_origin.source is 'Sentinel_endpoint' or msg_origin.source is 'Sentinel' and threatInfo.detectionType is 'dynamic' and the following fields are present and valid: threatInfo, threatInfo.threatId The endpoint must also be either a Mac OS or Windows host. if it is not, then a Quarantine is performed instead. |
https://<sentinelone region url>/web/api/v2.1/threats/mitigate/remediate revert: https://<sentinelone region url>/web/api/v2.1/threats/mitigate/rollback-remediation |
Third Party Native Alert Integration Details
SentinelOne Cloud
SentinelOne's threat dataset includes a variety of fields that enable Stellar Cyber to map the native SentinelOne alerts to the Stellar Cyber Alert index. For example, threatInfo.classification describes the event (such as Trojan). That and other fields in the threatInfo record support direct mapping of SentinelOne's MITRE | ATT&CK Tactic and Technique fields to Stellar Cyber's XDR Kill Chain. Of the assorted collected data types noted above, only the Threat (msg_class: sentinelone_threat_detection) are directly mapped to the Alert index. Select the Threat content type.
For details, see Integration of Third Party Native Alerts.
SentinelOne Singularity Identity
This connector ingests logs from SentinelOne to get the raw alerts that are stored in the Syslog index. Select the Unified Alerts content type.
Stellar Cyber maps SentinelOne alerts. The alerts are read from the Syslog index, enriched with Stellar Cyber fields, and mapped (with deduplication) to the Alerts index.
Deduplication is by tenantid and sentinelone.external_id.
For details, see Integration of Third Party Native Alerts.
Required Credentials and Configurations
-
Host URL and API Key (token).
-
To Collect, the SentinelOne User Account can have either the Viewer or Admin role. To Respond, the user Role must be Admin.
Locating Records
Use the following fields as a guide to query for records:
-
msg_origin.source:
sentinelone_endpoint -
msg_origin.vendor:
sentinelone -
msg_origin.category:
endpoint -
msg_class:
| Events (Threat Events)
|
Hosts (Agents)
|
Deep Visibility
|
| Alerts
|
Rogues
|
Threat
|
| Threat Notes
|
Vulnerabilities
|
Activities
|
| Misconfigurations
|
Unified Alerts
|
|
For SentinelOne Cloud, to search the Original Records in the Syslog index, use the query: msg_class:sentinelone_threat_detection
For SentinelOne Singularity Identity, to search the alerts in the Alerts index or the Original Records in the Syslog index, use the query: msg_class:sentinelone_unified_alerts AND sentinelone.detectionSource.product: Identity AND (NOT event.severity_str: INFO)![]()
Adding a SentinelOne Connector
To add a SentinelOne connector:
- Obtain SentinelOne credentials
- Add the connector in Stellar Cyber
- Test the connector
- Verify ingestion
You can also configure SentinelOne to send logs to the Stellar Cyber parser. However, the connector allows you to assign a tenant, while the parser does not.
Obtaining SentinelOne Credentials
As part of this procedure, you specify the credentials of an account on the SentinelOne server that will be used to retrieve data. This account must have read/view permissions or better on the SentinelOne server. To perform response actions, the account must have an administrative role.
-
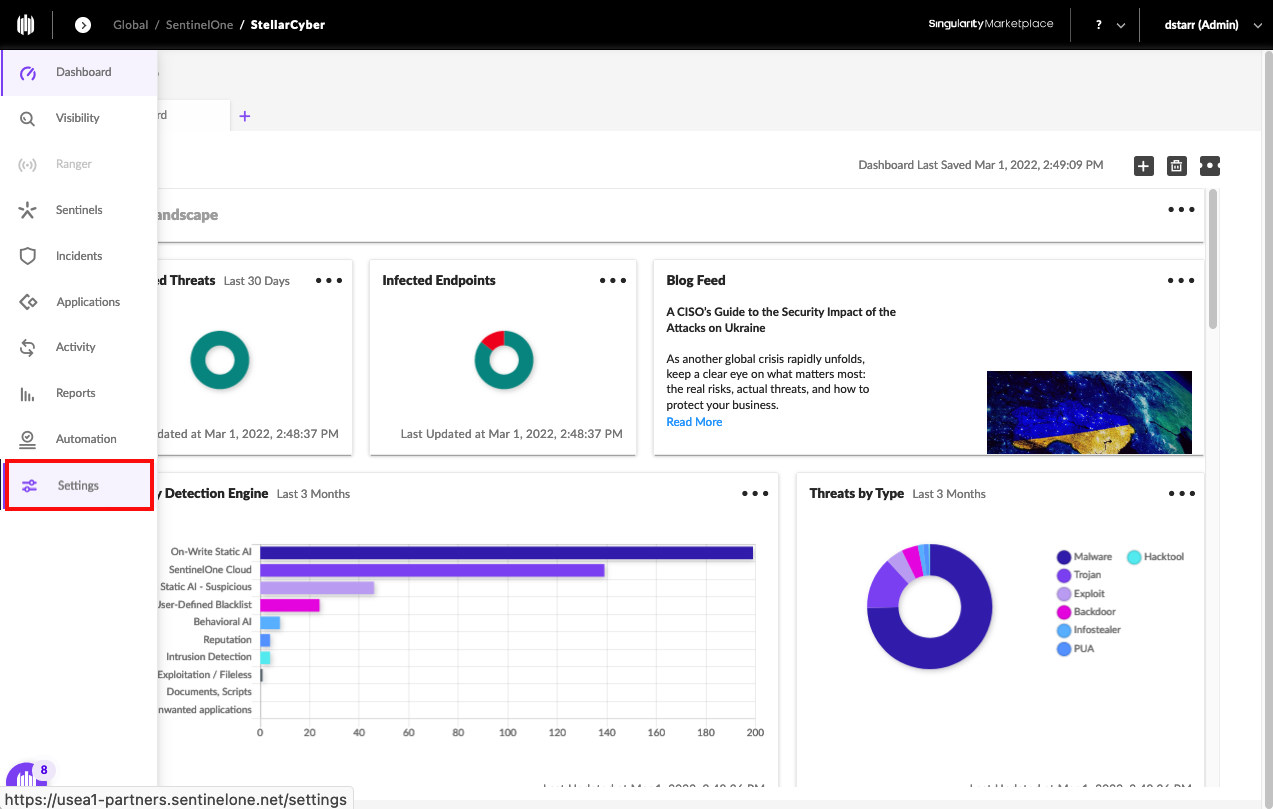
Log into your SentinelOne Management Console as an administrative user (for example: https://usea1-partners.sentinelone.net/login).
-
From the Management Console navigation pane, select Settings.
-
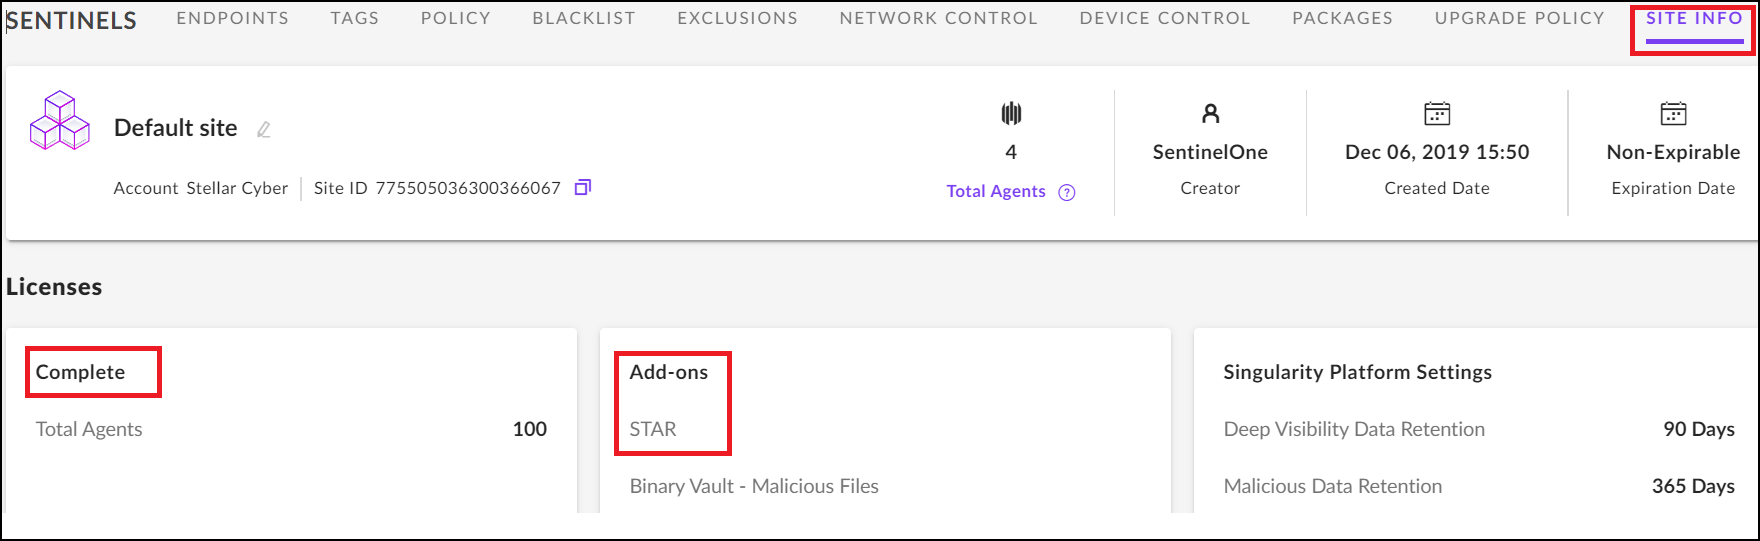
Navigate to Site Info.
-
Make sure that Licenses is Complete for the site and that Add-ons is STAR.
Some content types require an upgraded subscription (STAR), as well as permissions, otherwise the connector will not produce expected results.
-
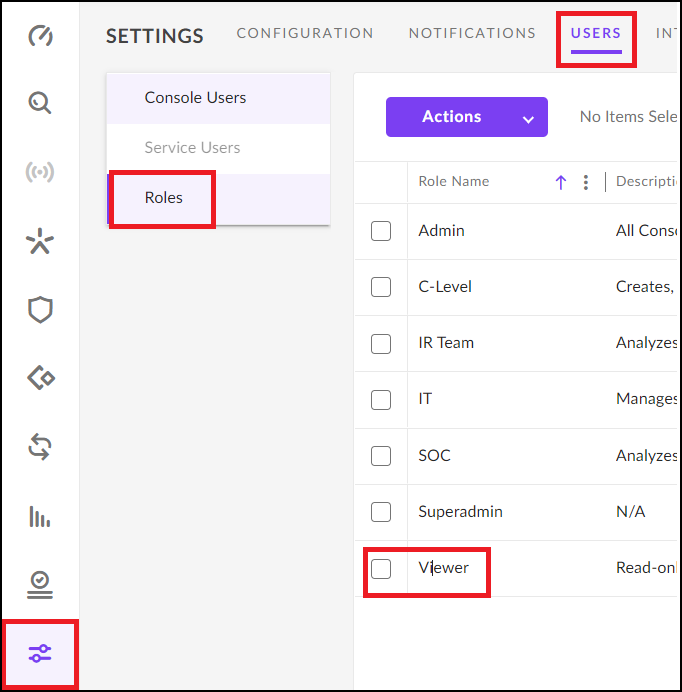
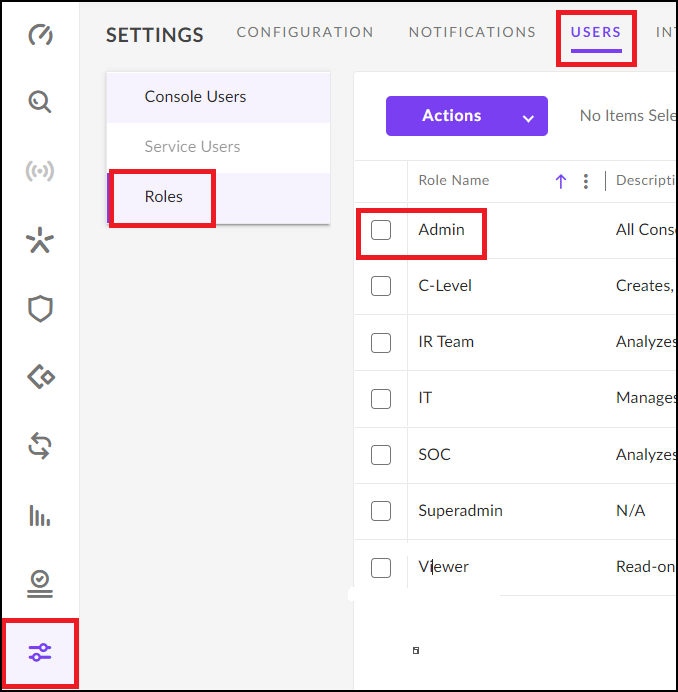
In the tab for Users, choose Roles.
-
To support the collect only function in Stellar Cyber, choose either Viewer or Admin.
-
To support the respond function in Stellar Cyber, choose Admin.
-
-
To support the Vulnerabilities content type, with the Admin role, choose Applications, and select Permissions including View Risks.
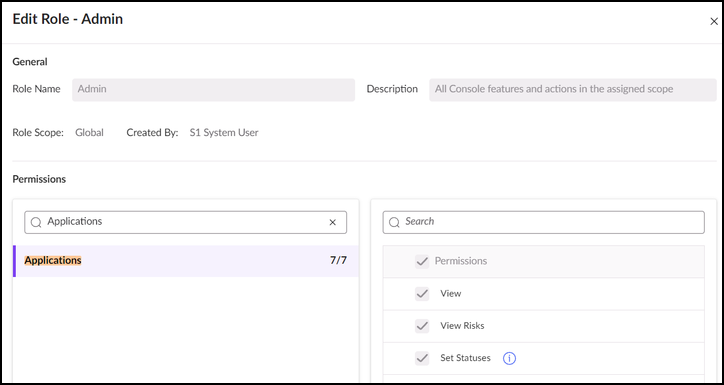
-
For the role, set the following permissions for certain content types:
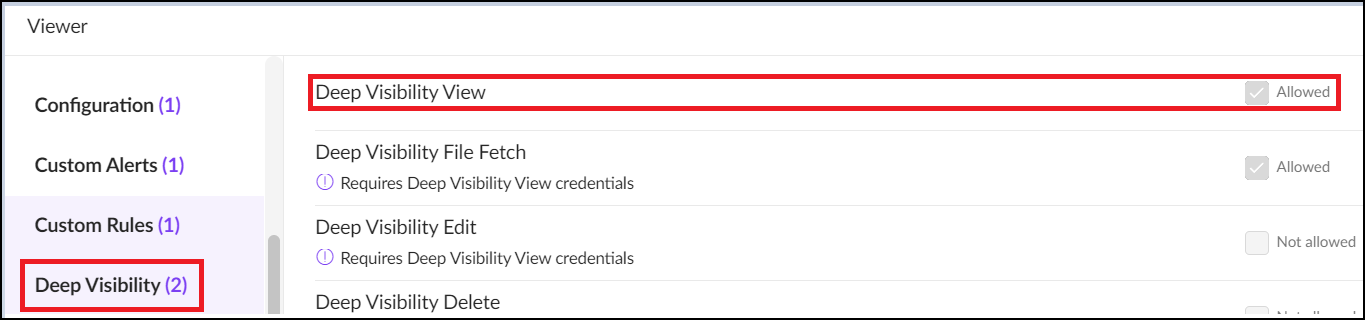
-
To support the Deep Visibility content type, choose Deep Visibility View.
-
To support the Threats content type, choose Threats View.

-
To support the Rogues content type, choose Rogues View.
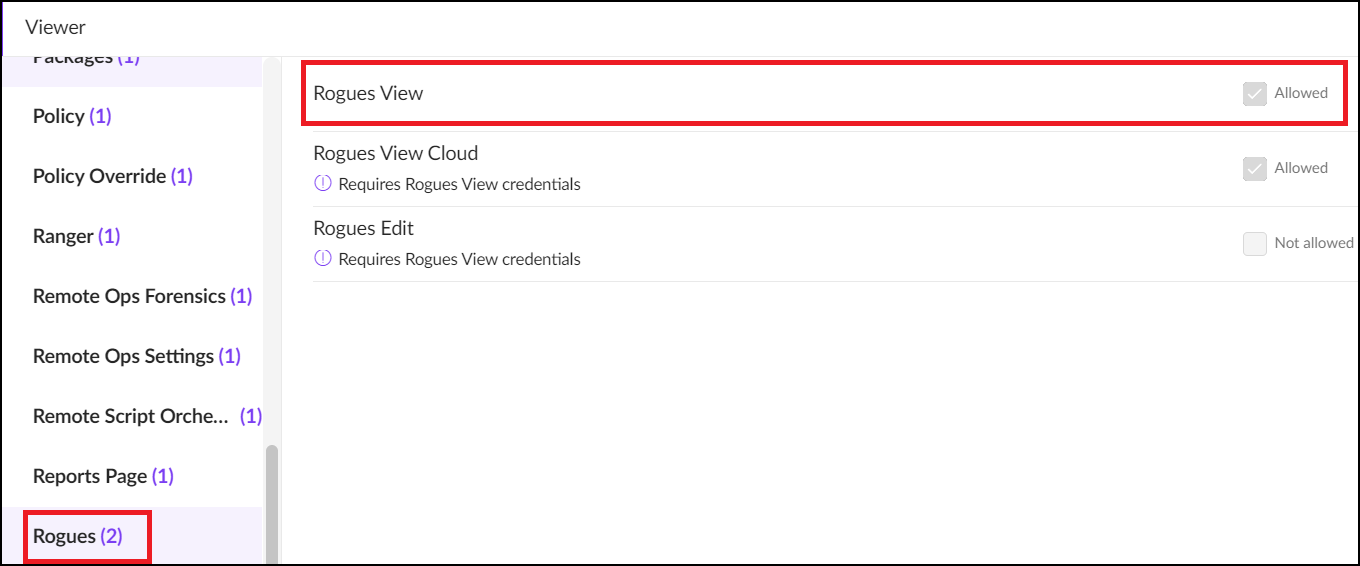
If these features are Not allowed (greyed out), contact SentinelOne.
-
-
Click Save.
-
Choose the Users tab and select the option to add a New User for the account you will use with the Stellar Cyber connector.

-
In the User Details, enter the information for the new user.
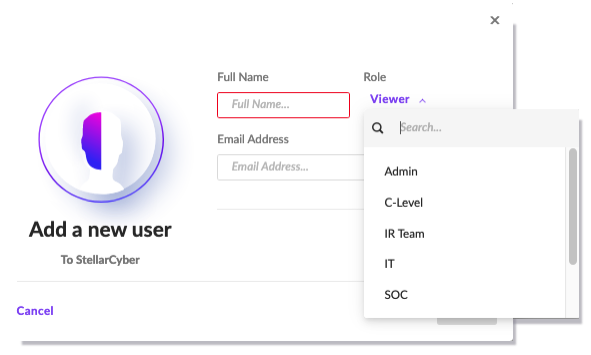
-
Make sure to assign a role to the account, either Viewer or Admin.
-
Log out of the SentinelOne Management Console and then log back in with the username you created. You are prompted to create a password for that user. Create the password and complete the login.
-
When logged into the SentinelOne online console as an administrative user, you need to generate an API token for the connector configuration. The token can be generated from a console user or from a service user.
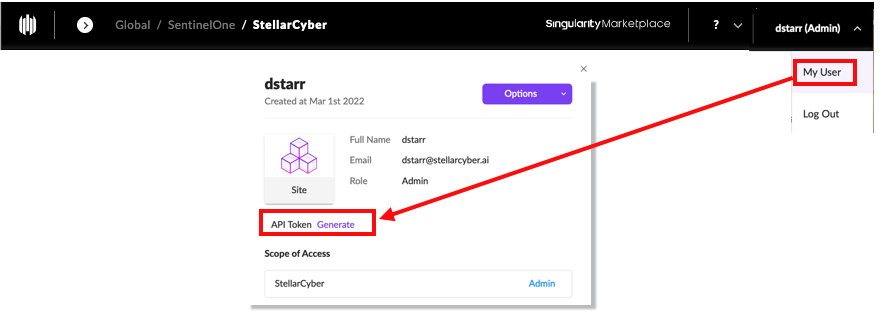
The following steps are to generate the API token from a console user:
-
Click the username from the top right of the console and select My User.
-
In the dialog that displays, click the link to Generate an API Token.
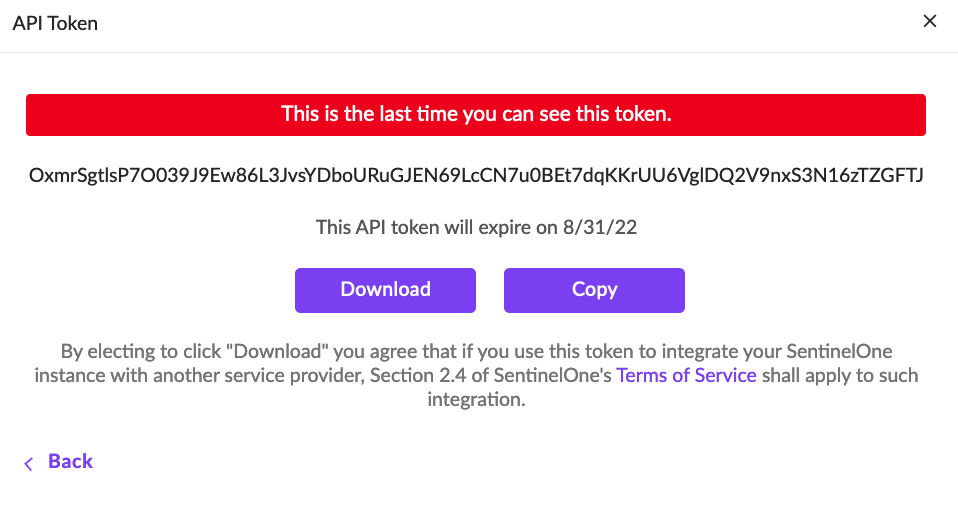
-
This displays the token with a warning to copy it. If you forget the token, you will need to regenerate it. Download it now or Copy it and save it to a file for later use in the connector you configure in Stellar Cyber.
-
Exit the console and proceed to the next section.
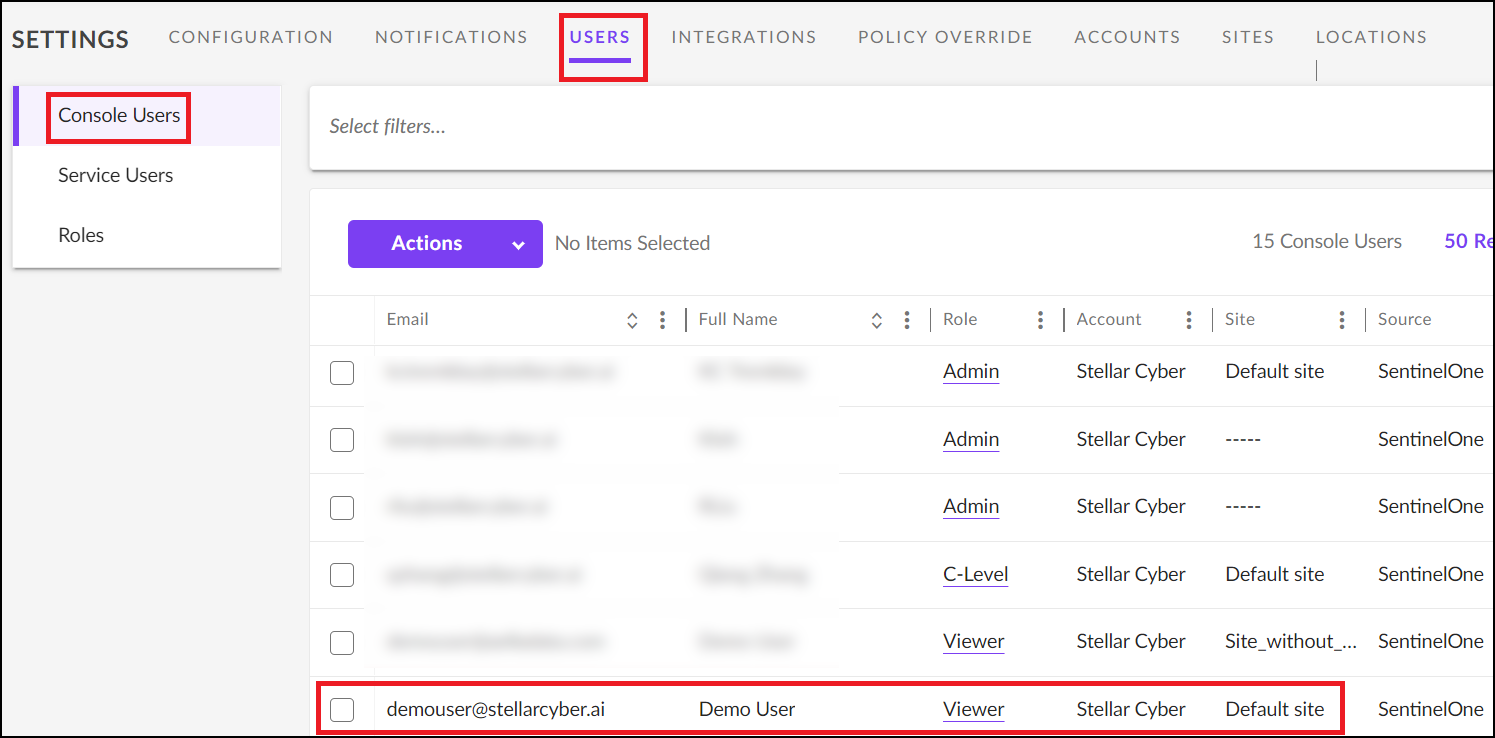
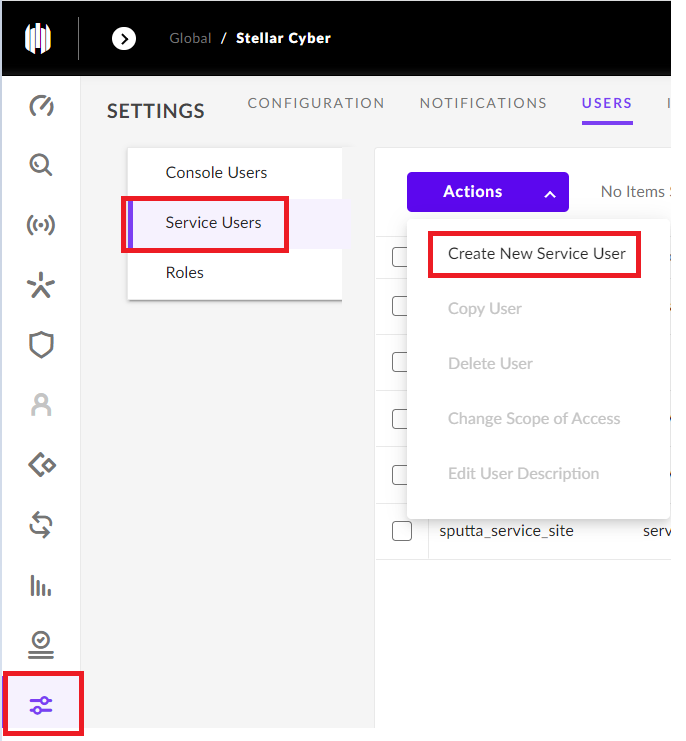
The following steps are to generate the API token from a service user:
-
Click the USERS tab and choose Service Users. Then select Create New Service User from the Actions menu.
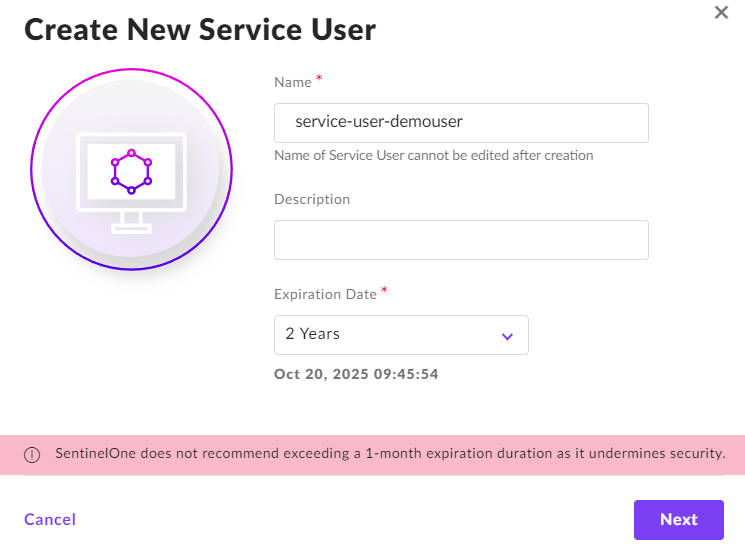
-
Enter the Name of the New Service User and choose an Expiration Date.Then click Next.
-
You can set the Scope of Access for the Account or the Site.
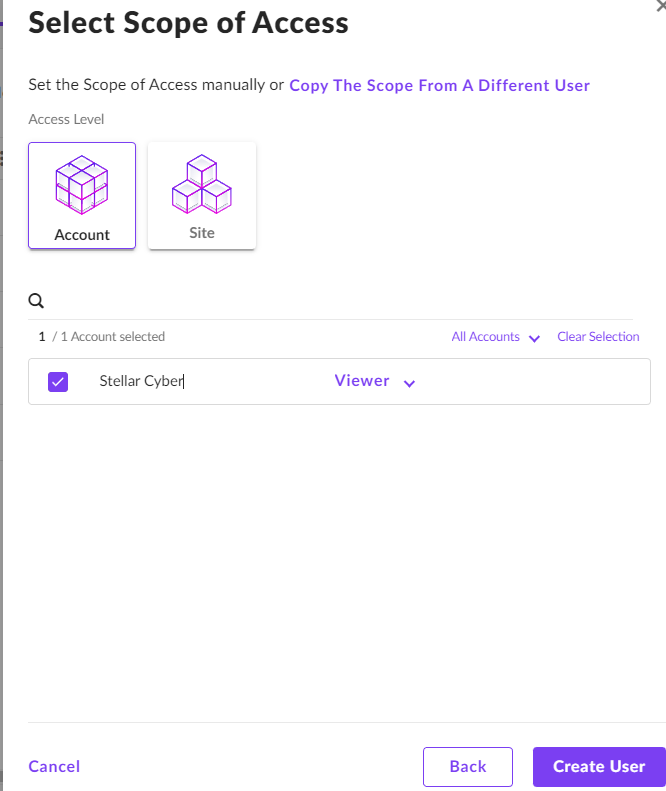
-
To set the Scope of Access for the Account, select Account. Choose Admin or Viewer from the dropdown menu for the role. Choose Admin for respond actions.

-
To set the Scope of Access for the Site, select Site. Choose Admin or Viewer from the dropdown menu for the role. Choose Admin for respond actions.
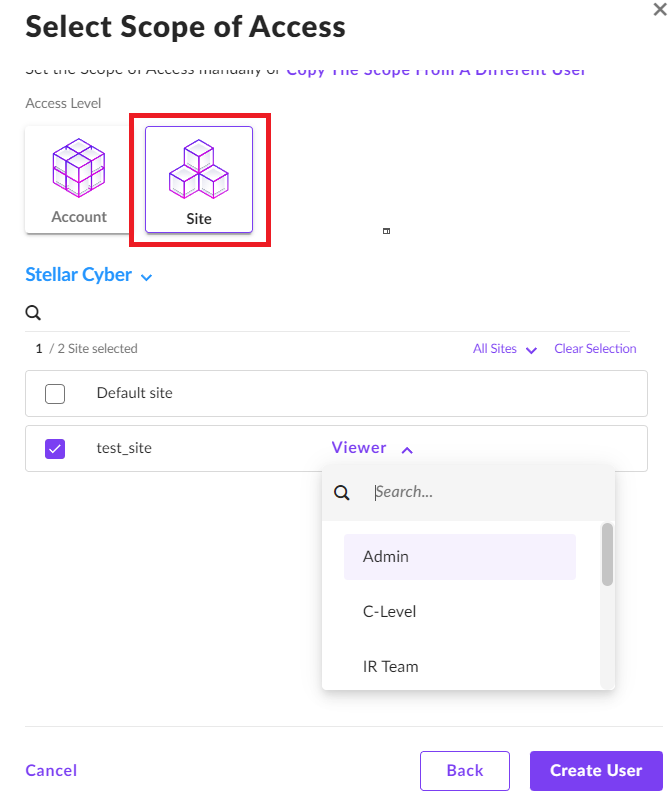
-
Click Create User.
-
Copy the API Token.
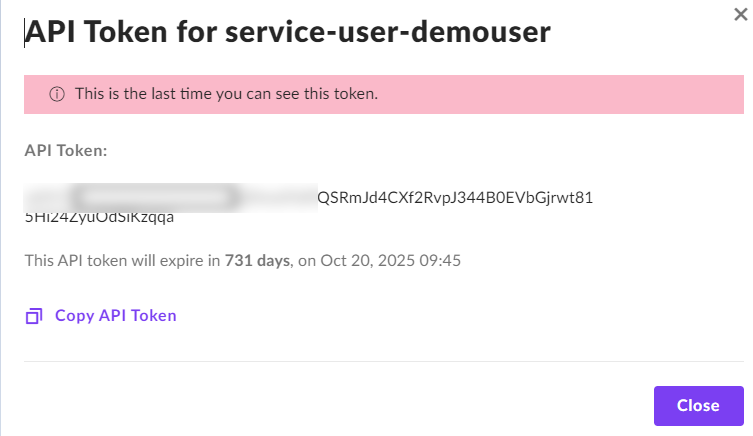
Store the API key in a safe location. It cannot be retrieved later although it can be regenerated.
-
Click Close.
-
Adding the Connector in Stellar Cyber
To add a SentinelOne connector in Stellar Cyber:
-
Log in to Stellar Cyber.
-
Click System | INTEGRATIONS | Connectors. The Connector Overview appears.
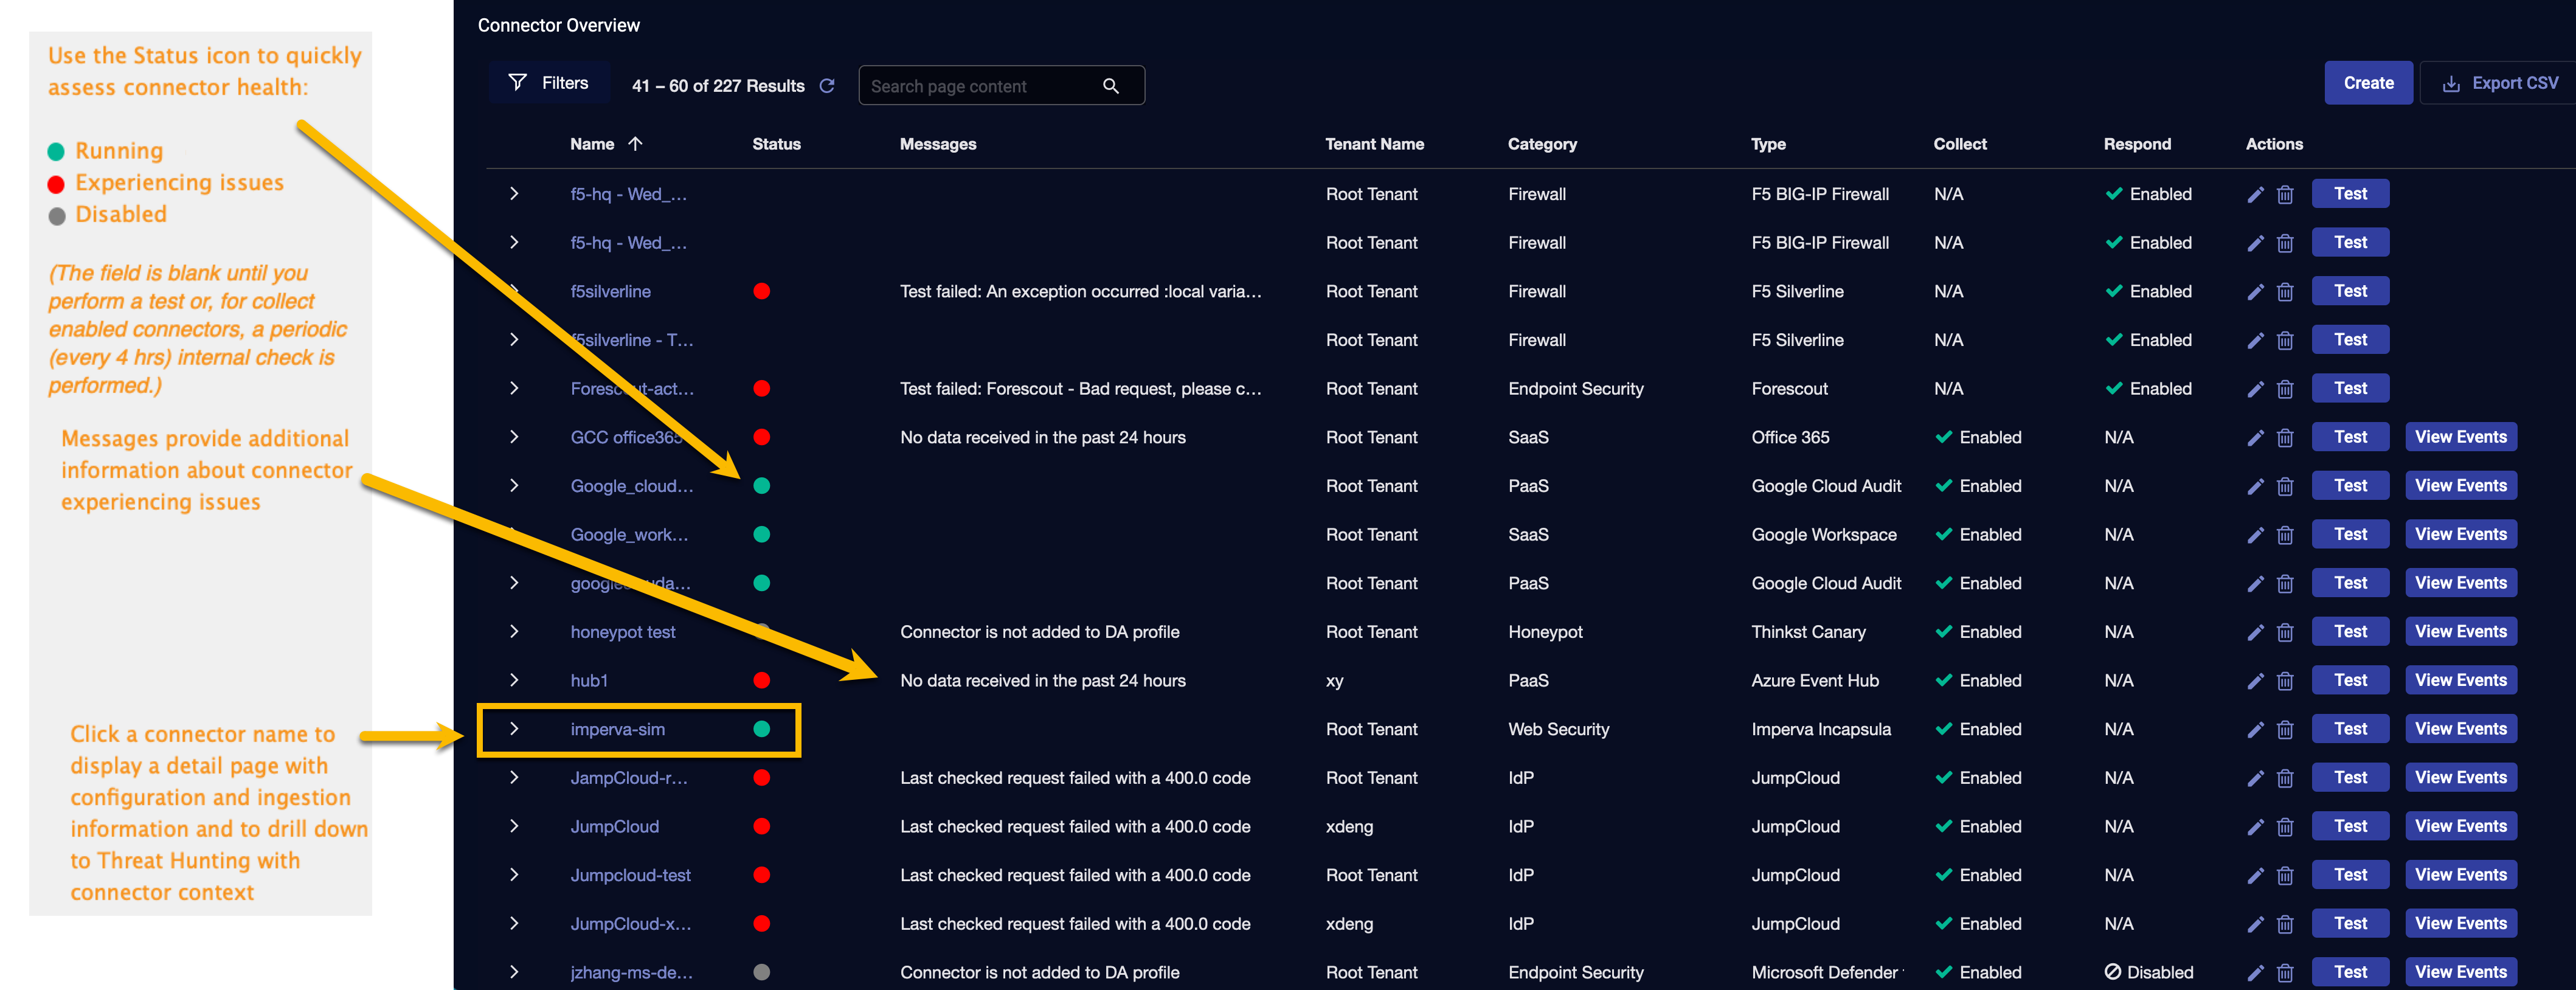
-
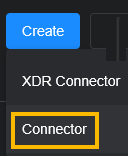
Click Create and select Connector.
The General tab of the Add Connector screen appears. The information on this tab cannot be changed after you add the connector.
-
Choose Endpoint Security from the Category dropdown.
-
Choose SentinelOne from the Type dropdown.
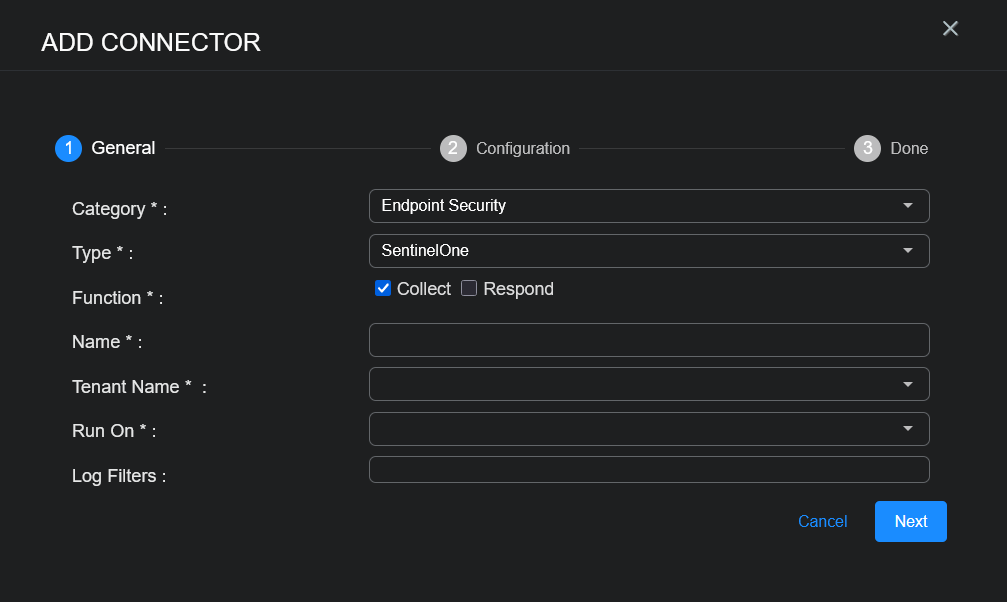
The asterisk (*) indicates a required field.
-
Enable the Function for Collect and/or Respond.
-
Enter a Name.
Notes:- This field does not accept multibyte characters.
- It is recommended that you follow a naming convention such as tenantname-connectortype.
-
Choose a Tenant Name. The Interflow records created by this connector include this tenant name.
-
Choose the device on which to run the connector.
-
(Optional) When the Function is Collect, you can apply Log Filters. For information, see Managing Log Filters.
-
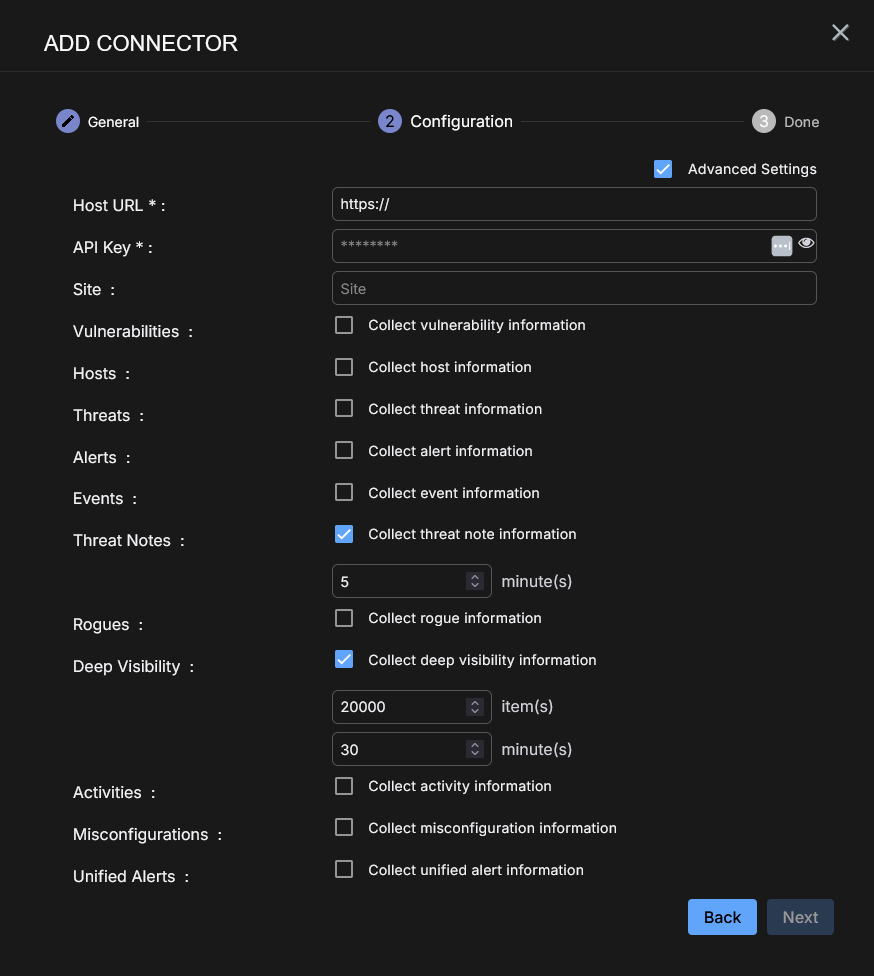
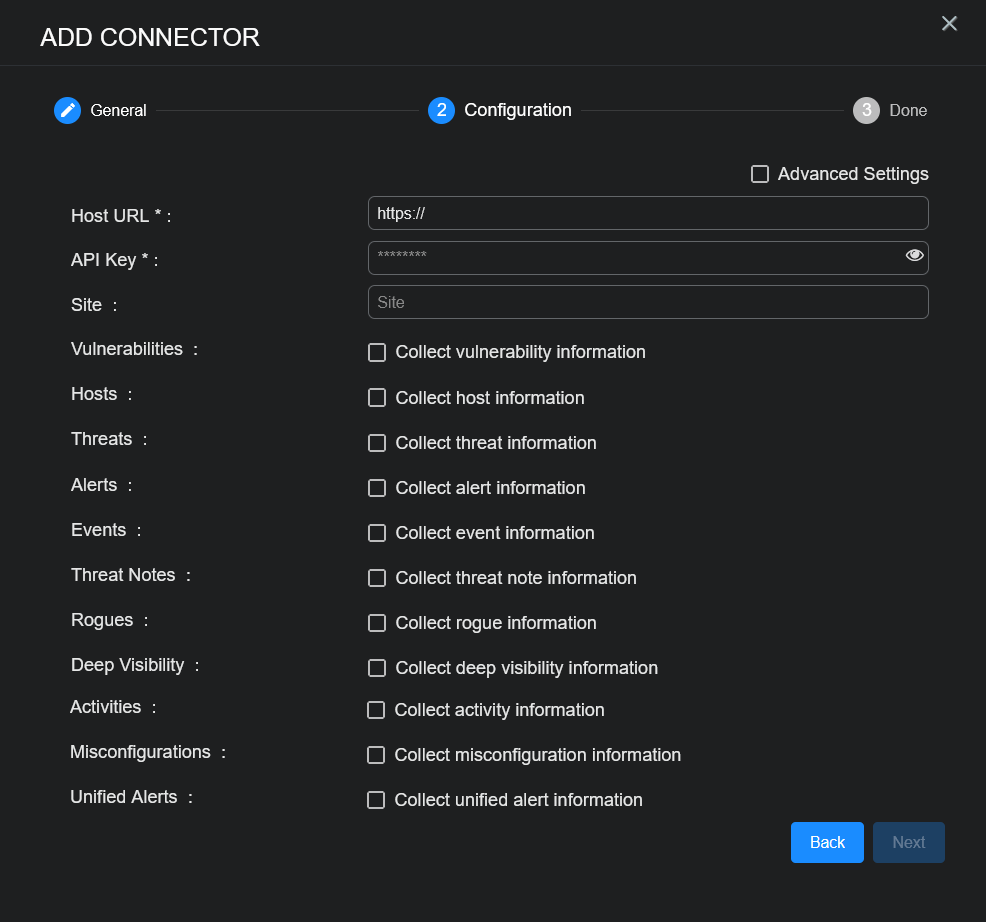
Click Next. The Configuration tab appears.
The asterisk (*) indicates a required field.
-
Enter the Host URL. This is the address of your SentinelOne server.
For release versions prior to v4.3.4, ensure the URL does not include a trailing "/" symbol.
-
Enter the API Key (token) you created above.
In earlier releases, Stellar Cyber supported use of a Username / Password combination. However, SentinelOne now enforces use of 2FA, which necessitates use of a token with API communications.
-
(Optional) Enter Site. This is a string and can be either a site ID or a site name. In the SentinelOne management console, navigate to Settings > Sites, click the site, and click Site Info for the value. A site ID is a long numeric string, for example: 775505036300366067.
-
Choose the Content Type. The following logs are supported:
-
Vulnerabilities
This content type requires a permission. See Obtaining SentinelOne Credentials for details.
The SentinelOne connector only supports single scope for the Vulnerabilities API. If multiple scopes are needed:
-
create multiple users: one scope per user
-
create multiple connectors: one connector per user
-
-
Hosts (Agents)
-
Threats
-
The following logs are supported for v4.3.5, and later.
These content types require an upgraded subscription (STAR), as well as permissions. See Obtaining SentinelOne Credentials for details.
-
Alerts
-
Events (Threat Events)
-
Threat Notes
-
Rogues
-
Deep Visibility
-
-
The following logs are supported for v5.3.0, and later.
-
Activities
-
Misconfigurations

-
Unified Alerts
-
-
-
Click the Advanced Settings checkbox to enter the interval, in minutes, for each content type selected. The interval is how often the logs are collected. There are default values for the interval, based on the content type. Most content types have a 5 minute default interval, but Deep Visibility has a 30 minute default interval.
Also for Deep Visibility, you can specify the number of items retrieved in the interval. The default is 20000. Use caution when adjusting the limit. If it is too high, there are risks, for example, the SentinelOne API might not support the high number.

-
Click Next. The final confirmation tab appears.
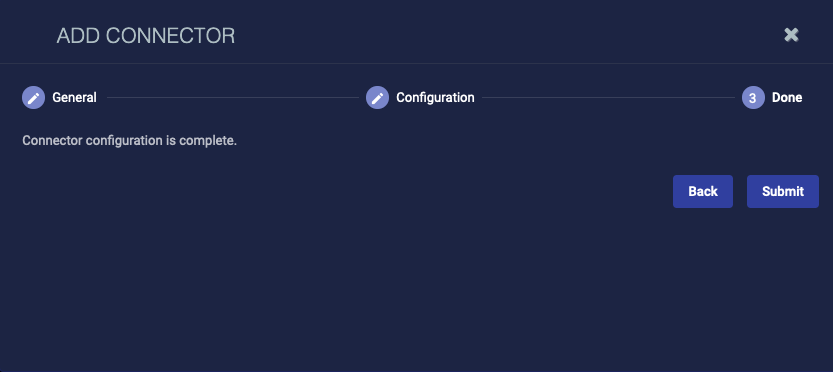
-
Click Submit.
The new connector is immediately active.
Guidance on SentinelOne Connector Rate Limits
Some customers using the SentinelOne connector in Stellar Cyber may occasionally experience API rate limit issues when retrieving data from SentinelOne endpoints, particularly /dv (Deep Visibility) and /cloud-detection/alerts. These limits are enforced by SentinelOne to ensure fair use and platform stability across tenants.
Why This Happens
SentinelOne applies API rate limits at the tenant or console level. For larger MSSP environments or those running multiple integrations, these limits can sometimes be reached during periods of high activity or large data pulls.
Recommended Customer Actions
The following are recommended actions you can take:
-
Contact SentinelOne Support or Your TAM
If you encounter rate limit issues, please reach out to your SentinelOne Technical Account Manager (TAM) or SentinelOne Support to request a rate limit increase.
-
SentinelOne’s official guidance on rate limiting can be found here: SentinelOne Community Article
-
Rate limit increases are reviewed and approved by SentinelOne
-
-
Review Your API Usage
Review how frequently your SentinelOne data is being queried. In some cases, reducing the query frequency or adjusting collection intervals can help avoid rate limit thresholds.
-
Dedicated Consoles (for MSSPs)
MSSPs operating on shared SentinelOne consoles may not be able to request IP whitelisting or dedicated rate limit adjustments.
However, if your organization operates a dedicated SentinelOne console, you can contact SentinelOne Support to ask about potential configuration options specific to your tenant.
Summary
While rate limits are controlled by SentinelOne, our integration is designed to ensure reliable data collection even under constrained conditions.
If you continue to experience interruptions, please contact Stellar Cyber Support for assistance. Providing your SentinelOne case number (if you have opened one) will help us coordinate more effectively with the SentinelOne team.
Testing the Connector
When you add (or edit) a connector, we recommend that you run a test to validate the connectivity parameters you entered. The test validates authentication and connectivity.
For connectors running on a sensor, Stellar Cyber recommends that you allow 30-60 seconds for new or modified configuration details to be propagated to the sensor before performing a test.
-
Click System | INTEGRATIONS | Connectors. The Connector Overview appears.
-
Locate the connector by name that you added, or modified, or that you want to test.
-
Click Test at the right side of that row. The test runs immediately.
Note that you may run only one test at a time.
Stellar Cyber conducts a basic connectivity test for the connector and reports a success or failure result. A successful test indicates that you entered all of the connector information correctly.
To aid troubleshooting your connector, the dialog remains open until you explicitly close it by using the X button. If the test fails, you can select the button from the same row to review and correct issues.
The connector status is updated every five (5) minutes. A successful test clears the connector status, but if issues persist, the status reverts to failed after a minute.
Repeat the test as needed.


If the test fails, the common HTTP status error codes are as follows:
| HTTP Error Code | HTTP Standard Error Name | Explanation | Recommendation |
|---|---|---|---|
| 400 | Bad Request | This error occurs when there is an error in the connector configuration. |
Did you configure the connector correctly? |
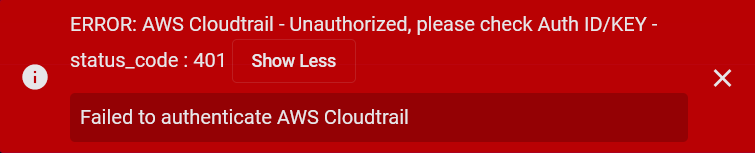
| 401 | Unauthorized |
This error occurs when an authentication credential is invalid or when a user does not have sufficient privileges to access a specific API. |
Did you enter your credentials correctly? Are your credentials expired? Are your credentials entitled or licensed for that specific resource? |
| 403 | Forbidden | This error occurs when the permission or scope is not correct in a valid credential. |
Did you enter your credentials correctly? Do you have the required role or permissions for that credential? |
| 404 | Not Found | This error occurs when a URL path does not resolve to an entity. | Did you enter your API URL correctly? |
| 429 | Too Many Requests |
This error occurs when the API server receives too much traffic or if a user’s license or entitlement quota is exceeded. |
The server or user license/quota will eventually recover. The connector will periodically retry the query. If this occurs unexpectedly or too often, work with your API provider to investigate the server limits, user licensing, or quotas. |
For a full list of codes, refer to HTTP response status codes.
Verifying Ingestion
To verify ingestion:
-
Select Threat Hunting. The Interflow Search tab appears.
-
Set the Indices for the type of content you collected:
-
For Threats, change the Indices to Syslog or Alerts.
-
For Hosts, change the Indices to Assets. Note that hosts discovered through this connector show SentinelOne as a data source.
-
For Vulnerabilities, change the Indices to Scans.
-
For all other data types, change the Indices to Syslog.
-
-
Search for the msg_class corresponding to the data type you want to view:
-
Vulnerabilities:
sentinelone_vulnerabilities -
Hosts (Agents):
sentinelone_host -
Threats:
sentinelone_threat_detection -
Alerts:
sentinelone_cloud_detection_alerts -
Events (Threat Events):
sentinelone_threat_events -
Threat Notes:
sentinelone_threat_notes -
Rogues:
sentinelone_rogues_table -
Deep Visibility:
sentinelone_deep_visibility -
Activities:
sentinelone_activities -
Misconfigurations:
sentinelone_misconfigurations -
Unified Alerts:
sentinelone_unified_alerts
-
