Configuring the Data Analyzer Profile
You must have Root scope to use this feature.
The Data Analyzer (DA) is one of the main components inside a Stellar Cyber data processor. Each installation must have at least one DA and can include more than one for the purposes of capacity and high availability. The System | Data Processor | Data Analyzer page lists the installed DA instances.
Stellar Cyber uses Data Analyzer Profiles to store configuration parameters in a reusable bundle that can be used by one or more DA instances. In deployments with multiple DAs, this arrangement avoids having to enter configuration multiple times, and, more importantly, helps prevent possible configuration conflicts and inconsistencies.
There is always one Data Analyzer Profile in the system named "Default." In most installations this is all that will be needed.
The System | Data Processor | Data Analyzer Profiles interface lets Stellar Cyber administrators create and manage Data Analyzer profiles.
Data Analyzer Profiles Table
When you choose the System | Data Processor | Data Analyzer Profiles option, Stellar Cyber displays a list of the currently configured Data Analyzer profiles, as shown below:
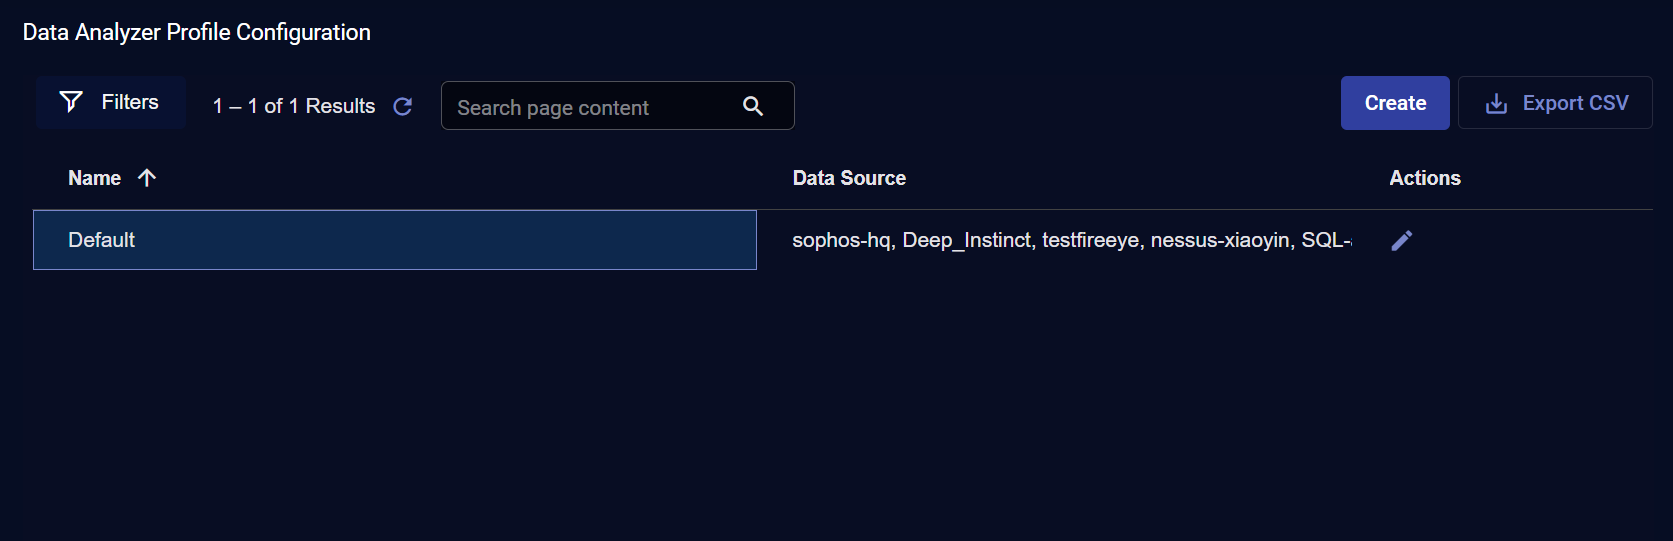
The Data Analyzer Profiles table lists each configured Data Analyzer profile with a summary of its settings. See the following sections for details.
Prior to Version 4.3.5, you could configure additional options for the Data Analyzer Profile, including Session Deduplication, Device Identification, Threat Intelligence, Maltrace, Hostname Correlation, and Username Correlation. These options are no longer available. If they still appear in the Data Analyzer Profile Configuration table, you can use the Change Columns | Reset Columns option to ensure that the display shows only the options available in more recent releases.
You can perform the following tasks in the Data Analyzer Profiles table:
- Click Create to add a new Data Analyzer profile to the list. The available settings are described in the following sections.
- Click
 to edit the corresponding Data Analyzer profile's settings.
 - Click
 to delete the corresponding Data Analyzer profile.
See the Tables page for more information on working with tables.
Adding or Editing a DA Profile
When you add or edit a Data Analyzer profile, Stellar Cyber displays a dialog box similar to the one shown below.
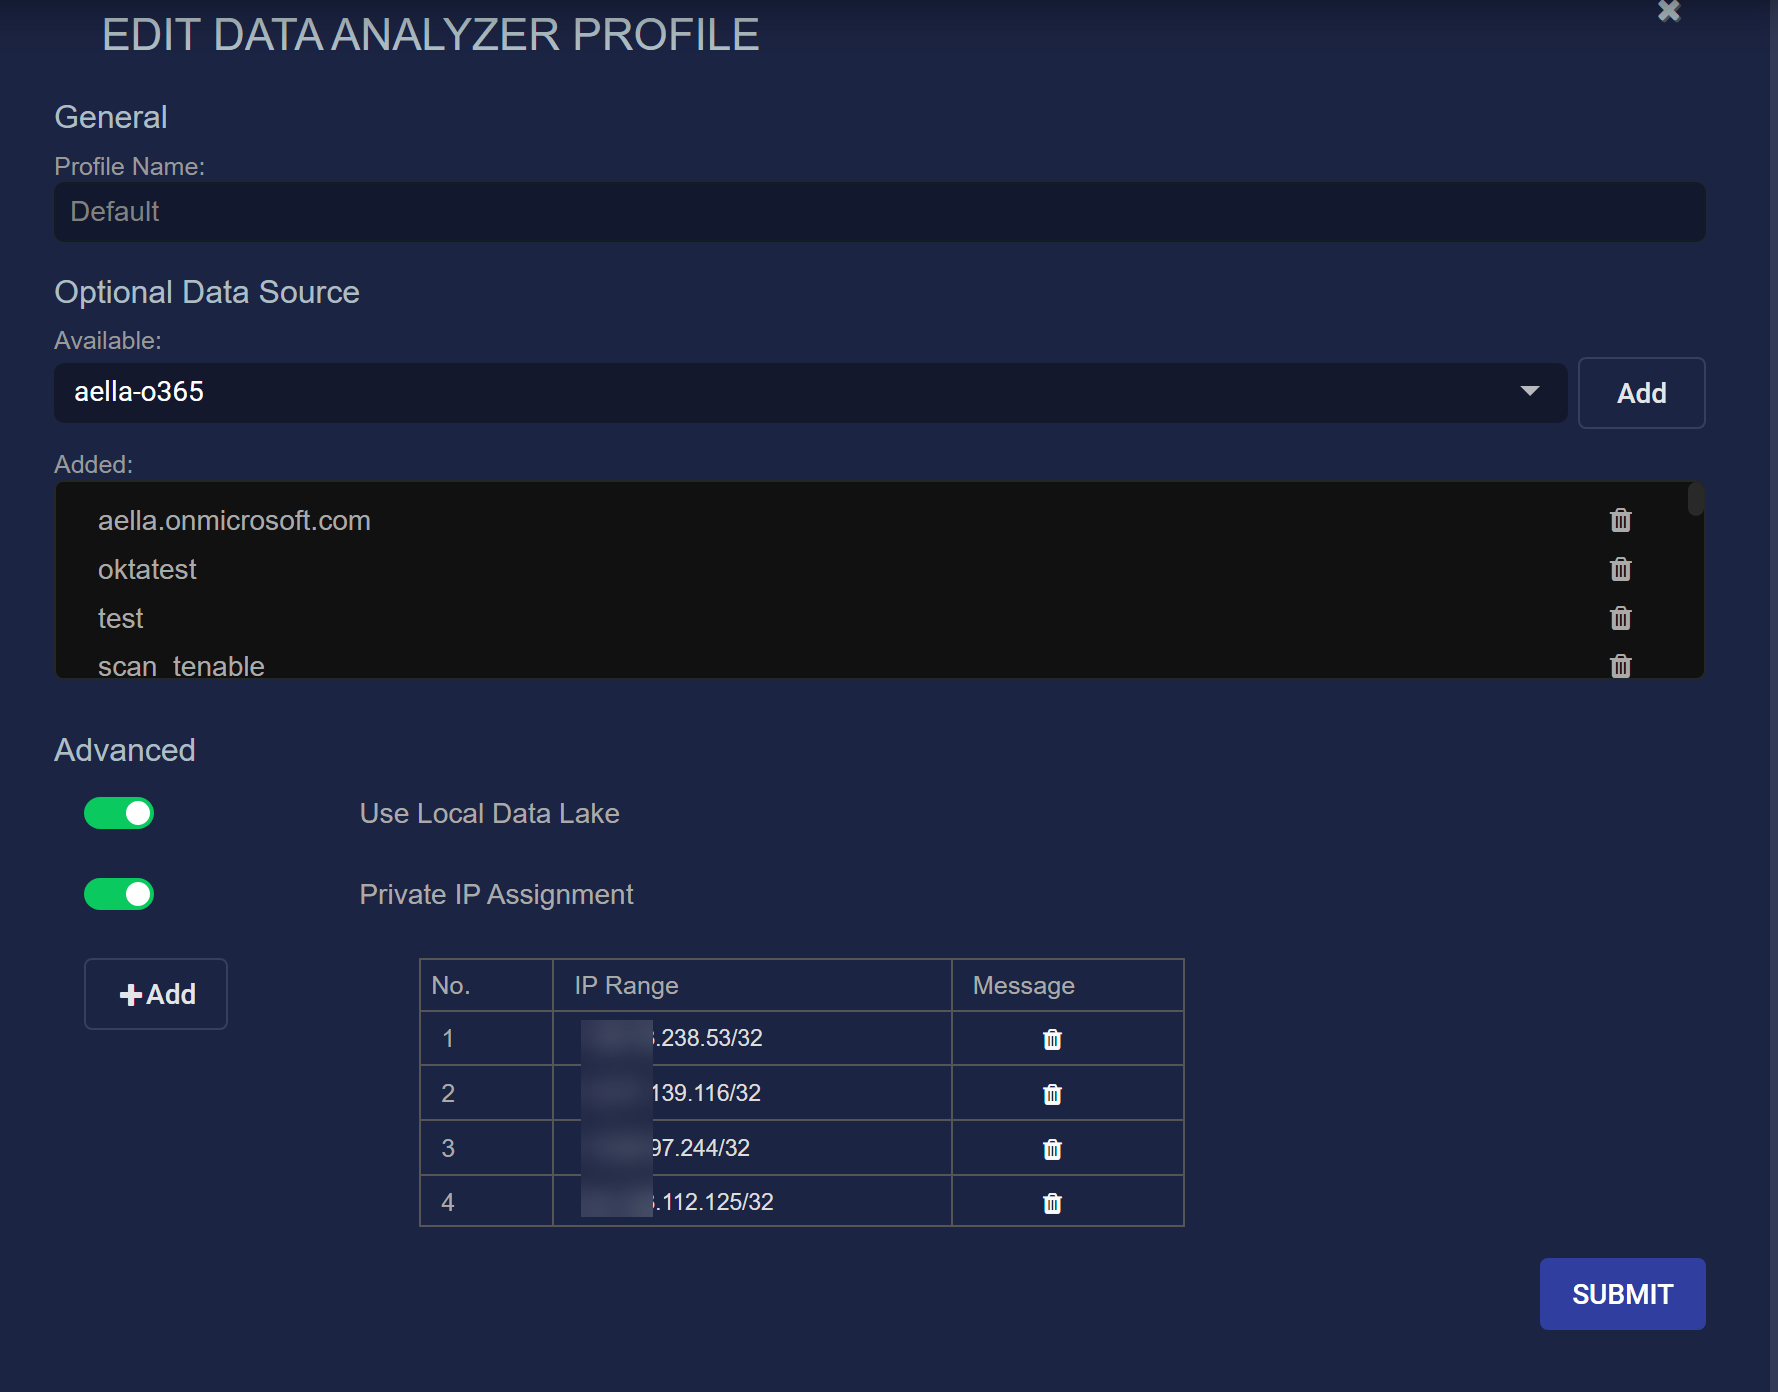
The following fields can be entered:
- Profile Name—A unique name for the profile. Default is the conventional name for the default profile. This field does not support multibyte characters.
- Optional Data Source
- Available—A selection list shows the available data sources that can feed data to the DA. Select one and click the Add button to add it to the Added list.
- Added—The data sources that have been added. To remove an item from the list click the button on the right hand side of the row.
Advanced Settings
Data Lake Selection
Enable the Use Local Data Lake option to instruct the DA to rely only on the locally installed data lake.
Private IP Assignment (Pre-v4.3.7 Only)
The Private IP Assignment feature lets you add subnets from which IP addresses are considered private and will be marked as such in event record fields. All other addresses (except RFC-1918 addresses) are considered public.
The Private IP Assignment feature moved to the System | Enrichments page in 4.3.7, allowing you to create different private IP ranges for different tenants.
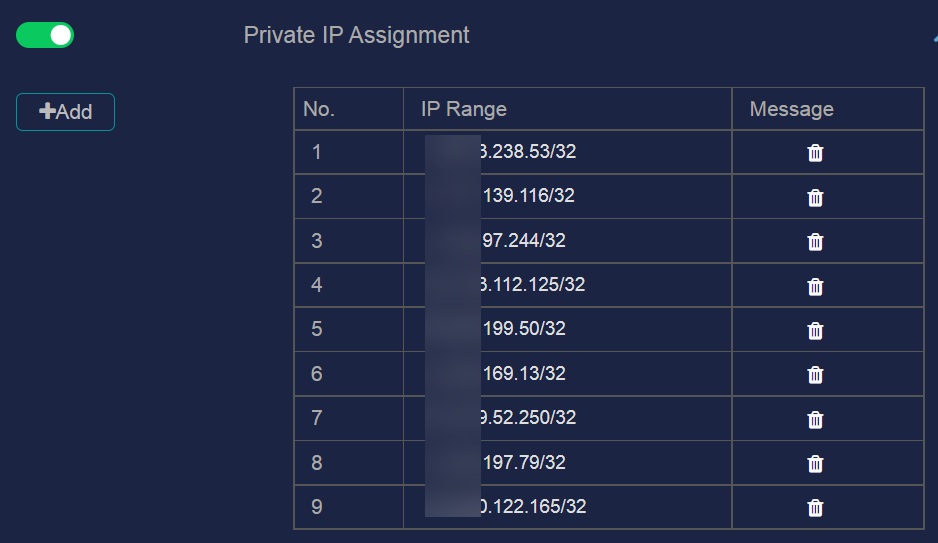
Click Add to add rows to the table and the button to remove rows. Each row contains the standard IPv4 address format for subnets and represents one subnet:
199.199.199.199/29IP addresses described by RFC-1918 as generally-accepted "private" IP addresses do not need to be added to this entry field. They are automatically designated as private.
Submitting Changes
When you have finished setting up your Data Analyzer profile, click Submit to apply your changes. Alternatively, you can use the button in the upper right corner of the dialog box to dismiss the dialog box and discard all changes.
