Managing Certificates
The System | Administration | Certificates page provides a centralized location to manage
Your user profile must have Certificates privilege enabled in the System | Administration | Role-Based Access Control page to use this feature. Only the Super Admin and Platform Admin profiles have this privilege enabled by default.
The certificates you upload in the Certificates page can be applied to different Stellar Cyber components elsewhere in the user interface:
-
Server certificates are used to validate communications between clients and different Stellar Cyber components (user interface, receivers, upgrades, and the CM service; you can apply different certificates to each). Once you've uploaded a server certificate, you can apply it to the DP in the System | Administration | Settings page. You can upload multiple Server certificates; however, only one can be in use at any time.
Refer to Generating Server Certificates for instructions on how to generate a Certificate Signing Request file and use it to obtain a certificate from your service provider.
-
CA certificates are used to enable upgrades of Stellar Cyber
-
Add the certificate to the DP's certificate repository in the System | Administration | Settings page. Make sure you select the correct tenant when uploading the certificate.
-
Add the certificate to the Tenant's sensors in the System | Collection | Sensors page.
Note that it is possible that the DP may be behind a different firewall than a sensor. Make sure you assign the CA certificate from the correct firewall to the corresponding Stellar Cyber component.
-
Stellar Cyber can parse chained certificates correctly.
Understanding the Certificates Page
The Certificates page lists each of the
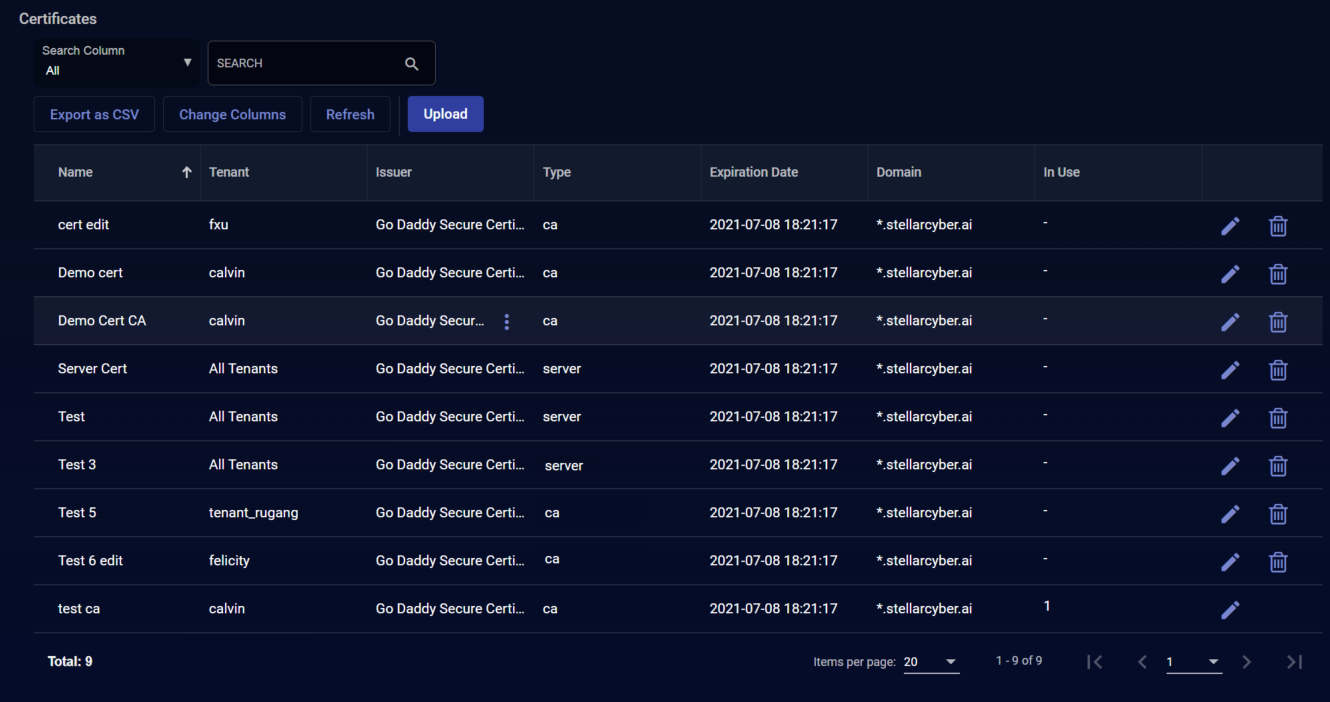
Each certificate you've uploaded to the system is listed with the following information:
-
Name – The name you specified for the certificate when you uploaded it.
-
Tenant – The tenant to which the certificate is assigned:
-
CA Certificates – CA certificates must be associated with a specific tenant. In a multi-tenant environment, you can upload the CA certificates used for SSL inspection by different tenants' firewalls and assign them correspondingly in Stellar Cyber, enabling software upgrades for components behind firewalls that use SSL inspection.
-
Server Certificates – Server certificates are used to secure communications with different Stellar Cyber components and are not associated with a specific tenant. This field always shows All Tenants for Server certificates.
-
-
Issuer – The issuing authority for the certificate, as read from the certificate itself.
-
Type –
-
Expiration Date – The date the certificate expires, as read from the certificate itself.
-
Domain – The domain(s) for which the certificate is valid, as read from the certificate itself.
-
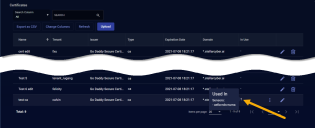
In Use – Shows the number of place in Stellar Cyber in which the certificate is in use. You can hover your cursor over this entry to see a popup listing the places in Stellar Cyberwhere the certificate is in use, as illustrated below:
-
Action Buttons:
-
Click
 to edit a certificate.
 -
Click
 to delete a certificate.
-
See the Tables page for more information on working with Tables, including the common Search, Export as CSV, Change Columns, and Refresh tools.
Uploading Certificates
Use the following procedure to upload a new certificate to Stellar Cyber:
-
Navigate to the System | Administration | Certificates page and click the Upload button.
-
Supply a Name for the certificate. The name you supply here is only used within Stellar Cyber to identify the certificate.
-
Select whether you are uploading a CA Certificate or a Server Certificate:
If you are uploading a CA Certificate:
-
Use the Choose File button in the Certificate field to browse to the location of the certificate you want to upload. The file you select must be a valid certificate in one of the following formats – .crt, .pem, .cer, .key, .p7b, .p7c, .der, .pfx, or .p12.
-
Use the Tenant dropdown to select the tenant associated with this certificate.
Select the specific tenant whose certificate you are uploading. The certificate should be the one used to perform SSL inspection on the tenant's firewall where the sensor is located. With this certificate added to Stellar Cyber and assigned in the Sensors and Settings pages, Stellar Cyber software upgrades can work successfully in an environment where the firewall performs SSL inspection.
If you are uploading a Server Certificate:
-
Use the Choose File button in the Certificate field to browse to the location of the certificate you want to upload.
-
Use the Choose File button in the Private Key field to browse to the location of the private key associated with the selected certificate. You created the private key when you generated the Certificate Signing Request to send to your service provider inGenerating Server Certificates.
Both the certificate and the private key you select must be in one of the following formats – .crt, .pem, .cer, .key, .p7b, .p7c, .der, .pfx, or .p12.
-
-
Click Submit to upload the certificate to Stellar Cyber.
Stellar Cyber performs basic validation of the uploaded certificate to verify that it is a certificate.
Next Steps
Once you've uploaded a certificate in the Certificates page, the next step is to apply it:
-
Server certificates are applied to the DP in the System | Administration | Settings page.
-
CA certificates are applied as follows:
-
Add the certificate to the DP's certificate repository in the System | Administration | Settings page.
-
Add the certificate to the Tenant's sensors in the System | Collection | Sensors page.
The tenant specified during the upload of the CA certificate must match the tenant whose sensors you want to assign it to in the Sensors page.
-
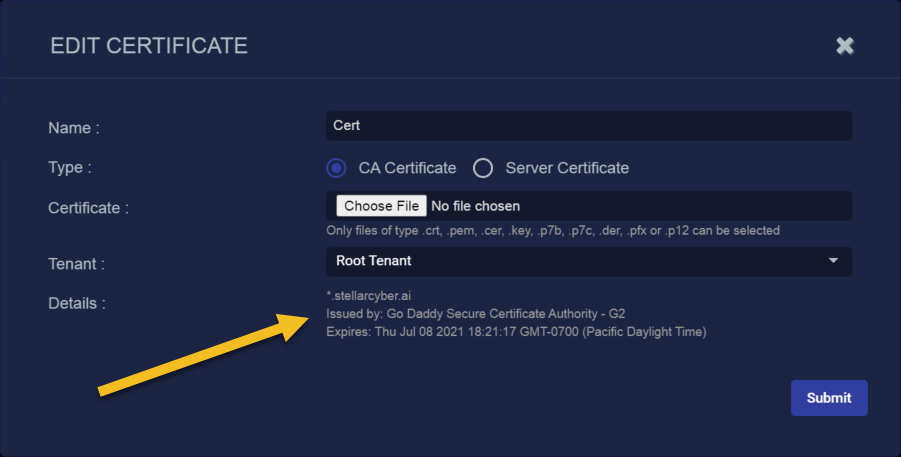
Editing Certificates
You can edit a certificate in the System | Administration | Certificates page by clicking the ![]() button at the far right of its entry in the table. In response, the Edit Certificate window appears, allowing you to change the certificate's name,
button at the far right of its entry in the table. In response, the Edit Certificate window appears, allowing you to change the certificate's name,
Note that editing a certificate that is in use by the DP may result in a few minutes of system downtime while the changes are applied.
In addition, the Edit Certificate window provides high-level configuration information for the existing certificate, read from the certificate itself, as illustrated below:
Deleting Certificates
You can delete a certificate in the System | Administration | Certificates page by clicking the ![]() button at the far right of its entry in the table.
button at the far right of its entry in the table.
Note that you can only delete a certificate that is not in use. Refer to the In Use column and use the popup there to determine where a certificate is in use, as illustrated below. Once you've removed the certificate from use, you can delete it.

