Adding an AWS S3 Data Sink 
You must have Root scope to use this feature.
You can add an AWS S3 Data Sink from the System | Data Processor | Data Sinks page using the instructions in this topic. Adding an AWS S3 Data Sink consists of the following major steps:
- Add a user in AWS with the appropriate permissions and retrieve its Access and Secret keys.
- Get the S3 bucket name in AWS.
- Add the S3 Data Sink in Stellar Cyber.
Use our example as a guideline, as you might be using a different software version.
Adding a User with the Appropriate Permissions
To add a user with the appropriate permissions in AWS:
-
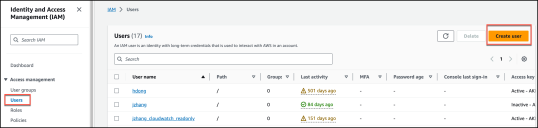
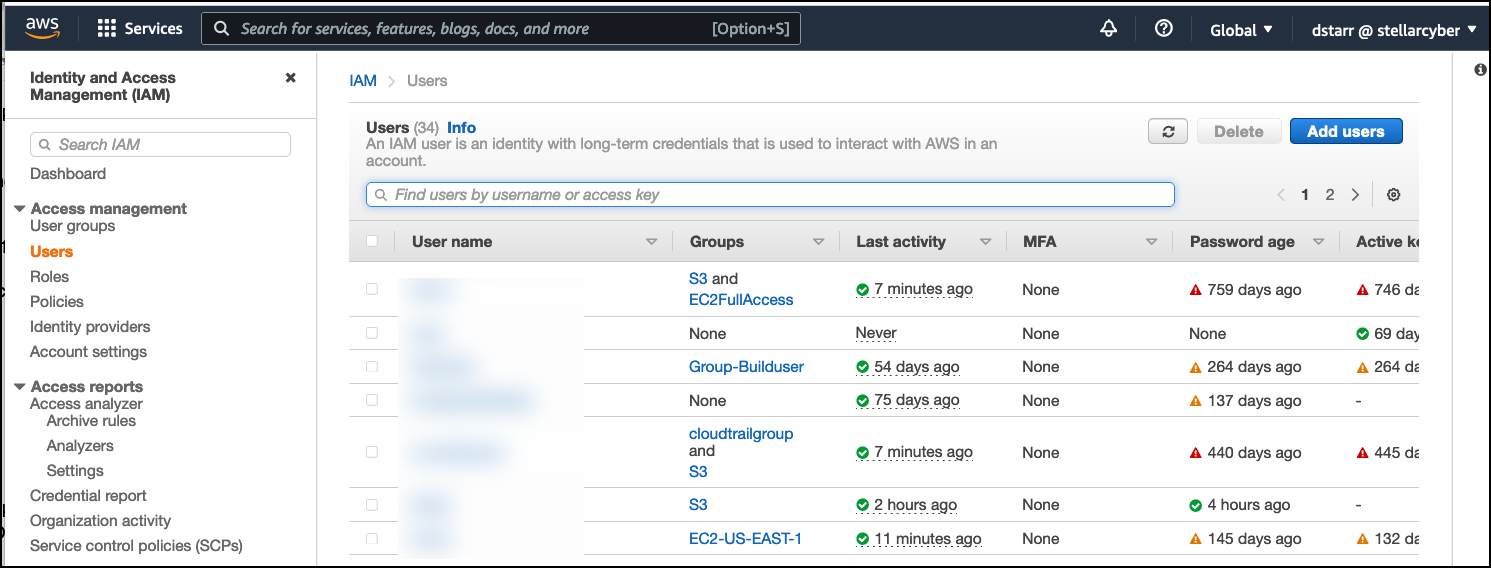
Log in to your AWS Management Console at https://aws.amazon.com .

- In Find Services, start entering iam. As you type, suggestions appear. Click on IAM. The IAM Dashboard appears.
-
Click Users.
-
Click Add user.

- Enter the User name. The Add user page appears.
-
Choose the Access type. We suggest Programmatic access, so you minimize the number of users with login access.
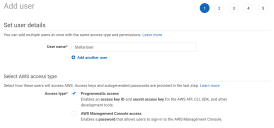
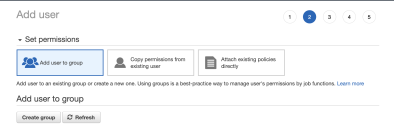
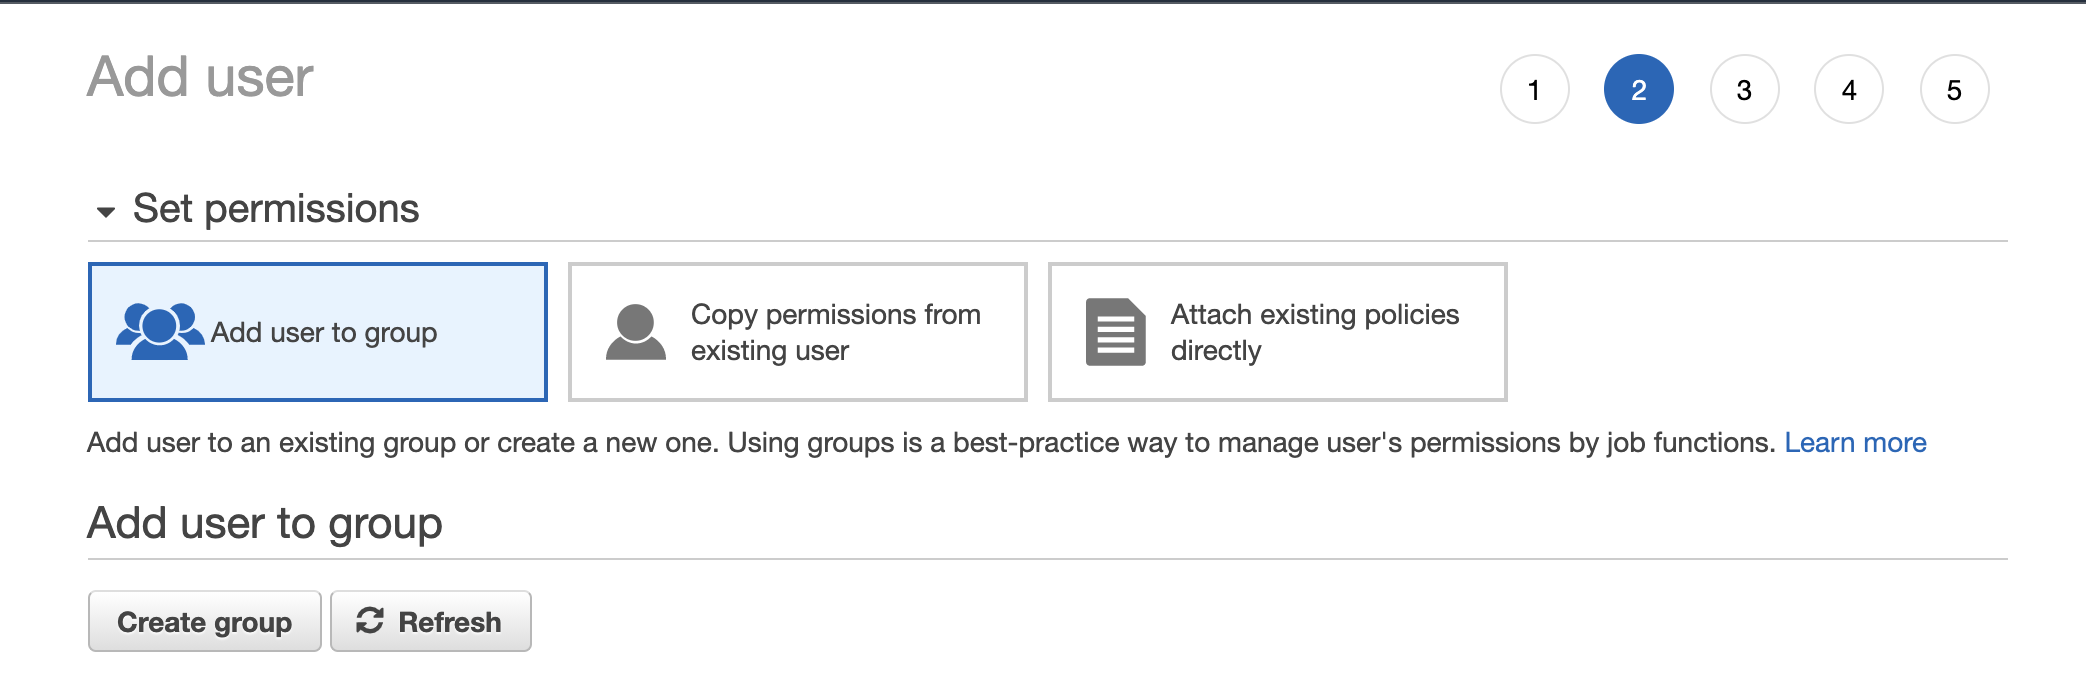
- Click Next: Permissions.
-
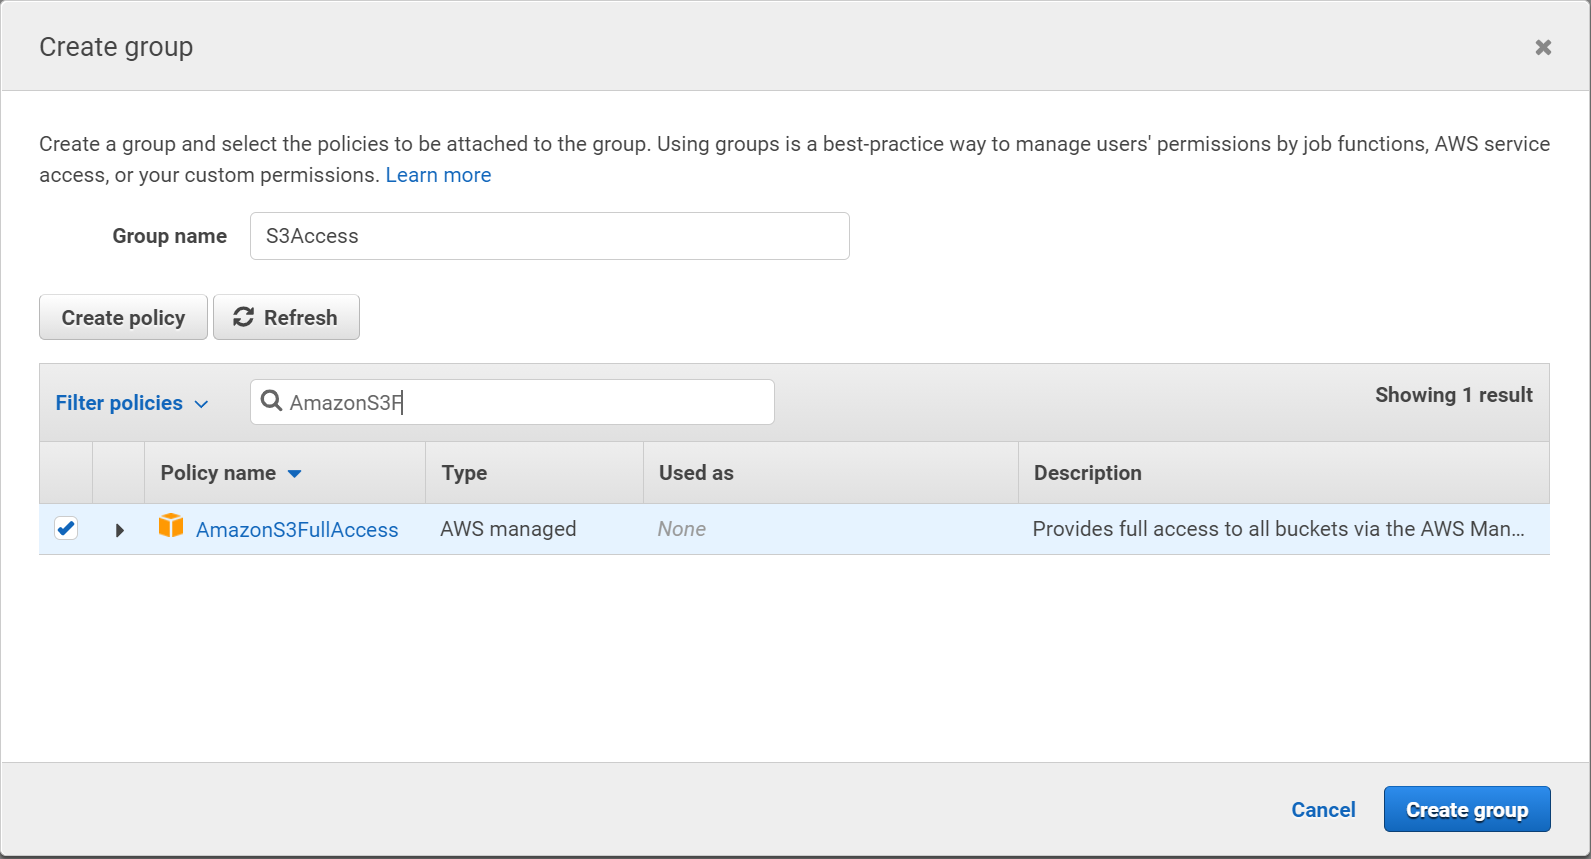
Click Create group.
-
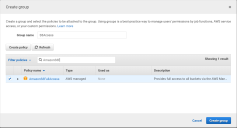
Supply a name for the group.
-
Select a policy for the group. You can either grant Full Access or create a policy that grants just the permission listed below.
Granting Minimum Permissions
If you elect to create a policy with just the minimum permissions, make sure it includes the following:
"Sid": "VisualEditor0",
"Effect": "Allow",
"Action": [
"s3:PutObject",
"s3:GetObject",
“s3:ListBucket”,
Here is a sample policy with the necessary minimum permissions granted. Replace <bucket_name> with your own bucket name.
Copy{
"Version": "2012-10-17",
"Statement": [
{
"Effect": "Allow",
"Action": [
"s3:ListBucket"
],
"Resource": [
"arn:aws:s3:::xxxxxx"
]
},
{
"Effect": "Allow",
"Action": [
"s3:PutObject",
"s3:GetObject",
],
"Resource": [
"arn:aws:s3:::xxxxxx/*"
]
}
]
}You may also want to grant the following additional privileges for convenience: s3:ListBucket and s3:DeleteObject.
Granting Multipart Permissions
If you set a Batch Window of greater than 60 seconds, you also need to enable the following permissions for the Multipart Upload feature in S3:
"s3:ListMultipartUploadParts"
"s3:AbortMultipartUpload"
"s3:ListBucketMultipartUploads"
Granting Full Access
-
To grant Full Access, search for the AmazonS3FullAccess policy.
-
Click the check-box next to the AmazonS3FullAccess policy.
-
- Click Create group. You return to the Add user page.
- Click the check-box next to the group you just created.
- Click Next: Tags.
- Add tags if you'd like.
-
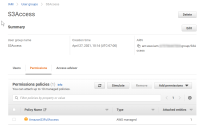
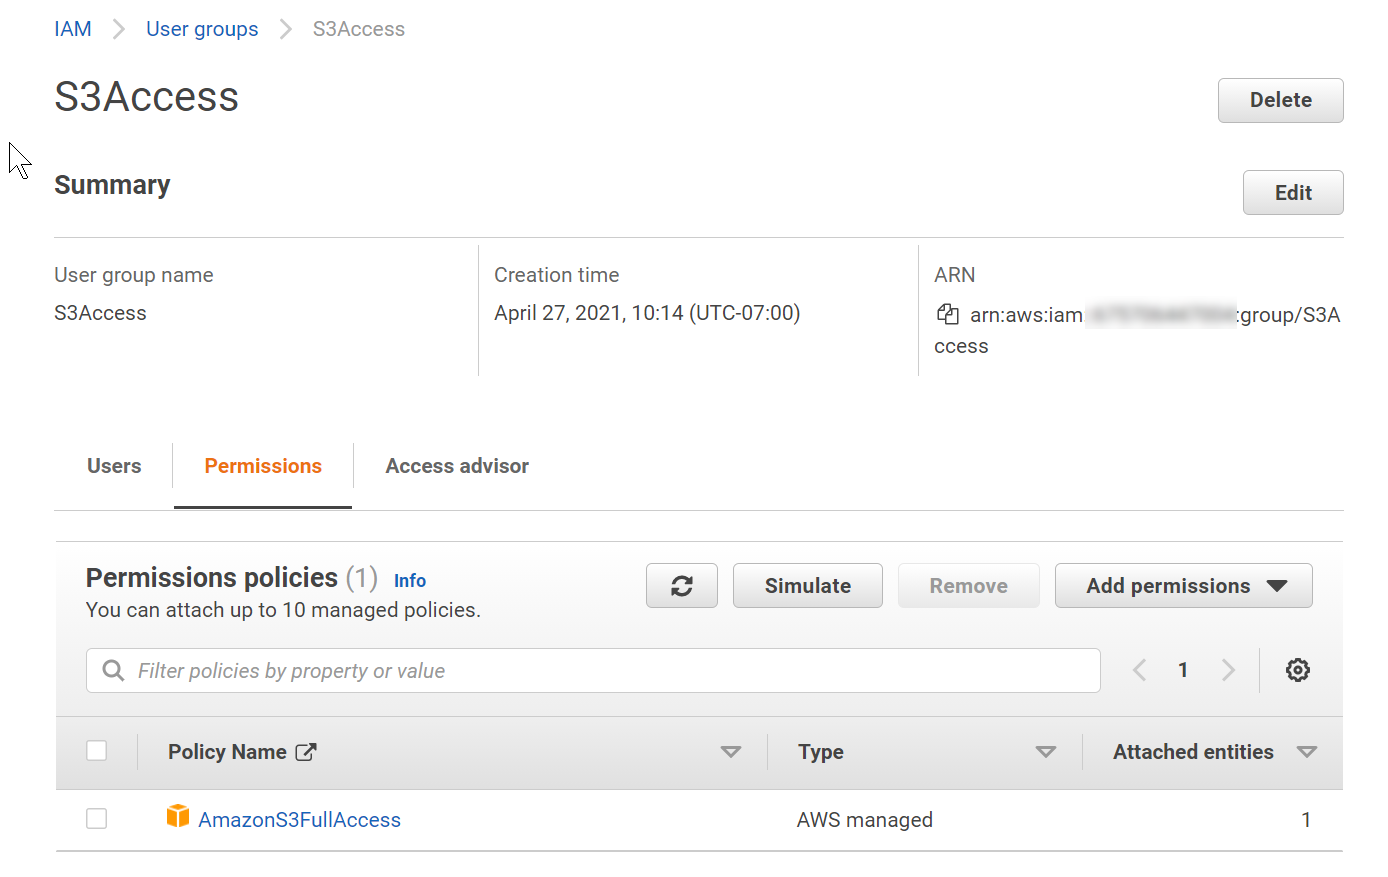
Click Next: Review. You can click on the group and then the Permissions tab to see the details and make sure that the correct policy is included. The example below shows Full Access granted, although you may want to create a custom policy that grants just the minimum permissions listed above.
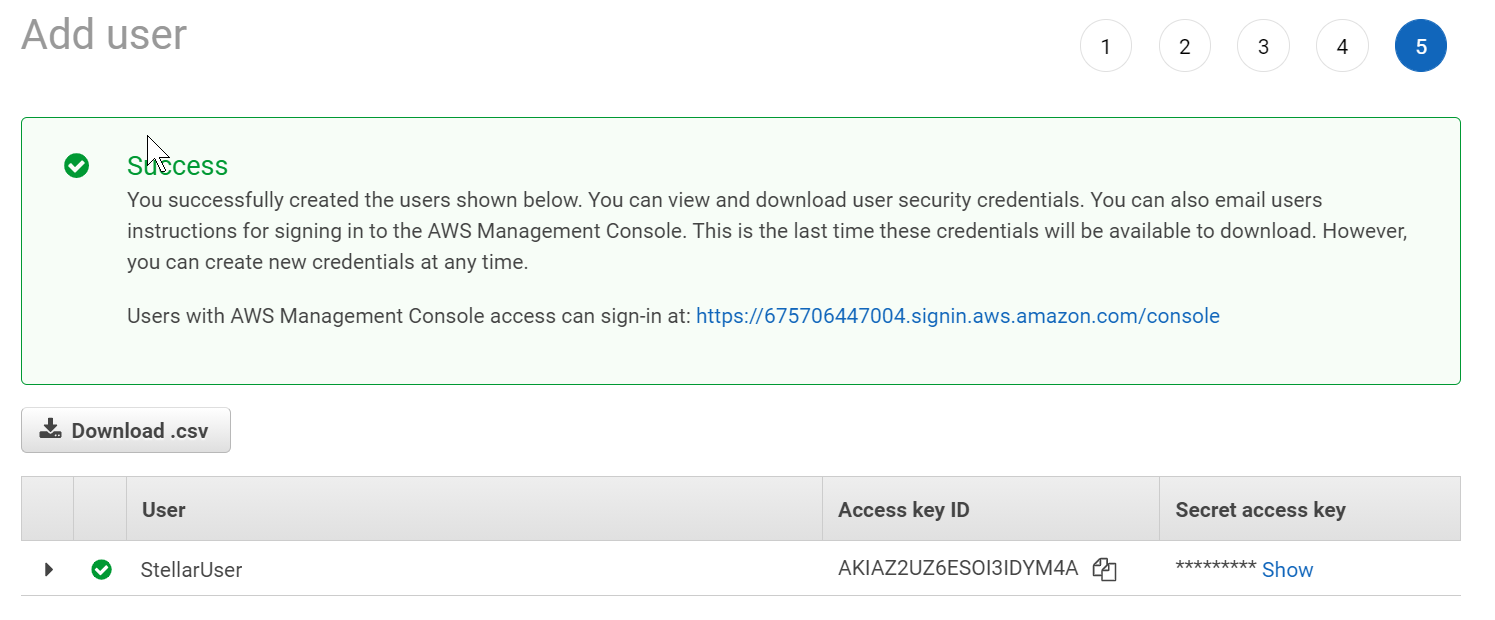
- Click Create user. You return to the Add user page with the new user listed.
-
Click Show to see the Secret access key.

- Copy the Access key ID and Secret access key. You will need these when configuring the Data Sink in Stellar Cyber.


Getting the Bucket Name in AWS
To get the S3 bucket name:
-
Log in to your AWS Management Console at https://aws.amazon.com .
-
Type S3 into the search field at the top of the console.
-
Click the S3 entry in the list of Services that appears.
The S3 Console appears.
-
Locate the S3 bucket you want to use as the destination for the data sink in Stellar Cyber and copy its name and AWS region. You will need these values when configuring the Data Sink in Stellar Cyber.
Adding the S3 Data Sink in Stellar Cyber
To add an AWS S3 Data Sink:
- Click System | Data Processor | Data Sinks. The Data Sink list appears.
-
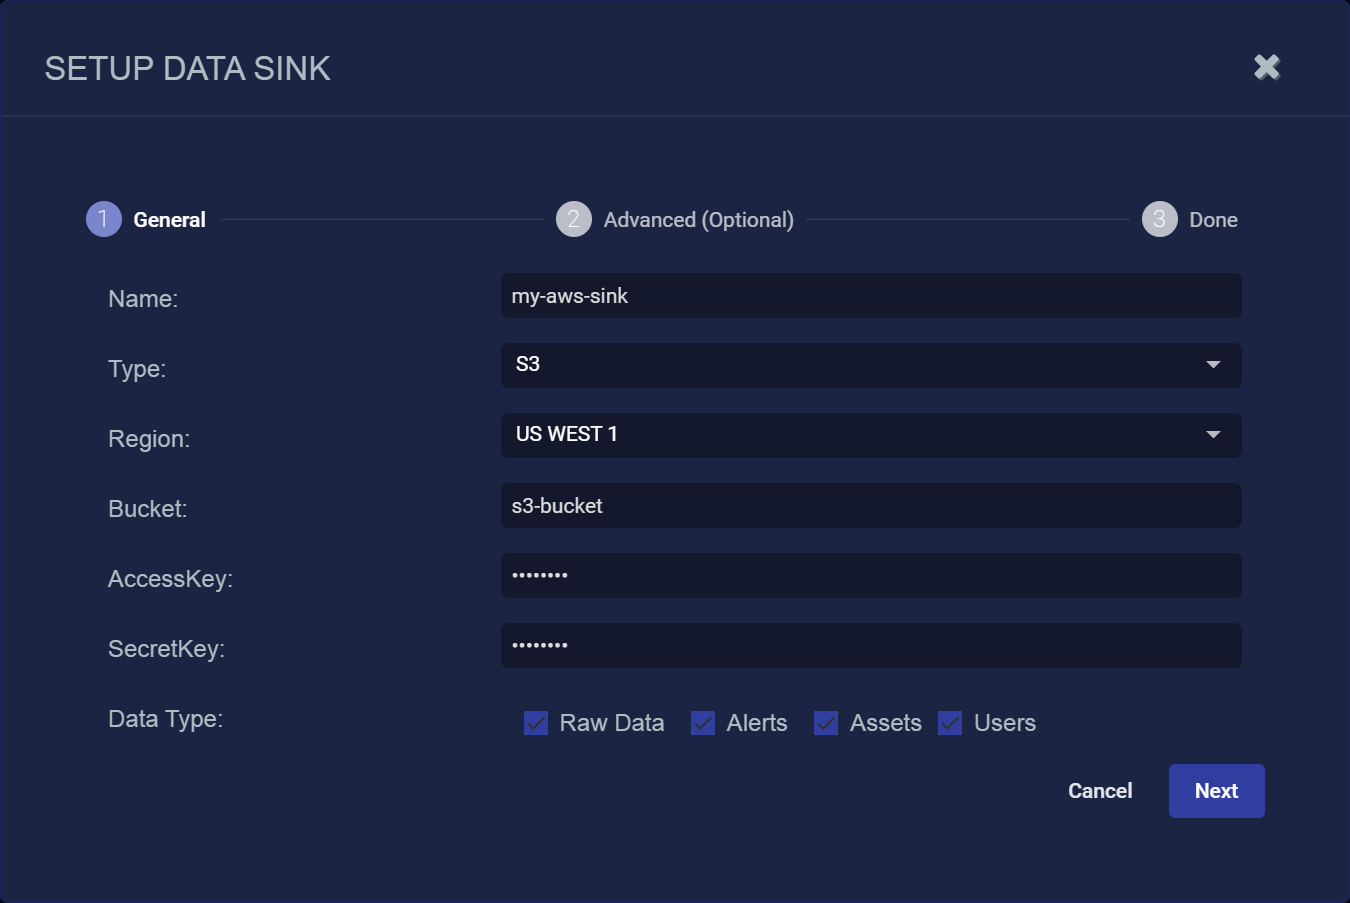
Click Create. The Setup Data Sink screen appears.
- Enter the Name of your new Data Sink. This field does not support multibyte characters.
-
Choose S3for the Type.
Additional fields appear in the Setup Data Sink screen:
- Use the Region dropdown to select the AWS region where the S3 bucket is located. You identified the bucket's region in Getting the Bucket Name.
- Supply the name of the S3 bucket in the Bucket field. You identified this name in Getting the Bucket Name.
- Supply the Access Key and Secret Key you identified in Adding a User with Appropriate Permissions in the corresponding fields.
-
Select the types of data to send to the Data Sink by toggling the following checkboxes:
-
Raw Data – Raw data received from sensors, log analysis, and connectors after normalization and enrichment has occurred and before the data is stored in the Data Lake.
-
Alerts – Security anomalies identified by Stellar Cyber using machine learning and third-party threat-intelligence feeds, reported in the Alerts interface, and stored in the aella-ser-* index.
-
Assets – MAC addresses, IP addresses, and routers identified by Stellar Cyber based on network traffic, log analysis, and imported asset feeds and stored in the aella-assets-* index.
-
Users – Users identified by Stellar based on network traffic and log analysis and stored in the aella-users-* index.
Alerts, assets, and users are also known as derived data because Stellar Cyber extrapolates them from raw data.
-
-
Click Next.
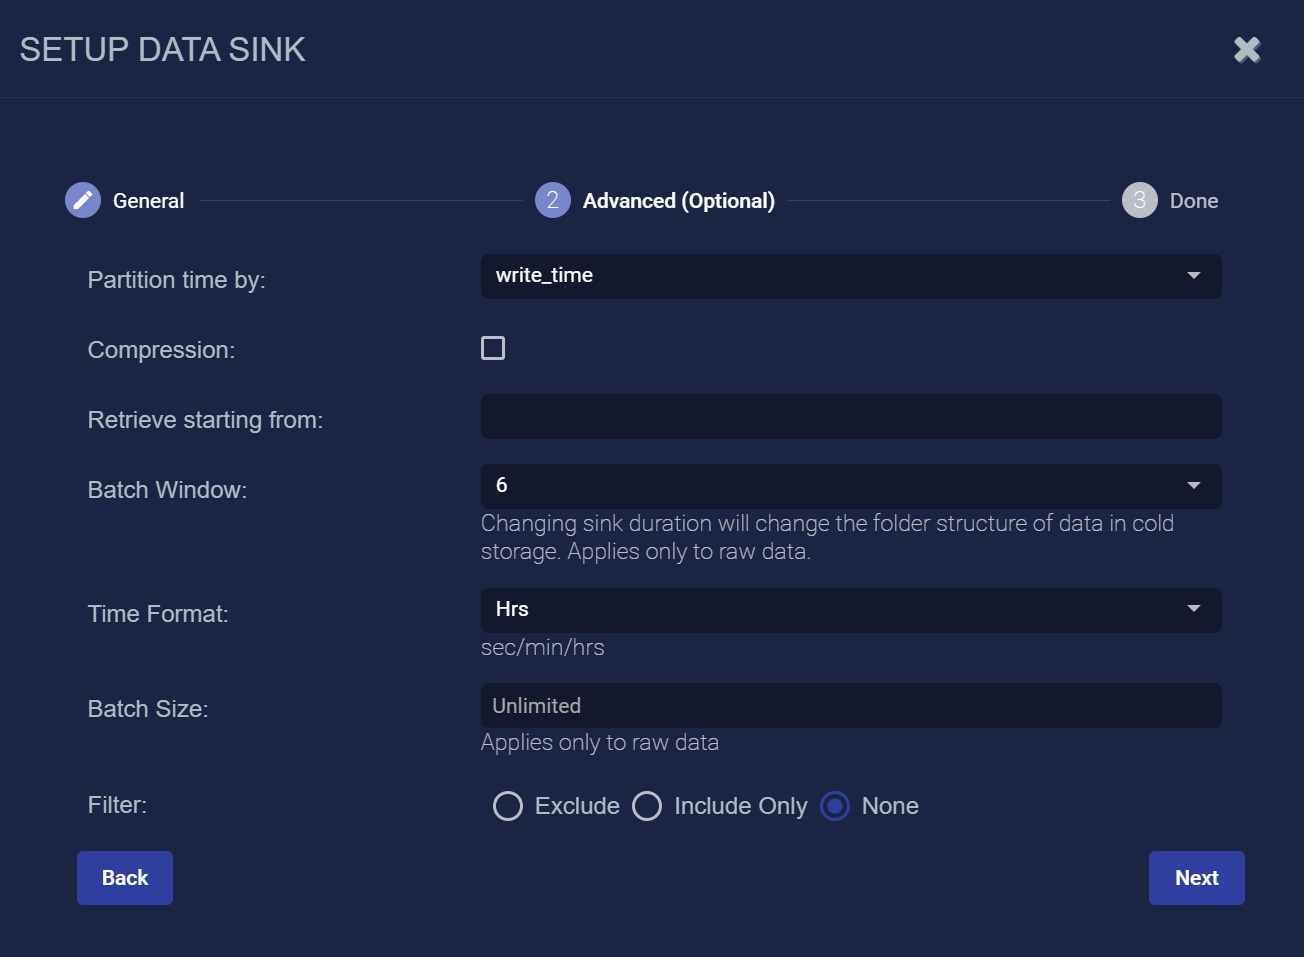
The Advanced (Optional) page appears.
-
Specify whether to partition records into files based on their write_time (the default) or timestamp.
Every interflow record includes both of these fields:
-
write_time indicates the time at which the Interflow record was actually created.
-
timestamp indicates the time at which the action documented by the Interflow record took place (for example, the start of a session, the time of an update, and so on).
When files are written to the Data Sink they are stored at a path like the following, with separate files for each minute:

In this example, we see the path for November 9, 2021 at 00:23. The records appearing in this file would be different depending on the setting of the Partition time by setting as follows:
-
If write_time is enabled, then all records stored under this path would have a write_time value falling into the minute of UTC 2021.11.09 - 00:23.
-
If timestamp is enabled, then all records stored under this path would have a timestamp value falling into the minute of UTC 2021.11.09 - 00:23.
In most cases, you will want to use the default of write_time. It tends to result in a more cost-efficient use of resources and is also compatible with future use cases of data backups and cold storage using a data sink as a target.
-
-
Enable the Compression option to specify that records be written to the Data Sink in compressed (gzip) format.
For most use cases, Stellar Cyber recommends enabling the compression option to save on storage costs. Compression results in file sizes roughly 1/10th the size of uncompressed files.
-
You can use the Retrieve starting from field to specify a date and time from which Stellar Cyber should attempt to write alert, asset, and user records to a newly created Data Sink. You can click in the field to use a handy calendar to set the time/date
Note the following:
-
If you do not set this option, Stellar Cyber simply writes data from the time at which the sink is created.
-
This option only affects alert, asset, and user records. Raw data is written from the time at which the sink is created regardless of the time/date specified here.
-
If you set a time/date earlier than available data, Stellar Cyber silently skips the time without any available records.
-
-
Use the Time Format, Batch Window and Batch Size fields to specify how often data is written to the sink. The frequency with which data is written to the sink also affects the size of the files – the longer you wait to send files, the larger they will be.
-
Start by setting the Time Format option. This specifies the units for the Batch Window and gives you access to different granularities for the files written to the Data Sink. You can specify Seconds, Minutes, or Hours (the default).
-
The Batch Window specifies the maximum amount of time that can elapse before data is written to the Data Sink. By default, this is set to 6 hours. The values available depend on the units selected for Time Format:
-
If Time Format is set to Hours, you can select from 1, 4, 6, 12, or 24 hours. The 24 hour setting is the maximum granularity; after that, files start to become too large for efficient storage.
-
If Time Format is set to Minutes, you can select from 5, 10, 20, or 30 minutes. As you can see, each of these values divides evenly into an hour, giving you a precise idea of the number of files stored to the sink per hour by each worker. For example, with a setting of 30 minutes, there will be two files per hour for each worker in the sink.
-
If Time Format is set to Seconds, you can specify any value up to 60. This was the granularity supported in Data Sink version prior to 4.3.7.
The Batch Window helps you balance granularity with costs when storing data in external cloud storage, where vendors often charge you by the API call.
For example, writing to a data sink with a fine granularity expressed in seconds may result in excessive files and folders written to your external cloud storage and require you to incur the costs of a more expensive storage tier. By using a coarser granularity, you can ensure that the data files written to the cloud are larger and written less frequently. For example, the default granularity of six hours typically ensures that data files are larger than 128 KB, allowing you to take advantage of, for example, the less costly AWS S3 Intelligent Storage Tier. Contact Customer Success if you are interested in moving your Data Sink to a different storage tier.Note that after upgrading to 4.3.7, existing AWS and OCI data sinks with a Batch Window greater than 60 seconds are converted to the nearest available selection expressed in minutes or hours.
-
-
The Batch Size specifies the maximum number of records that can accumulate before they are sent to the Data Sink. You can specify either 0 (disabled) or a number of records between 100 and 10,000.
The Batch Size option is only available when the Batch Window is set to a per-second interval and Size Format is set to Records. This is the batching implementation used in versions prior to 4.3.7. For all other Batch Windows, the Batch Size is set to Unlimited and cannot be changed.
If you use the per-second interval together with the Batch Size option, Stellar Cyber batches data to the Data Sink depending on whichever of these parameters is reached first. Consider a Data Sink with a Batch Window of 30 seconds and a Batch Size of 300 records:
-
If at the end of the Batch Window of 30 seconds, Stellar Cyber has 125 records, it sends them to the data sink. The Batch Window was reached before the Batch Size.
-
If at the end of 10 seconds, Stellar Cyber has 300 records, it send the 300 records to the Data Sink. The Batch Size was reached before the Batch Window.
-
-
- Note that if you set a Batch Window of greater than 60 seconds, you must grant additional Multipart Upload permissions to the S3 user for this data sink.
-
You can use the Filter options to Exclude or Include specific Message Classes for the Data Sink. By default, Filter is set to None. If you check either Exclude or Include, an additional Message Class field appears where you can specify the message classes to use as part of the filter. For example:

You can find the available message classes to use as filters by searching your Interflow in the Investigate | Threat Hunting | Interflow Search page. Search for the msg_class field in any index to see the prominent message classes in your data.
-
Click Next to review the Data Sink configuration. Use the Back button to correct any errors you notice. When you are satisfied with the sink's configuration, click Submit to add it to the DP.
- Click Submit.

The new Data Sink is added to the list.
