Adding a Splunk Data Sink
You must have Root scope to use this feature.
You can add a Splunk Data Sink from the System | Data Processor | Data Sinks page using the instructions in this topic.
Before you Begin
Before you add a Splunk Data Sink, configure Splunk and get a token:
- Log in to Splunk.
- Click Settings | Data Inputs.
- Click HTTP Event Collector.
- Click Global Settings.
- Ensure that All Tokens is Enabled.
- Ensure that Enable SSL is not checked.
- Change the port if you want. Note the port number.
- Click Save.
- Click New Token.
- Enter the Name.
- Click Next.
- Choose Automatic for the Source type.
- Click Review.
- Copy the Token Value.
Procedure
To add a Splunk Data Sink:
- Click System | Data Processor | Data Sinks. The Data Sink list appears.
-
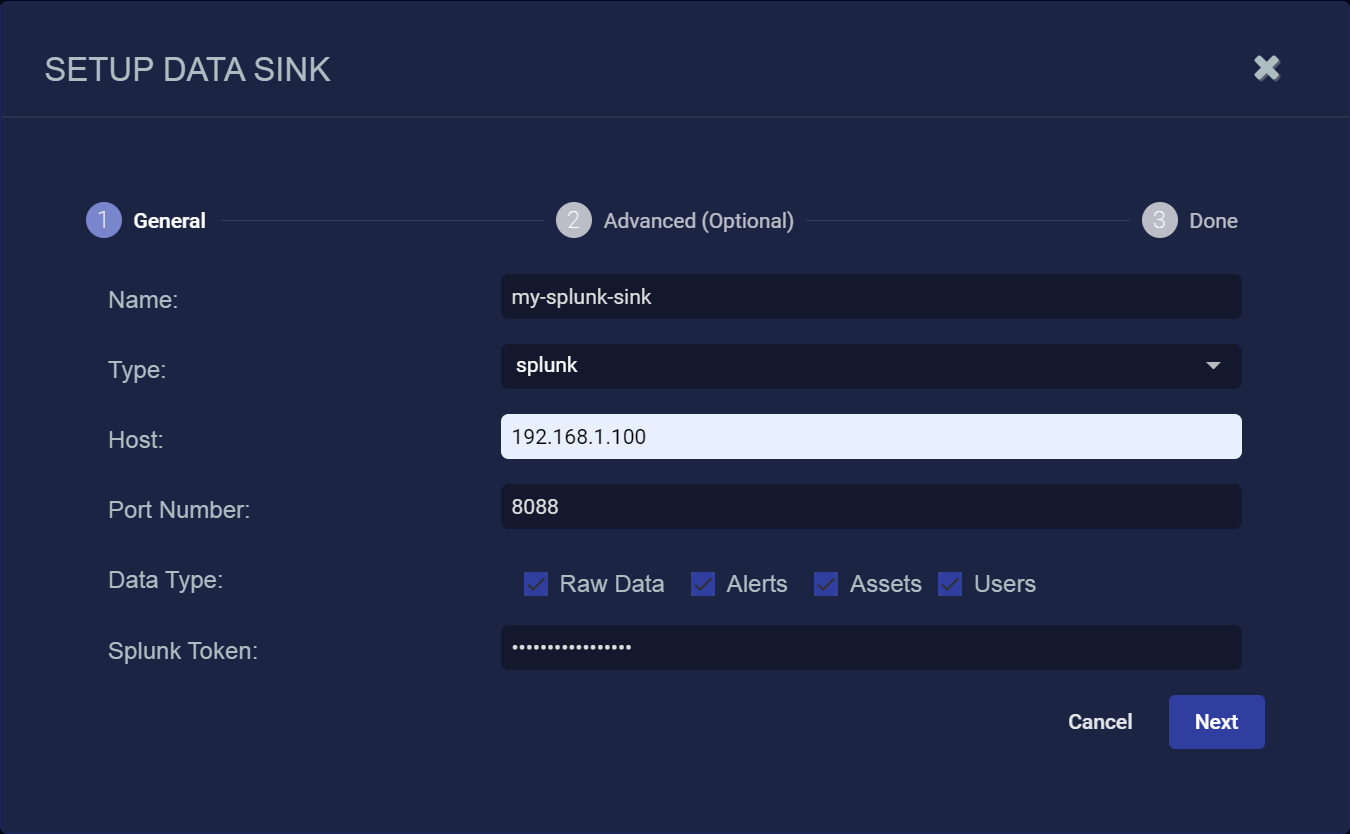
Click Create. The Setup Data Sink screen appears.
- Enter the Name of your new Data Sink. This field does not support multibyte characters.
-
Choose splunkfor the Type.
Additional fields appear in the Setup Data Sink screen appear:

- Enter the Host. This is the FQDN or IP address of the Splunk server.
- Enter the Port Number you configured on Splunk. The default is 8088.
-
Select the types of data to send to the Data Sink by toggling the following checkboxes:
-
Raw Data – Raw data received from sensors, log analysis, and connectors after normalization and enrichment has occurred and before the data is stored in the Data Lake.
-
Alerts – Security anomalies identified by Stellar Cyber using machine learning and third-party threat-intelligence feeds, reported in the Alerts interface, and stored in the aella-ser-* index.
-
Assets – MAC addresses, IP addresses, and routers identified by Stellar Cyber based on network traffic, log analysis, and imported asset feeds and stored in the aella-assets-* index.
-
Users – Users identified by Stellar based on network traffic and log analysis and stored in the aella-users-* index.
Alerts, assets, and users are also known as derived data because Stellar Cyber extrapolates them from raw data.
-
- Enter the Splunk Token you copied earlier.
-
Click Next.
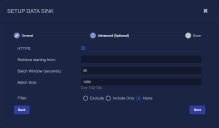
The Advanced (Optional) page appears.
-
Check the HTTPS box to use secure HTTP for data sent to this data sink.
-
You can use the Retrieve starting from field to specify a date and time from which Stellar Cyber should attempt to write alert, asset, and user records to a newly created Data Sink. You can click in the field to use a handy calendar to set the time/date
Note the following:
-
If you do not set this option, Stellar Cyber simply writes data from the time at which the sink is created.
-
This option only affects alert, asset, and user records. Raw data is written from the time at which the sink is created regardless of the time/date specified here.
-
If you set a time/date earlier than available data, Stellar Cyber silently skips the time without any available records.
-
-
Use the Batch Window (seconds) and Batch Size fields to specify how data is written to the sink.
-
The Batch Window specifies the maximum amount of time that can elapse before data is written to the Data Sink.
-
The Batch Size specifies the maximum number of records that can accumulate before they are sent to the Data Sink. You can specify either 0 (disabled) or a number of records between 100 and 10,000.
Stellar Cyber batches data to the Data Sink depending on whichever of these parameters is reached first.
So, for example, consider a Data Sink with a Batch Window of 30 seconds and a Batch Size of 300 records:
-
If at the end of the Batch Window of 30 seconds, Stellar Cyber has 125 records, it sends them to the data sink. The Batch Window was reached before the Batch Size.
-
If at the end of 10 seconds, Stellar Cyber has 300 records, it send the 300 records to the Data Sink. The Batch Size was reached before the Batch Window.
These options are primarily useful for data sink types that charge you by the API call (for example, AWS S3 and Azure). Instead of sending records as they are received, you can use these options to batch the records, minimizing both API calls and their associated costs for Data Sinks in the public cloud.
By default, these options are set to 30 seconds and 1000 records for Splunk data sinks.
-
-
You can use the Filter options to Exclude or Include specific Message Classes for the Data Sink. By default, Filter is set to None. If you check either Exclude or Include, an additional Message Class field appears where you can specify the message classes to use as part of the filter. For example:

You can find the available message classes to use as filters by searching your Interflow in the Investigate | Threat Hunting | Interflow Search page. Search for the msg_class field in any index to see the prominent message classes in your data.
-
Click Next to review the Data Sink configuration. Use the Back button to correct any errors you notice. When you are satisfied with the sink's configuration, click Submit to add it to the DP.
- Choose the Topics.
- Click Submit.


The new Data Sink is added to the list.
